DIY Mobile with Origami Cranes – Step by Step Instructions

Introduction:
Want to make make your own mobile? Well, you’ve come to the right place as we will show you a step-by-step process on how to make cool mobiles that are fun and easy to make. Most of the materials and supplies required are everyday household stuff which makes this activity fit for everyone.
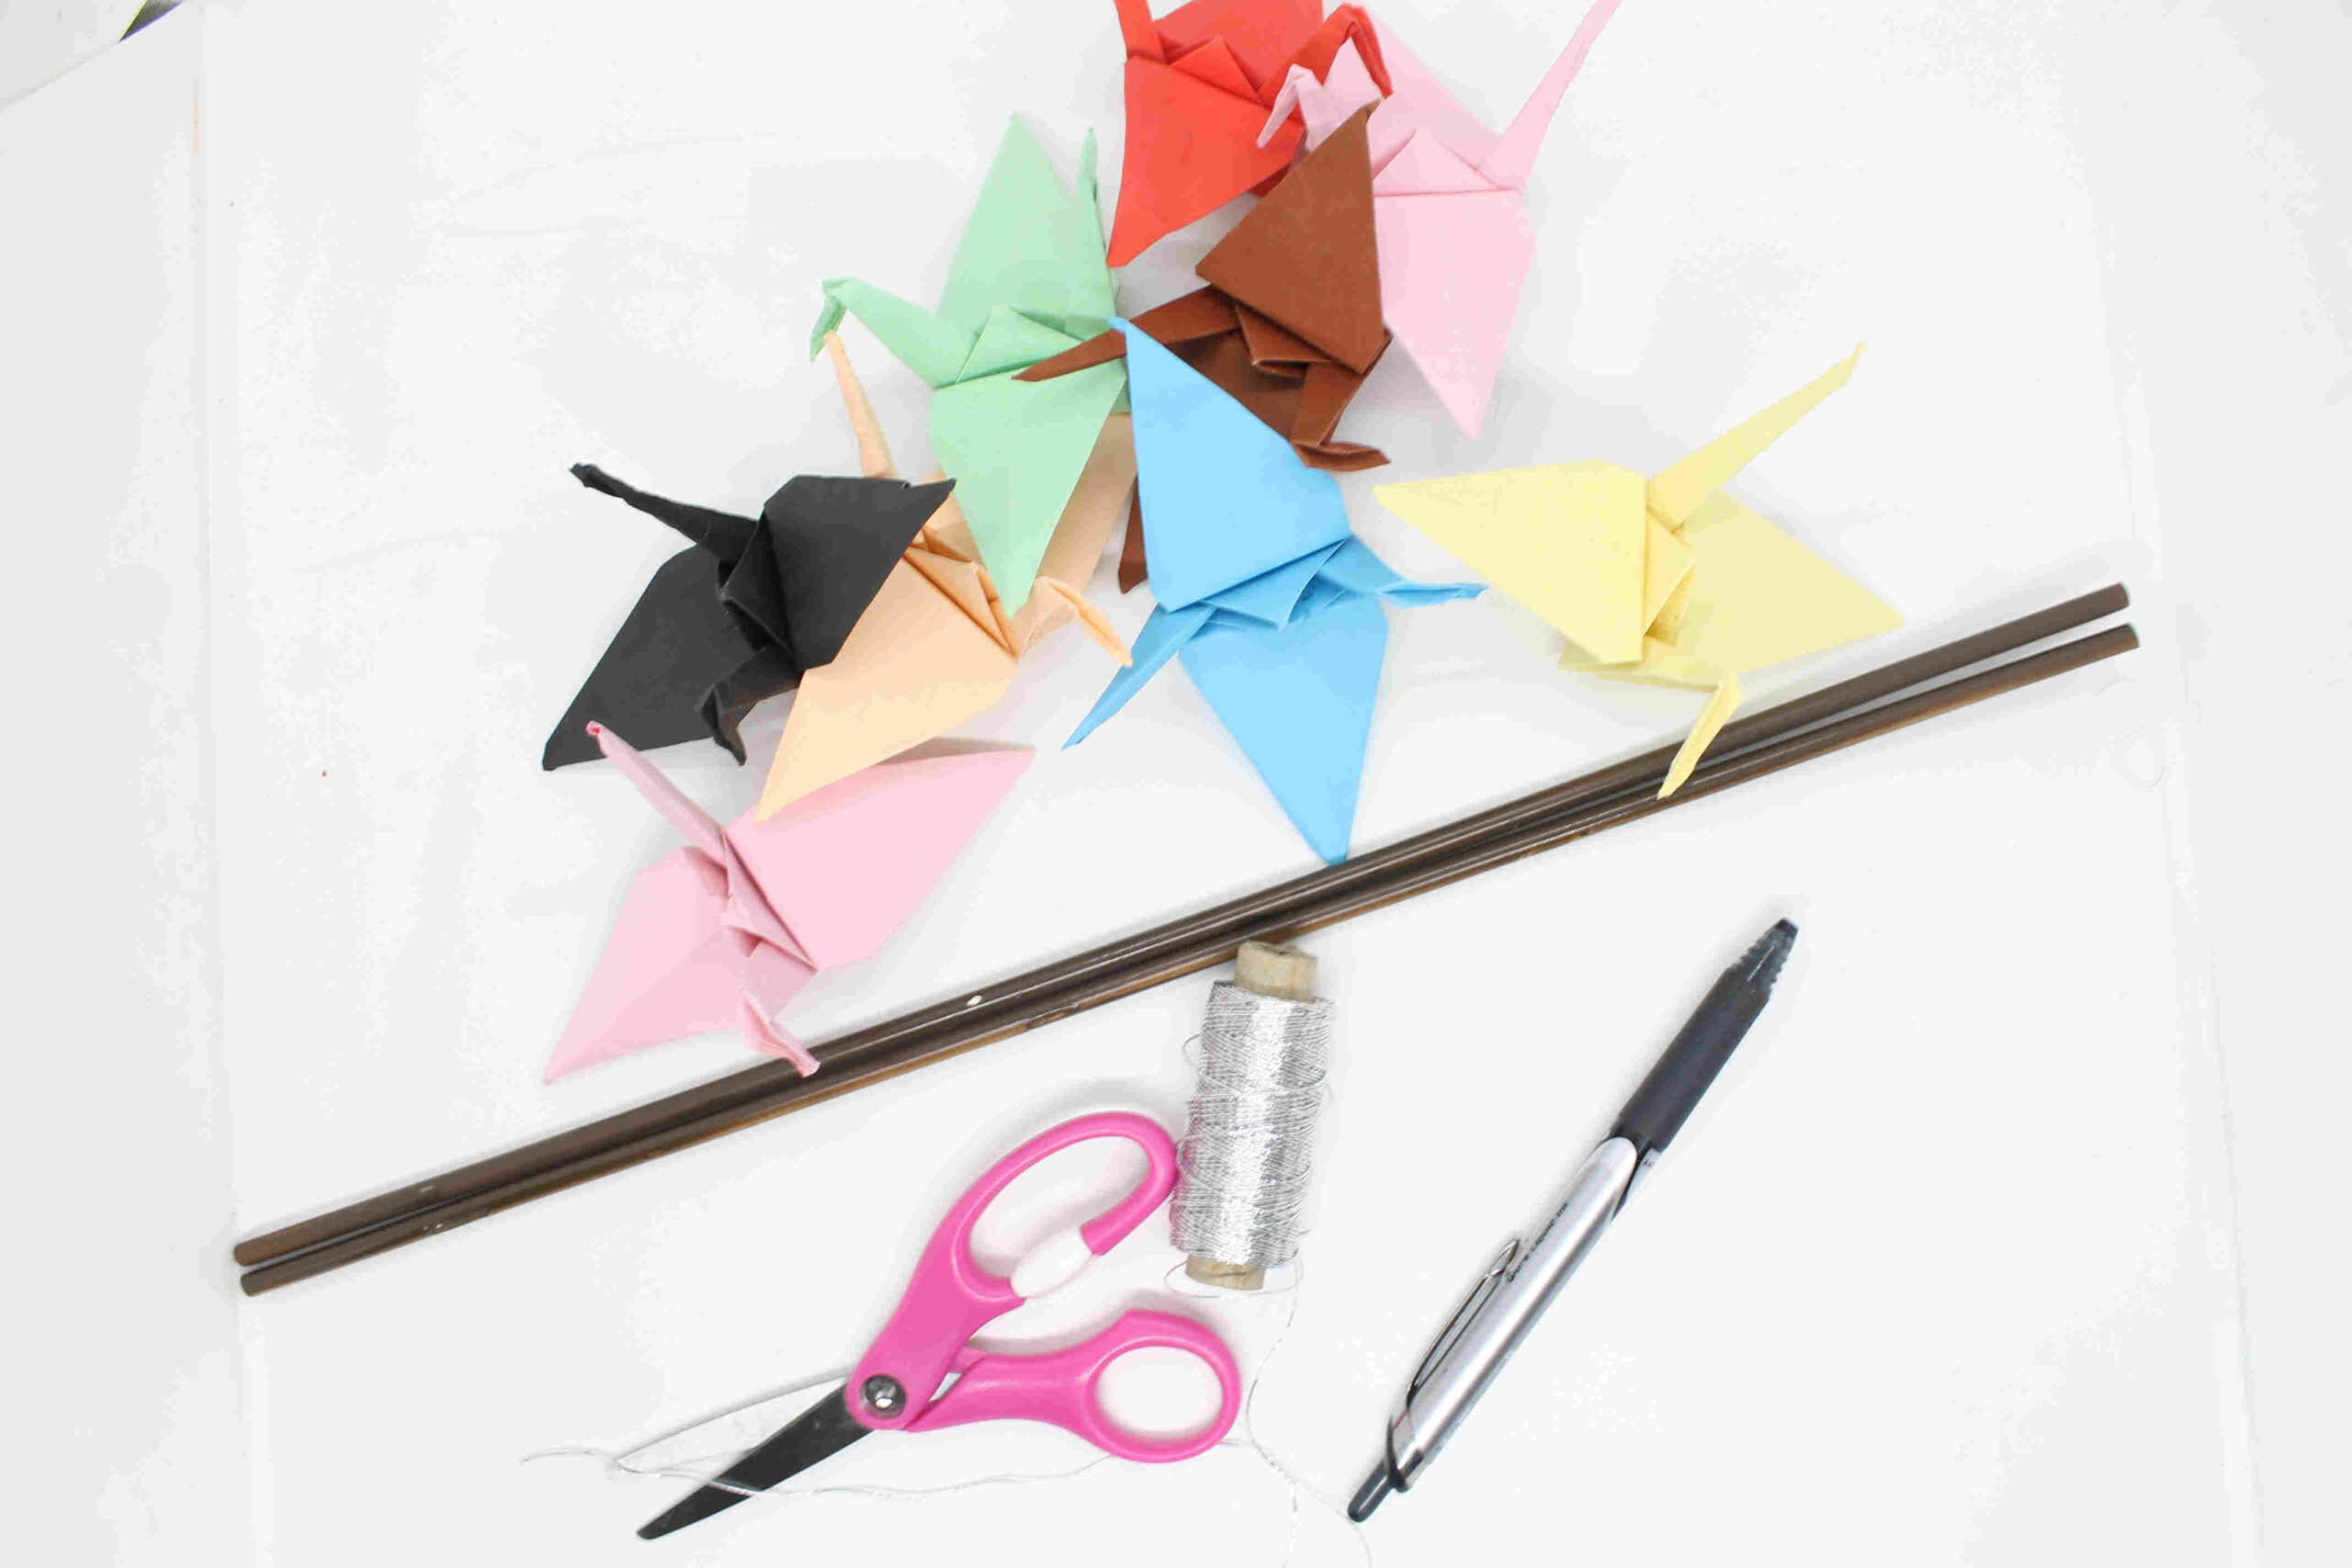
You’re going to need origamis for this craft. And in this guide, paper cranes were used. You could choose another type of origami though.
Please don’t forget to read our tips below so you could discover a cool pattern that you could use to hang your origamis. Have fun making the origami mobile!
Tools
- Scissors
- Pen
Supplies
- 8 Origami Cranes
- 2 Round bars (100 cm)
- Wool or thread
Tie the Two Poles Together
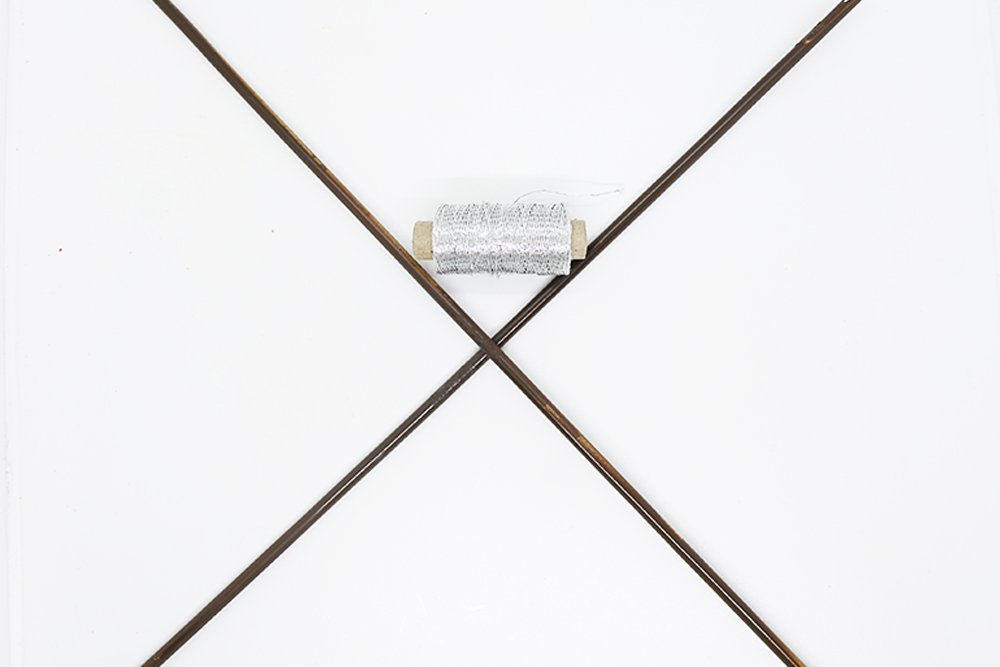
You need two poles of about 100 cm in length. There are several ways to secure the shape of the mobile but this guide, it will make use of thread only. Easy and simple.

Tie the two poles securely using your thread or wool. Loop it several times over as you want your poles to retain the desired shape for a long time. Tying it a few times is ideal.
Prepare the Origami Cranes
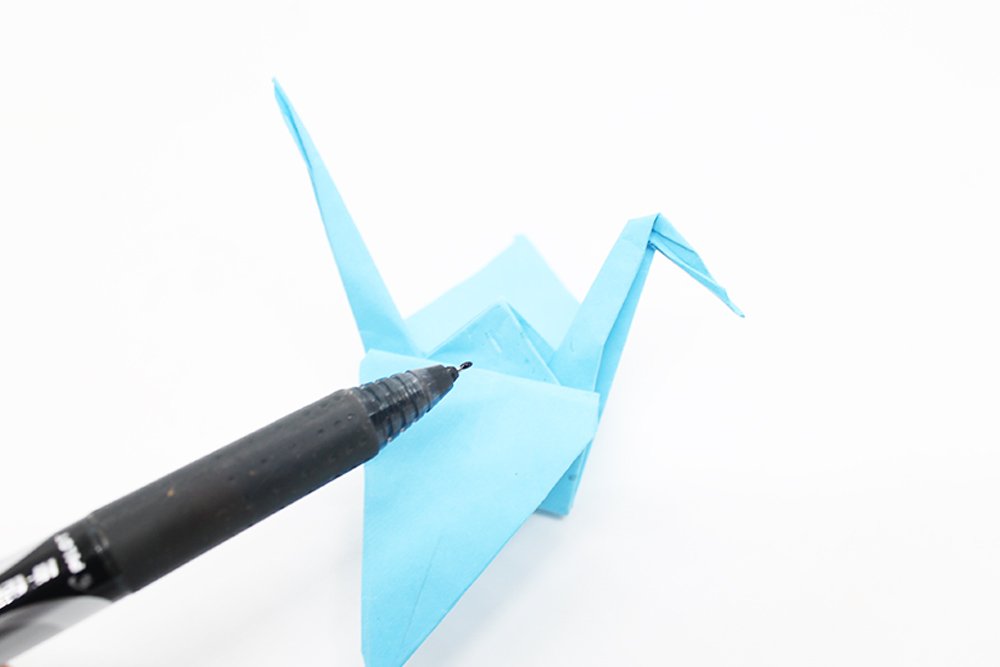
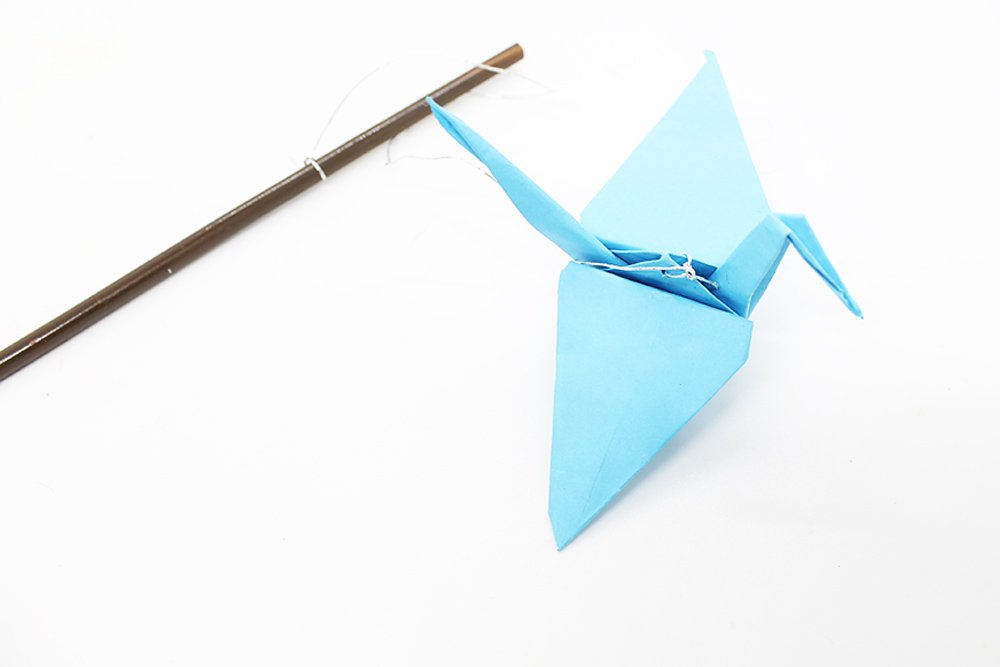
Using a pen, make a mark just below the top triangle corner. This is where you will attach the strings later on. Make sure that it is directly beneath that point or else the origami won't hang properly.
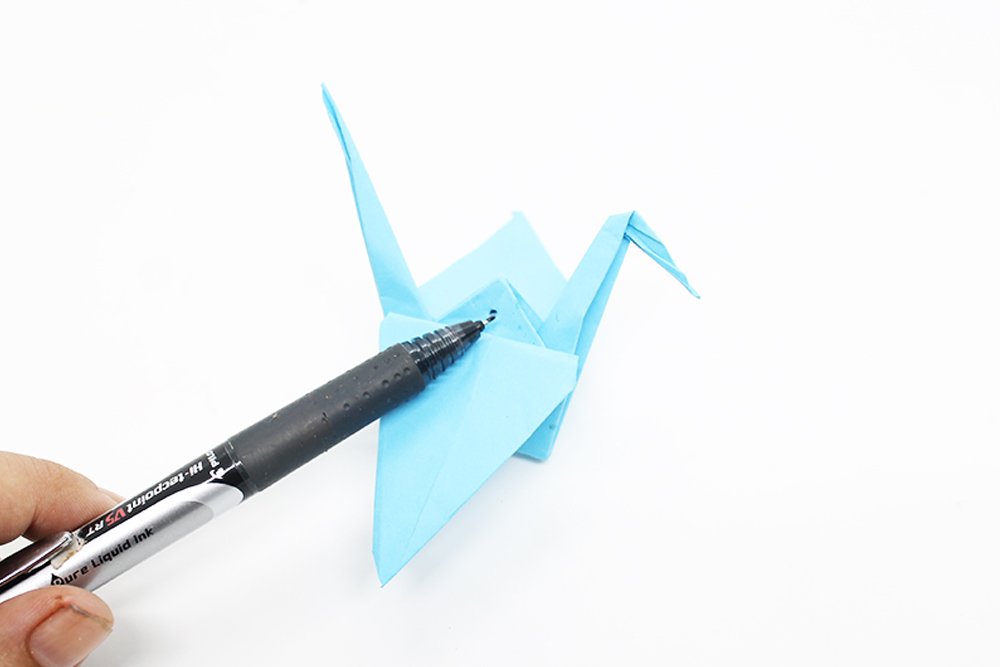
After making the mark or a dot, drive the tip of the pen into the mark to create a hole. And make sure to drive it through the other side.
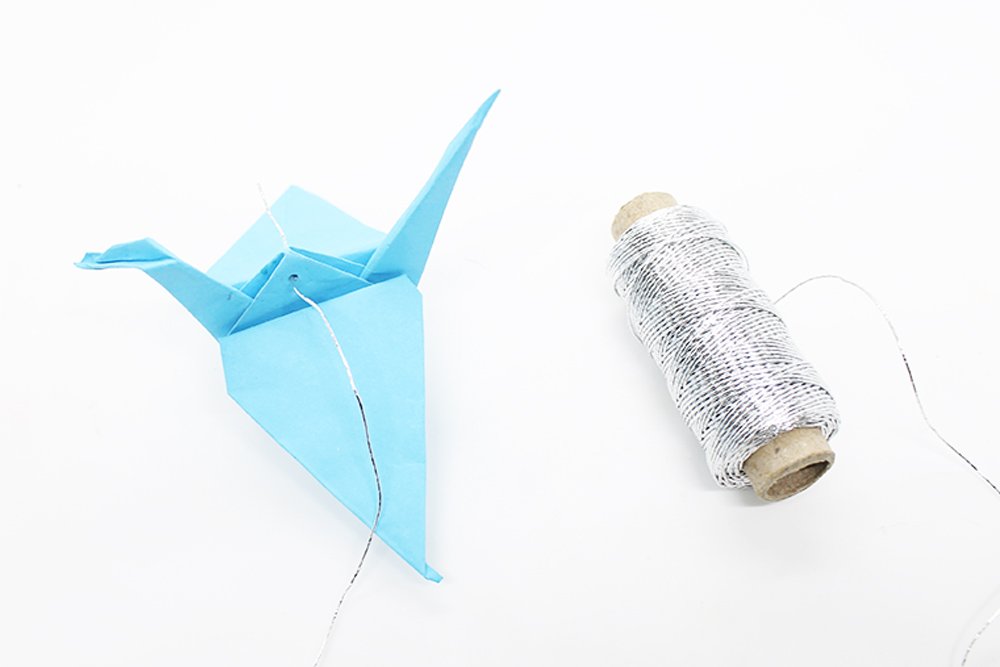
Then get some yarn or wool. Pick one origami crane to insert the string. If you don't have origamis then check out the link to the crane origami above or check out our origami section!
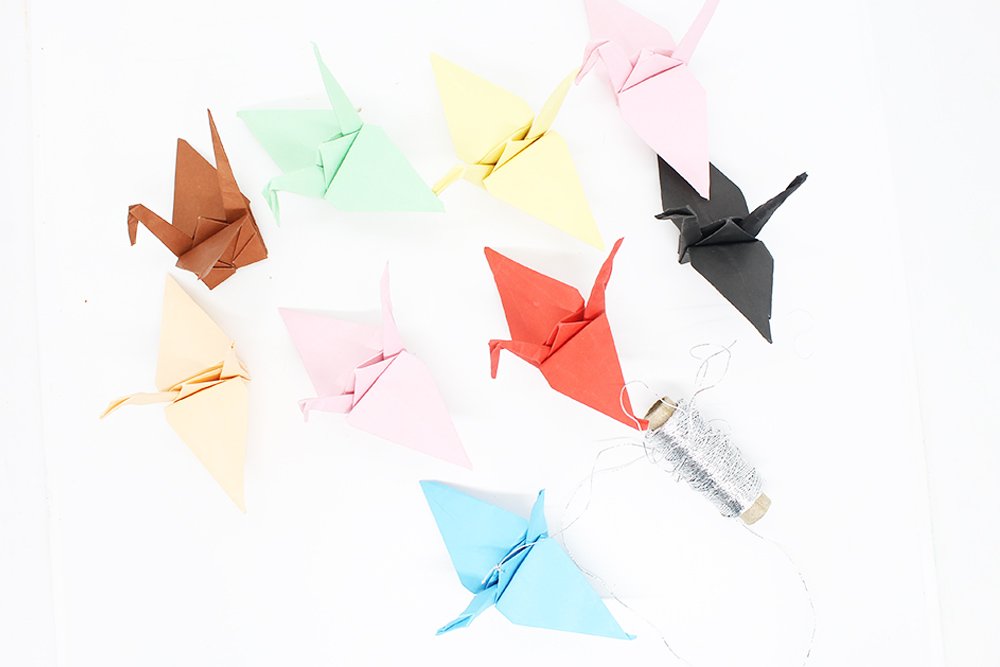
Get your other origamis and get ready to do the same process for each. You're halfway through this activity - good job!
Hang the Origamis Into the Mobile
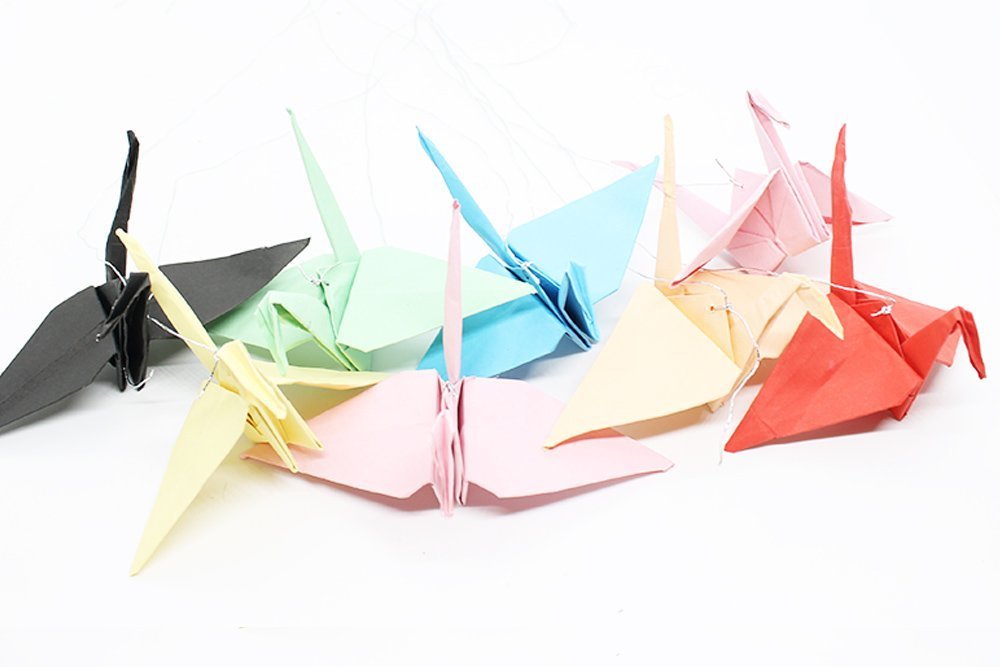
Tie a string to each origami. Please check out our tips section below so you could get a cool idea of how long the strings should be and of the pattern.
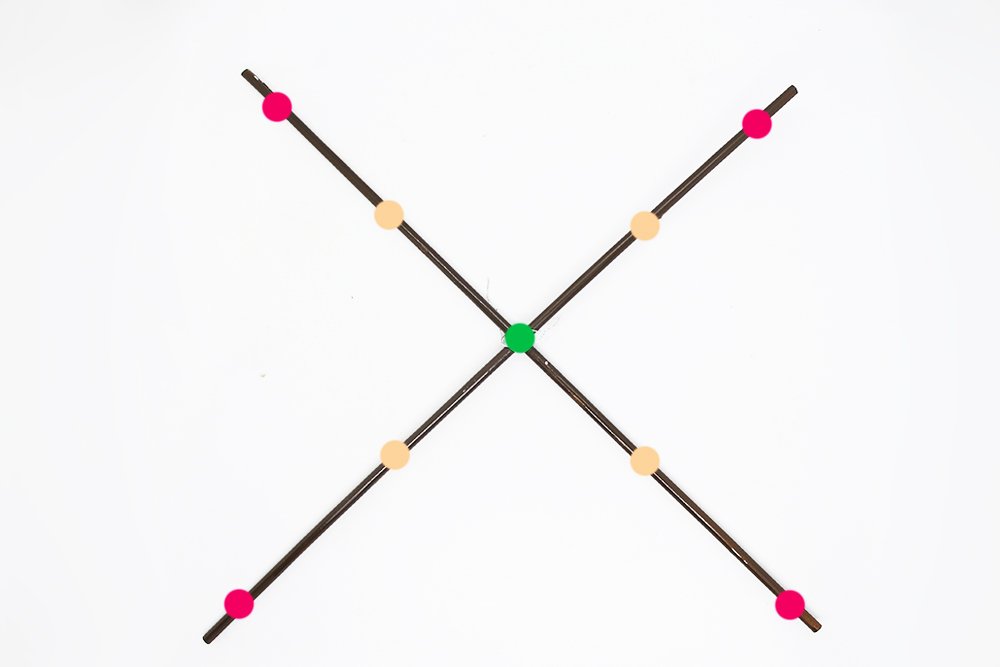
As you can see from the image above there are circles. These circles serve as points wherein you could attach the free end of the strings.
To attach the string, simply tie the free end of the string at the designated spots. Of course, you could carve a depression at the marks before tying the knot.
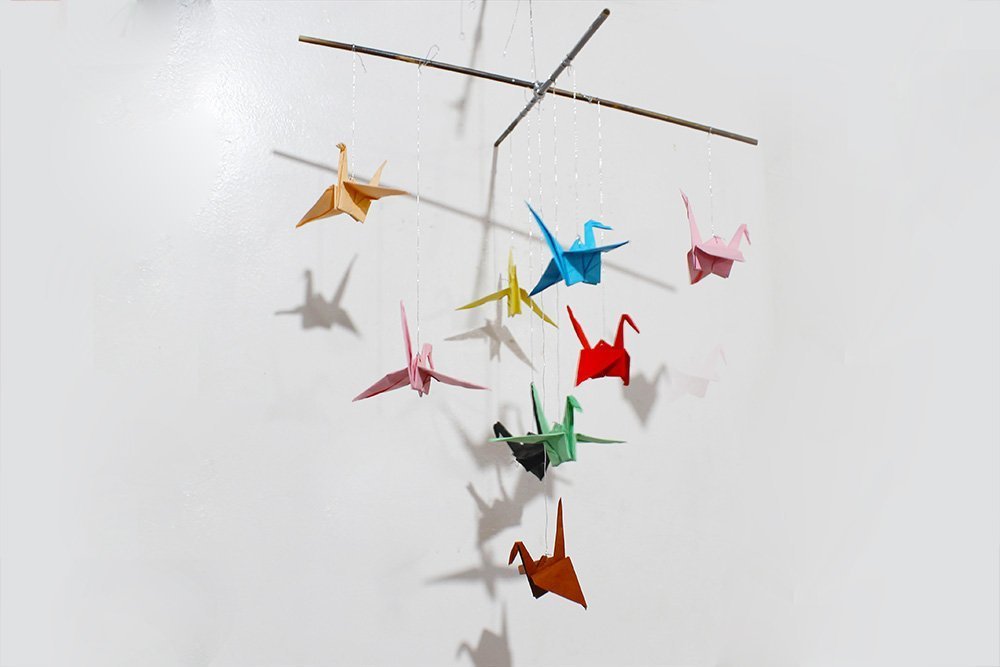
Tie the strings of all the remaining origamis. Congratulations you are done with this craft. Do kindly leave a comment below and check out our other cool crafts for kids!
Extra Tips
- So that your mobile won’t slant, the center crane should hang with the longest string, then the outermost crane should be hanged with the shortest string. If you follow these instructions, you will get a spiral pattern. This pattern looks especially nice when your mobile is turning.
- If your mobile hangs crooked after hanging, you can either push the birds further outwards or inwards. Comparable to a scale, you can determine exactly how your mobile hangs.
- Have fun hanging up your mobile. Leave a comment below where you hung your mobile. Do you think this mobile is also suitable for children? If yes or no. comment down below 🙂


love this guide – i wish they put the tips much earlier though
had to learn the origami crane. It was hard for me cause I have fat fingers. but my mobile was finished alright!
Thanks for letting this guide out for the all the DIYers out there!!
Such an amazing craft! My kids love it so much <3
🤩