Paper Plate Lion Face Stand Step-by-step instruction

Introduction:
Create a paper plate lion out of paper plates. Not your usual paper plate animal, what’s super cool about this bust of an adorable lion is that it can stand on its own. Place it on any flat surface and turn it into an awesome decoration. Have fun crafting!
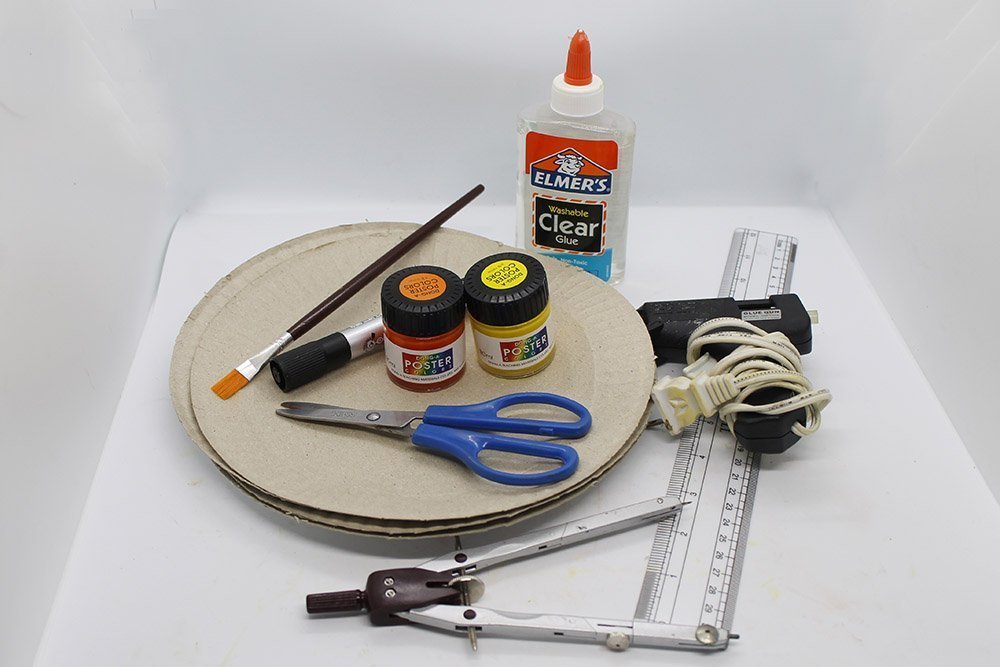
Tools
- Scissors
- Ruler
- Compass
- Glue Gun/ Hot Glue
- Paintbrush
Supplies
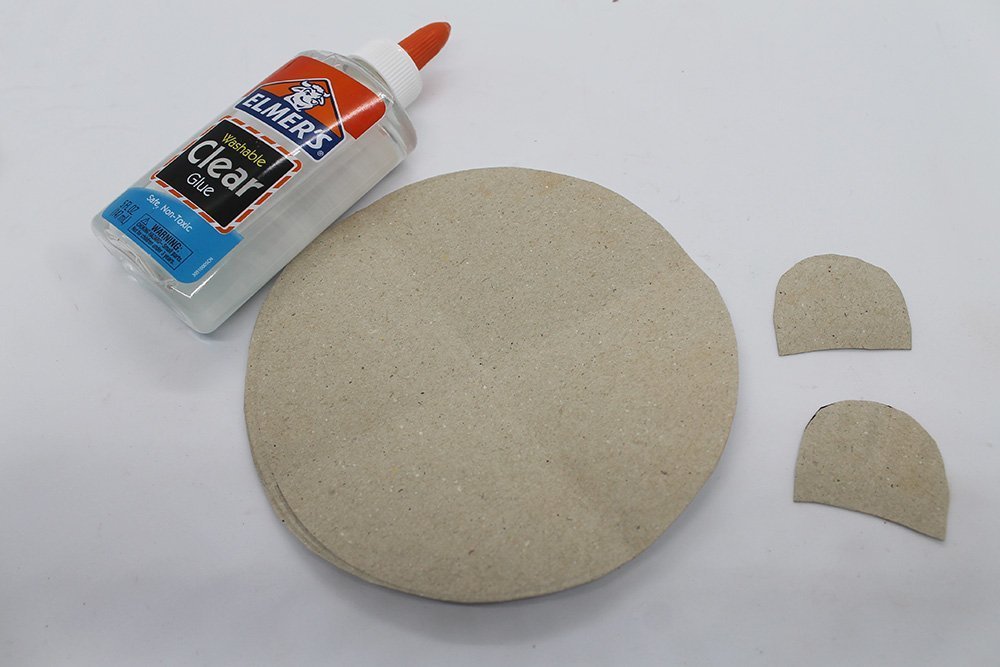
- 4 pieces 9inch Paper Plates
- Glue
- Orange poster paint
- Yellow poster paint
- Black marker
Create the mane of the lion
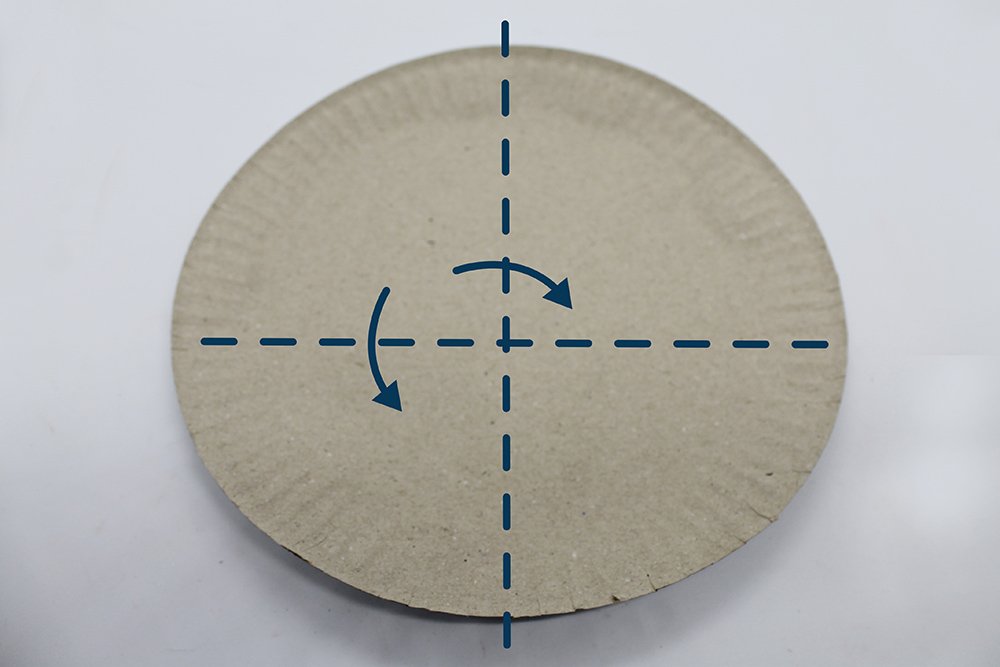
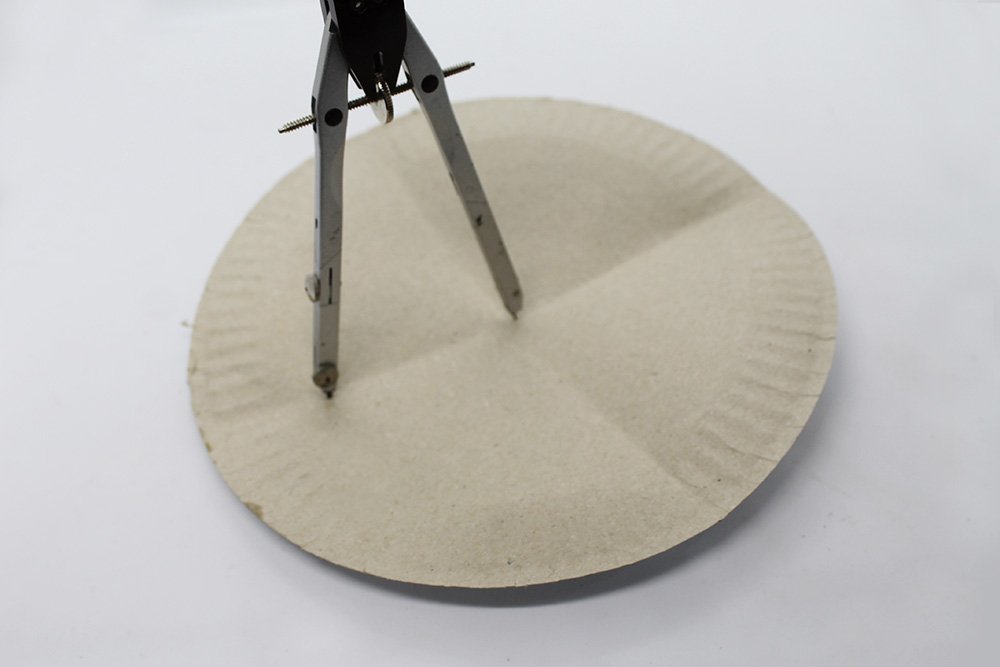
For this instruction, we will be using the backside of the paper plate. Fold the plate lengthwise and crosswise in half. Unfold it after.
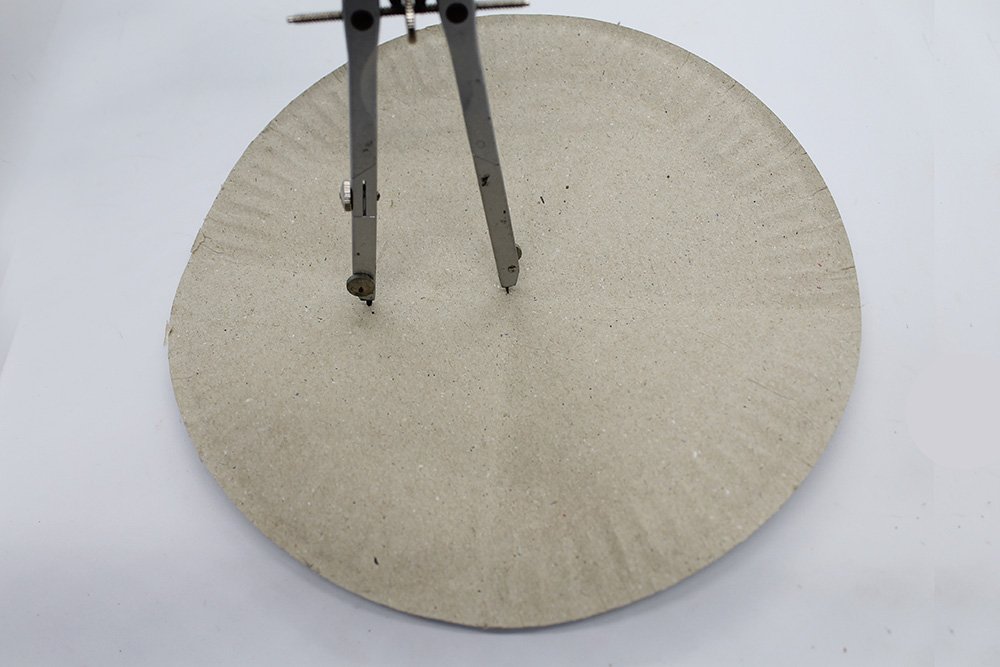
Using a compass, create a circle with a 2-inch radius. Mark the circle with a pencil.
If you don’t have a compass, you may use a small cylindrical container and trace the rim to the paper plate.

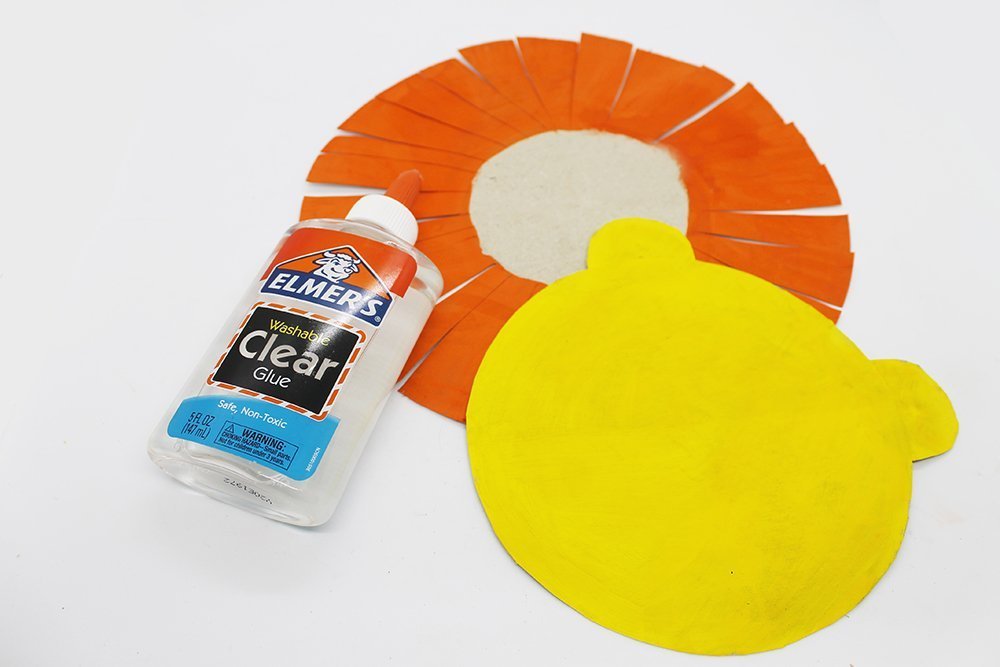
Paint over the paper plaint with orange. Paint only the outer area of the circle drawn.
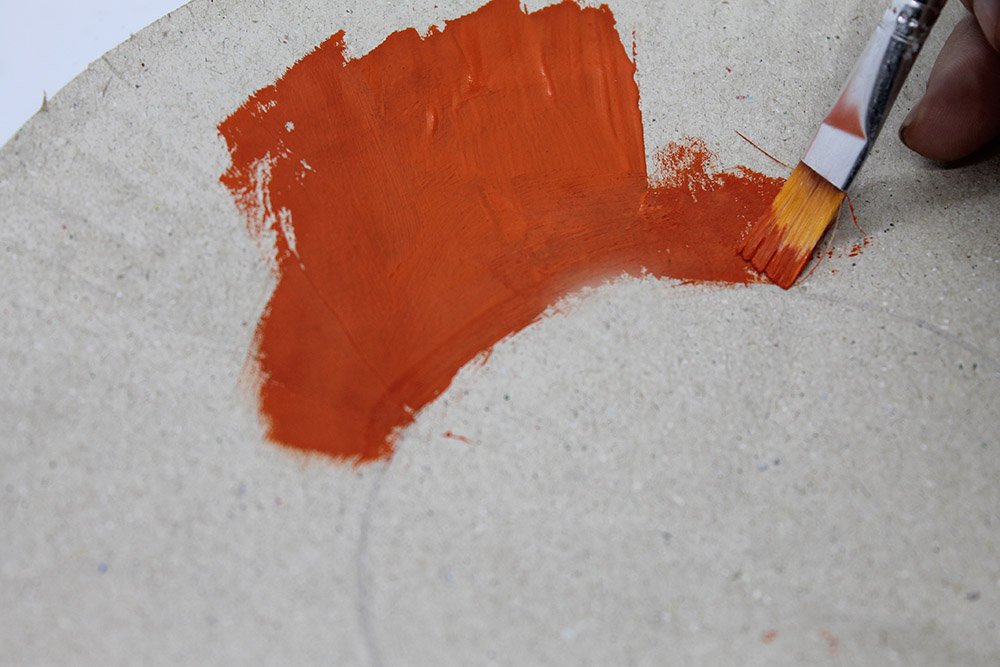
You can paint over the pencil mark as long as you do not go over the boundary too much.
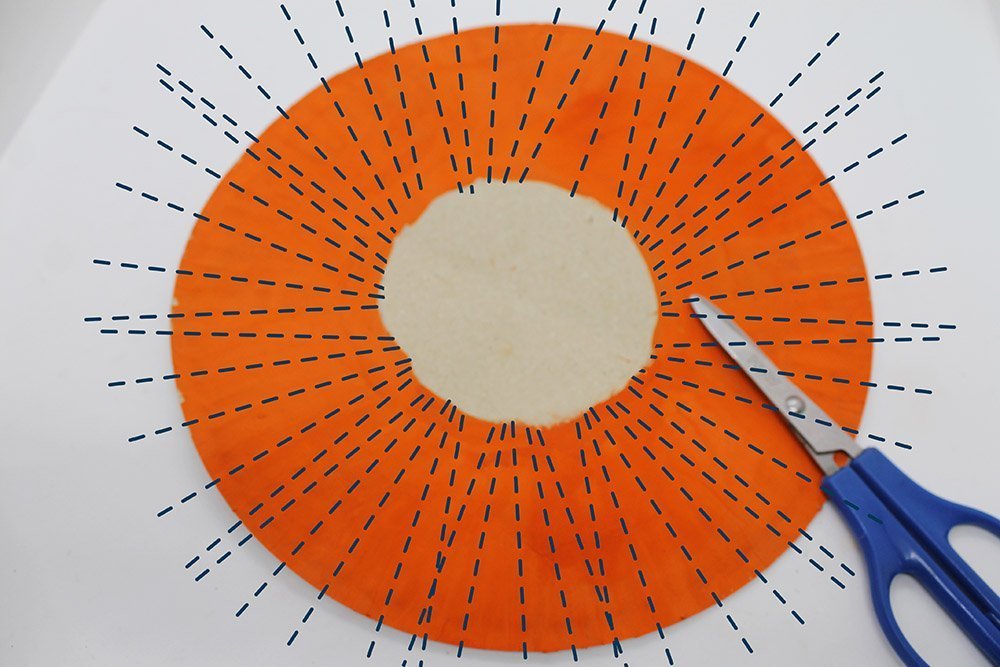
To create the “hairy” mane of the lion, Cut along the dashed lines. Make sure you do not go over the unpainted side. This unpainted center will be where the head of the lion will be glued.
You don’t necessarily need to follow the dashed lines exactly. Just snip around the orange part of the plate to make a “hair” like effect.
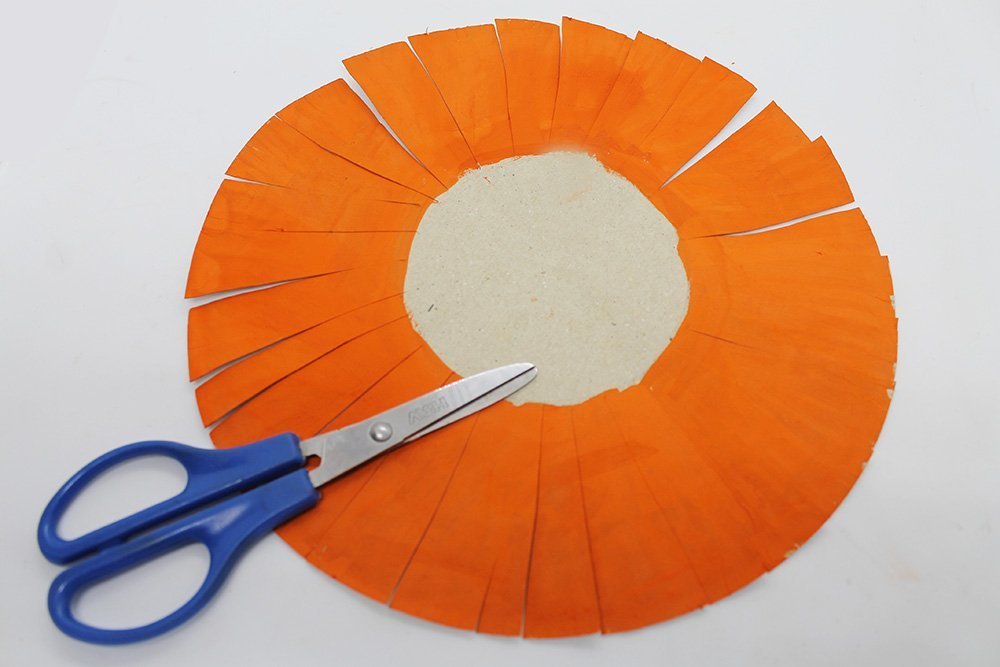
The lions’ mane is done! Set it aside for now.
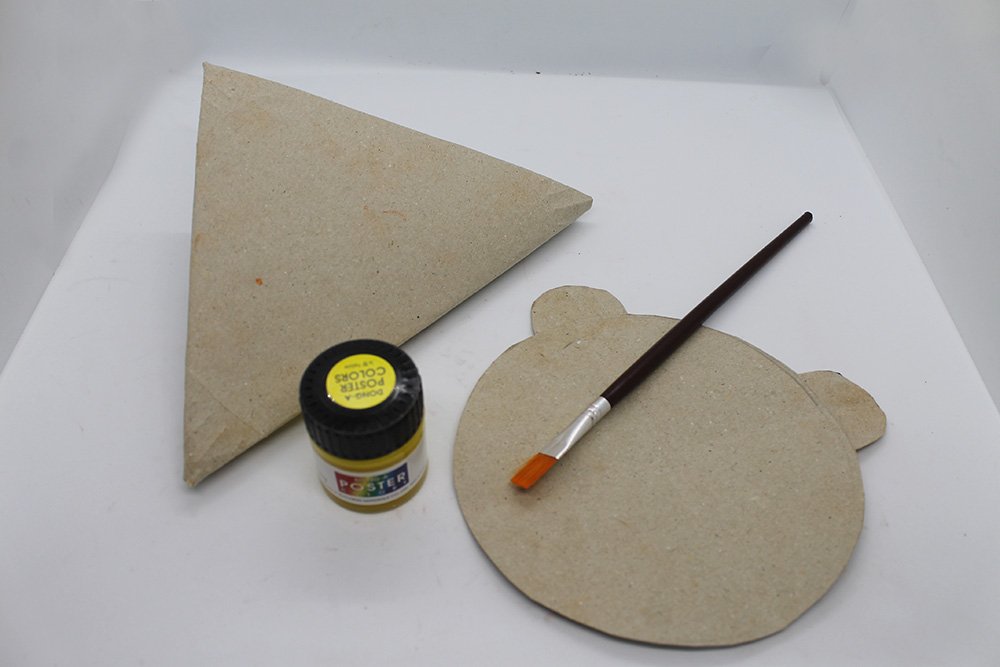
Cut out the head of the lion from paper plates.
Get another plate and repeat the 1st and 2nd steps. This time the radius of the circle is 3 inches. Cut along the circle made.
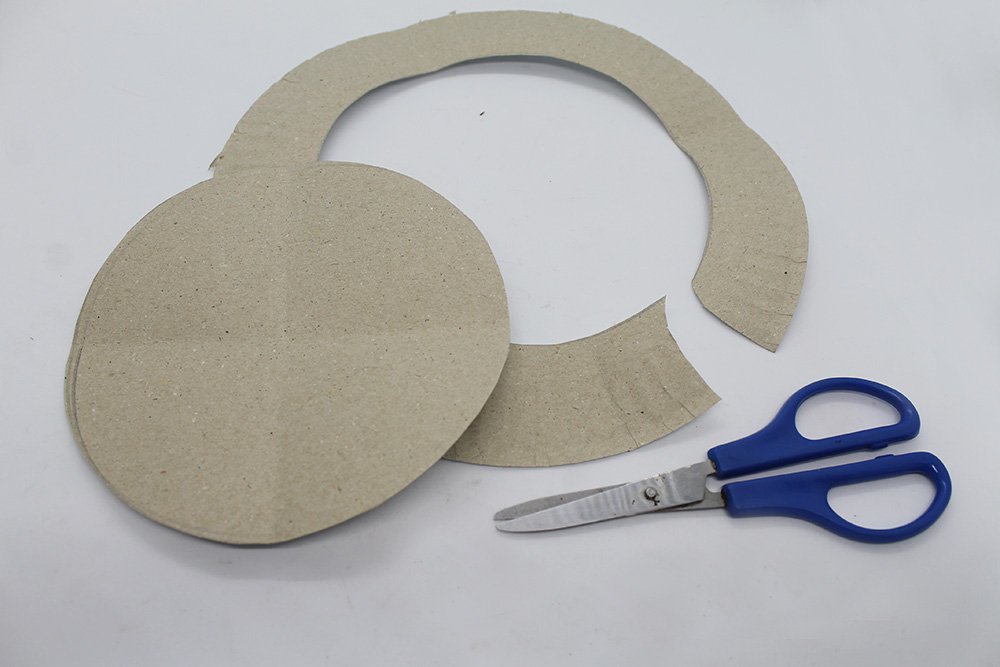
The circle cut out will be the lion’s face. Now let’s make the ears of the lion from the leftover plate from the circle cut out.
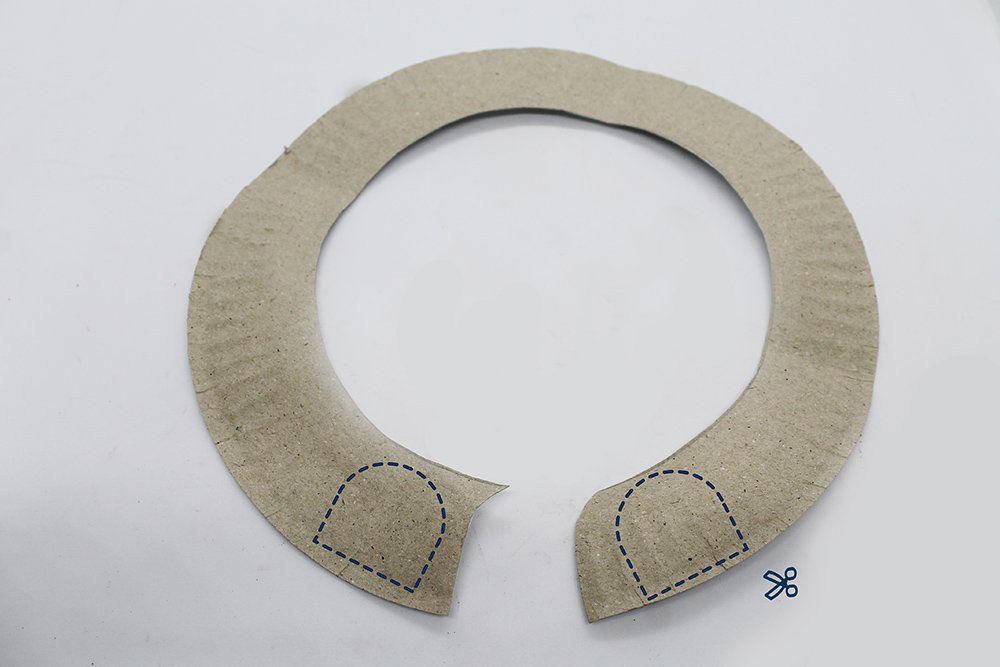
Cut some round shape ears like the one in the picture above.
You don’t need to follow how this one is shaped like. You may shape the ears however you please as long as you can glue them from the back.
Now glue the ears at the back of the circle cut-out.

You have now made the head of the lion. Set it aside for now.
Make the upper body part of the lion.
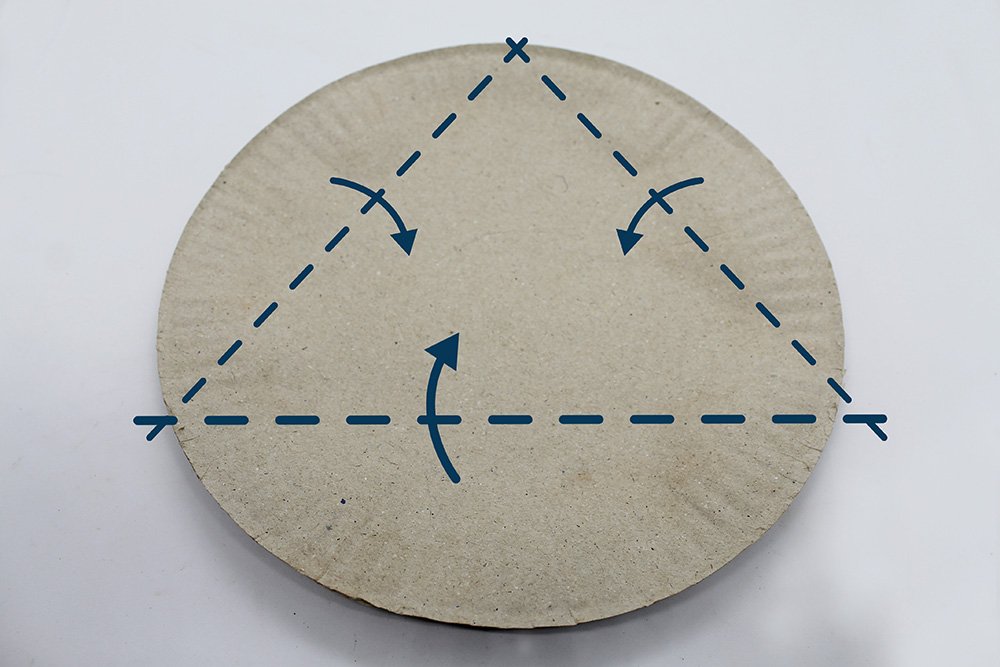
Get another paper plate and fold the paper as illustrated in the picture above.
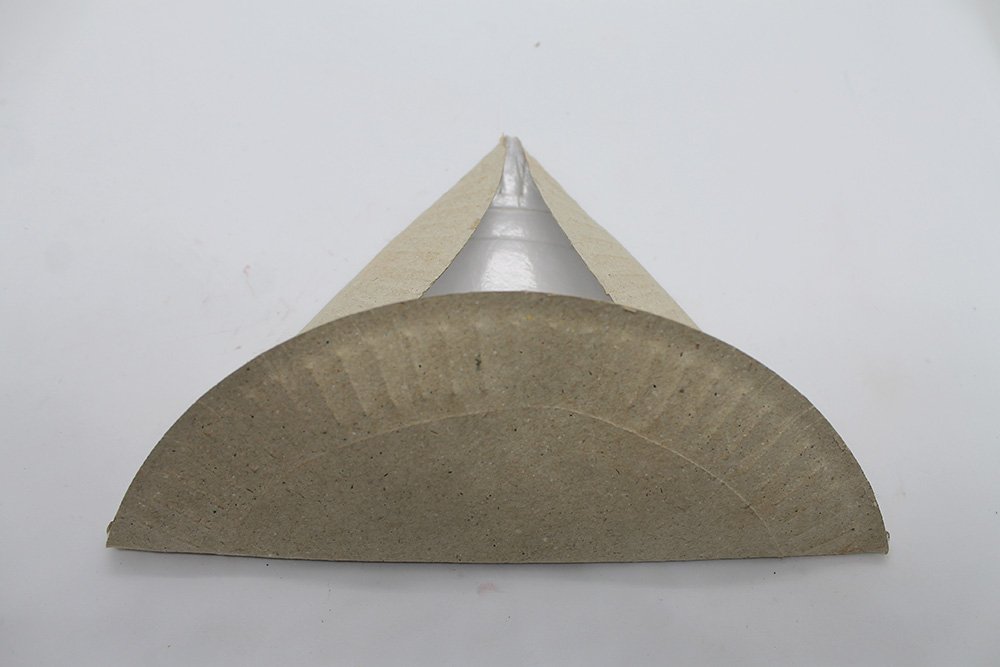
Now flip it over to the other side.
It should look like this! The body should stand on its own.
Now get the head cutout and some yellow paint and brush. Paint the head and body of the lion. Set both aside to dry fully.
Assemble the head and mane of the lion
Attach the head cut out and paper plate mane with some regular glue or hot glue.
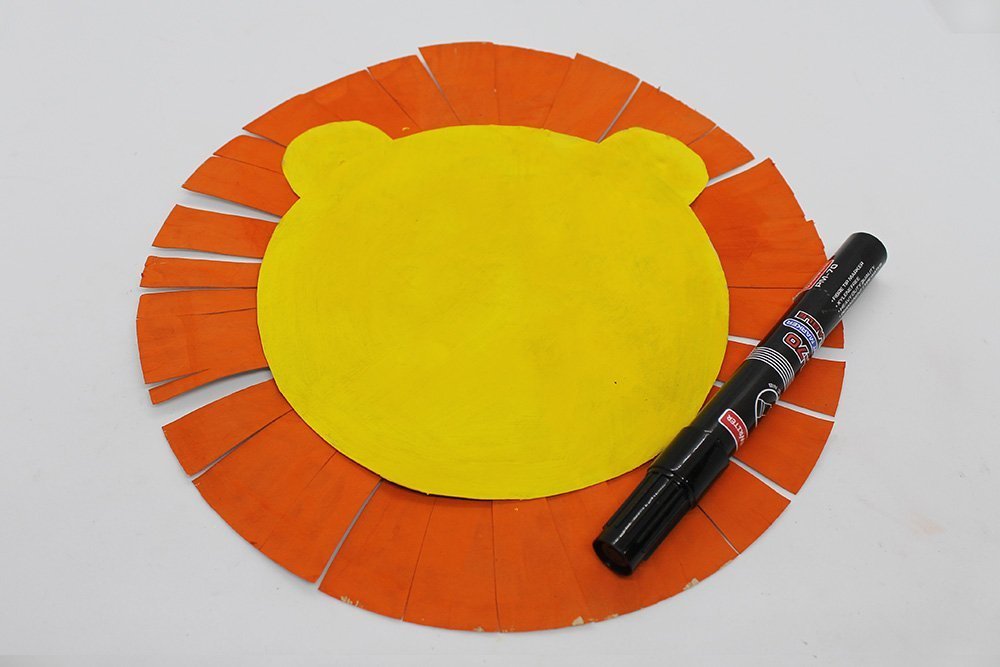
Your lion’s head is almost done! Now draw the face of your lion with a black marker.
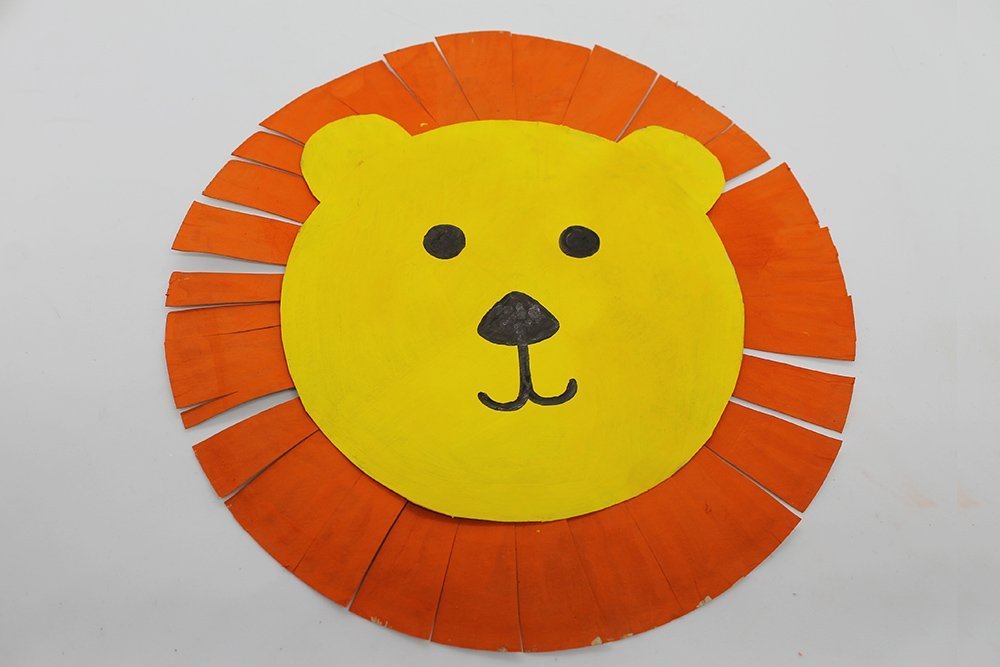
The paper plate lion’s face is done! Time to assemble!
Connect the lion’s head and body
Get the lion’s body and some regular glue/hot glue.
With some regular glue/ hot glue, attach the body to the head.
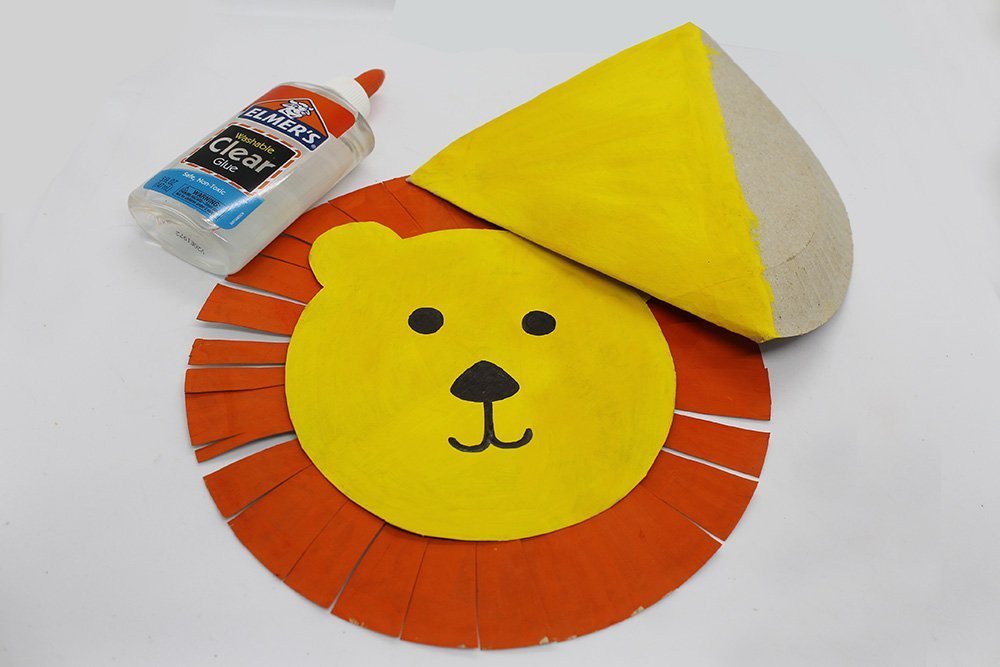
It’s almost done! Now the head is heavy, and the body will not support it to stand. To fix this, we need to create support at the back.
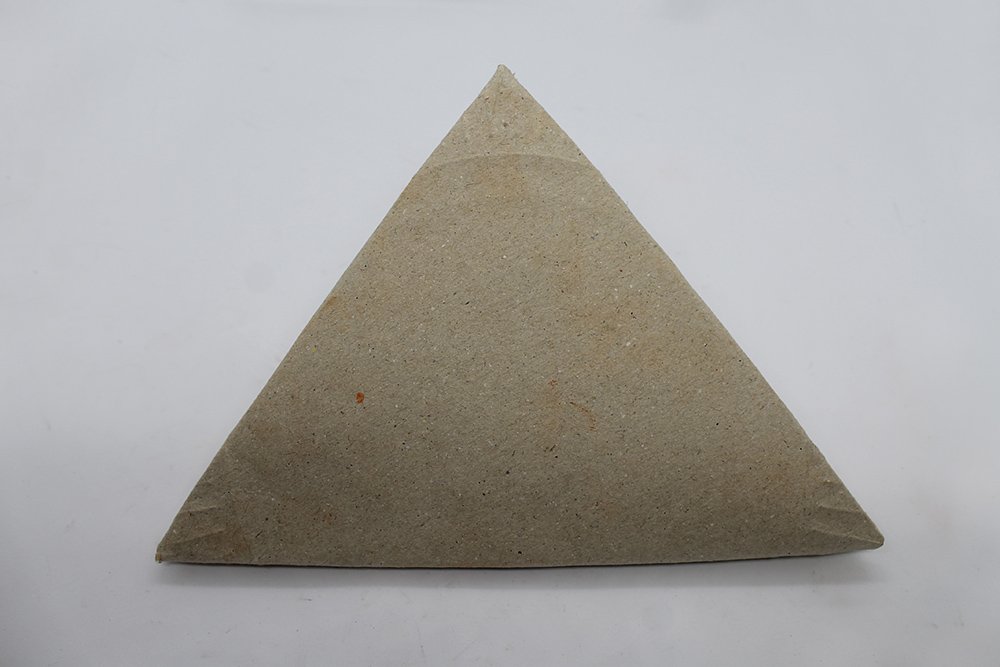
Build the lion’s bust stand
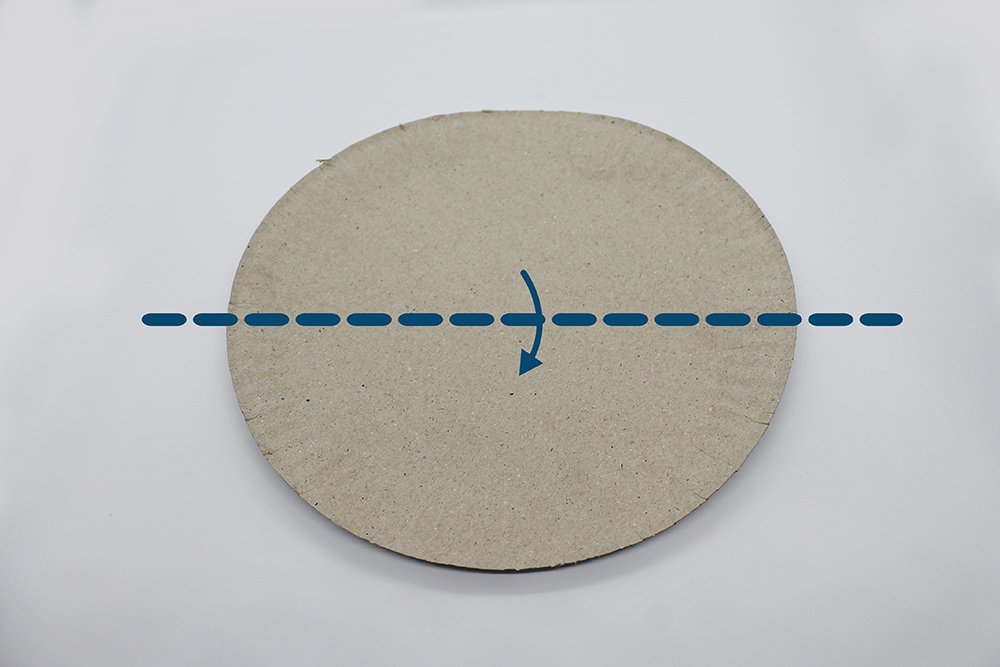
Take another paper plate and fold it at the back.
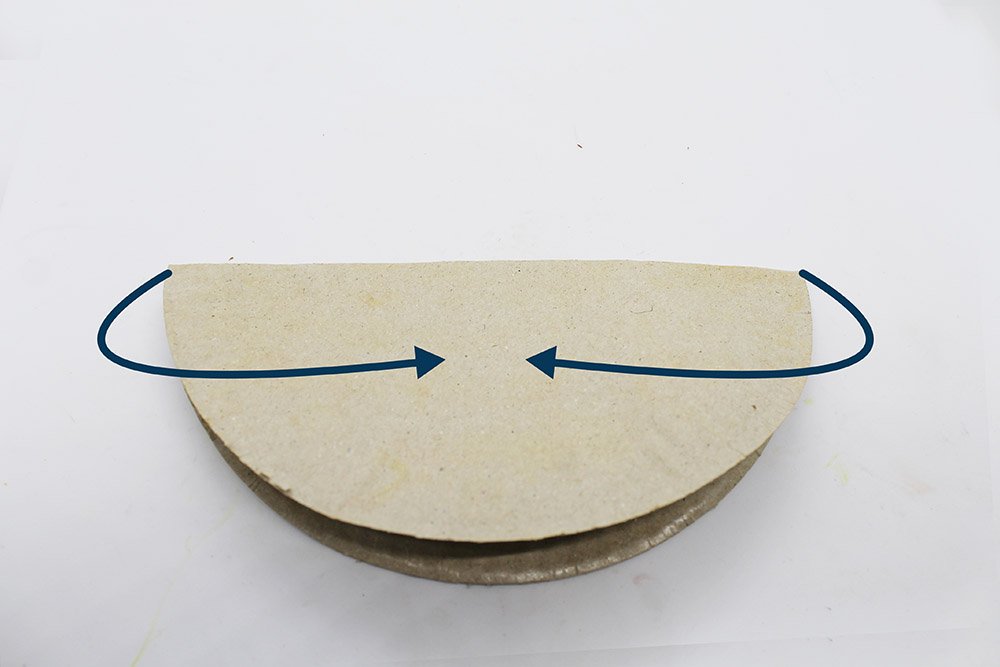
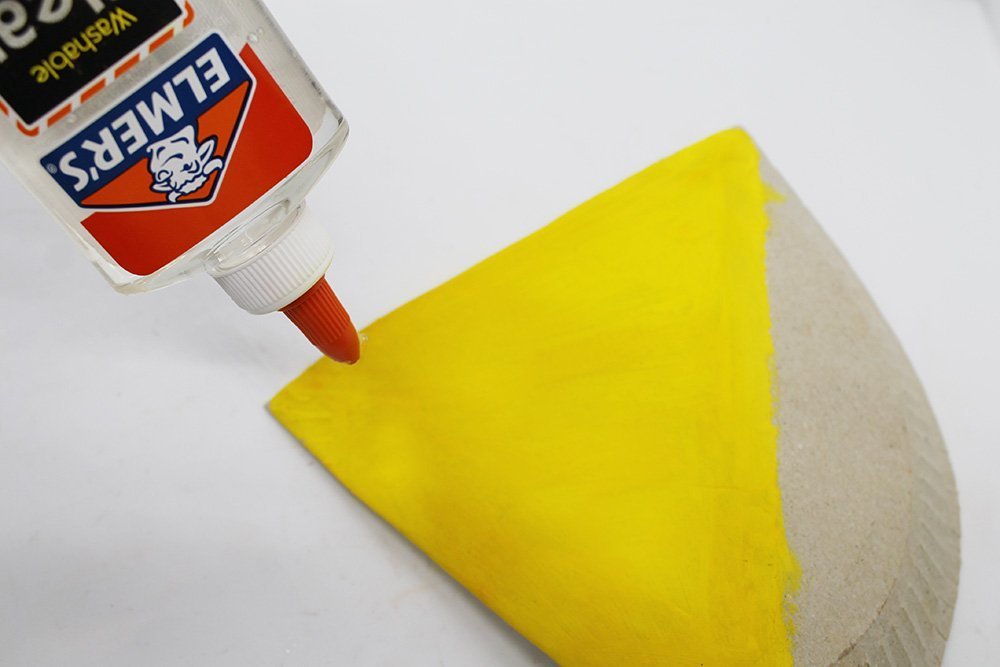
Bring together the left and right corners to form the stand.
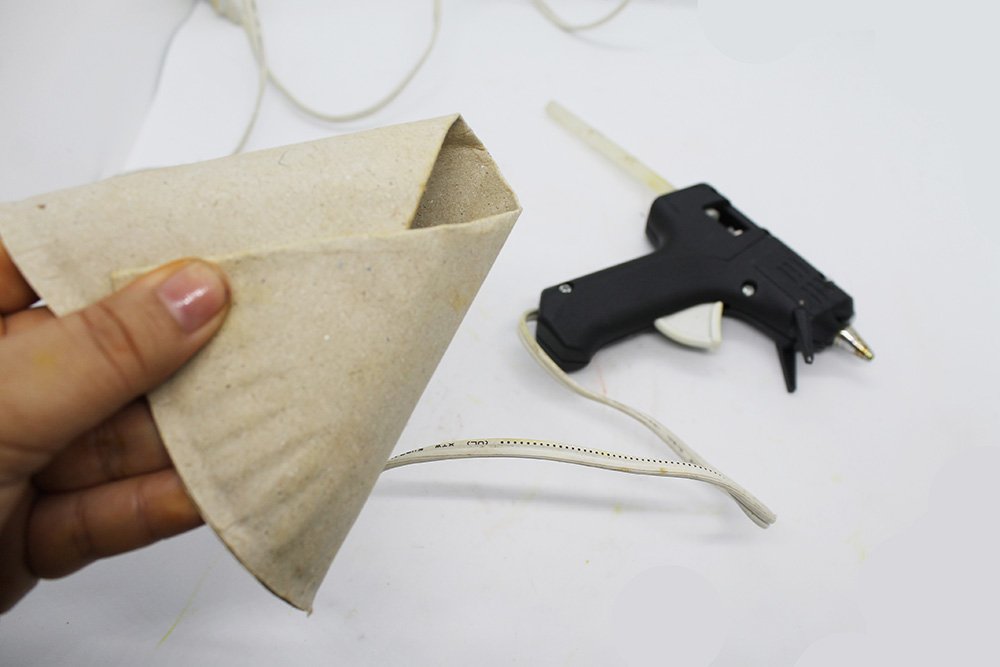
Secure the cone with a glue gun.
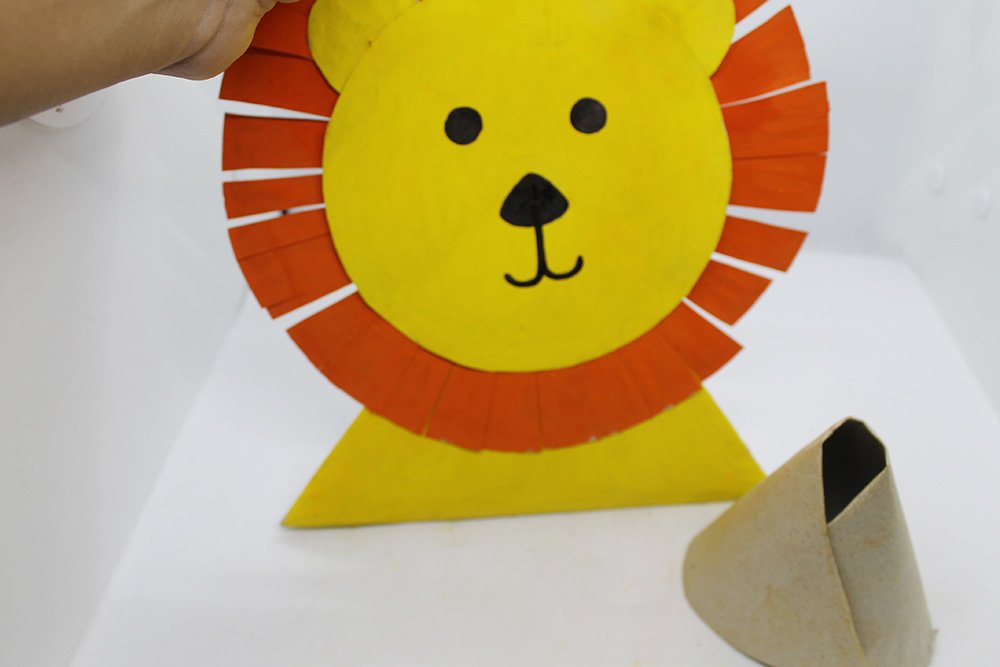
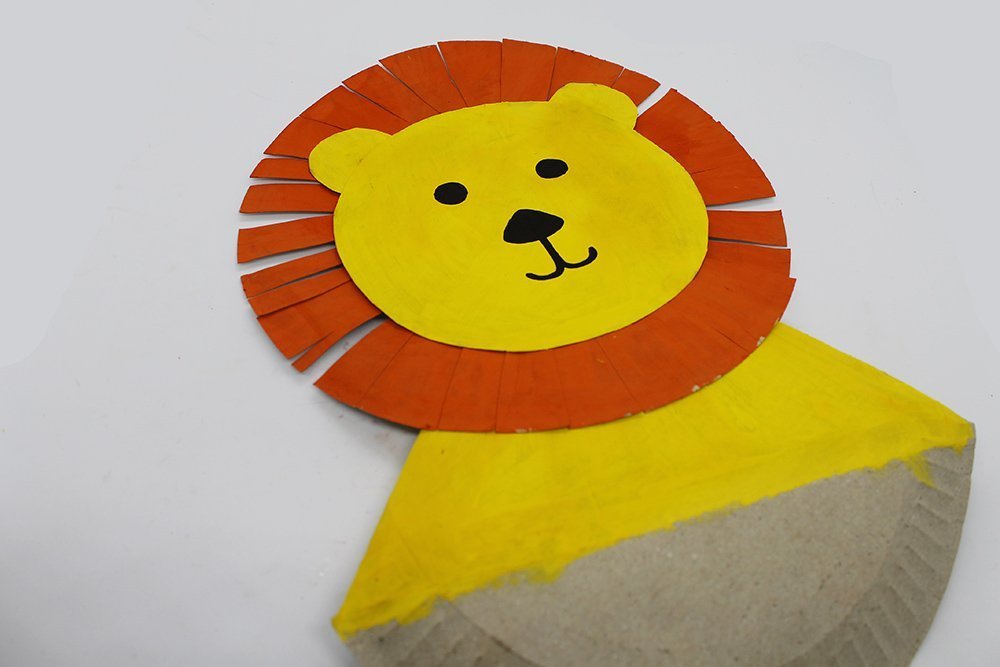
To attach the lion’s bust to the stand, turn the lion to the back.
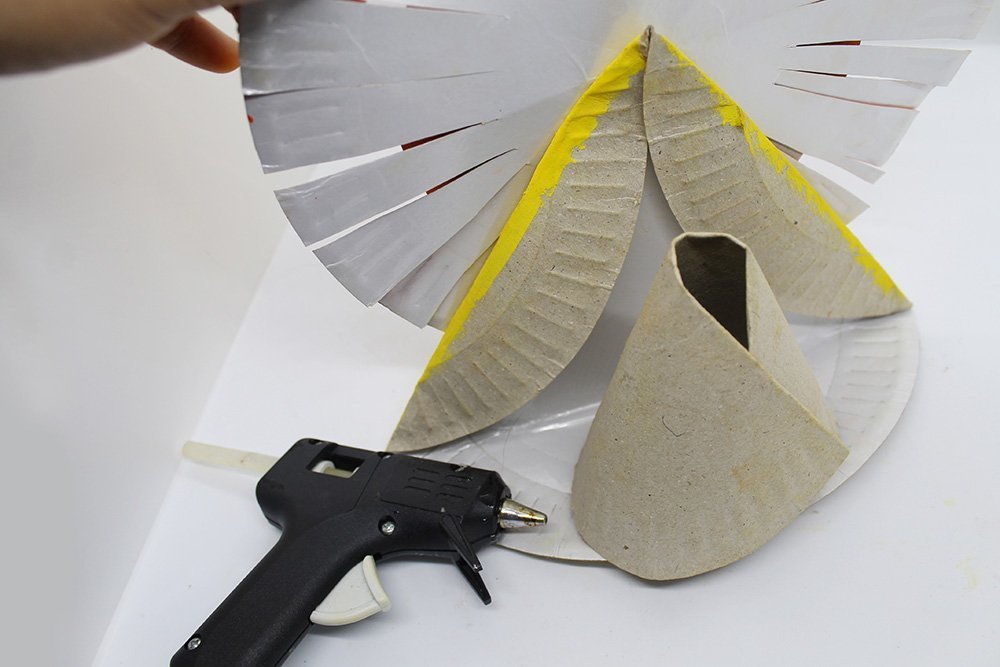
With a glue gun, stick the cone stand to the back of the lion.
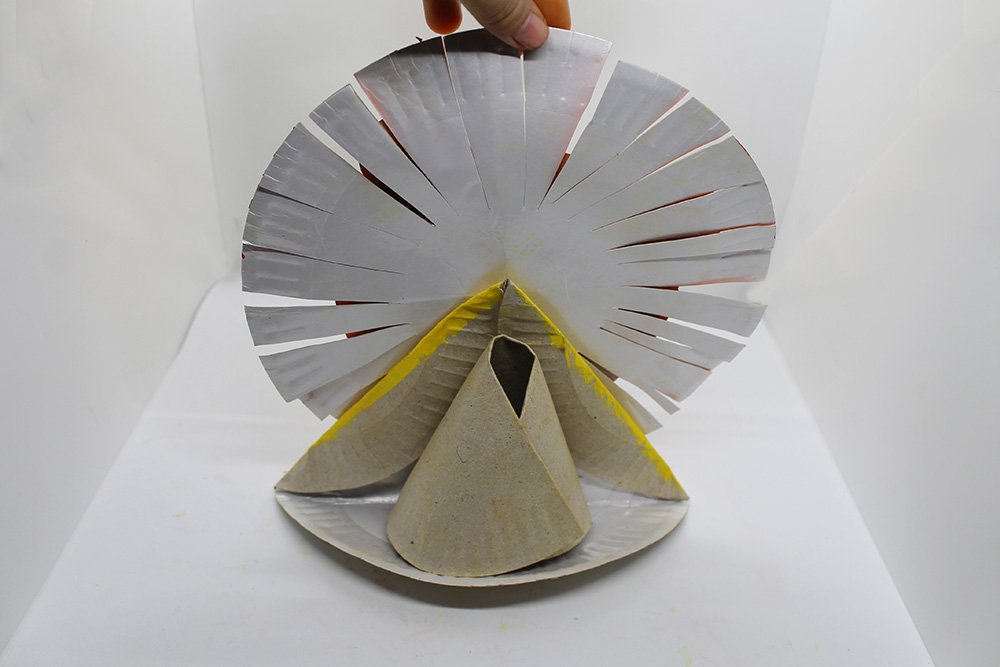
Once the lion’s bust is secured to the cone stand, Turn it around to the other side.
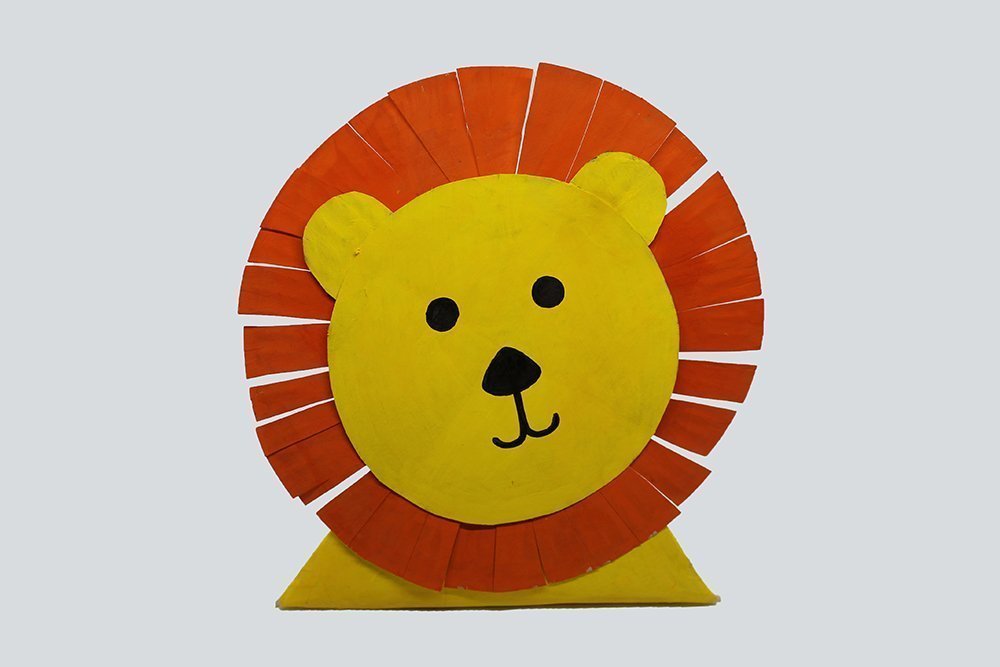
Your paper plate lion is done! Now it can stand on its own and can be decorated anywhere on a flat surface.
Extra Tips
- The head and mane of the lion can be a bit heavy; you can make the head smaller by using a smaller size of paper plates. Creating a smaller head, it is possible that you do not have to make the cone stand.
- When using hot glue, be very careful and use it with an adult’s supervision.
- If you do not plan to use hot glue, then it’s fine. Allow regular glue to dry for a longer period of time or strong, clear tape.
- You make decorate the lion’s face however you like! Use some googly eyes or draw him a funny expression!


Did this craft Dec on 2021:
I wanted to use the glue but my dad didn’t let me. And I got angry because he treated me like a child.
Didn’t knew that would be our last time together. I just wanted to share this because making this with my pa was one of the best memories of my life and u’ll miss them so bad if they’re gone
Man, that’s sad. Stay strong buddy
This was cumbersome but it felt good while doing it. Prolly won’t do it again but the end result was 👍👍
My mom won’t still buy me a glue gun so I used only the stick. TOugh life…
This guide was easy to follow, so good job! I think I could have made it better but I’m fine with what i made