How to Make a Goat Paper Plate | Animal Crafts for Kids

Introduction:
Making a paper plate goat is an easy craft for kids and beginners – all you need is the right guidance and materials. We will teach you how to make a goat in an enjoyable way using everyday stuff. First off, you’d need two paper plates to create the face, horns, and ears of the goat. There’s more to it than that but we will get to that later.
There would be a lot of painting and cutting involved in this craft. Painting is a pretty fun activity and so is cutting. But kids should be supervised when using scissors.
Anyways, we hope that you would enjoy making the goat of paper plates.
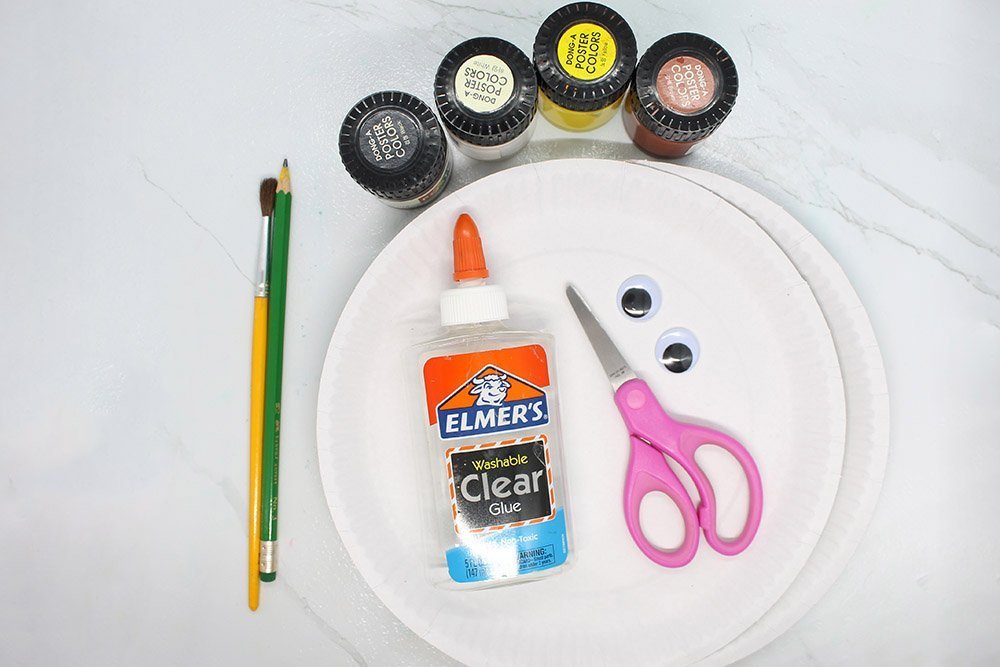
Tools
- Scissors
- Pencil
- Paintbrush
Supplies
- 2 Paper plates
- Glue
- Googly eyes
- Paint
Cut the Ears and Head
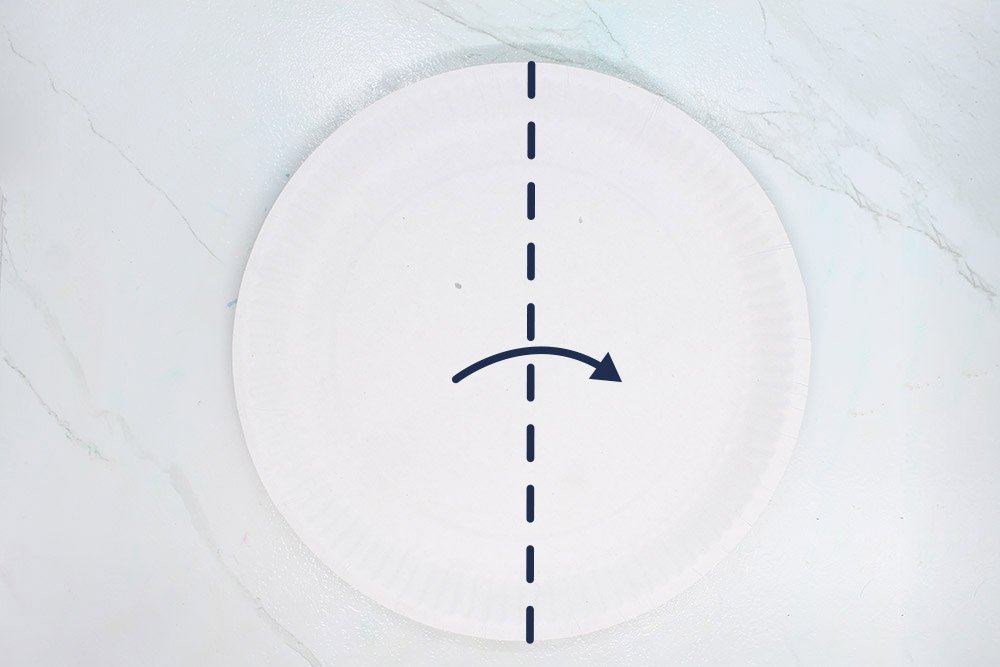
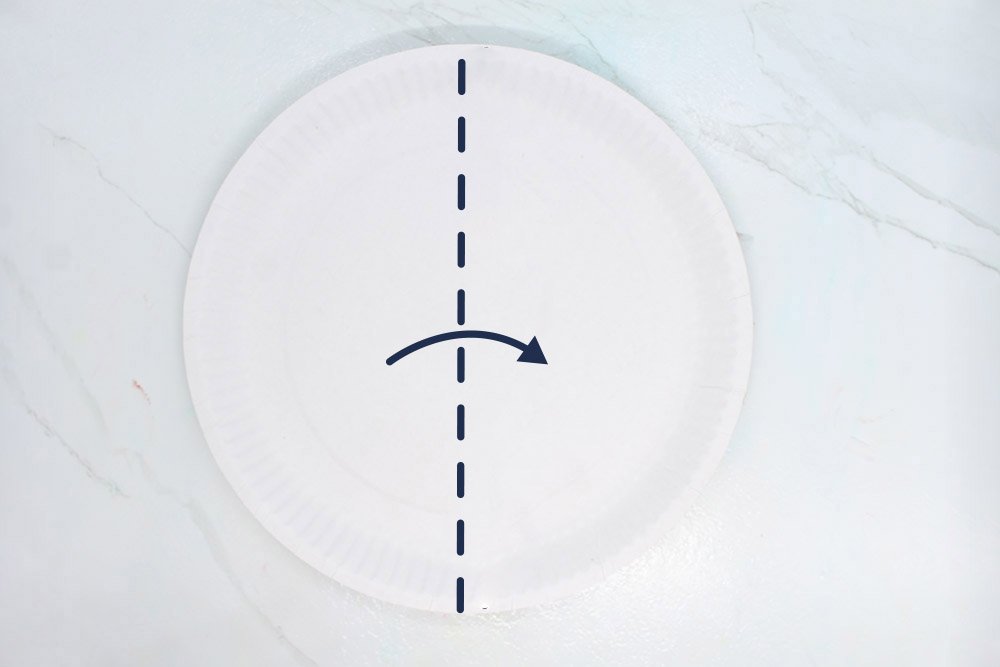
Welcome to the goat paper plate guide! Your first immediate goal is to make the head and ears of the goat. Symmetry is important in this step.
Fold the paper plate from left to right. Then take a close look at the image above and you have the option to draw on your paper plate. Just copy the dashed lines,
Then cut along the curved line. After doing so, you'll have the ears and head of the goat.
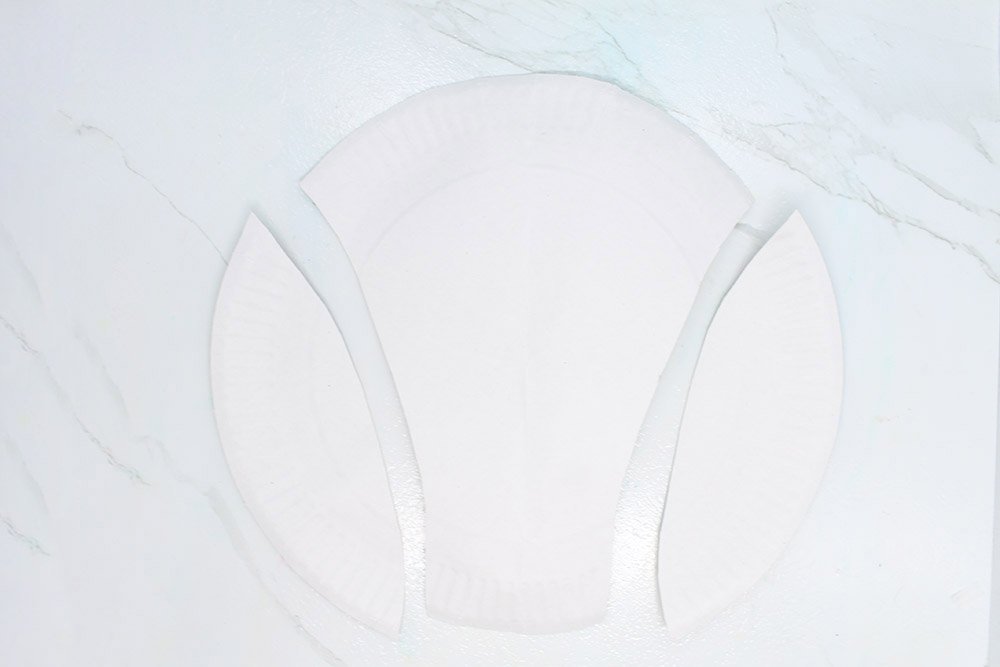
Unfold the largest part of the paper plate and place the ears on the side of it. Great job so far. Now it's time to move to the next step.
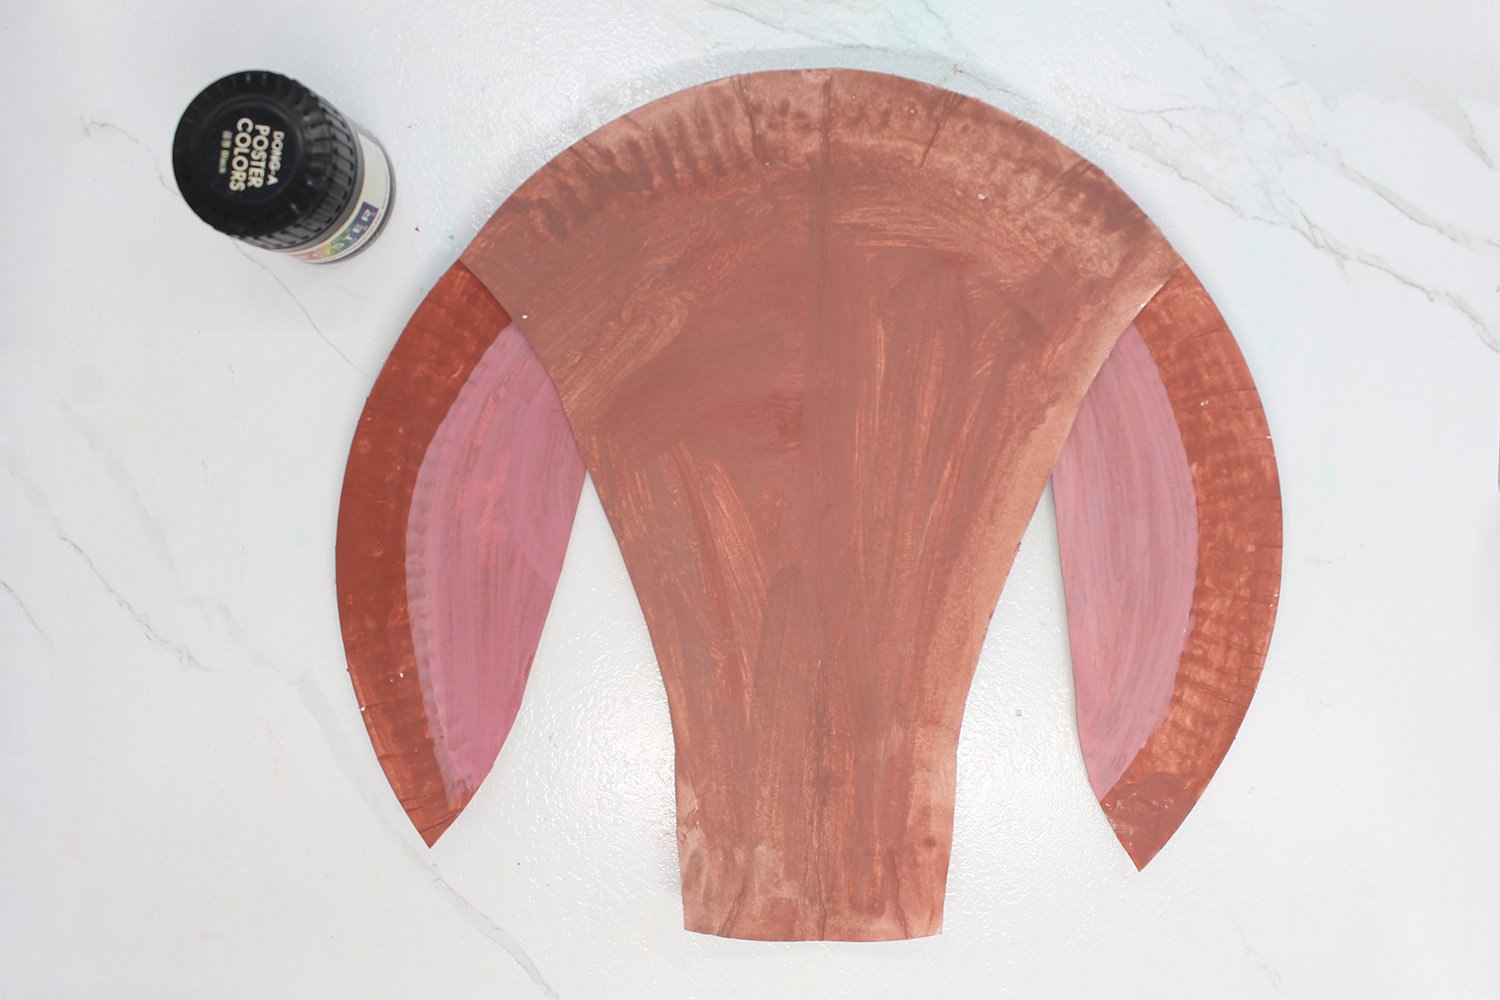
Paint the Head and Ears of the Goat
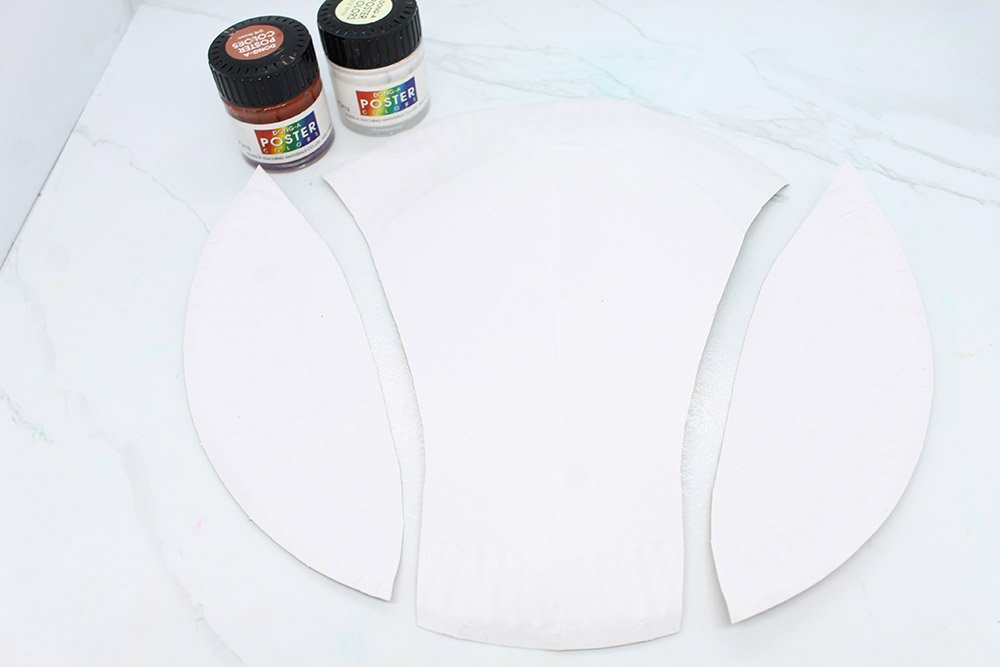
In this section, you will focus on painting the paper plate. For this you'll have to get your brown and white paint.
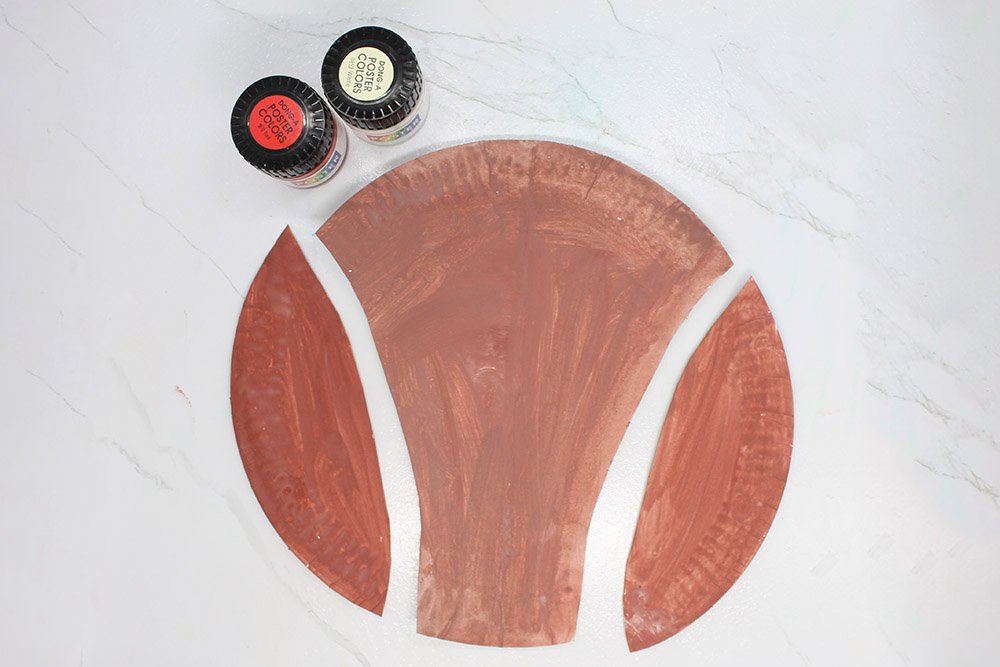
Paint the ears brown. For the head though paint it with a mixture of brown and white paint. Then get your red and white paint.
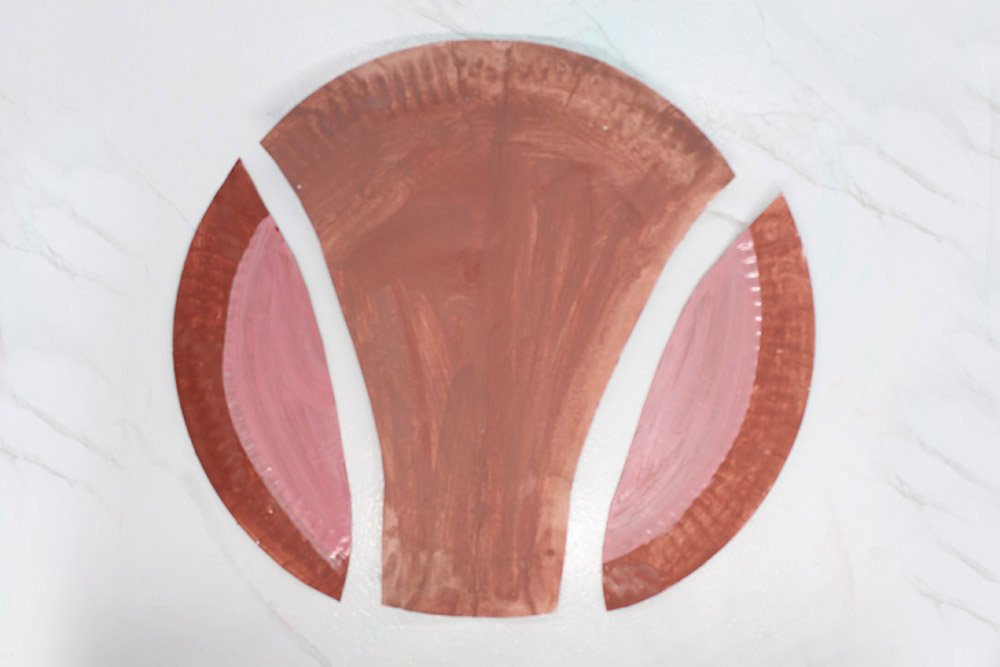
Let the paint dry. And only then paint the ears pink. Mix the red and white paint first if you don't have pink poster paint. Great job so far! Now it's time to move to the next step.
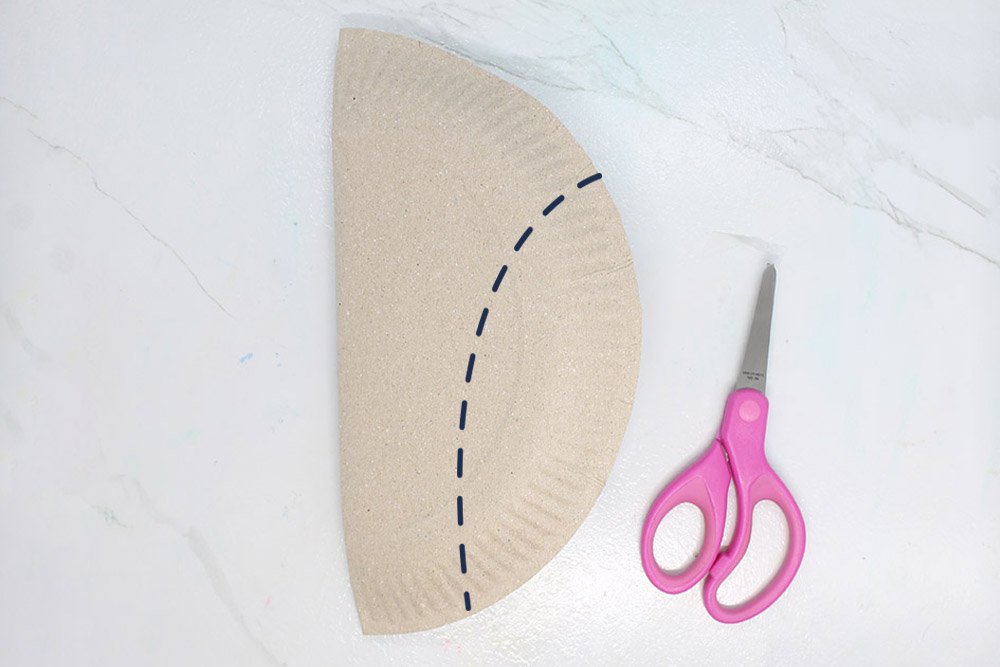
Make the shape of the Horns and Nose
You now have to make the horns and nose of the goat craft. To do this, you'll need another paper plate.
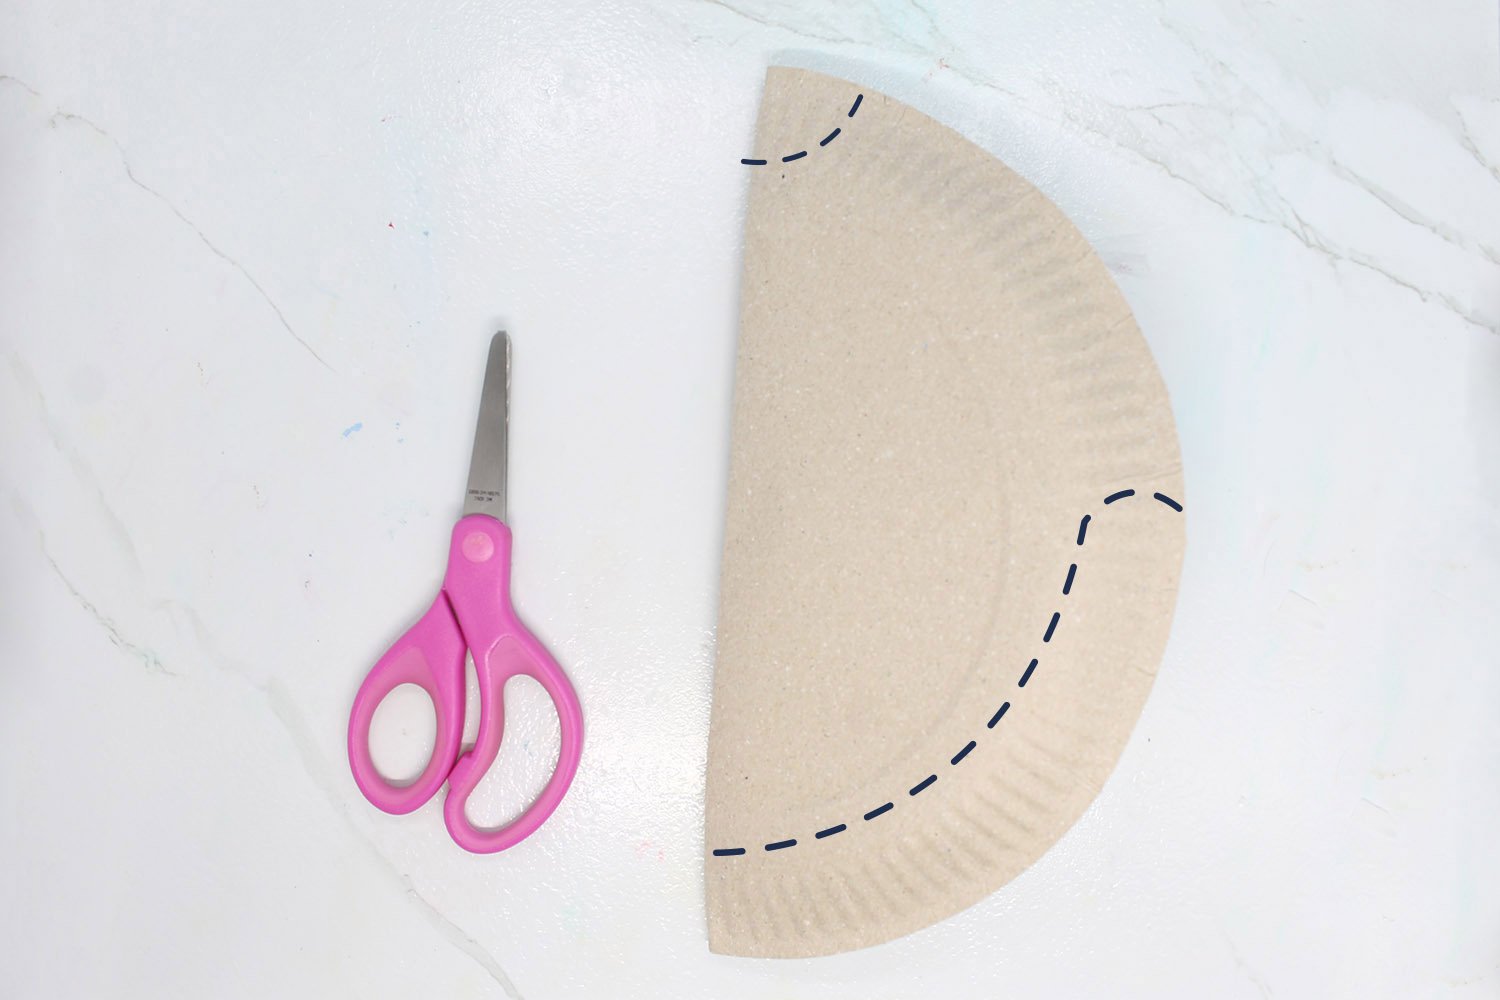
Then take a good look at the dashed lines in the image above after folding the paper plate.. You have to cut along these lines on your paper plate. And you can draw the lines in your paper plate first.
Then cut along the dashed lines. Do this step carefully so that you could create the horns and nose of the goat.
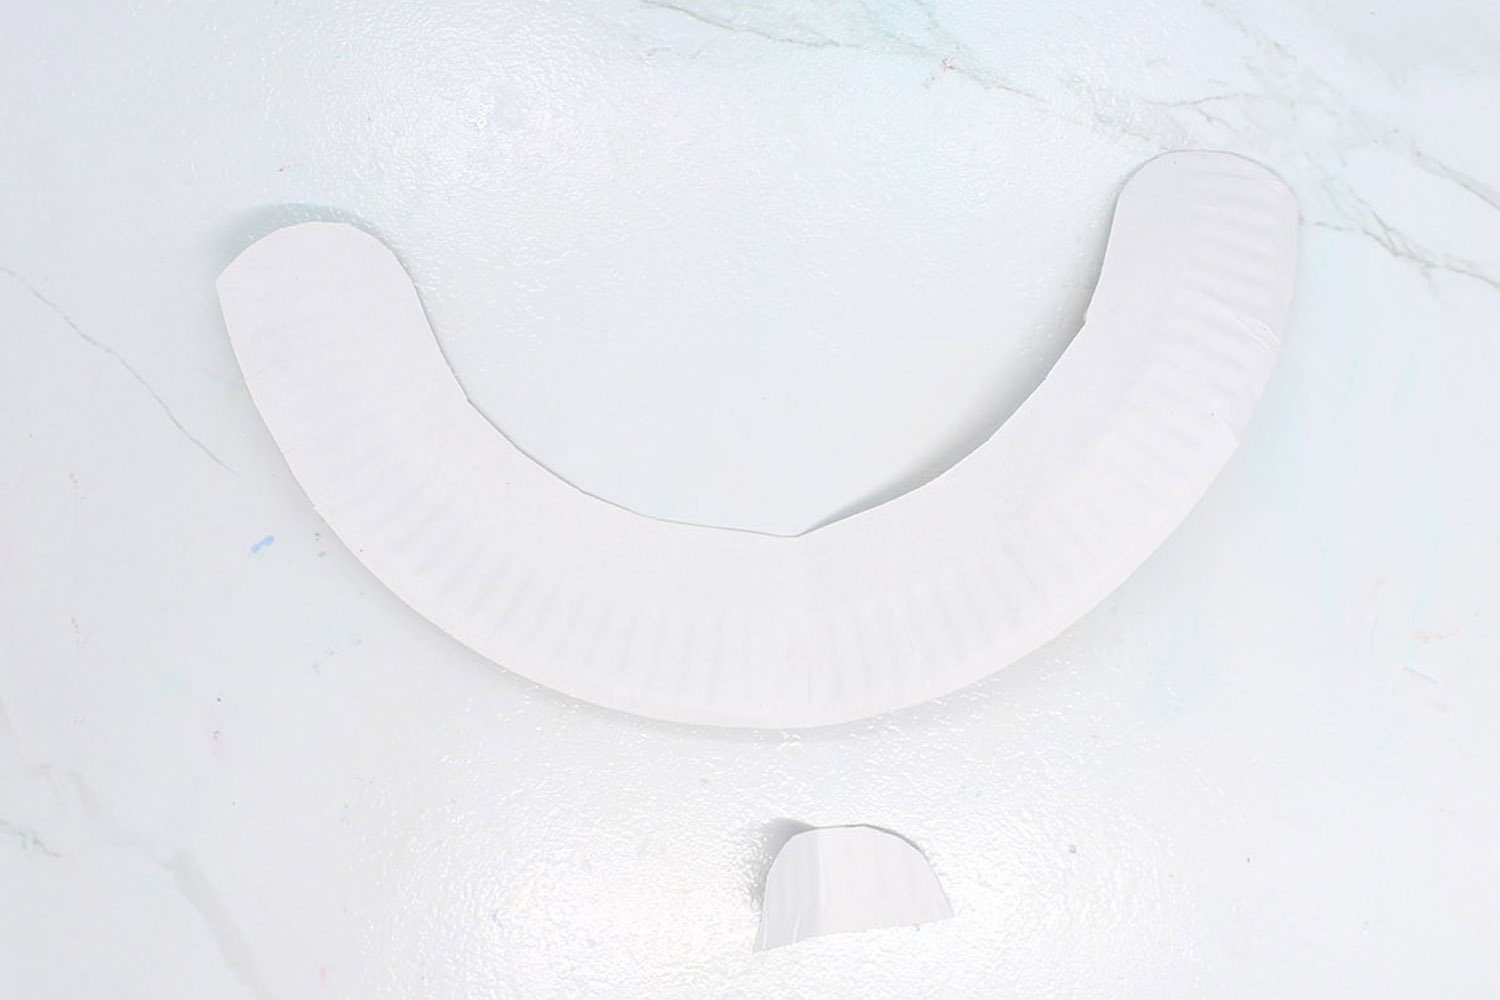
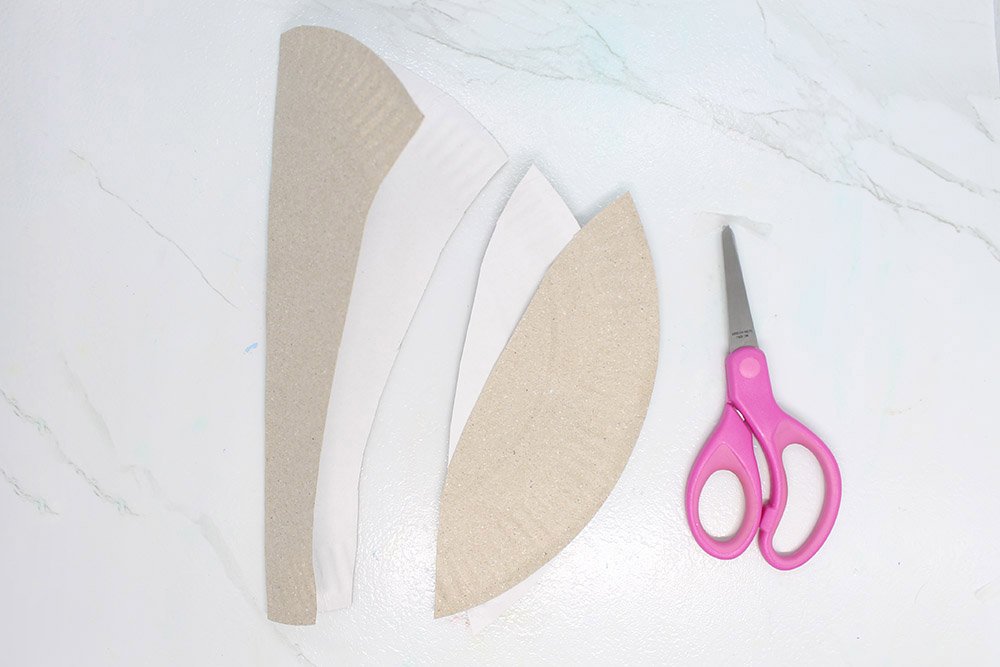
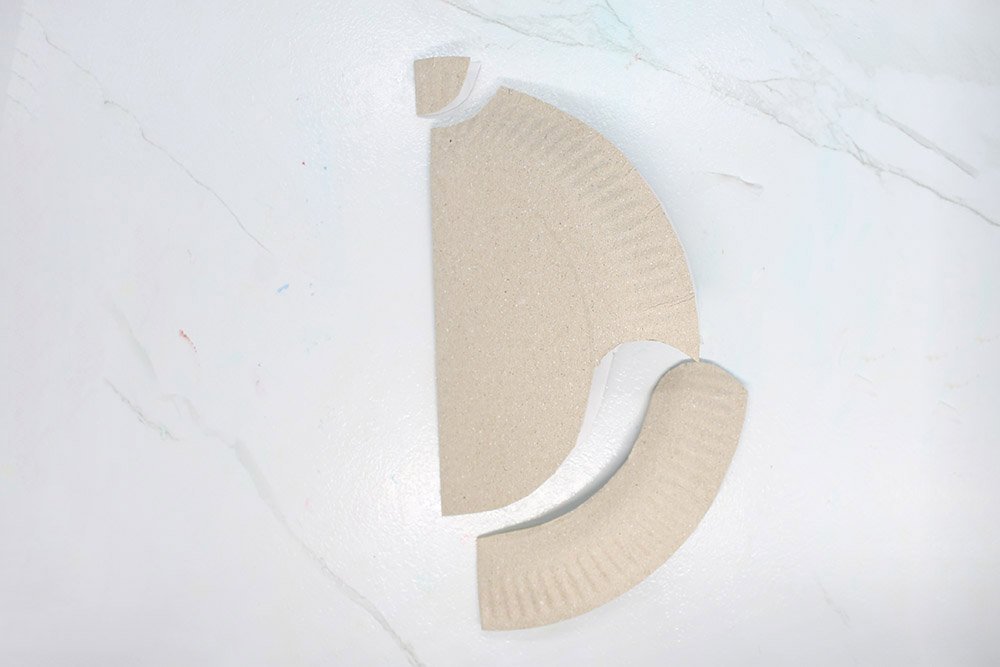
Unfold the top and bottom parts only. Discard the part in the middle. And you should have your horns and nose ready! Great, it's time to move to the next step.
Paint the Horns and Nose
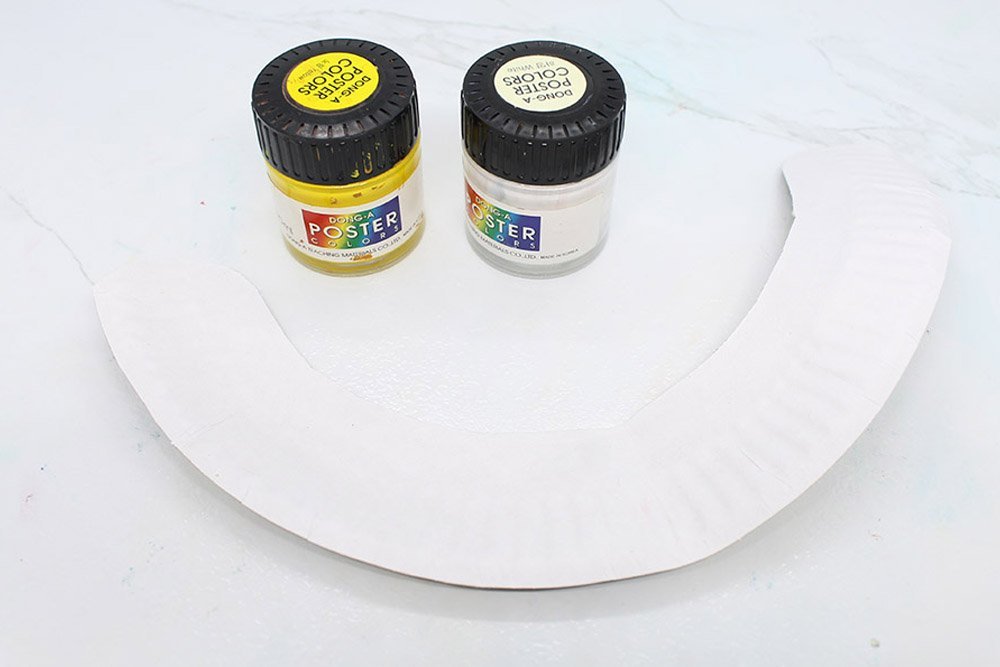
In this section of the project, you will be painting the horns and nose of the goat. You'll be adding some details. So, get your paper plate horns and nose. As well as yellow and white paint.
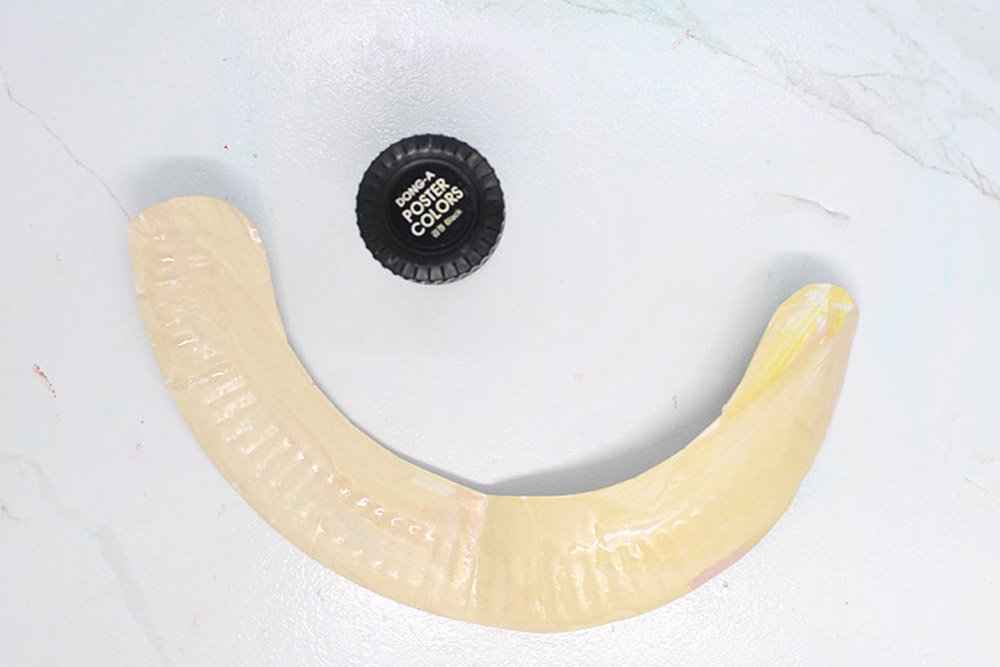
Paint the horns with a mixture of yellow and white paint. And then get your black paint as you will be painting to add details next.
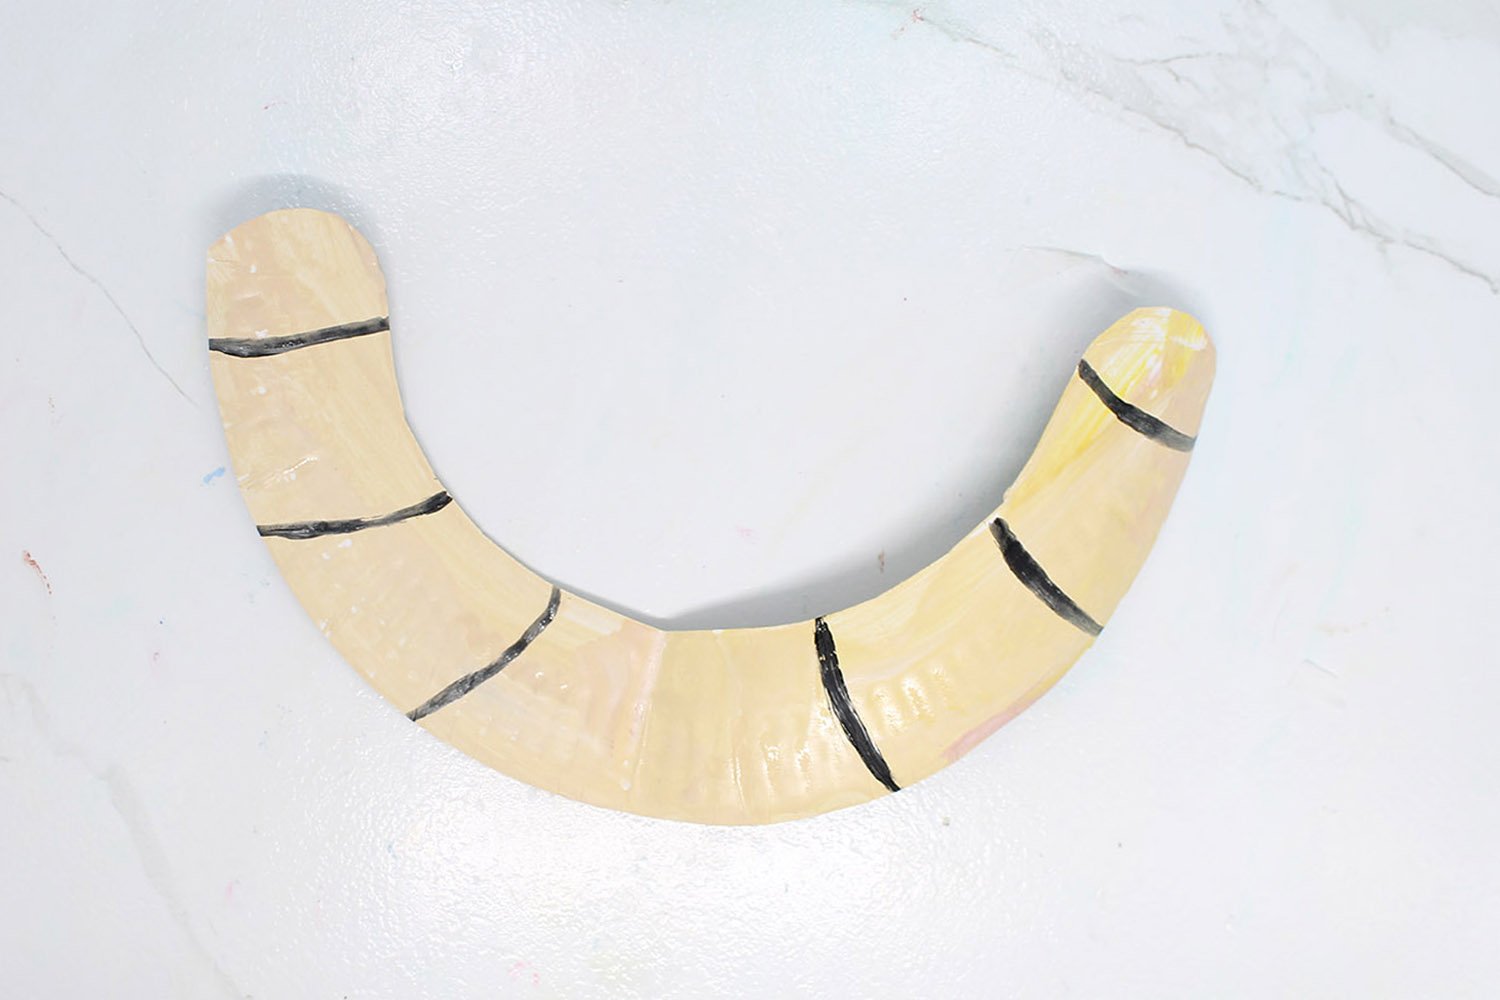
Simply just make slim black lines along the length of the horns like in the image above. It's important to note that even though there's only one object. that object represents two horns!
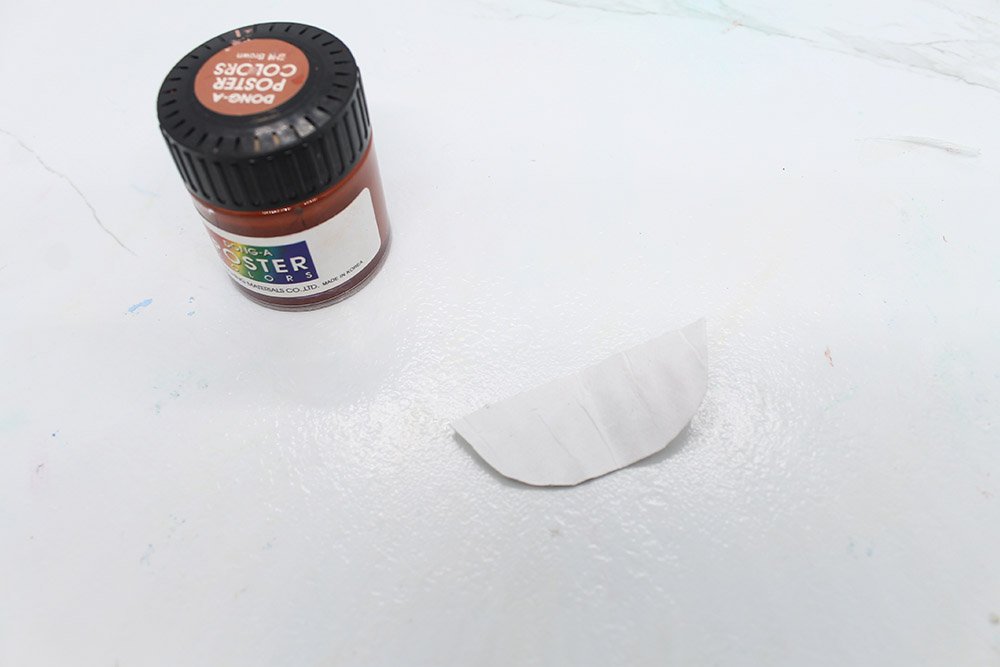
Great! Now, get your goat's nose and some brown paint. Let the horns dry off in another place.
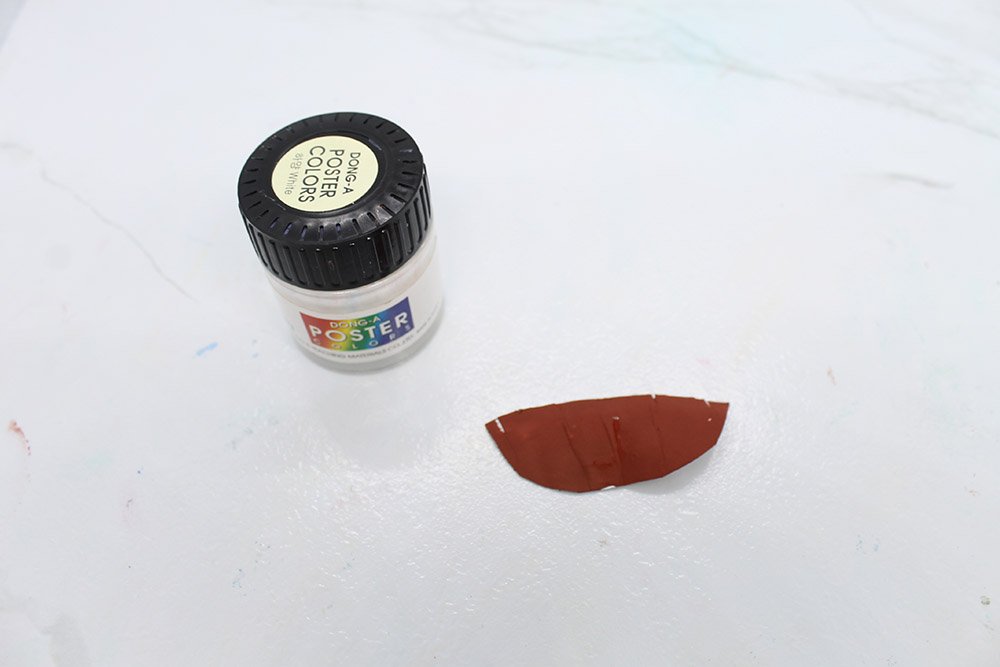
Pain the nose brown. But wait, there's still one tiny step you have to do.
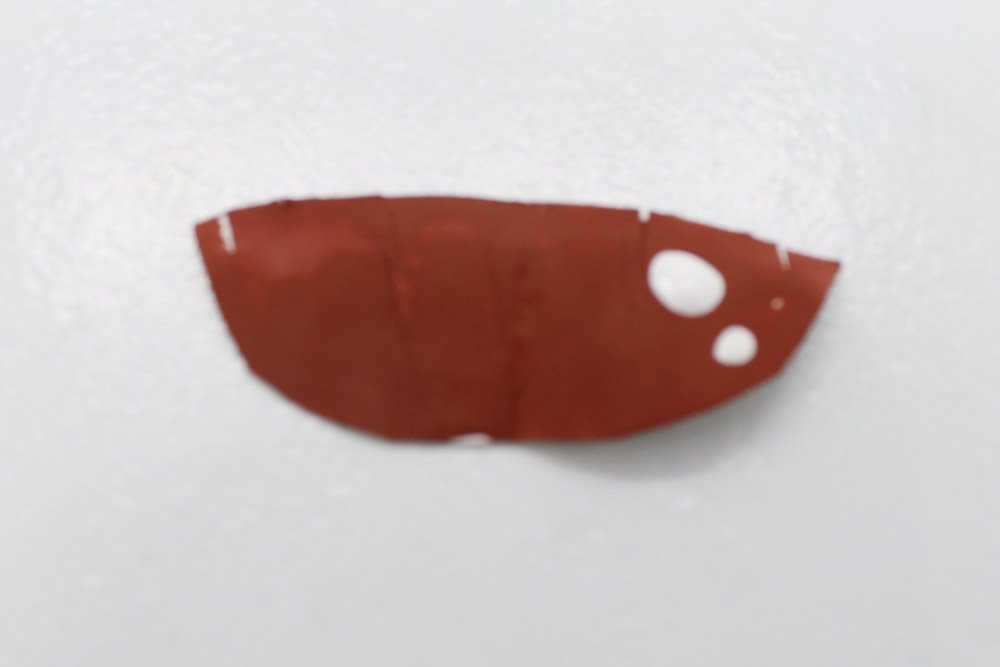
Add white dots onto the right side of the nose. This will give the illusion of a shiny nose. Awesome! Now, it's time to combine everything together.
Combine Everything to Make the Paper Plate Goat
Glue the ears into the back of the paper plate head. Get your black paint too.

And then give your goat a mouth line using black paint. Also, get the nose.
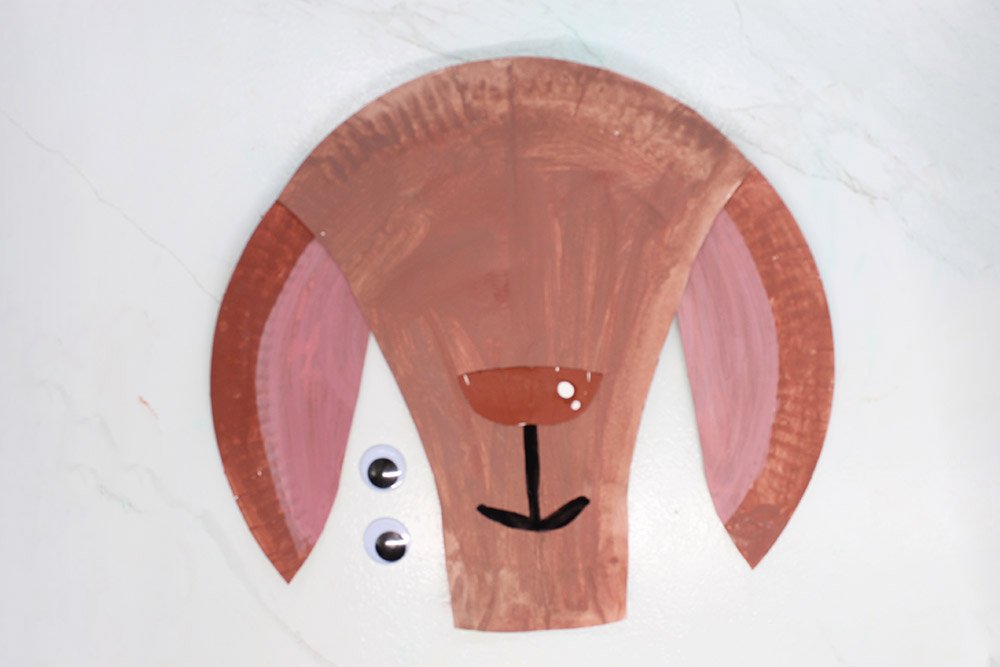
Glue the nose into the paper plate goat and get the googly eyes.
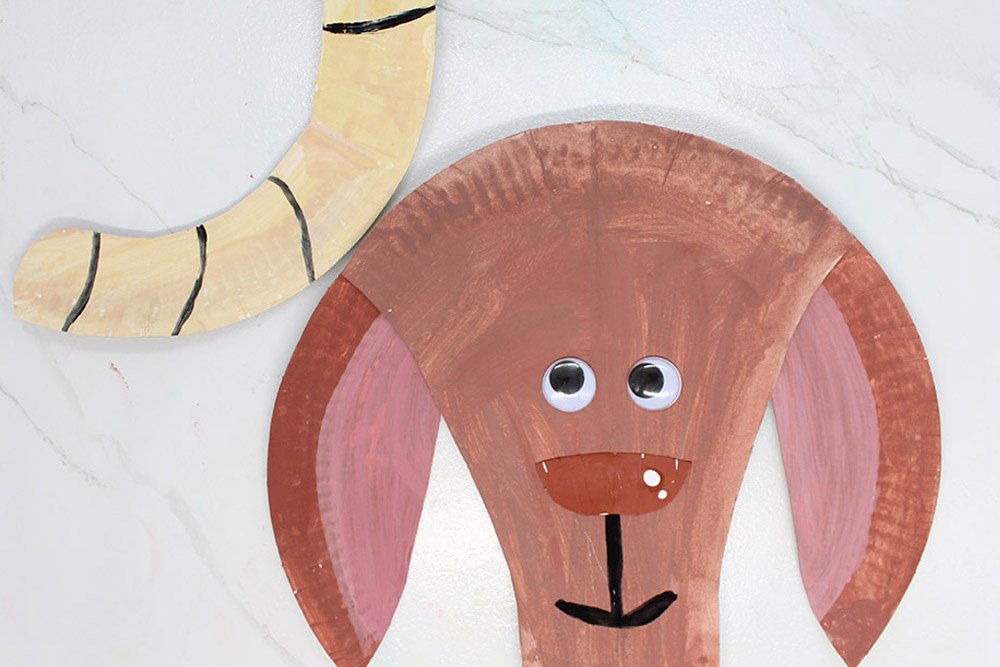
And then glue the googly eyes above the nose. Then get the horns. You are almost done with the craft.
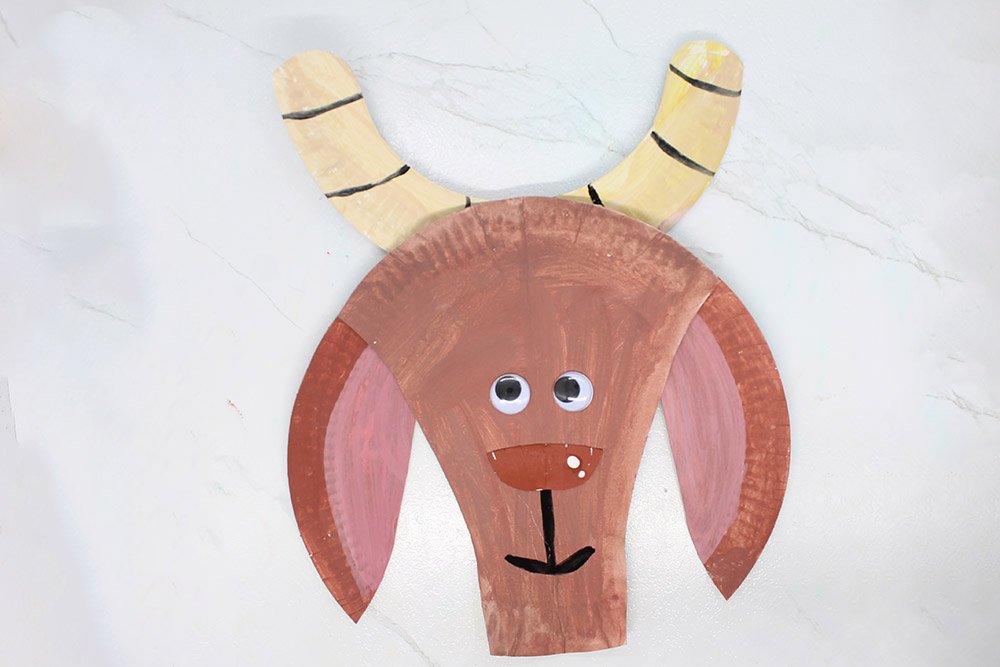
Attach the horns to the top part of the goat. Looking thoughtful there, aren't you mister goat? Congratulations, your paper plate goat is done. For more awesome crafts for kids, check out the articles below.
Extra Tips
- What additional details can you add to your goat craft to make it more unique? Think about it 🙂
- Scissors should not be taken lightly when kids are the ones using it.
- As always, enjoy the process.


I like mine though it looks suprised rather than thoughful heehe
You rock for making this guide!
Thank you for making it so easy
Could u make it a little more furry? Yup you can just reply to this comment!
This paper plate goat rocks but my son doesn’t liek it as much as the other crafts here – good job still!