Introduction:
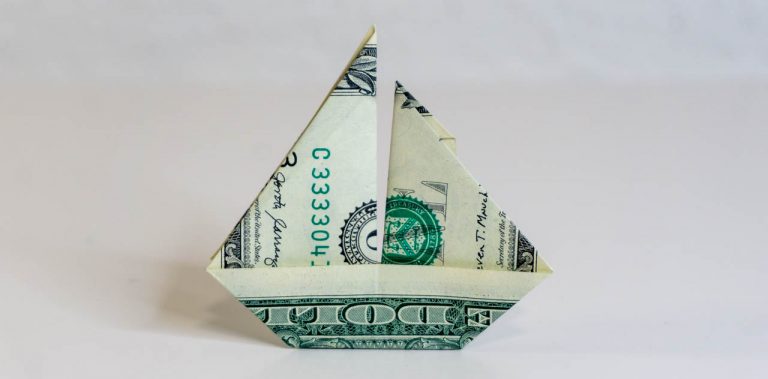
Making a paper boat out of a dollar bill is very easy! Its great activity for kids and beginners to the art of (dollar) paper folding, this origami is easy to make and only has a few steps. You don’t necessarily need a dollar bill; if you don’t have one available, then use a rectangular piece of paper to make your very own origami boat.
The ratio of the height to the width is 1:2.35.
The dollar bill sailboat is a cool-looking fold and will most likely impress anyone who sees it. That’s if they don’t do dollar origamis themselves! Anyways, this is a fun fold to learn and try, so read the guide and enjoy.
Make Some Creases

The first step is to get a suitable dollar bill and find a flat surface,like a table. A paper that has the same ratio of a dollar bill can also be used.
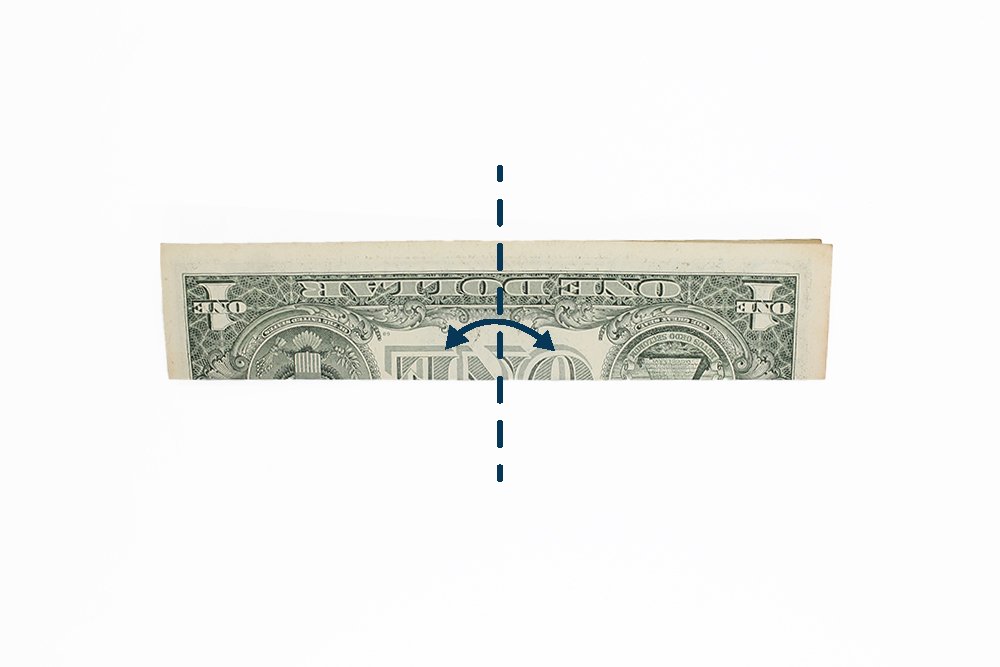
Fold it in half lengthwise then unfold.Fold the paper bill crosswise in half.
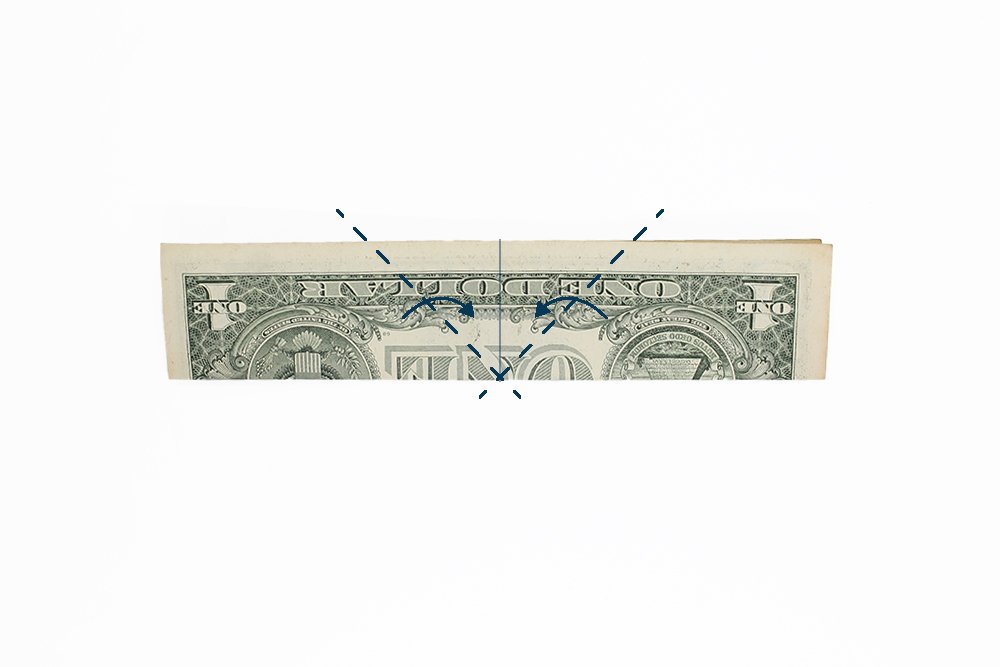
Then do a diagonal crease mark on the left and right side. See next steps for guidance.
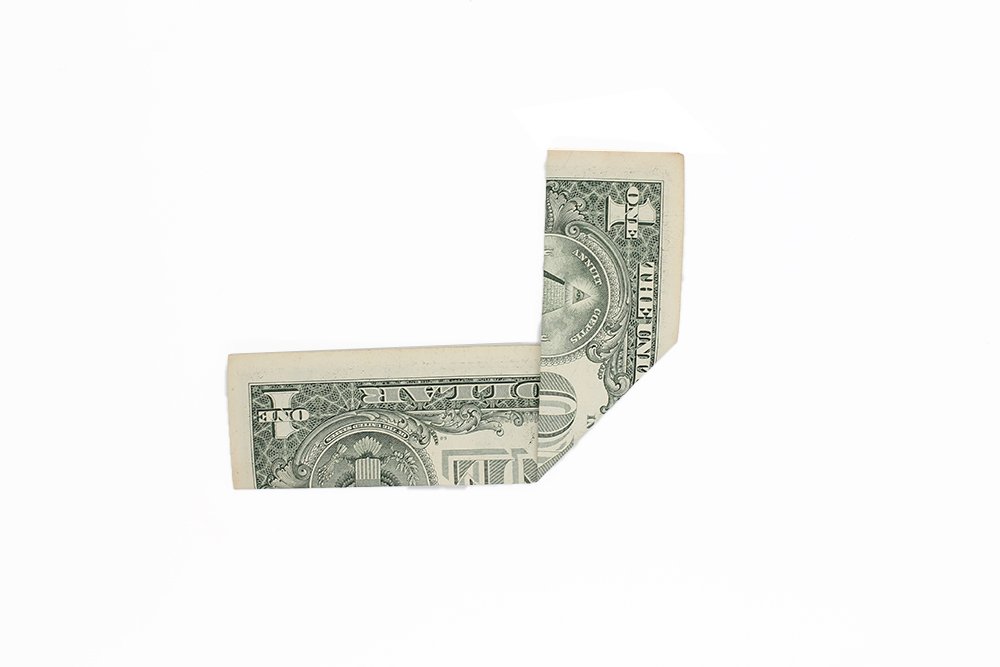
Fold the right side along the crease mark made at the middle of the dollar bill.

Do the same for the left side. Bring the left edge towards the middle like in the picture so you'll get a symmetrical shape.
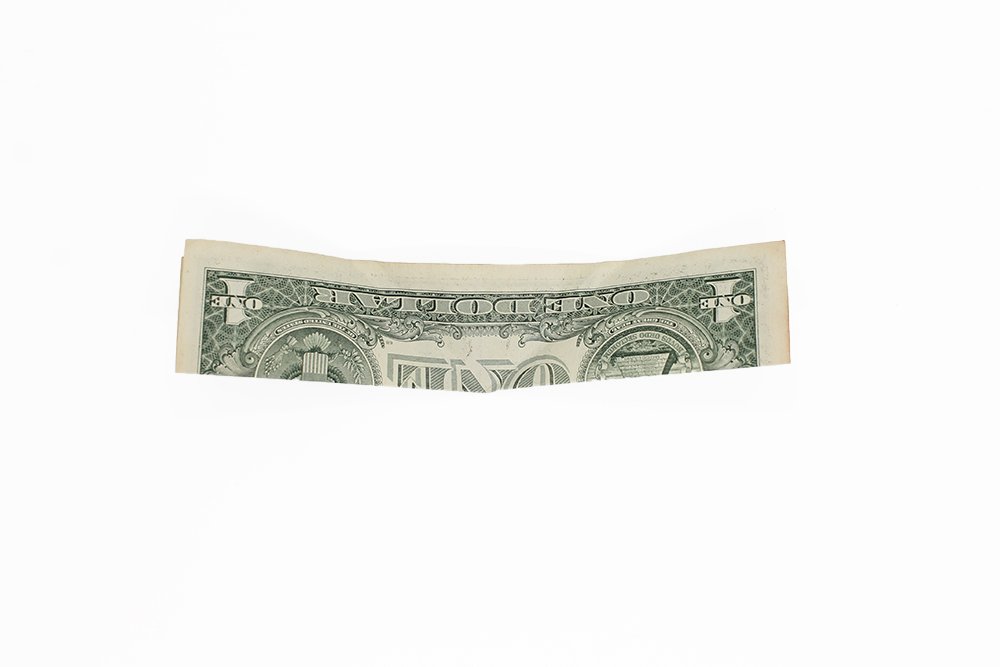
Then unfold the diagonal folds you made. Good job! Now it's time to proceed to the next steps.
Work on the sails and hull of the money boat
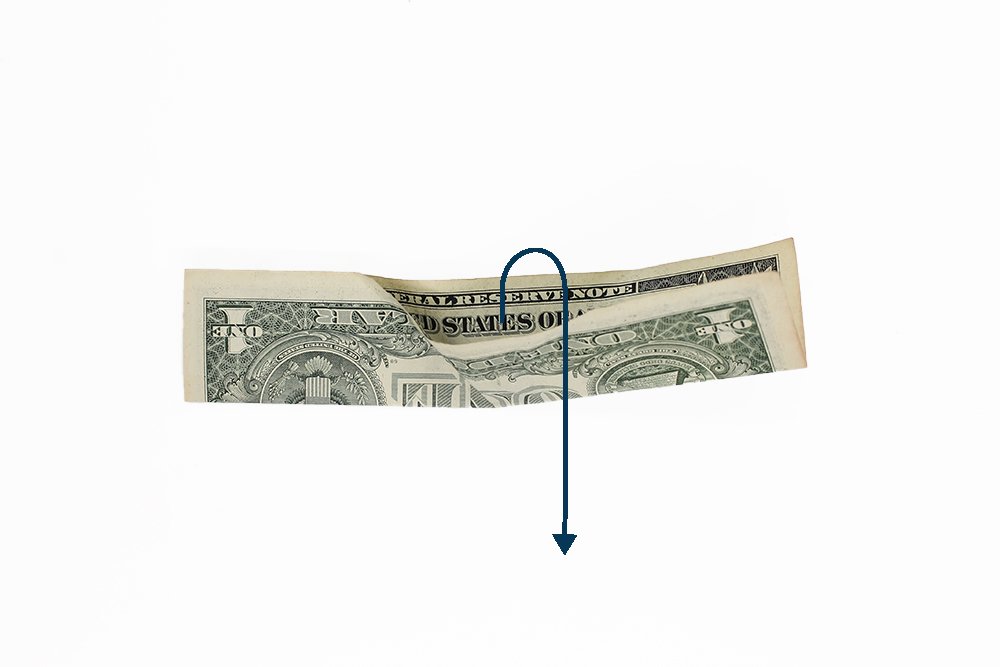
Your focus should be on how to create the sails and hull in order to finish the dollar boat.
Pry open the dollar bill at the middle.
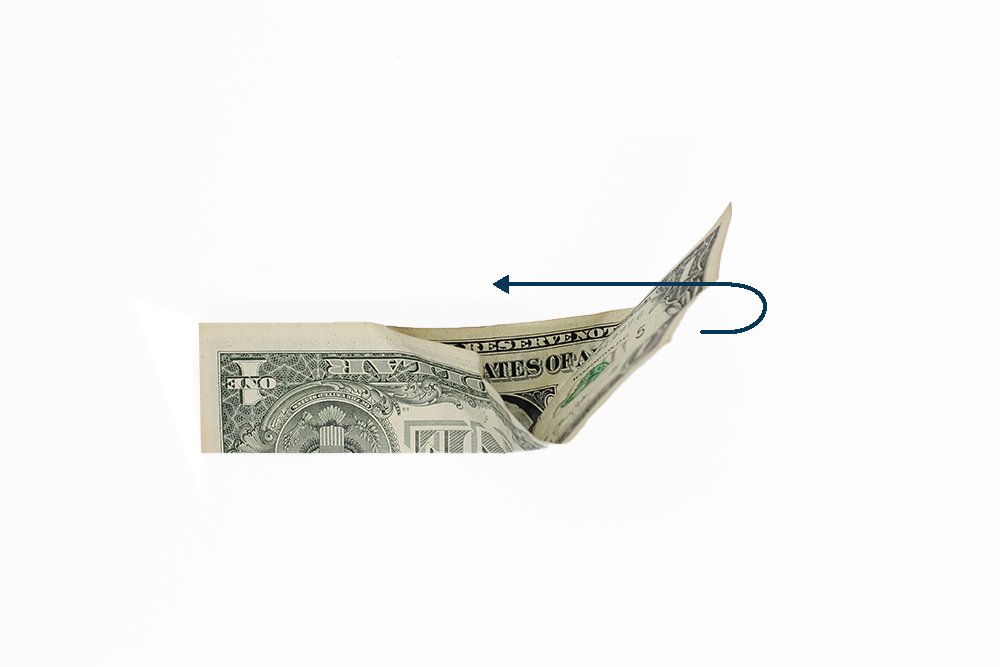
As you pry it open, bring the right part of the dollar bill inwards to the left side.
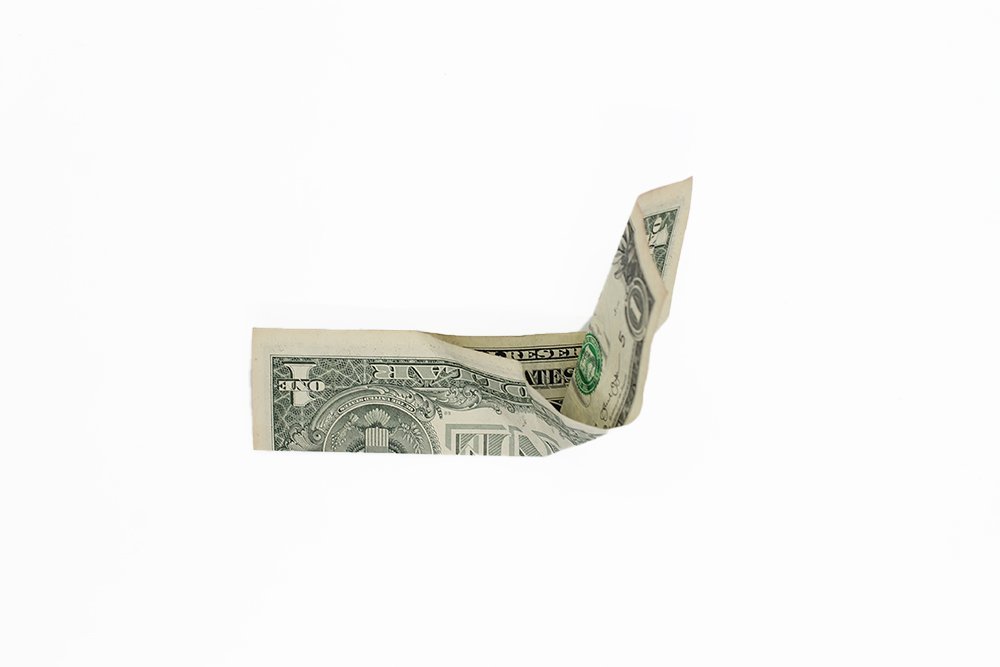
Keep bringing it to the opposite side until the edge of the right part is at the top part.
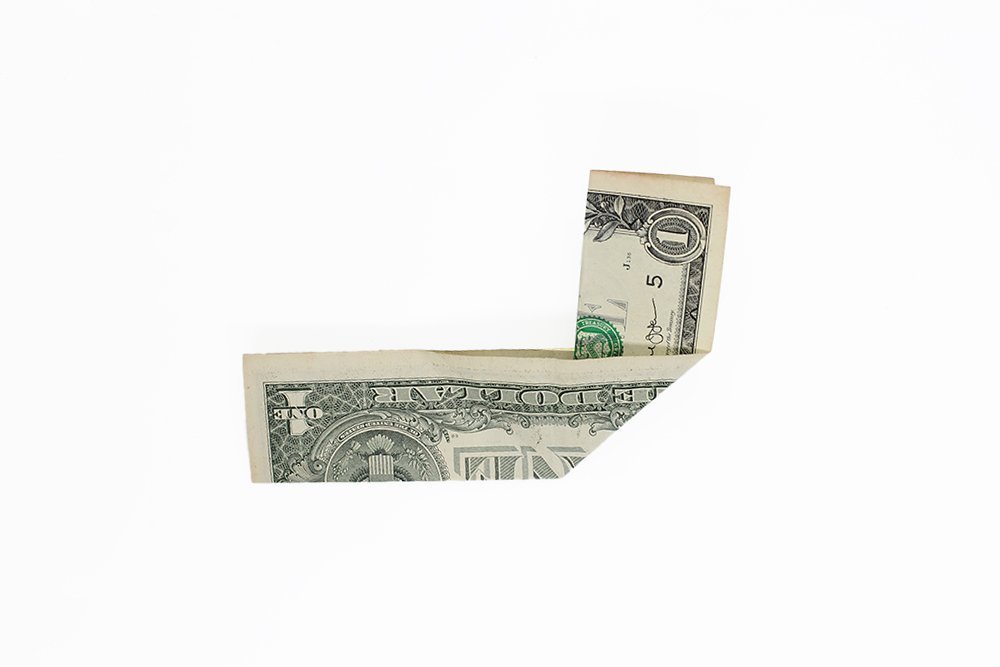
Once you have completed the inside fold, the right part of the money sailboat should look something like this.
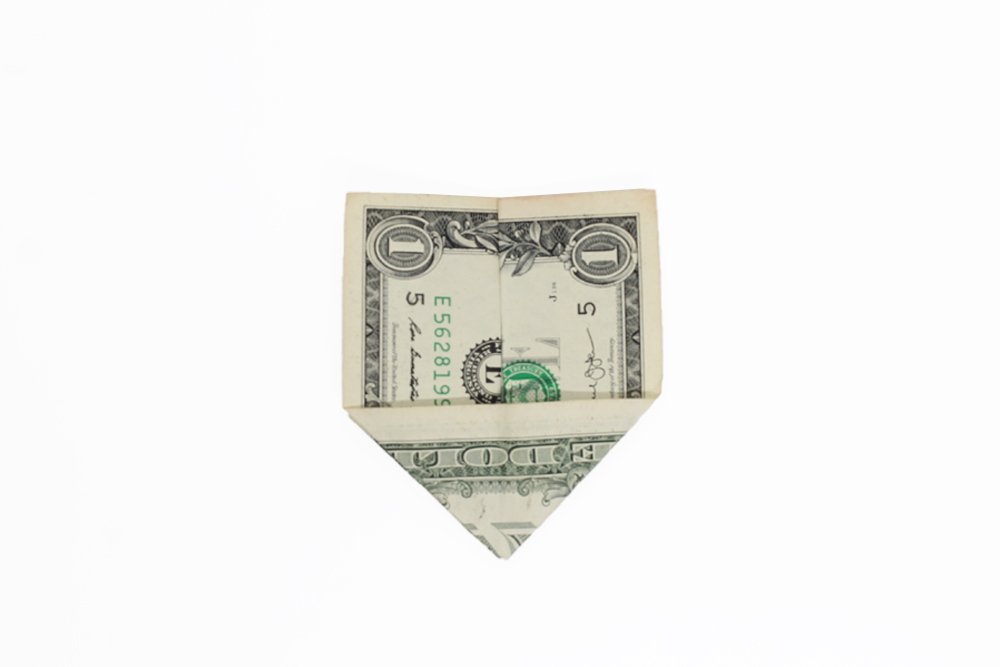
Do the same for the other side. Your dollar bill should now look like the image above. As you can see, the top part of the fold resembles the sails but only a little bit. The same goes with the hull.
Finalize the Dollar Bill Origami Sailboat
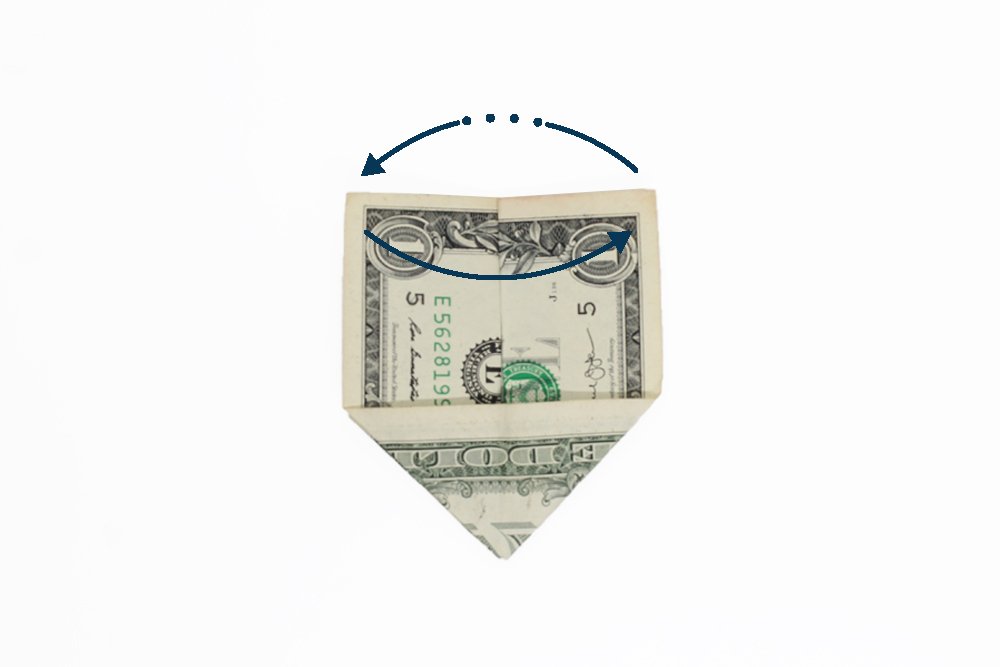
This will be a long step but no worries! Continue reading our guide and you'll have your sailboat in time. Flip the left side to the right side like a page of a book. Do the same on the back side as well.
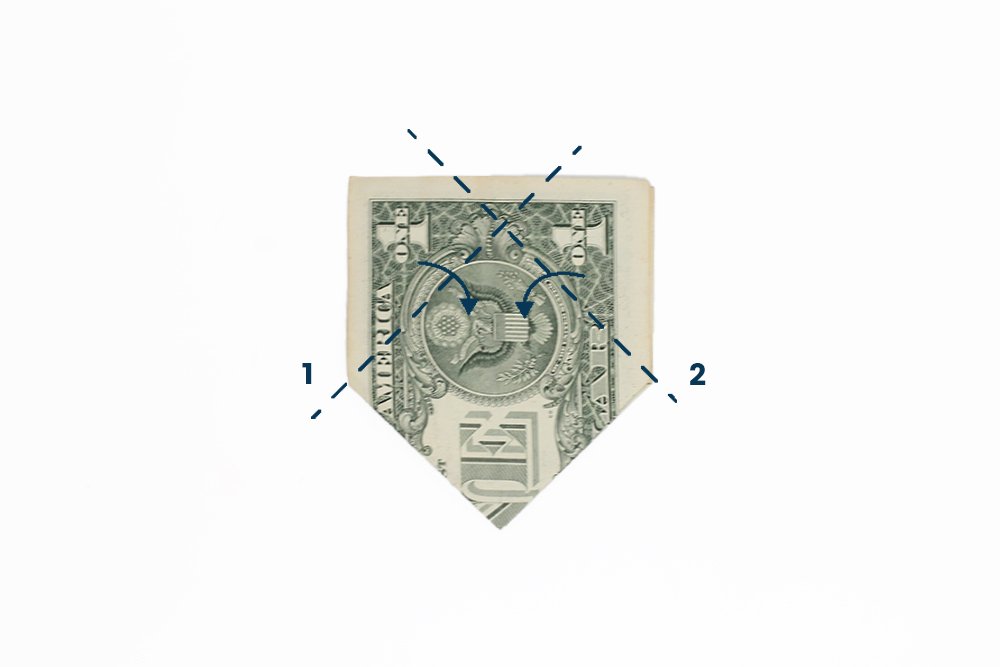
Right, your dollar bill should now look like the image above. Next, we'll focus on the top layer. Diagonally fold the top left and right corners towards the middle so that a diamond shape will form.
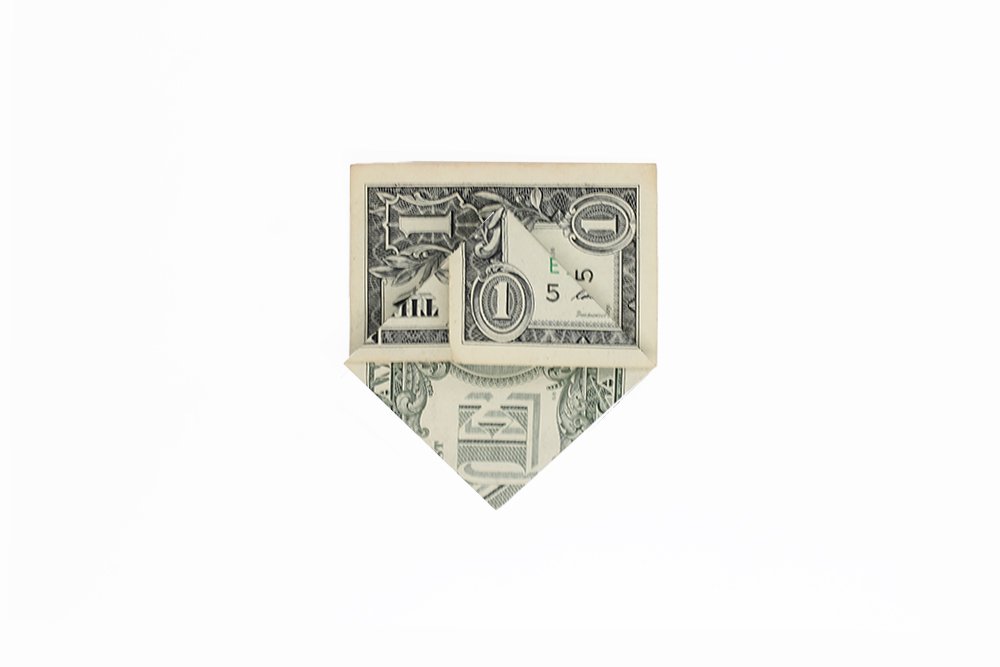
The dollar bill boat should now look something like this.

Flip it over to the other side. Fold both the top left and right flaps but this time the fold on both sides is diagonally steeper.
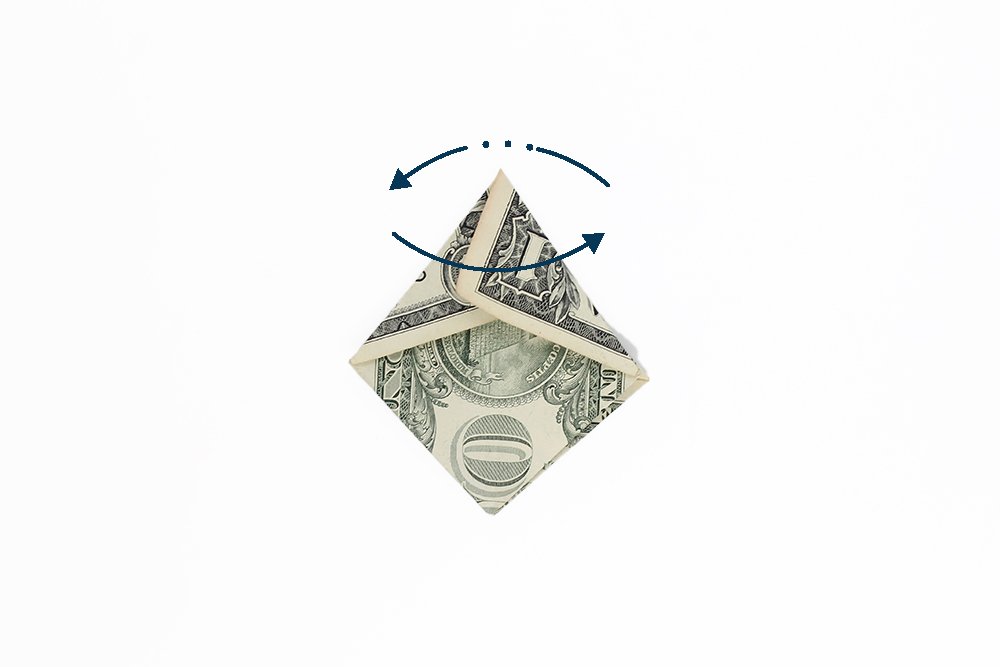
The dollar bill should now look like this. Flip the left side of the top layer to the other side. Do the same at the back side.
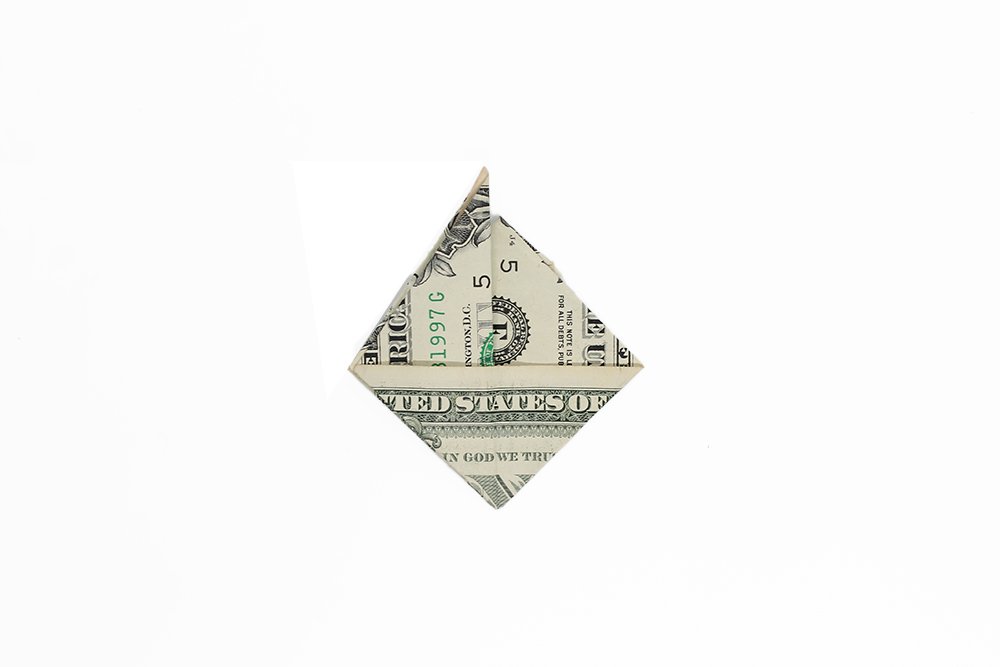
Your dollar sailboat should now look like this.
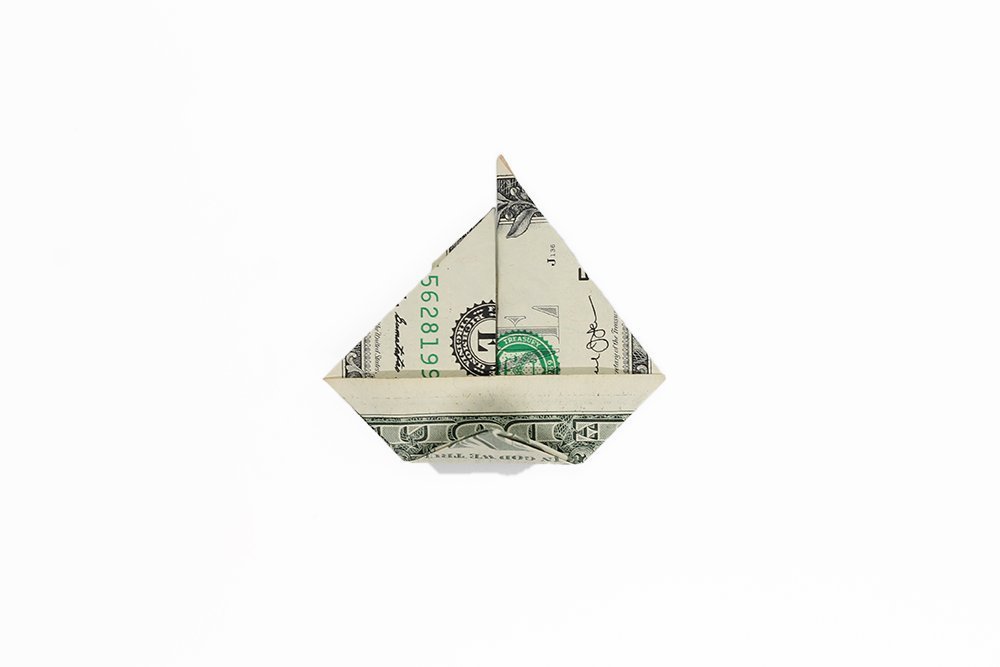
Complete the origami sailboat by bringing the bottom corner towards base of the two triangles.
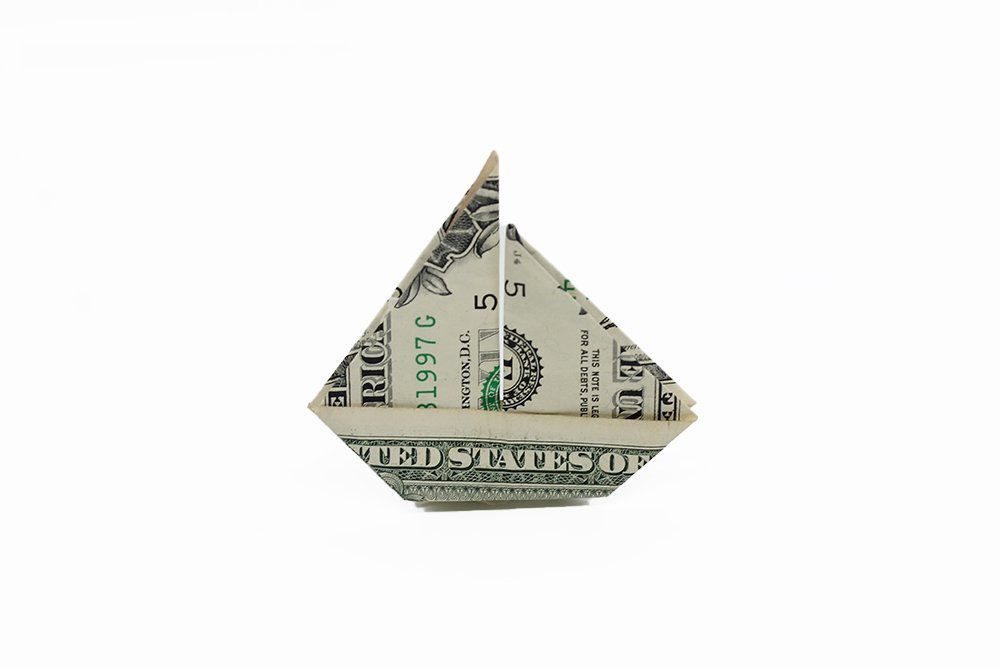
Flip it over and your origami sailboat is done! Congratulations. For more dollar origamis check our articles down below - and please leave a comment to tell us what about your experience.
Extra Tips
- Flatten the dollar bill inside a thick and heavy book. This also makes the paper more presentable later on.
- Remember to sanitize your dollar bills first before folding! Stay on the safe side by cleaning the paper/s first.
- This tutorial will always be here so you could come back in case you forget a step. And if you're stuck with a particular step just drop a comment down below - we'll help ASAP.

