How to Make a 3D Modular Origami Star | Step-by-Step Tutorial

Introduction:
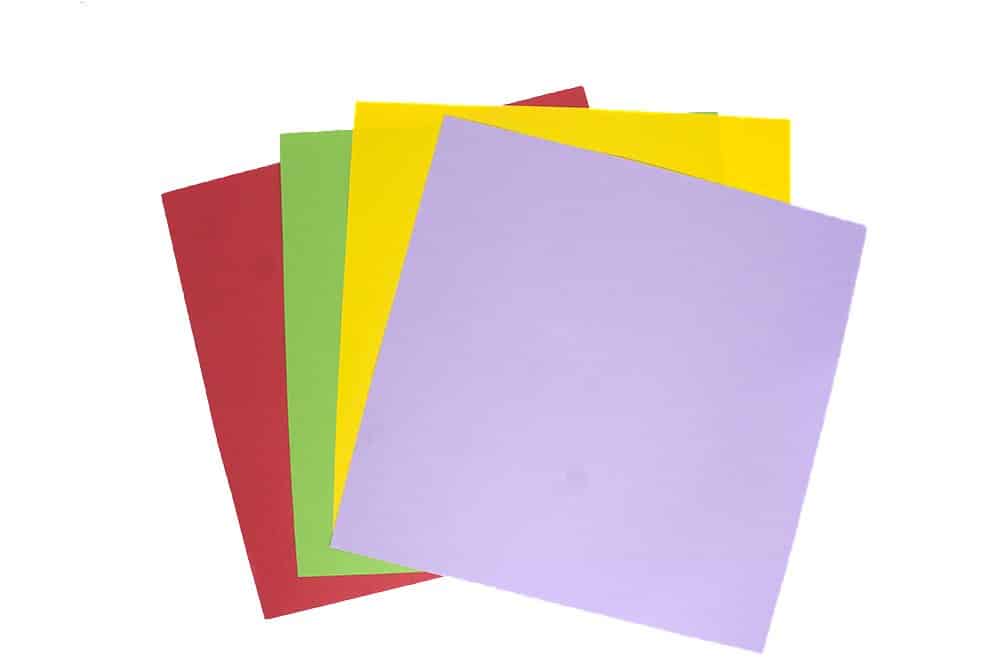
If you’re wondering how to make a 3D origami star with different appearances when flipped, then we’ll show you! This modular origami star is a paper procedure in which more than one piece of paper is used to make an origami piece. This modular origami star may look a bit difficult to make, but it is simple to do. You will need 5 pieces of origami paper to make this. Any color of paper is fine to use, but it is recommended to use different colored papers to make the modular piece nicer.
Learn how to make one of the segments of the five pointed modular origami star
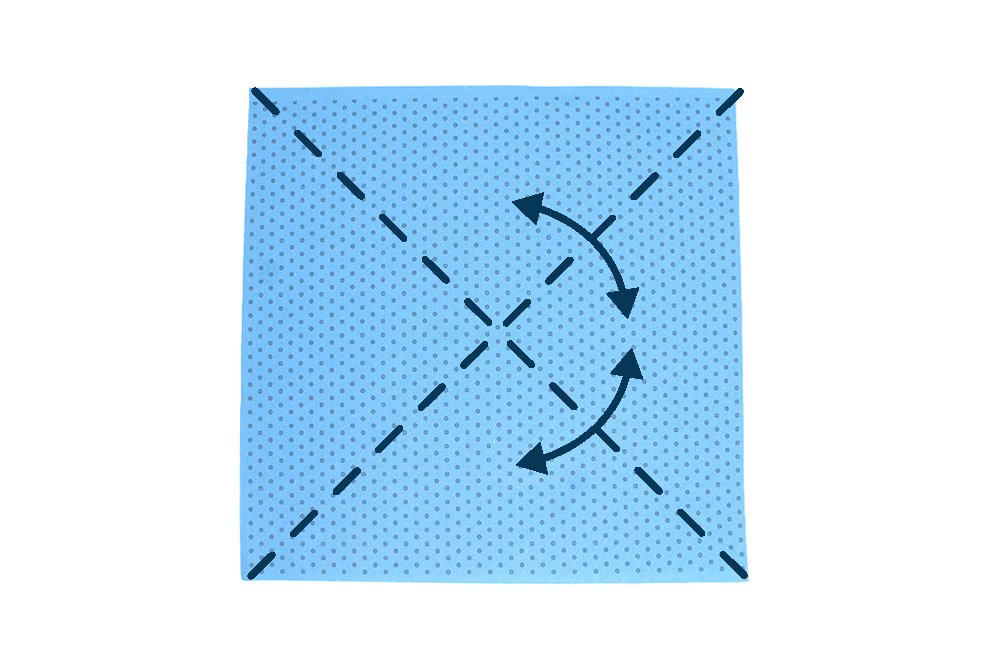
Make an X crease mark by folding the paper diagonally in half.

Fold all the corners of the origami paper to the center.

Unfold the top right flap and the bottom left flap of the paper.
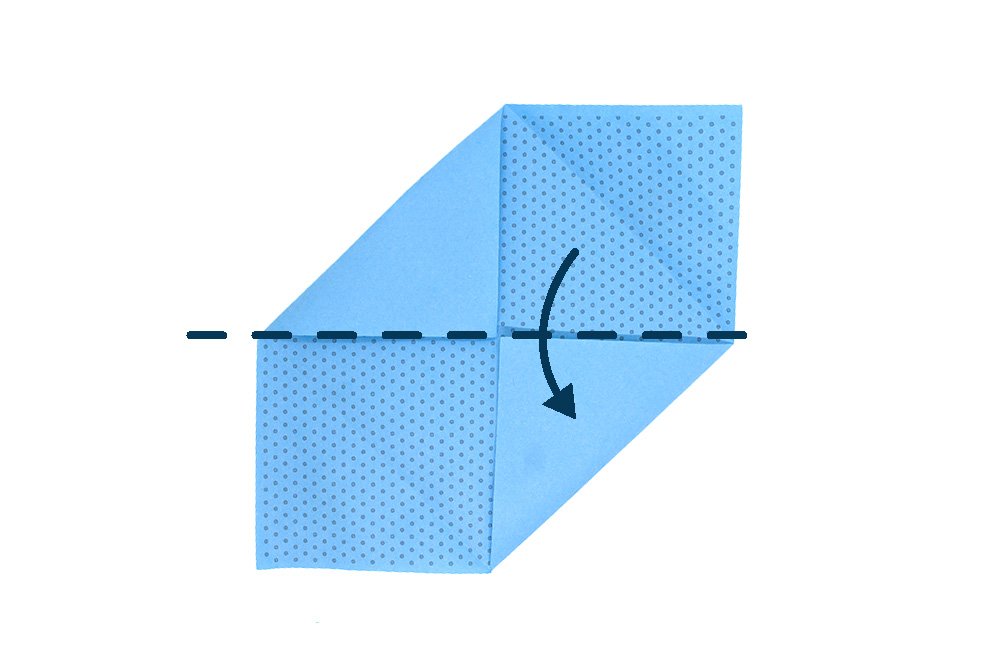
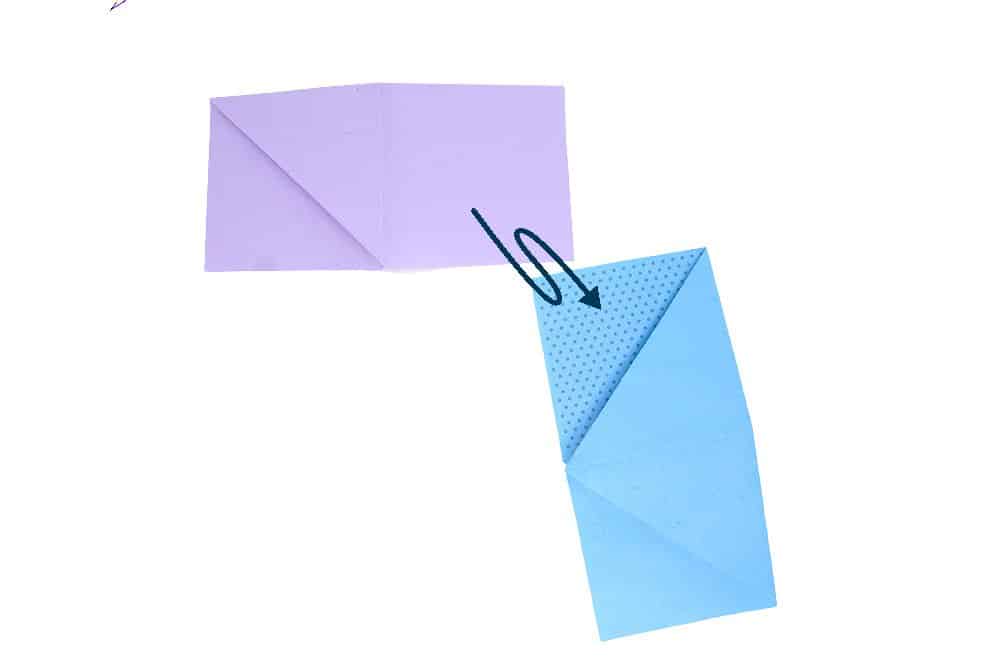
Fold the paper downwards in half.
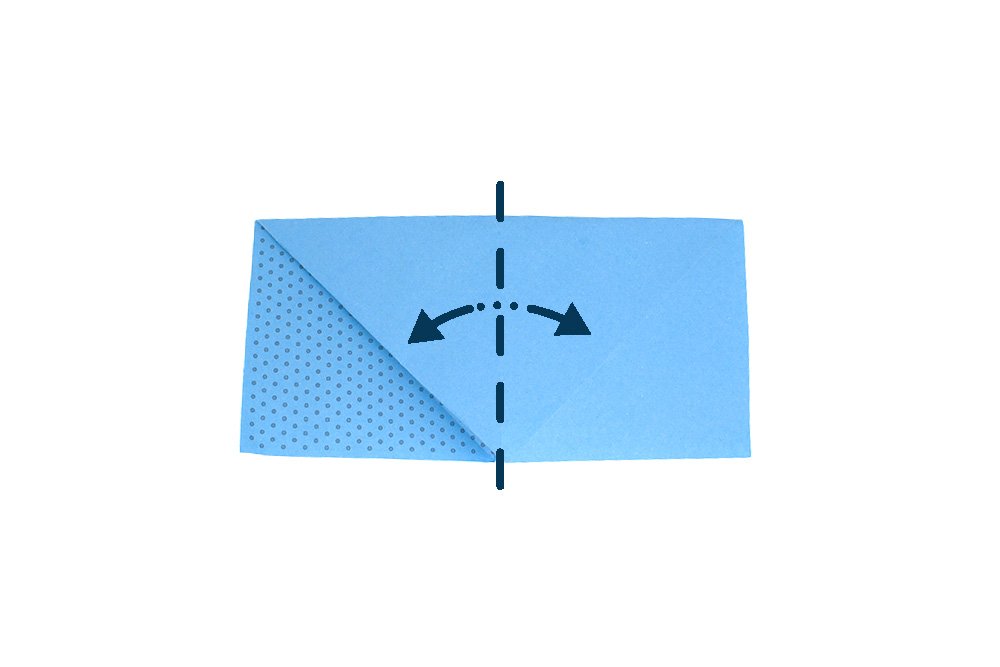
Crease the paper lengthwise in half.

When finished, this is one of the segments of the modular star.
Create 4 more segments of the modular origami star
We need four more segments to make this origami modular star. Grab four more pieces of paper that has the same size of the previous origami segment you've made.

Create four more segments as shown above. Once you've done that, we are now ready to connect them them together to form a star!
Connect the segments together
Get two segments of the origami star. Lay it out as shown above. Then, insert the right side flap of the first segment (purple) into the pocket flap of the second segment (blue).

Fully insert the bottom right corner inside the pocket of the second segment.
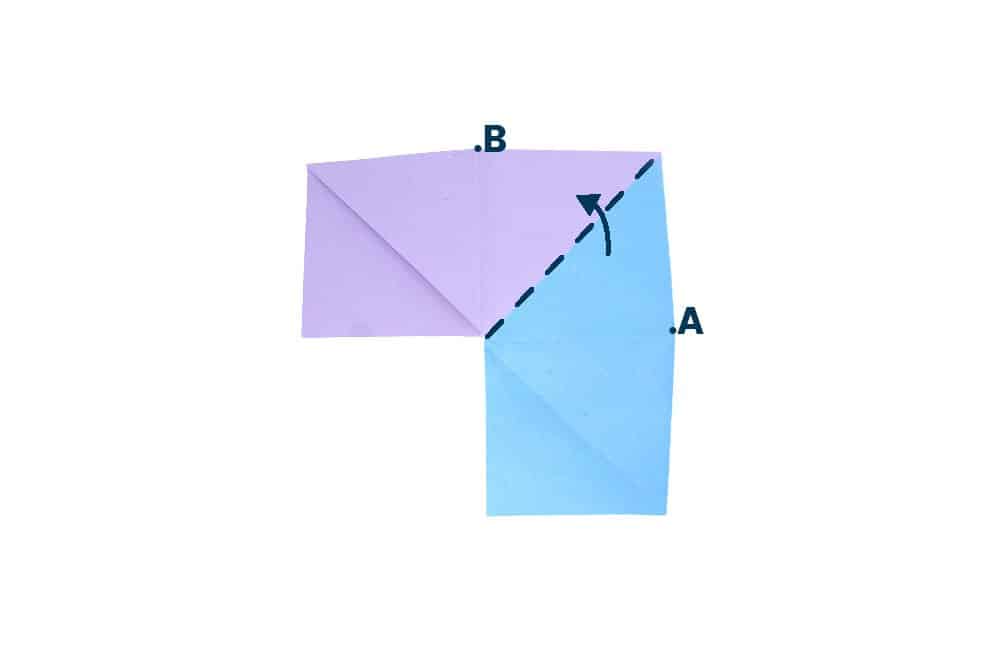
Once connected, fold along the dashed line (from point A to B).
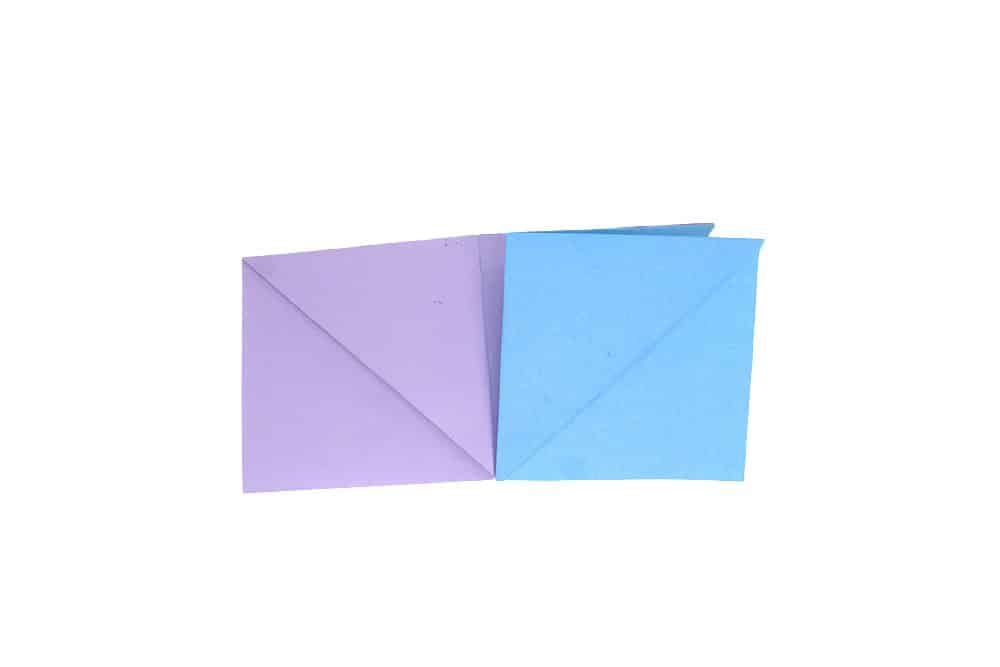
The two segments when connected and folded together should look like this. The second segment (blue) will naturally fold into a square. Keep doing this on the other three segments as well.
Connect the other segments
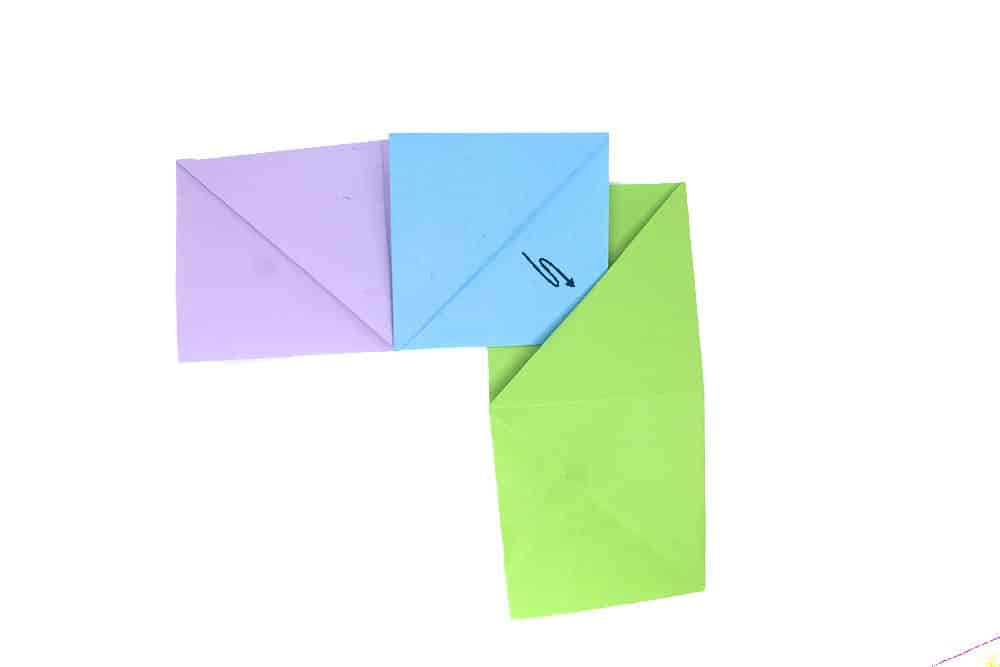
Now that you know how to connect two segments together, repeat this on the other segments (green, yellow, and red). Insert the flap of the second segment (blue) to the pocket of the third segment (green.)
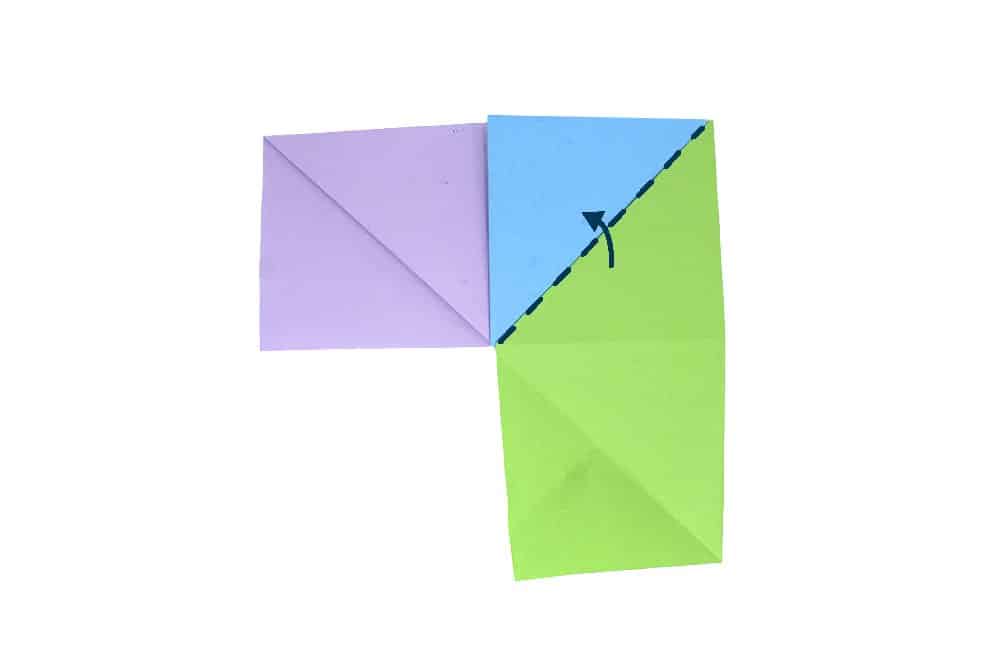
Fold it diagonally along the dashed line.

Again, insert the third segment (green) flap into the pocket of another segment (yellow).
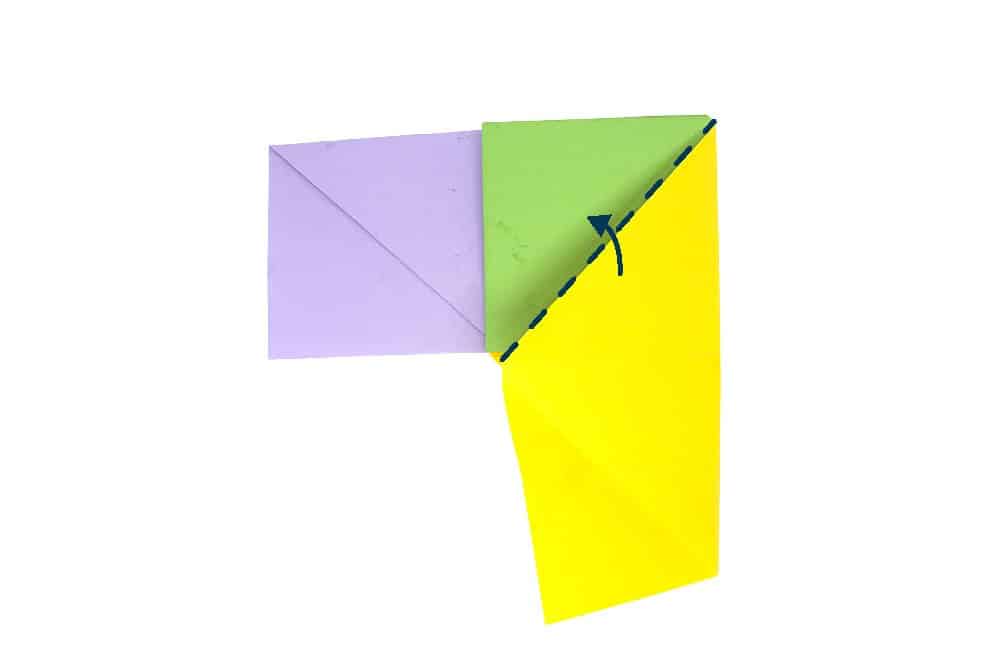
Diagonally fold it in half.

Connect the last segment by inserting the fourth segment (yellow) to the pocket of the last segment (red).
Connect the ends together

Insert the end flap of the last segment (red) into the pocket of the first segment (purple).
Fully insert the flap of the last segment to secure the star.
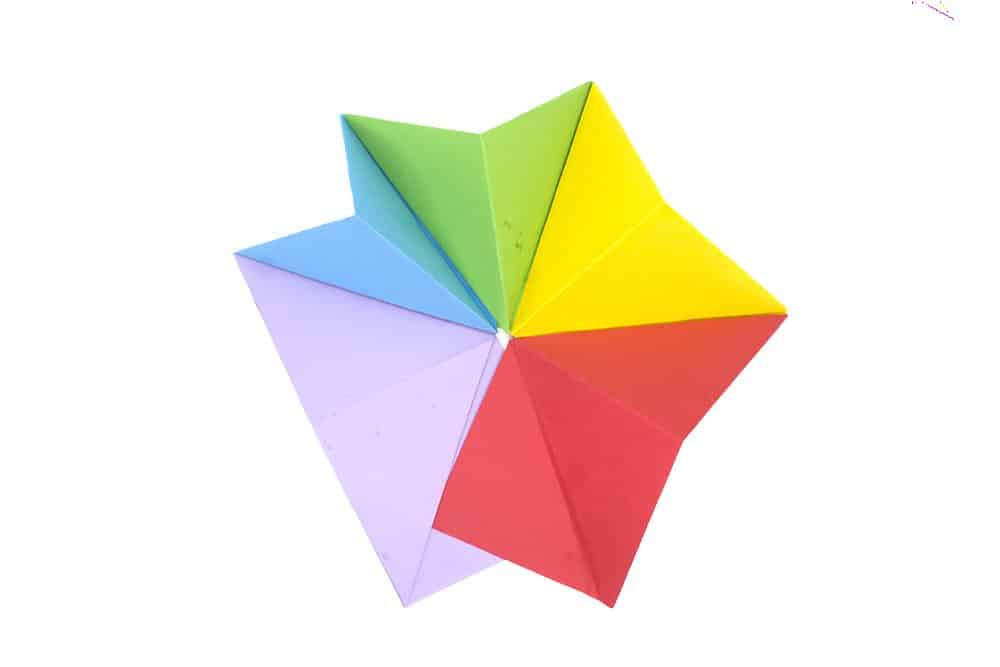
2 versions of the modular origami star

Spread it over like a starfish, and voila! The 5-pointed modular star is finished!

What's amazing about this origami modular star is when you flip it over, it also forms into a slimmer version of the a star.
Pretty cool right? Which version do you like? Comment down below.
Extra Tips
- Use different colors and patterns of paper to make a truly one-of-a-kind star.
- For Christmas or any festive season, use red and/or green colored paper to display as decoration.
- This would make a lovely Christmas tree topper if you make this with a glittered paper or gold metallic paper.
- If you're not into colorful ones, use only one color to make a single colored star.


Very nice and this is very easy
Wow so creative idea but how many paper size
Just finished my first one – love it ! Thanks !
I love this star!! I made it with a pattern paper. Turned out so cute!! 3D and reversible. Looks like a quilt pattern. Not hard at all. !!! Thank you !!
It’s a little hard but the final result looks INCREDIBLE, IF YOU are watching this comment Don’t think it two times and just DO IT
its good but when you put both of them together it’s actually tricky
Thank you for the tutorial, I have now memorized how to make these
This was super easy , it was so easy this is the first time I made one I made mine mini for my first try , it came out perfect