Create An Origami Box Rectangle for Storage & More

Introduction:
Making this origami box rectangle is quite easy to do. It is a great way to store small trinkets such as paper clips and various accessories. You can also turn it into a gift box that you can give to someone special.
Use thick paper so that the origami box will be sturdy. You may use a single-sided colored paper such as the illustration below. That way, it will be clearer to follow the instruction.
Make the rectangular base of the origami box
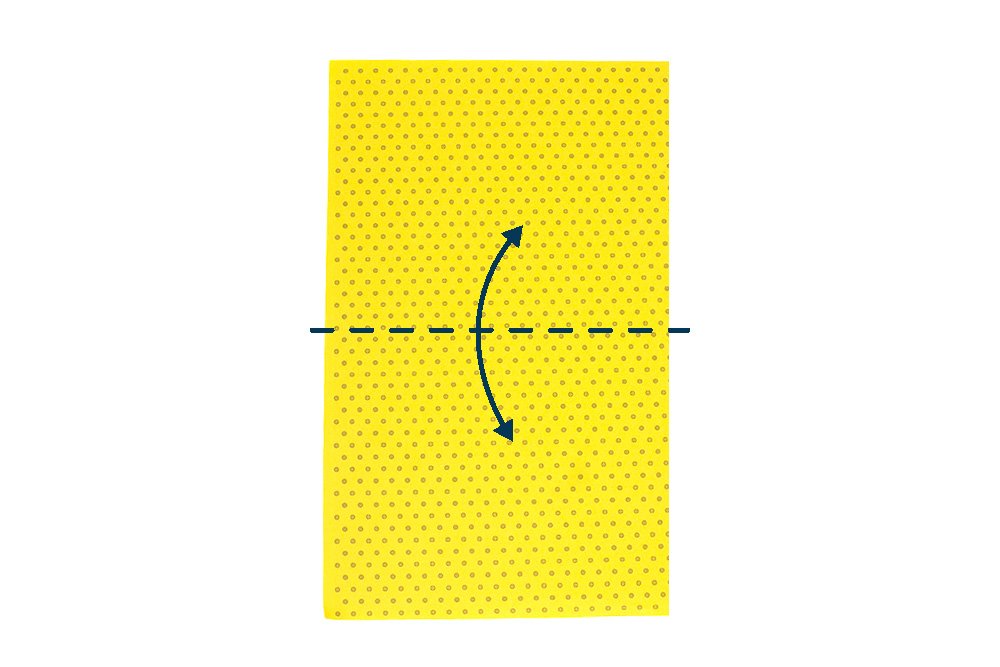
Get a rectangular piece of origami paper. Lay it on a flat surface and then fold the paper crosswise in half. Crease the paper well and unfold.
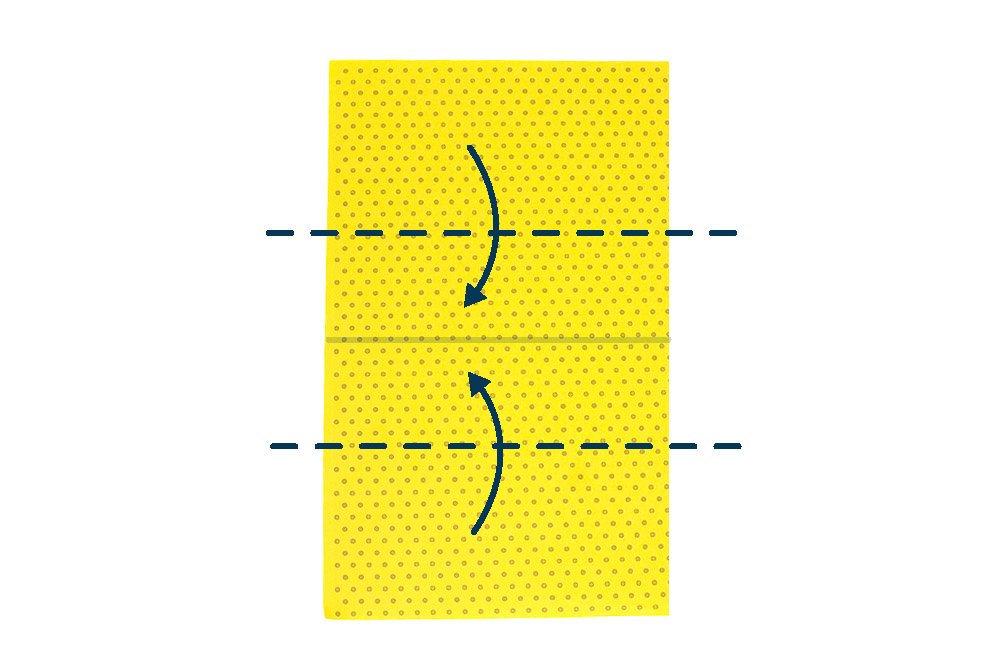
The second step is to bring the top and bottom edge to the center crease line made. Follow along the dashed lines for guidance.
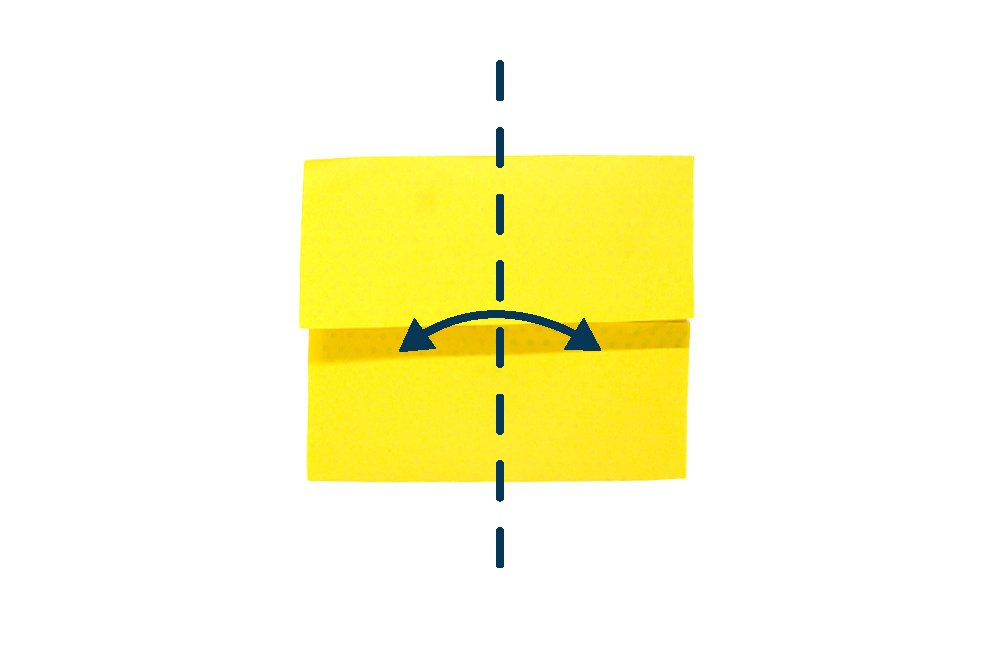
Make a crease mark by folding the paper lengthwise in half. Crease the origami paper well and unfold.
Secure the corners of the paper box
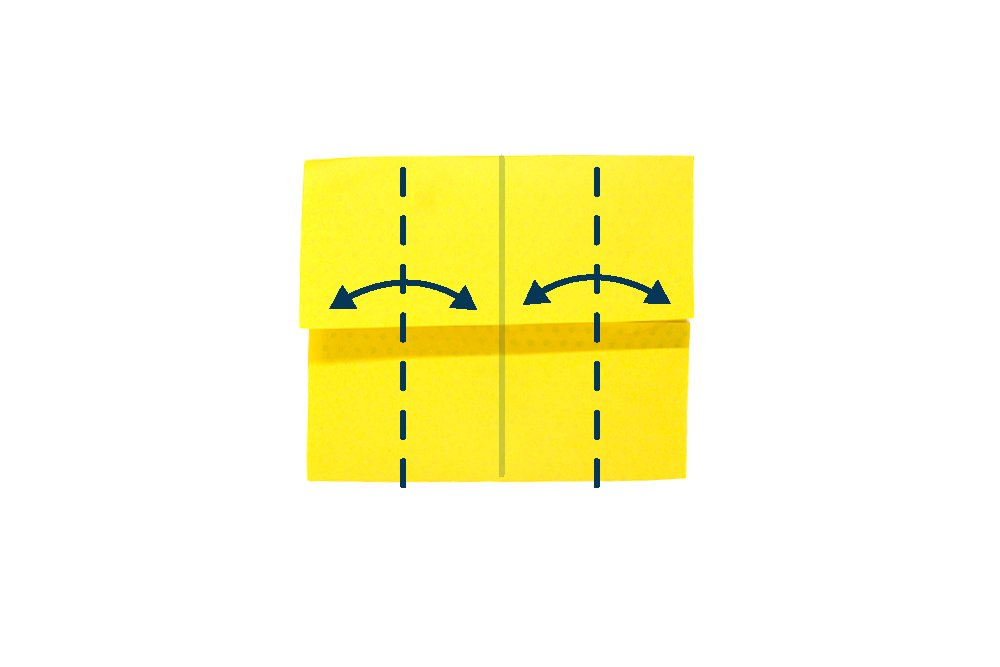
Bring the left and right edge to the middle crease line. Crease well and then unfold.
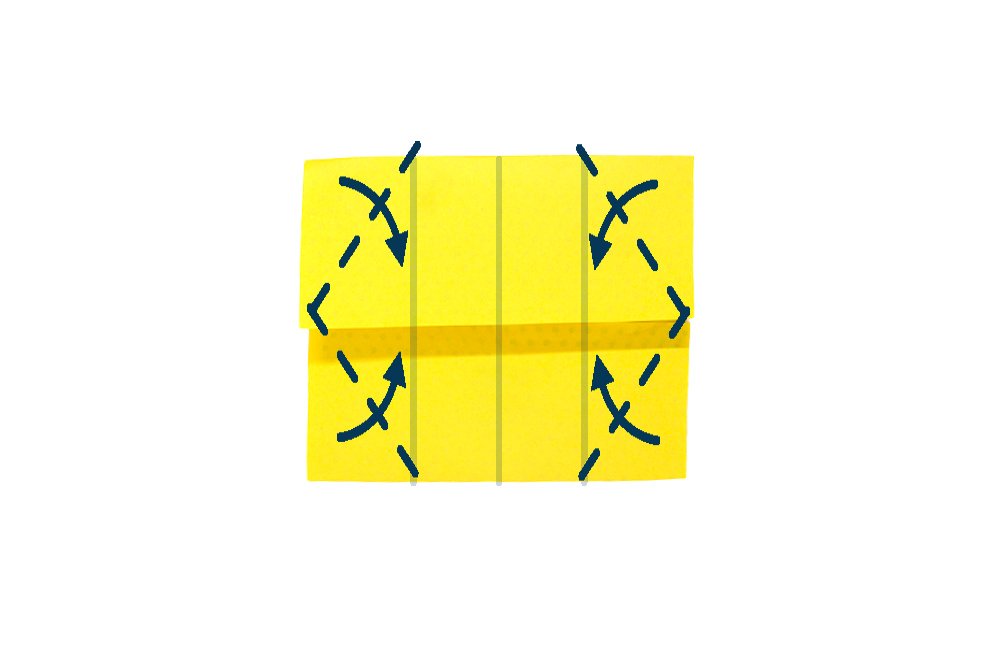
Fold each of the four corners to the crease lines made in the previous step.
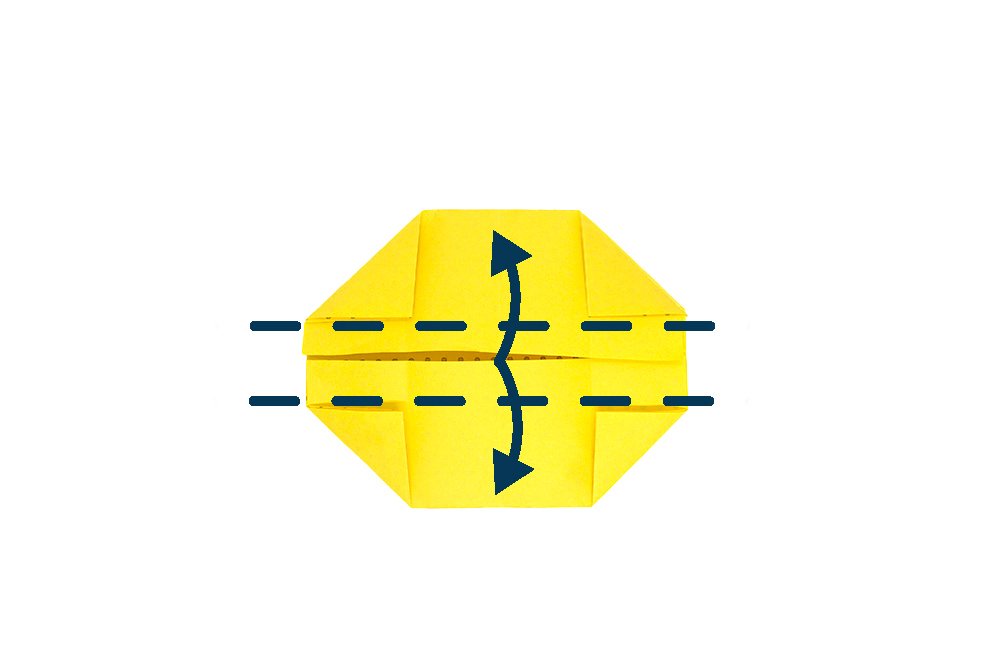
Fold the edges of the outer layer outward. Make sure to fold the outer layer along the dashed lines ONLY
Shape it into a rectangular box
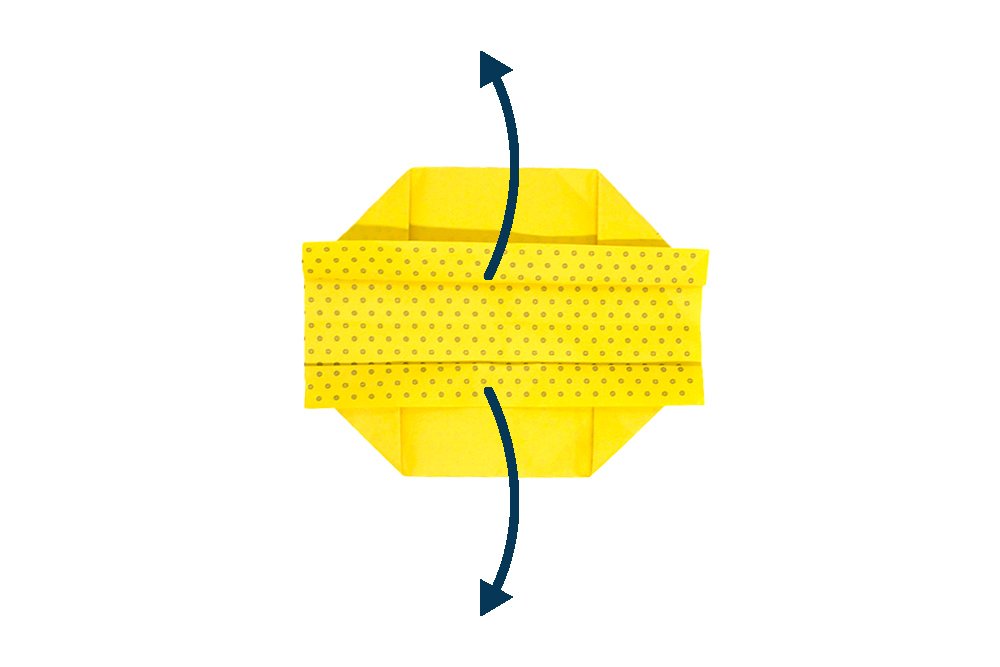
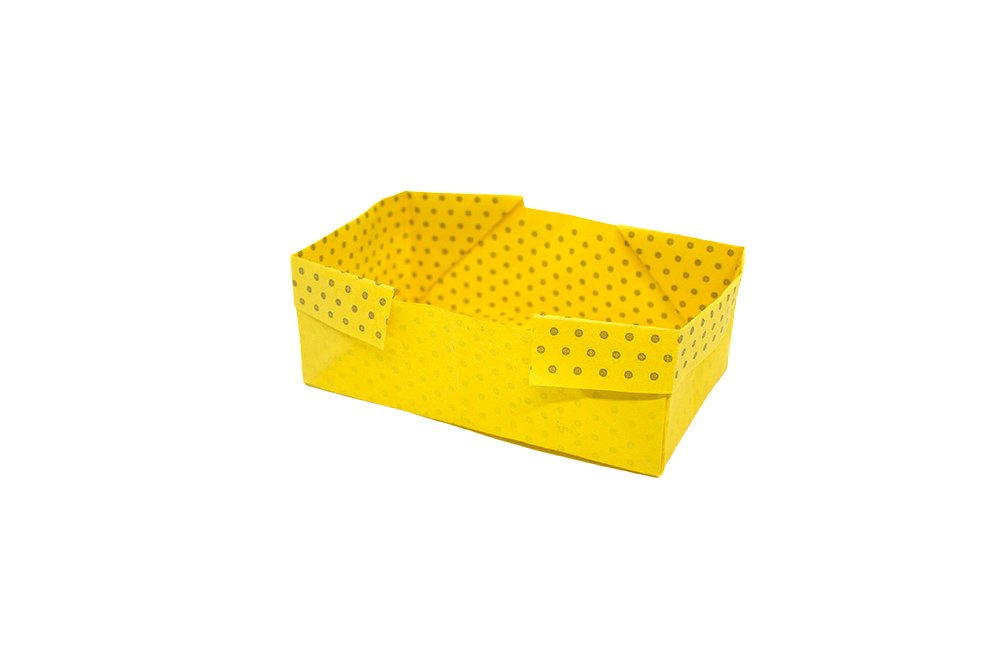
Pry open the model as shown. As you open the origami piece, the box will form itself.
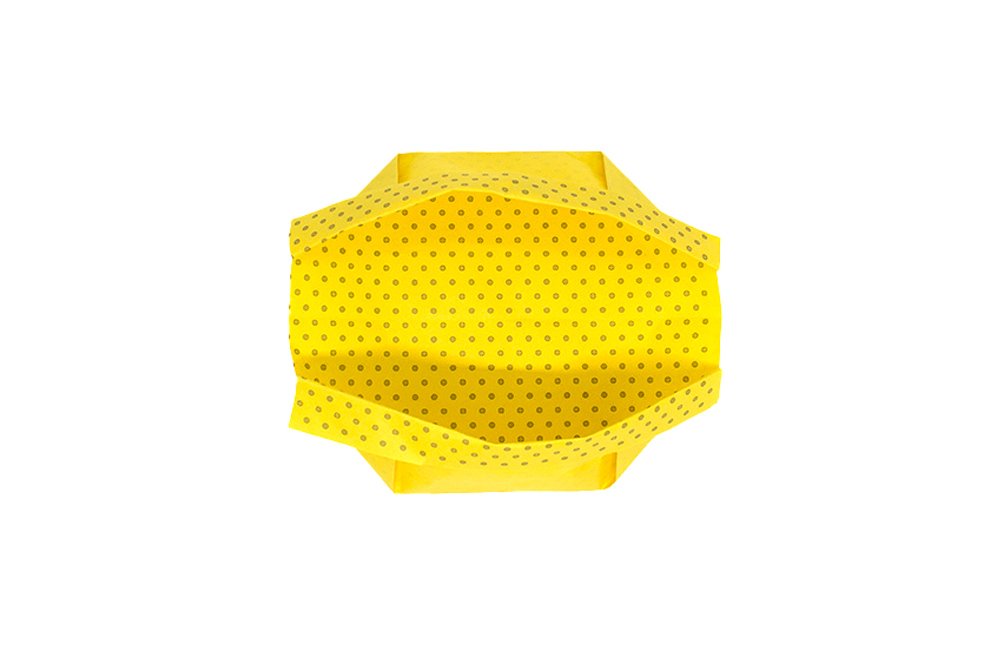
It's starting to look like a rectangular origami box. Push the sides inward to shape it more into a rectangle.
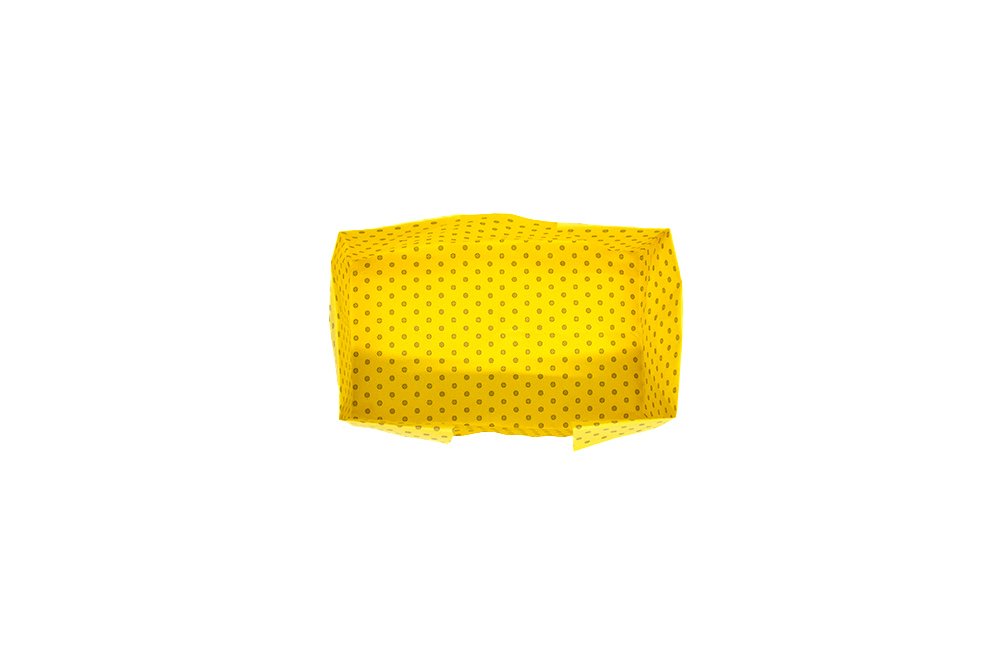
Ta-dah! Your origami box is finished
You may store anything you like once finished.
Extra Tips
- Experiment with different sizes of paper and different methods to make boxes.
- Make it extra fancy by decorating it! Use any coloring materials you have available Draw, color, or paint it however you like!
- You may also put all sorts of embellishment like stickers or beads.
- Want to make a lid for this paper box? Get a slightly bigger piece of square paper and repeat this tutorial. This can store your little trinkets nicely without the contents spilling.
- Did you know that you can make a lid for this rectangular paper box? Get a slightly bigger piece of square paper and repeat this tutorial. This can store your little trinkets nicely without the contents spilling.
- Use a thicker type of paper if you want your box to be functional. You may use a thin piece of cardboard to make this box extra sturdy. Just make sure that the cardboard can be bended and folded multiple times.


I wish schools everywhere would include this in its art programs or even when teaching about different cultures. Fascinating skill!
so simple!!!!!
thank you so much! this is an amazing tutorial and my box turned out so cute 🙂
I remember that in the school I went to the teachers taught their students once a month to make origami. It was pretty fun.
nice cool gooood!