Funny Clown Paper Plate Craft for Kids | Fast & Easy

Creating a paper plate clown is quick and easy with the help of our guide. Make a colorful and happy clown with a few materials in less than eleven minutes.
We will start by creating the face then we will create the hat and his funny-looking bow tie. Get your tools ready because we’ll start creating a paper plate funny man soon.
Have Fun!
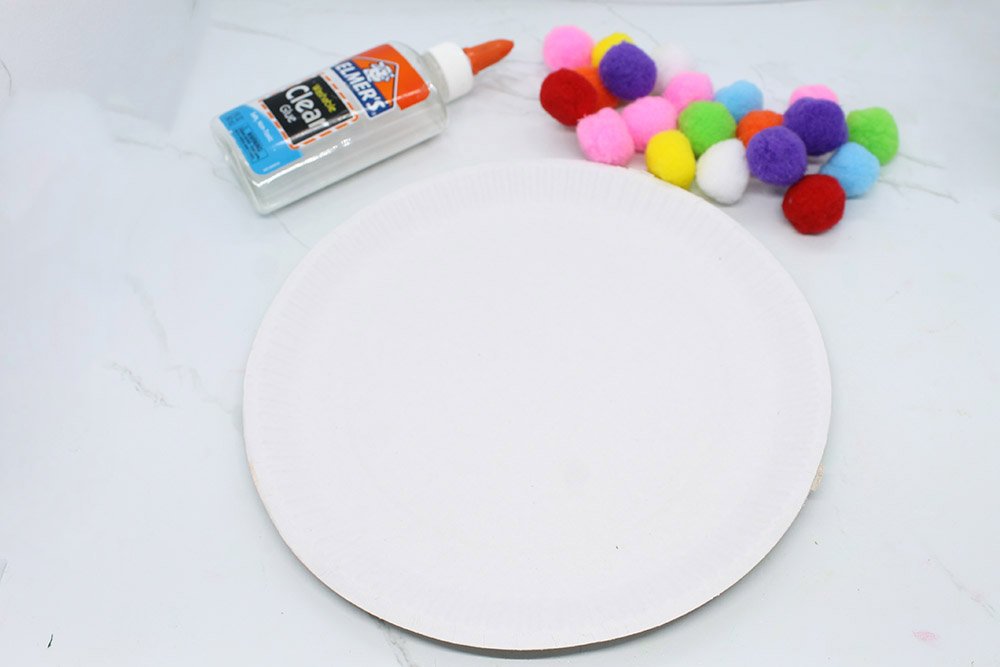
Tools
- Pencil
- Black marker
- Scissors
Supplies
- 2 Paper plates
- Glue
- Jewel-like stickers
- Pom-pom balls
Make the Hair of Our Paper Plate Clown
Prepare some clear glue and lots of pom-pom balls. In this case, clear glue would be the best.
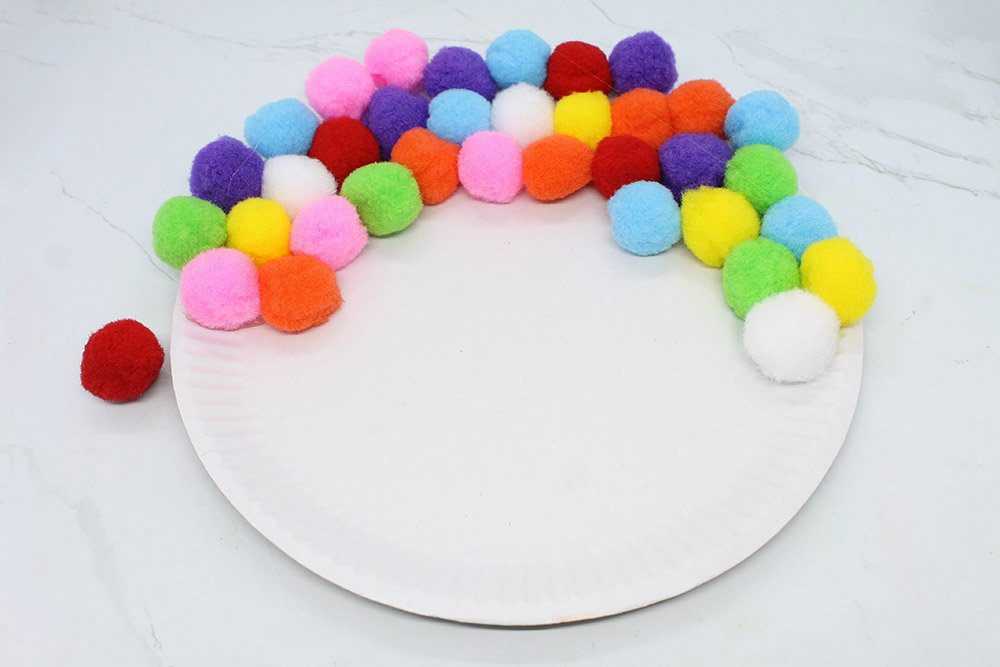
Glue the colored pom-pom balls on the top part of the paper plate to form the hair of the clown paper plate.
What do you think should the hair of the clown be? Would you prefer it to only have two colors and have a pattern? The choice is yours but let your creativity shine.
Note: Set aside one red ball for the nose.
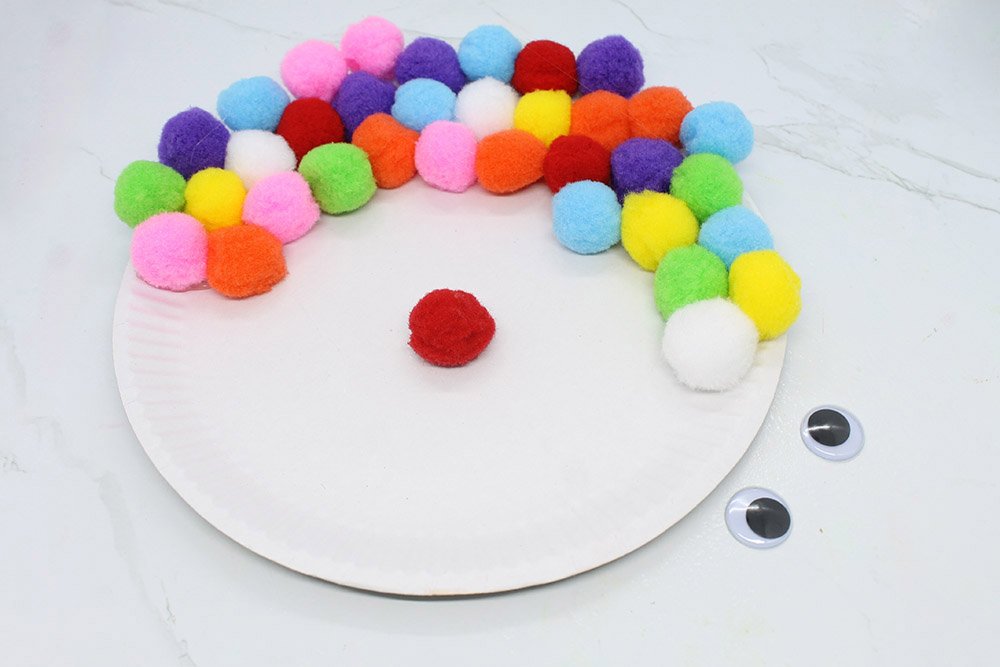
Make the nose of the clown. Attach a red ball in the center.
If you think about it, most clowns have red balls for noses. But who says you have to choose red?
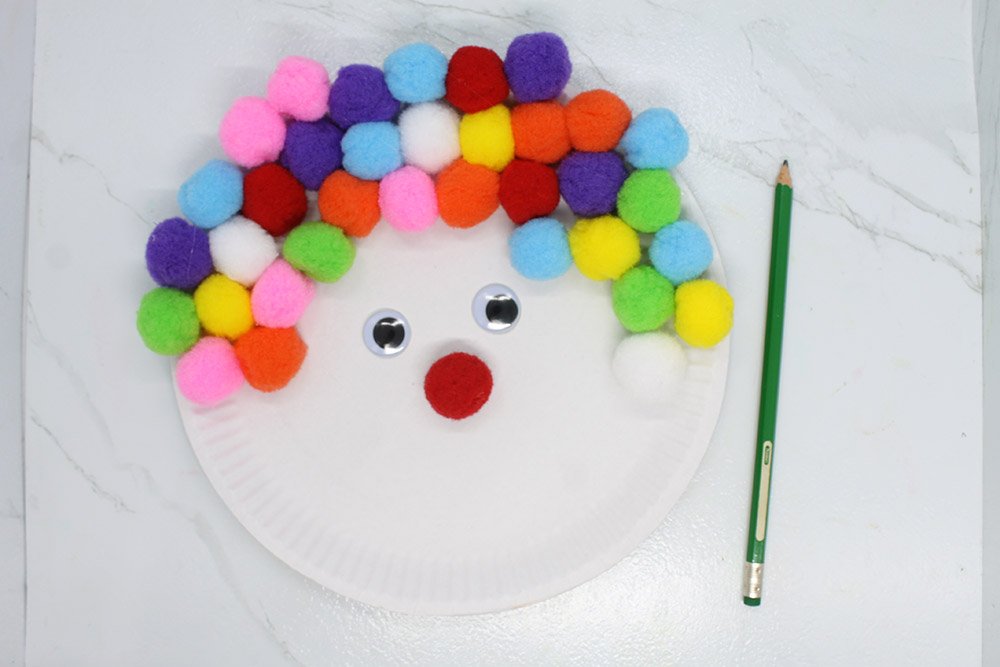
Glue the two googly eyes above the nose of your clown.
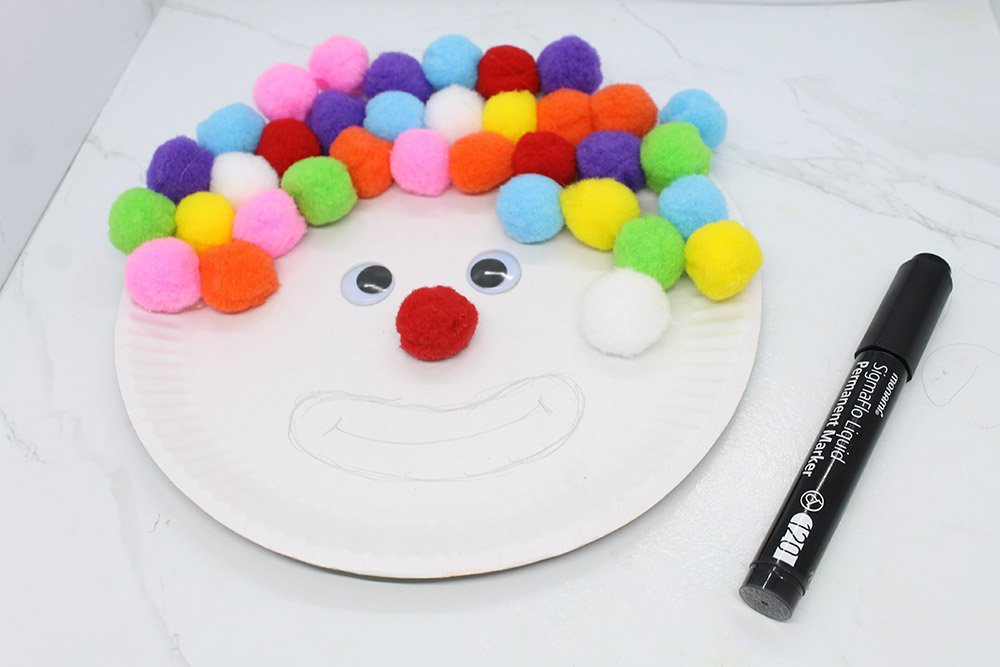
Give your clown a nice and simple smile. Use a pencil first then draw with a pentel pen.
Make a Colorful Hat for Our Paper Plate Clown
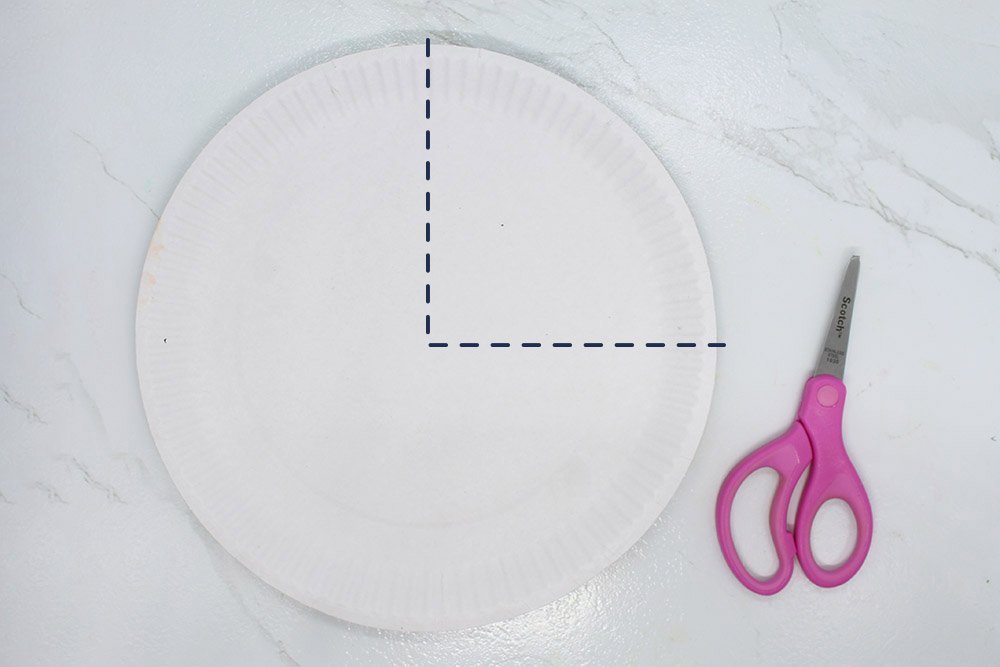
Cut the paper plate as directed in the image above. We'll be using the smaller part as our hat.
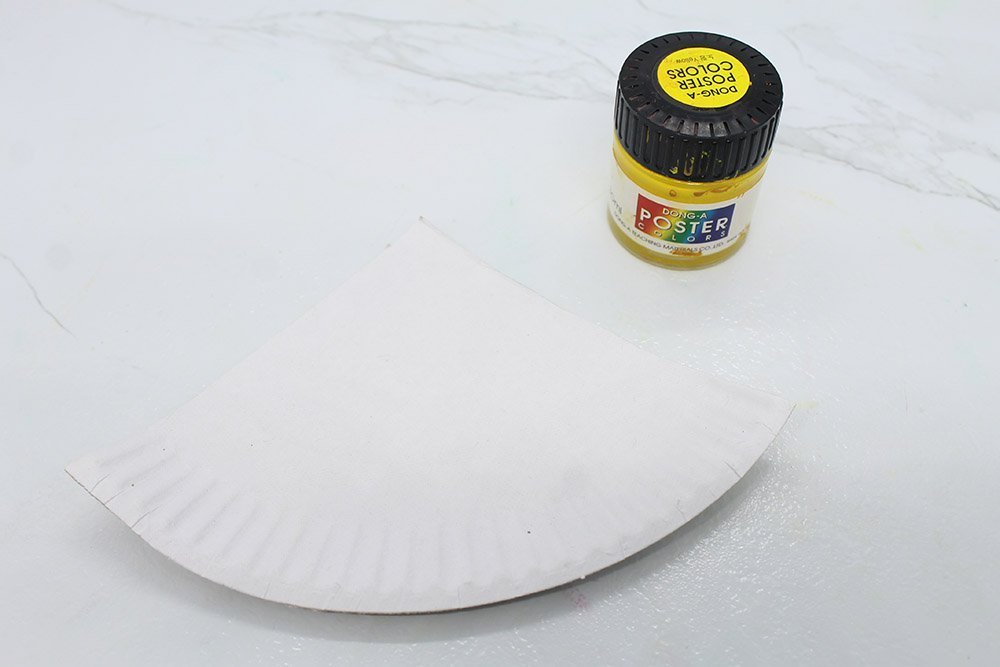
Paint the shape with yellow.
Remember, you can choose other colors if you want to for this part.
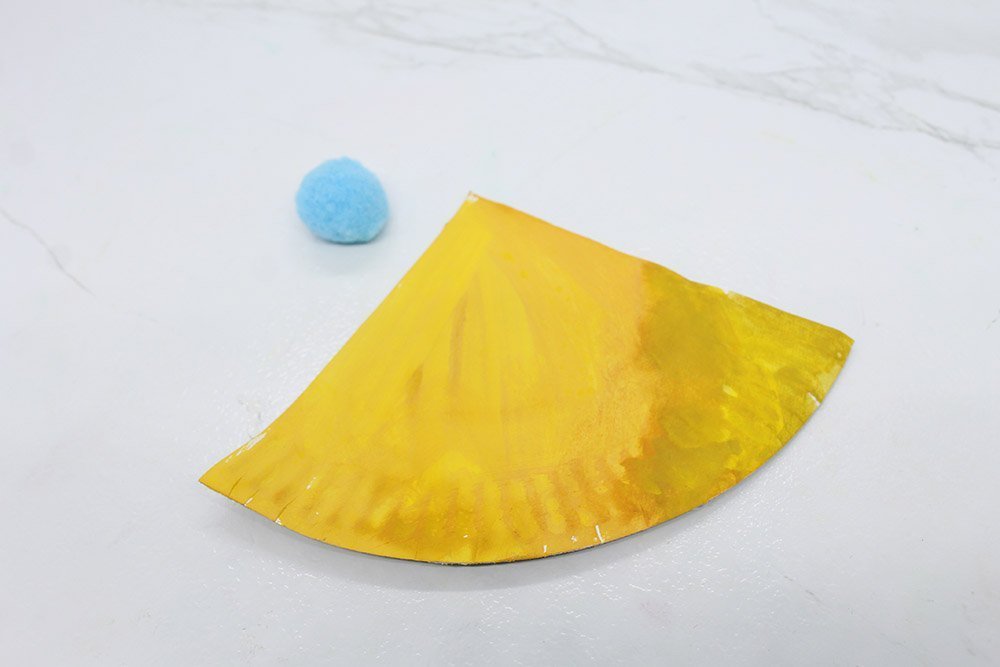
Next, we'll add a blue pom-pom ball to give our hat a more jolly appearance.
The pom-pom balls also make the hat appear more colorful.
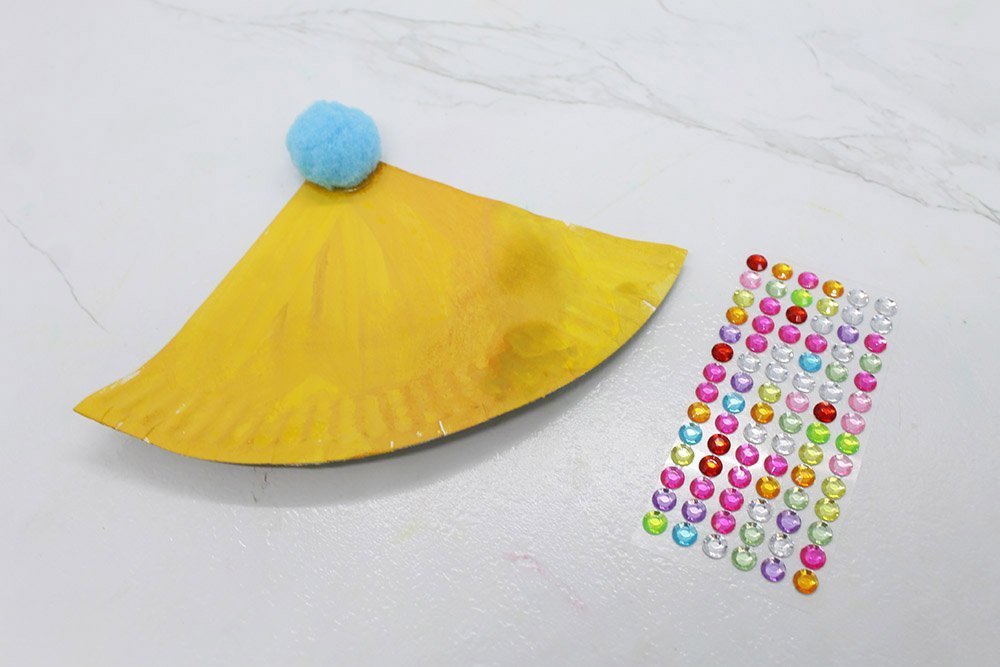
Prepare your stickers, and think about what your style would be.
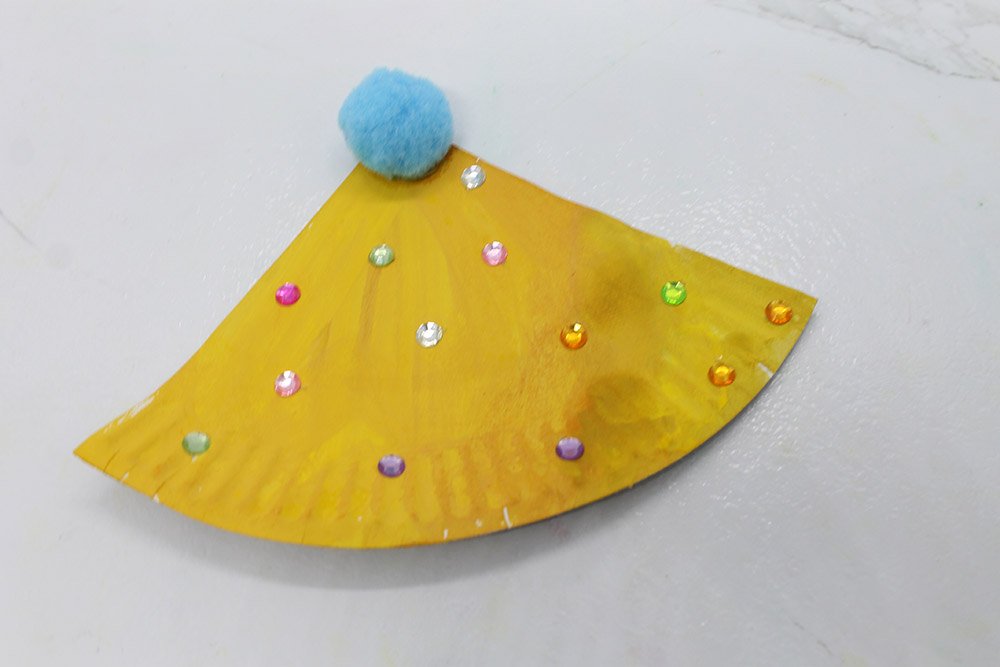
Next, place the stickers into our hat. They can be at any patter that you want but I preferred using random colors and I followed no pattern.
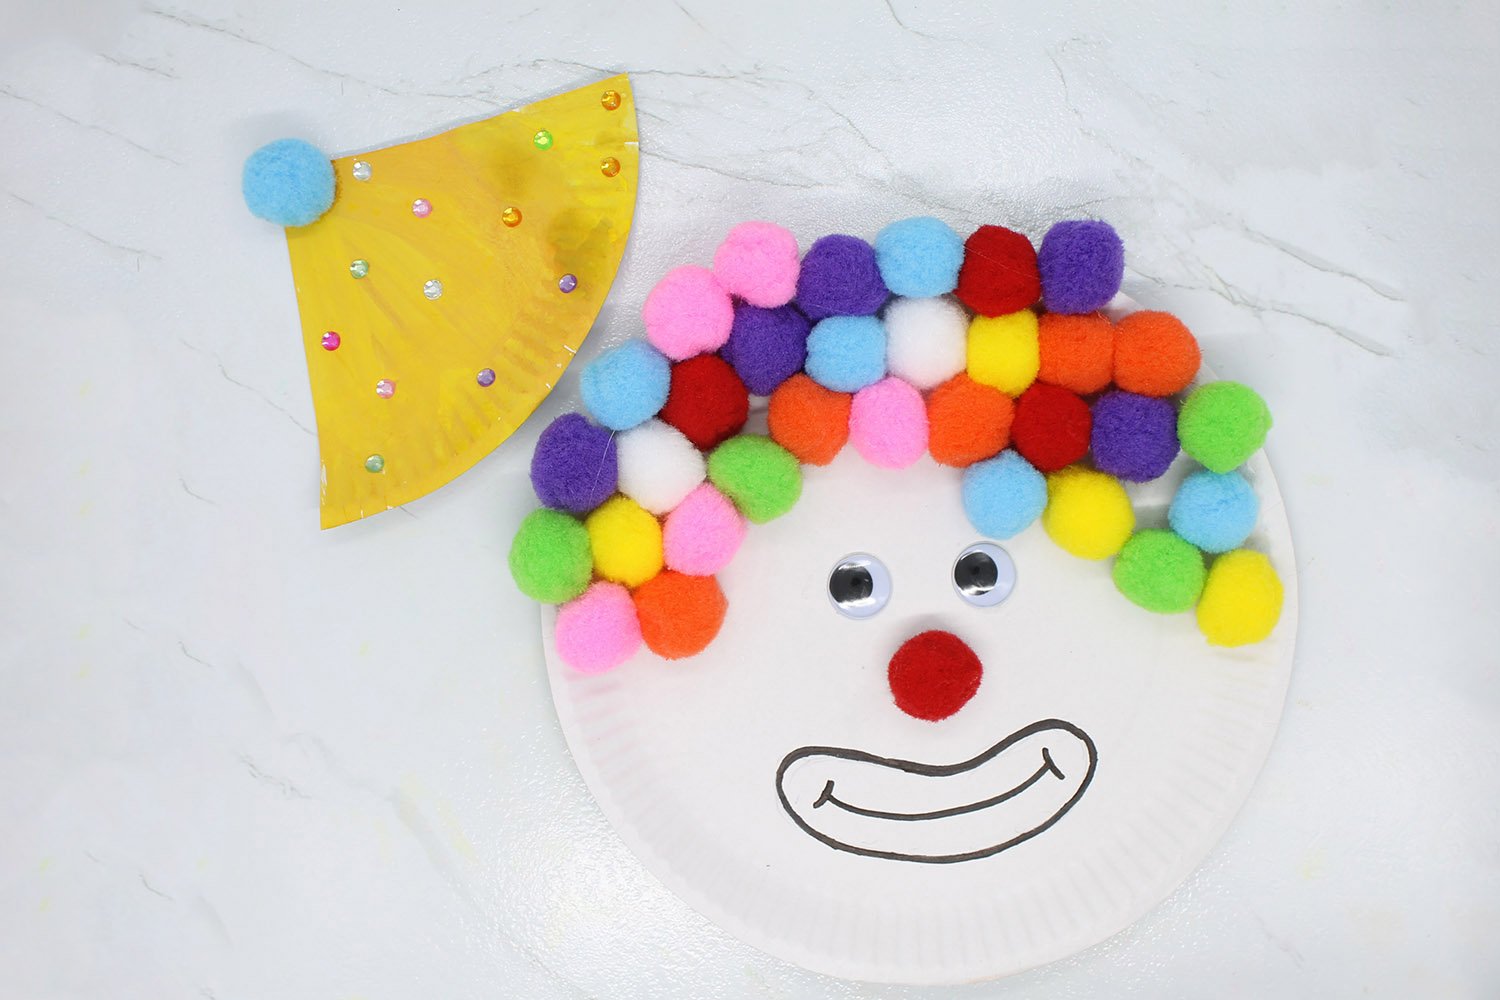
Put the hat in top of our clown.
Fantastic! We are so close to finishing our clown.
Make the Bow Tie of Clown Paper Plate
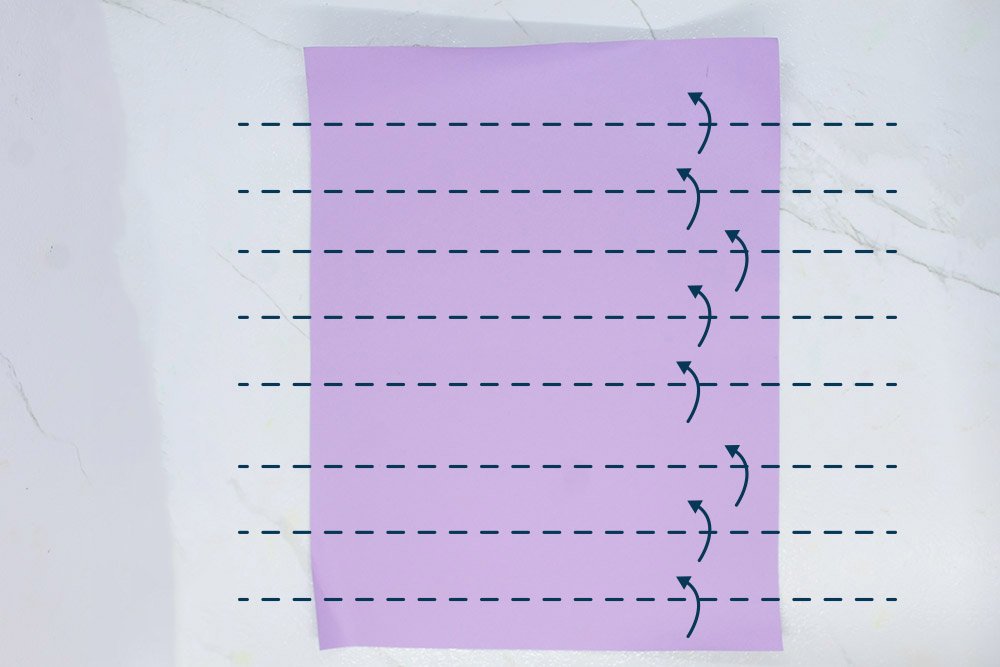
Fold the construction paper many times. This will give it the look of a clown's tie later on.
We used purple in this example. But you can use a different color.
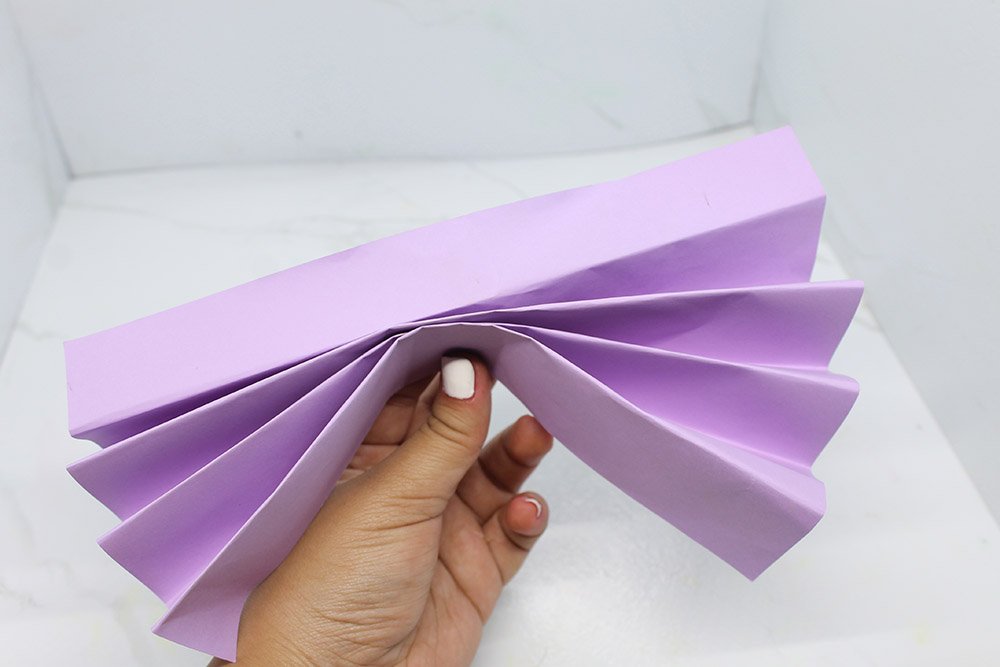
Fold the bottom part of the paper. Hold it in there for a bit until it retains it shape.
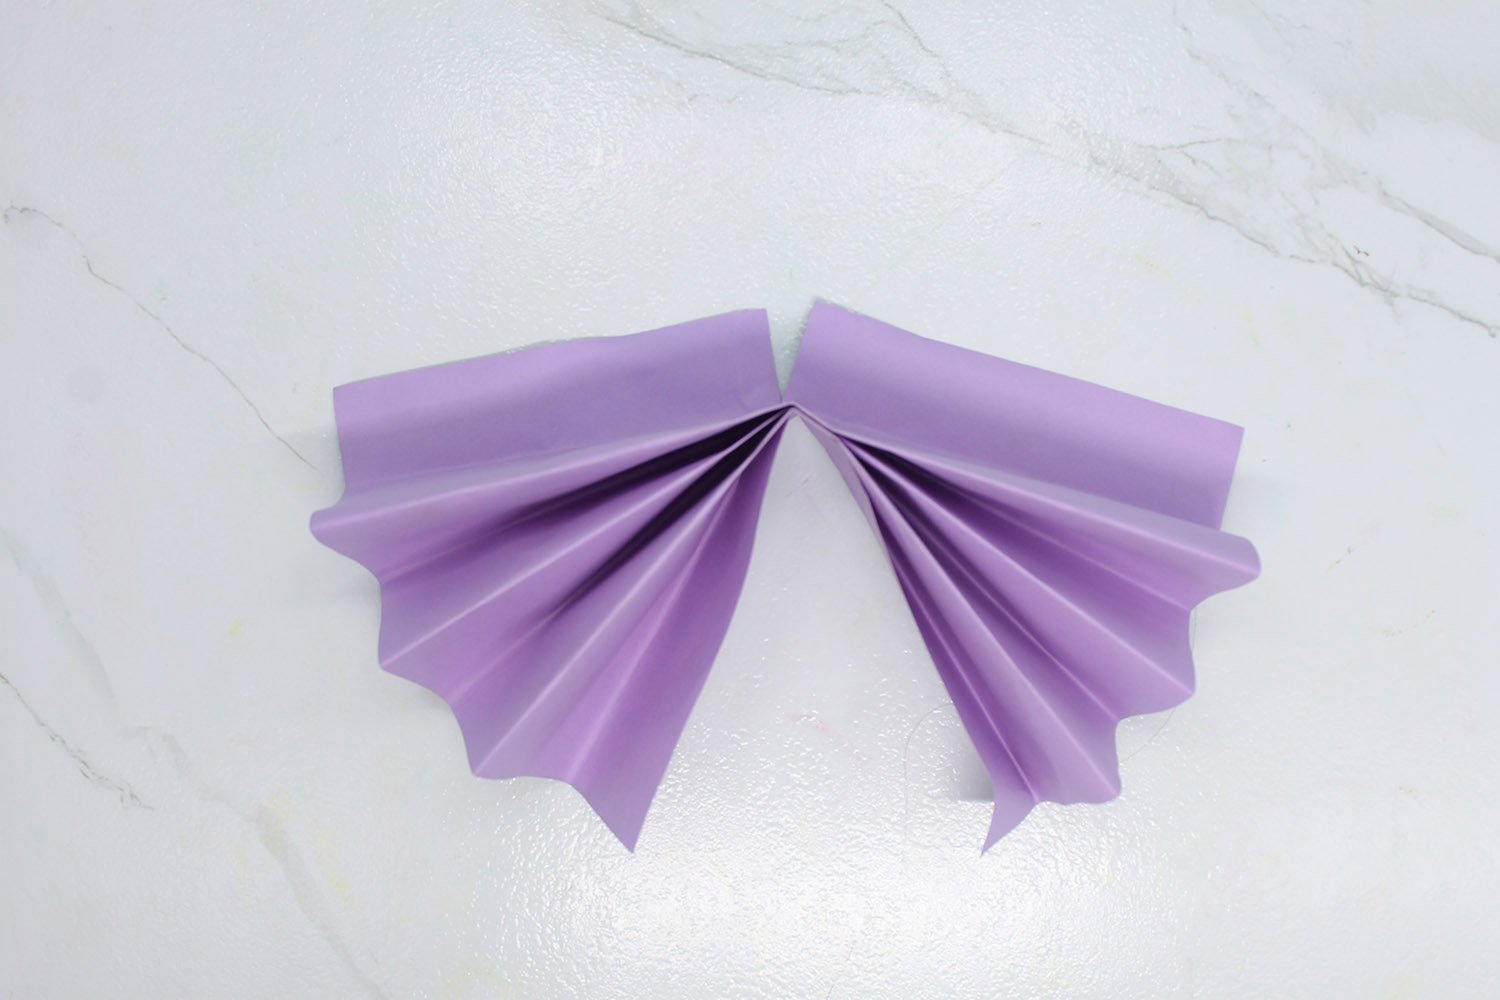
Make a cut in the center. Be careful not to slice it too deep. We want to naturally let the sides of the ribbon fall downwards later.
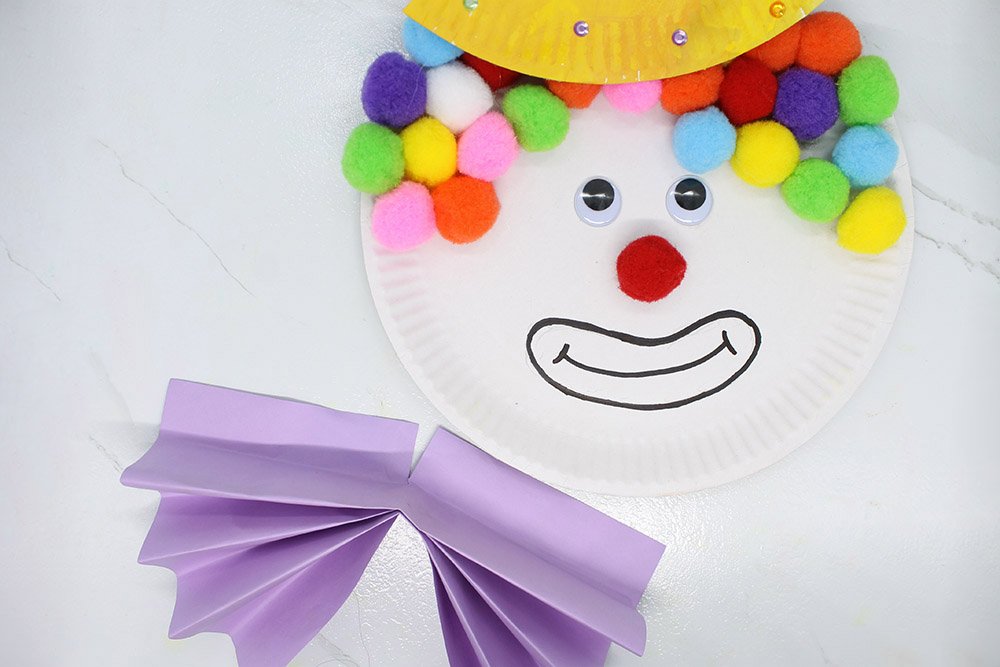
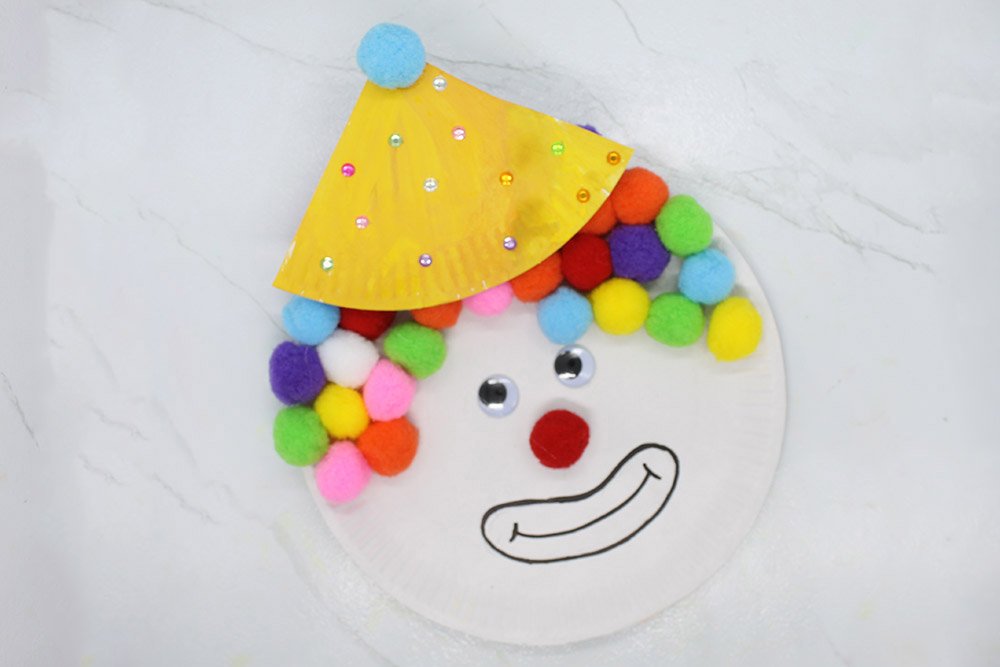
Gathering up all three pieces we would now be ready to fully assemble the paper plate clown.
Join the the bowtie to the clown.

There you have it! You have made a fantastic paper plate clown out of simple materials.
Extra Tips
- Giving the Paper Plate Clown face a bright red lips would be something worth to try.
- This craft is a good opportunity to encourage creativity, and build up your kid's confidence. What can make this art activity truly yours?


Just by looking at the first picture it had my heart captured
Me and my kids had fun making this. They were all into it and mommy had no probs with the instruction BUT it reminded them of candy balls 🤡🤡
that’s funny
same effect on me hehe
Mine turned to be different because i had to use materials that i had. still looks like the paper clown in the guide but the style and colors are different.