Christmas Grinch Paper Plate Craft | Free Printable!

Introduction
In this tutorial, we’ll give you the best way to create a paper plate Grinch craft. This activity is simple, affordable, and most importantly fun!
This is a perfect opportunity for some bonding time come Christmas season.
Kids and adults alike will surely enjoy creating the Grinch. We start by creating the shape of the face. And then we paint it. Then we add the details until we create the Grinch.
Good luck, and have fun.
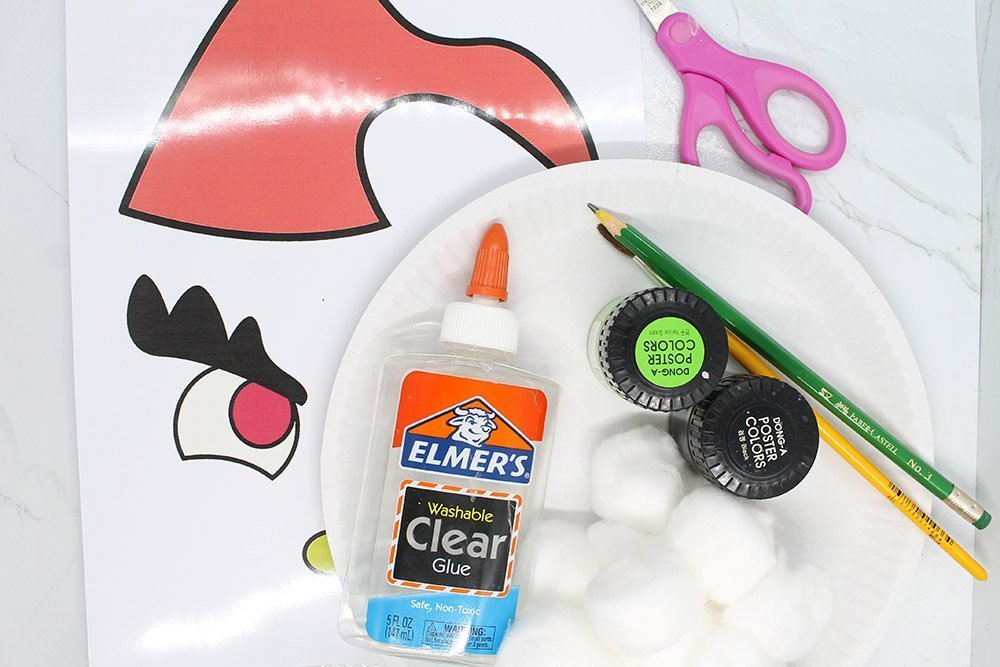
Tools
- Scissors
- Pencil
- Paint brush
Supplies
- Paper plate
- Printable
- Glue
- Poster Color (Green and Black)
- Cotton balls
Download Area
Download TemplateCreate the Shape and Paint the Face of the Paper Plate Grinch
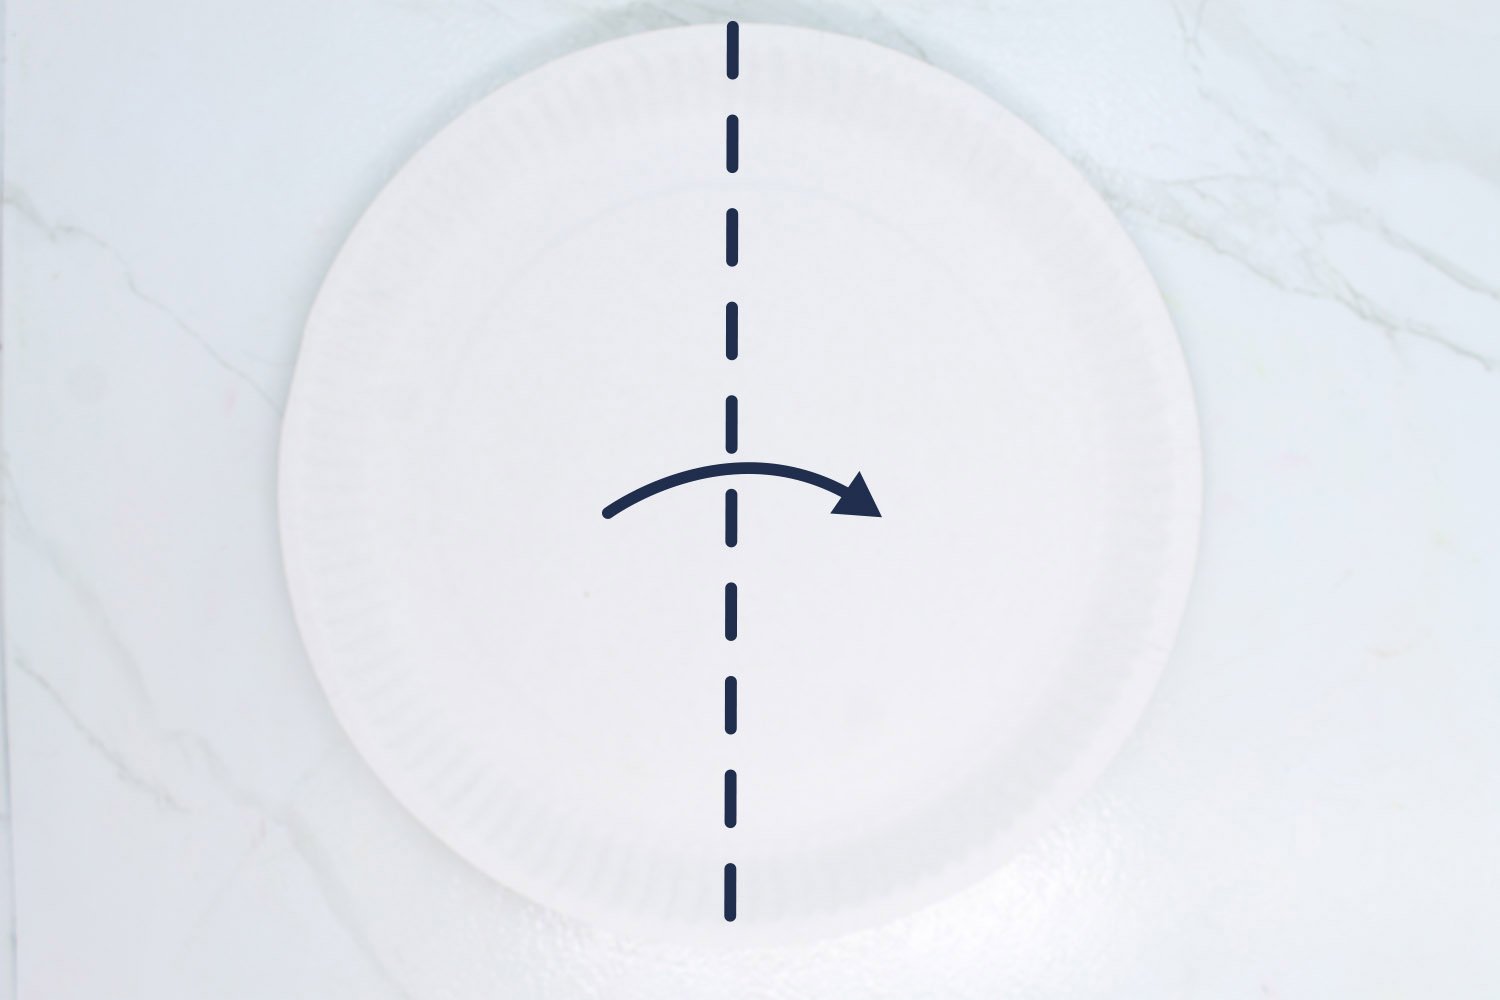
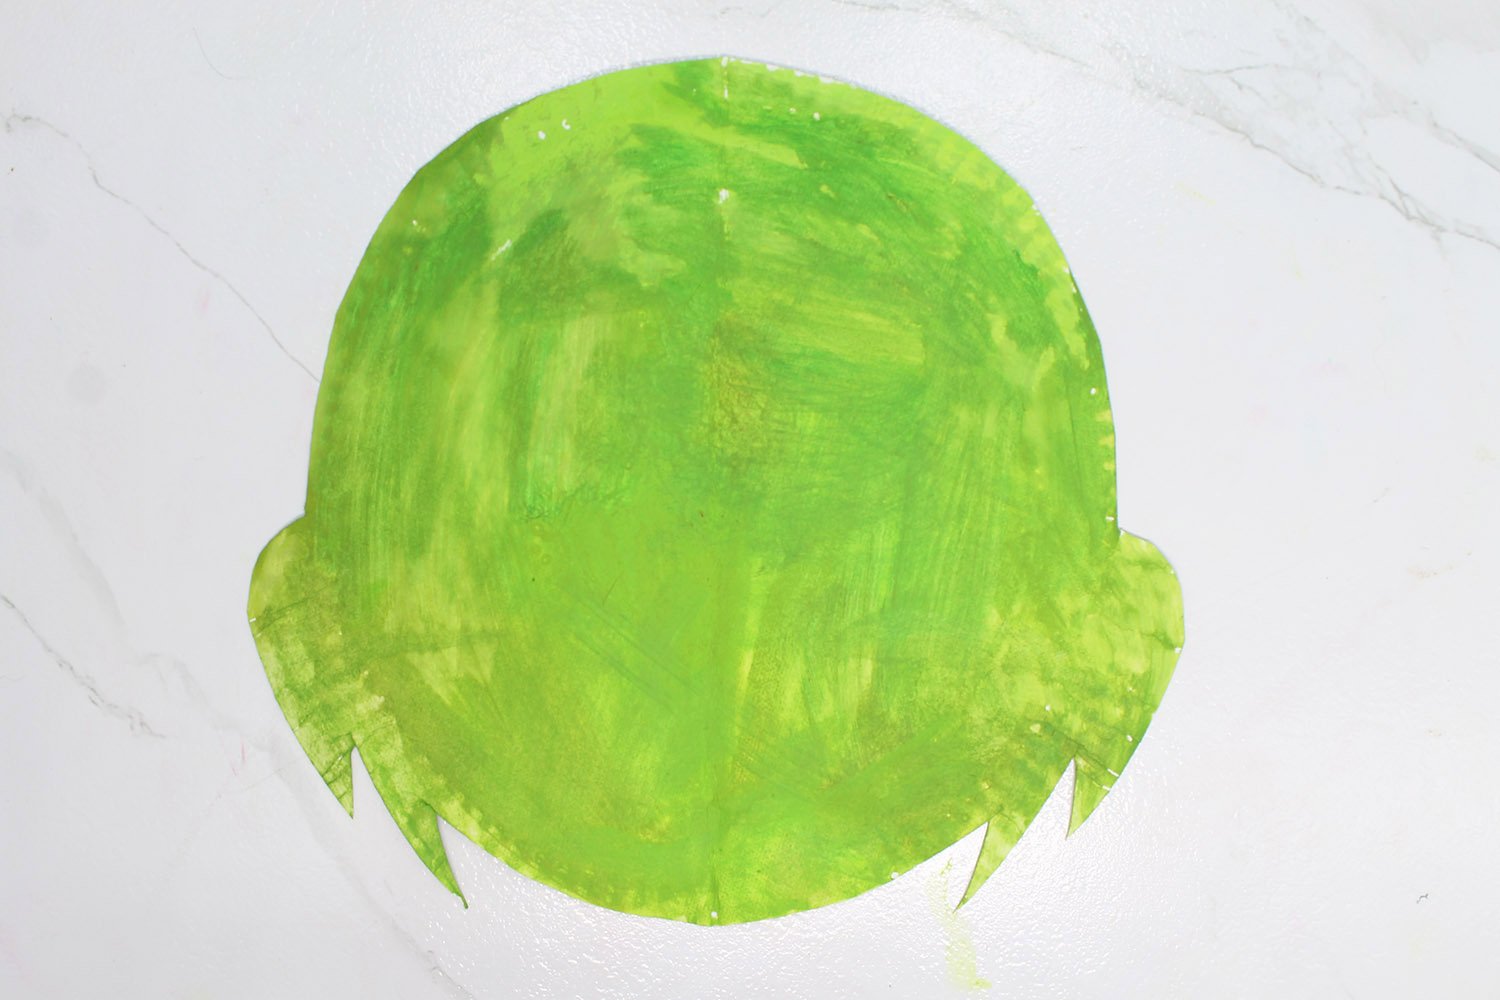
Fold the paper plate in half. You want to create symmetry so the line should be straight and centered as possible.

Draw exactly as shown in the image above. This will be helpful in forming the shape that we want. The grinch has a furry face and to capture that look there would be hair protruding from his cheeks in this craft.
Tip:Try to take a closer look at the drawing, and take your time when making the lines. Although, if you are experienced in using the scissors, you could cut immediately!
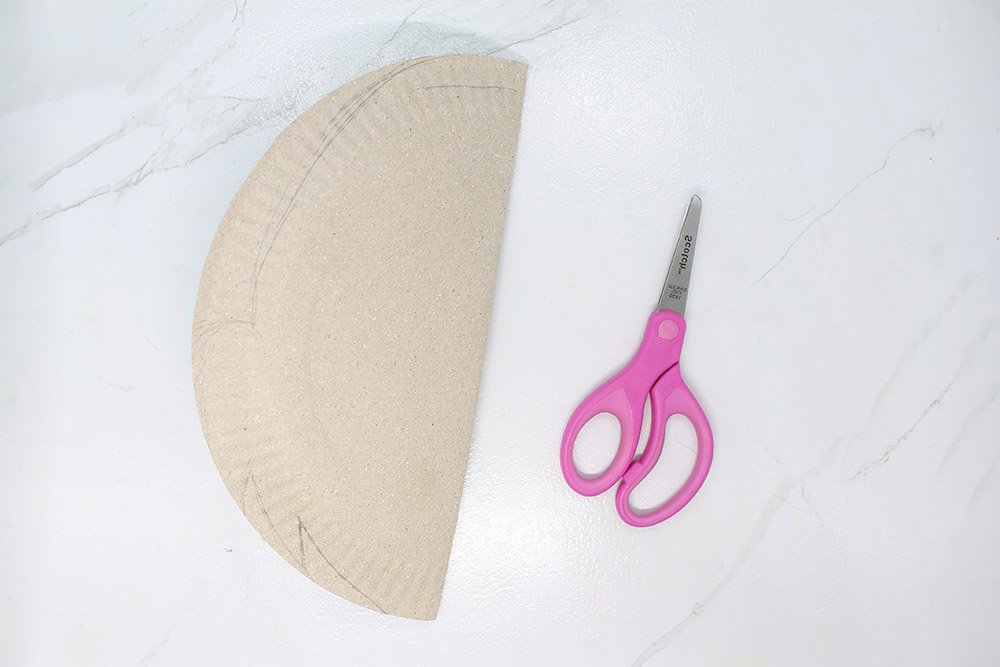
Use your drawing as a guide to making the shape of the face of the Grinch. A smooth cut is what you want so taking your time while cutting is good.
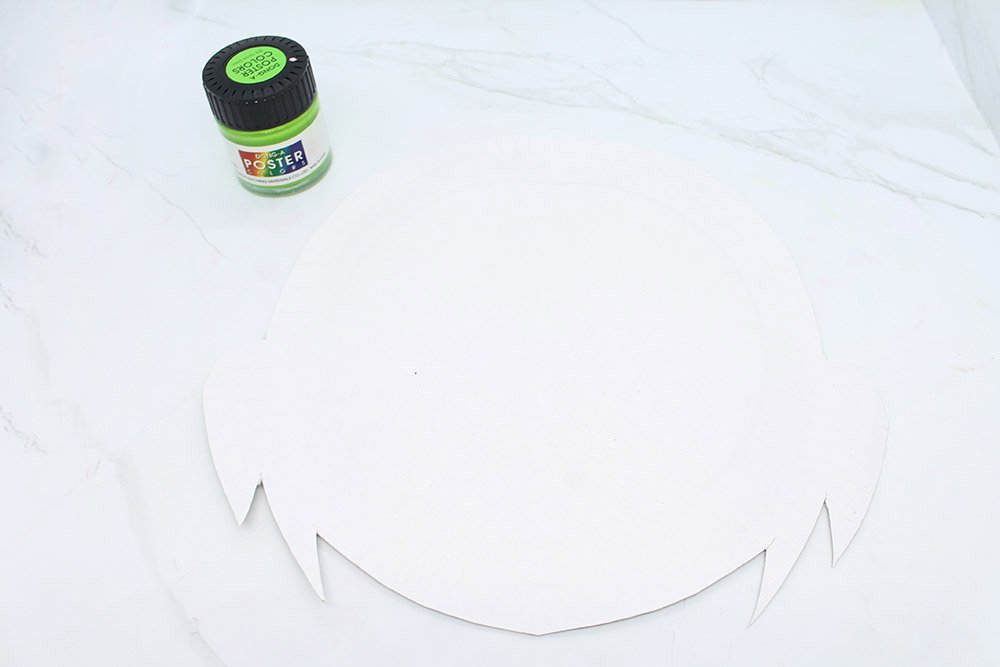
Unfold it, and there you have it. The shape of the face of the Grinch. But now you have to get your green paint and color the face evenly.
Good job, you've made excellent progress. Our next objective is to paste the the pieces of the printable to paper plate.
Cut and Paste the Free Printable
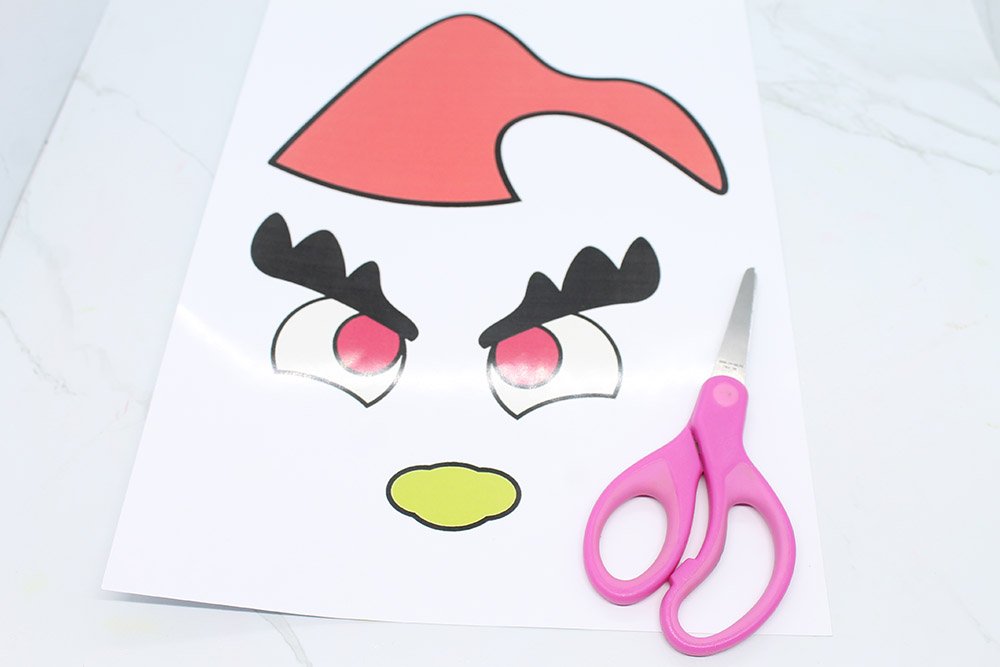
The first thing to do is download the file if you haven't already. Then you should print the file which has the eyes, hat, and nose of the Grinch.
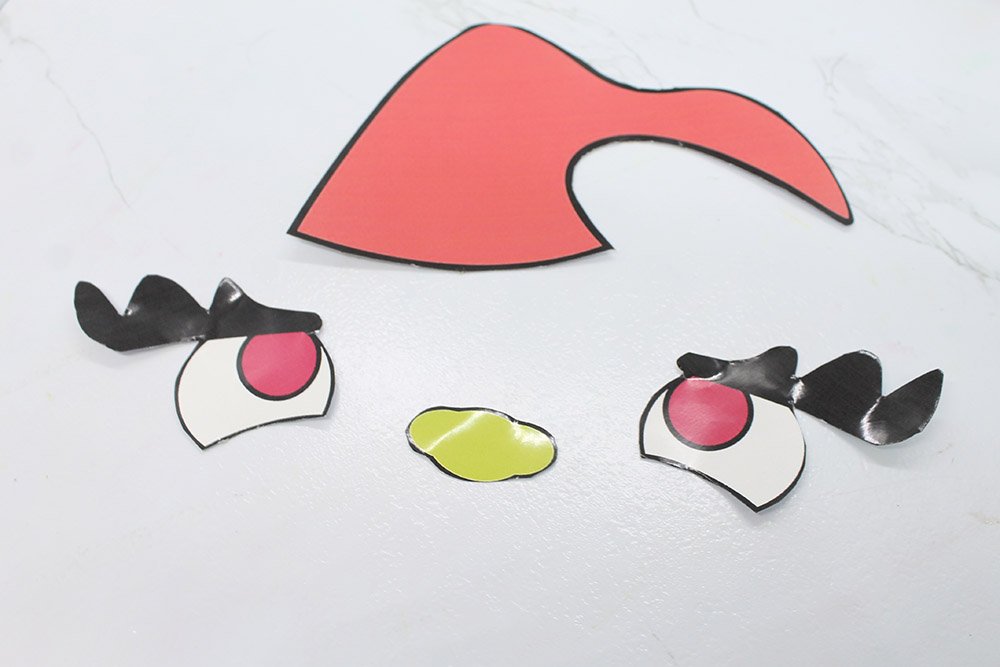
Cut the hat, eyes, and nose carefully out of your printable. Start by dividing the paper into three sections separating the hat, both eyes, and the nose. Then finally cut the pieces out.
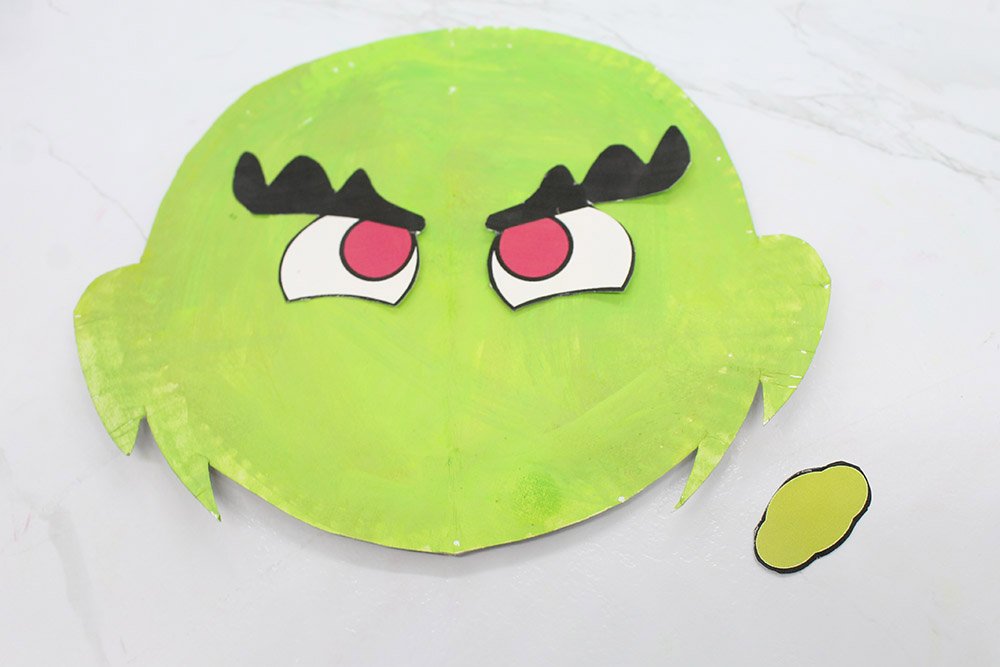
Paste the eyes to the paper plate. The placement and orientation of the eyes are important here although they can be subtle. In this example, the eyes are placed in the center and they are leveled.
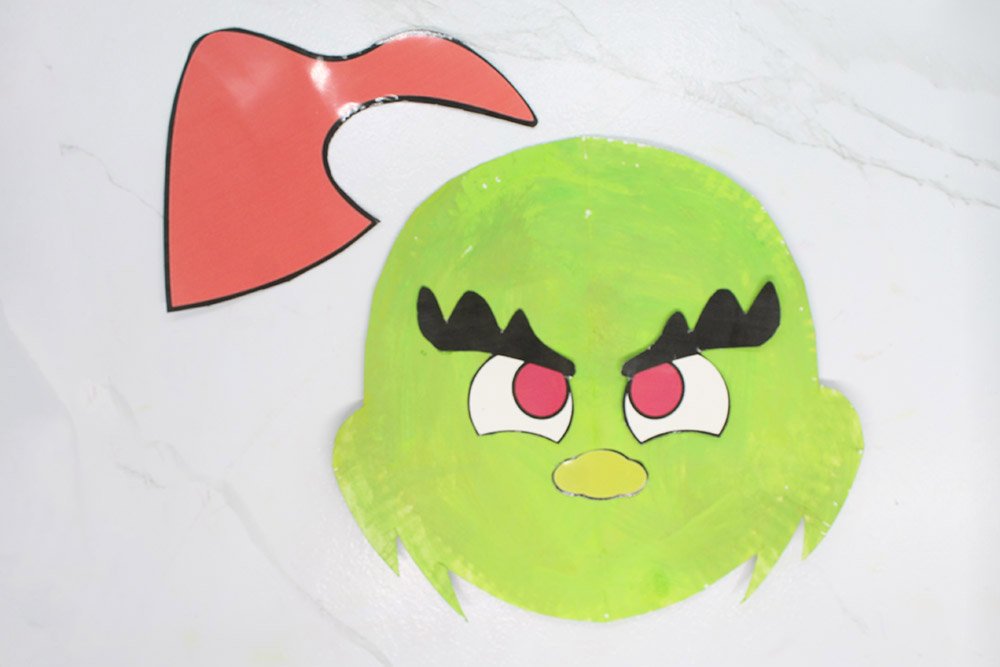
Glue the nose to the Grinch paper plate below and between the eyes.
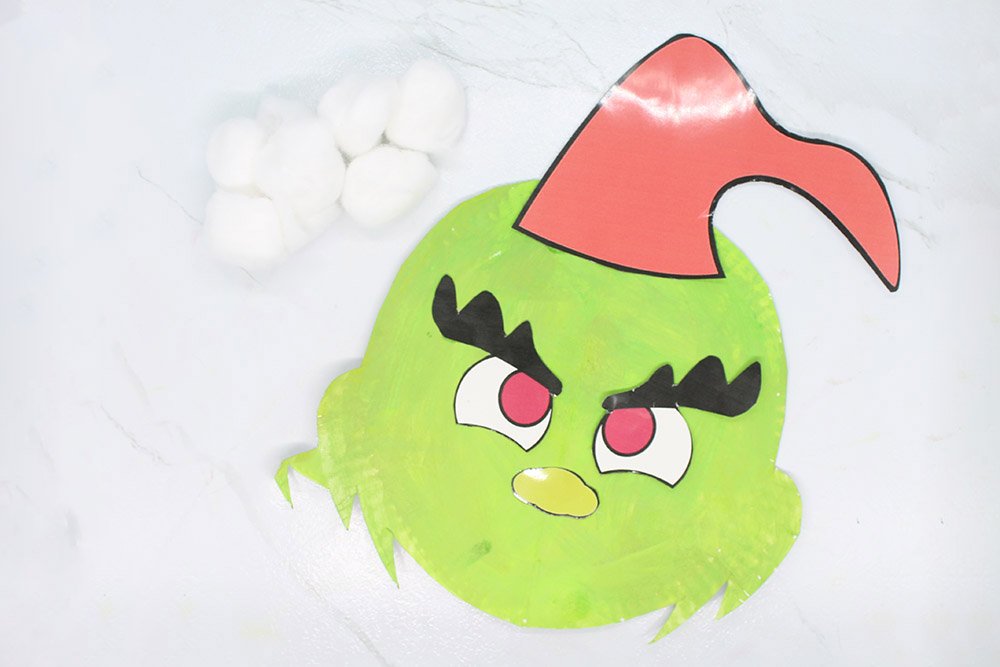
And finally, attach the hat. Great job! We are almost there.
Complete the Grinch by Adding the Details
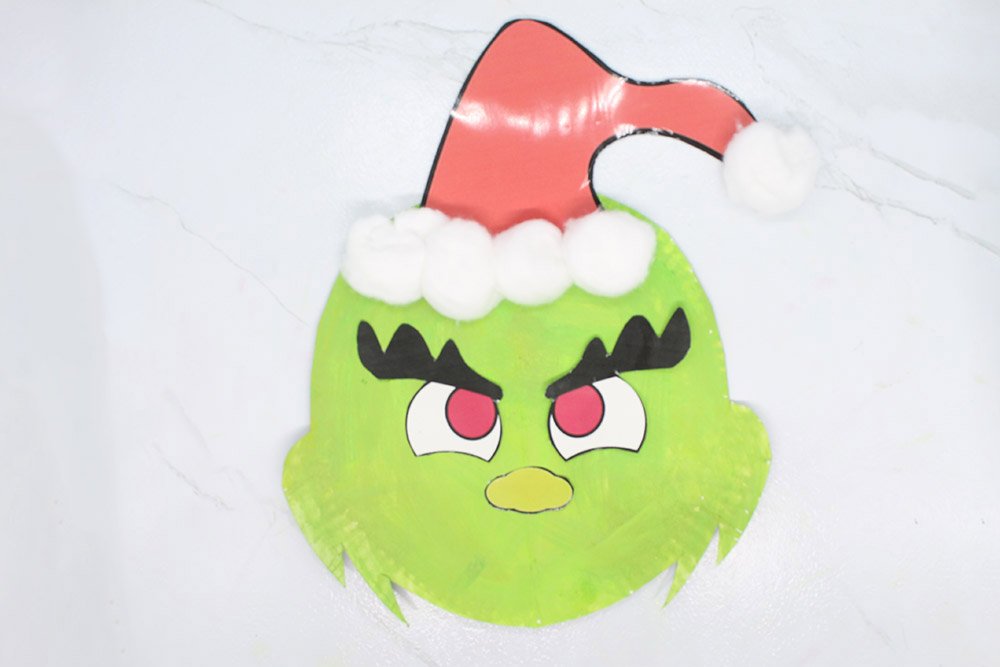
Add cotton balls at the tip and base of the hat. This gives the appearance of a true Christmas hat.
Get ready to put some fine lines on the paper plate grinch to make the smirk. Don't forget to include philtrum and connect it to the lip line. In making the mouth of the Grinch, we want to make the lips seem a bit naughty.
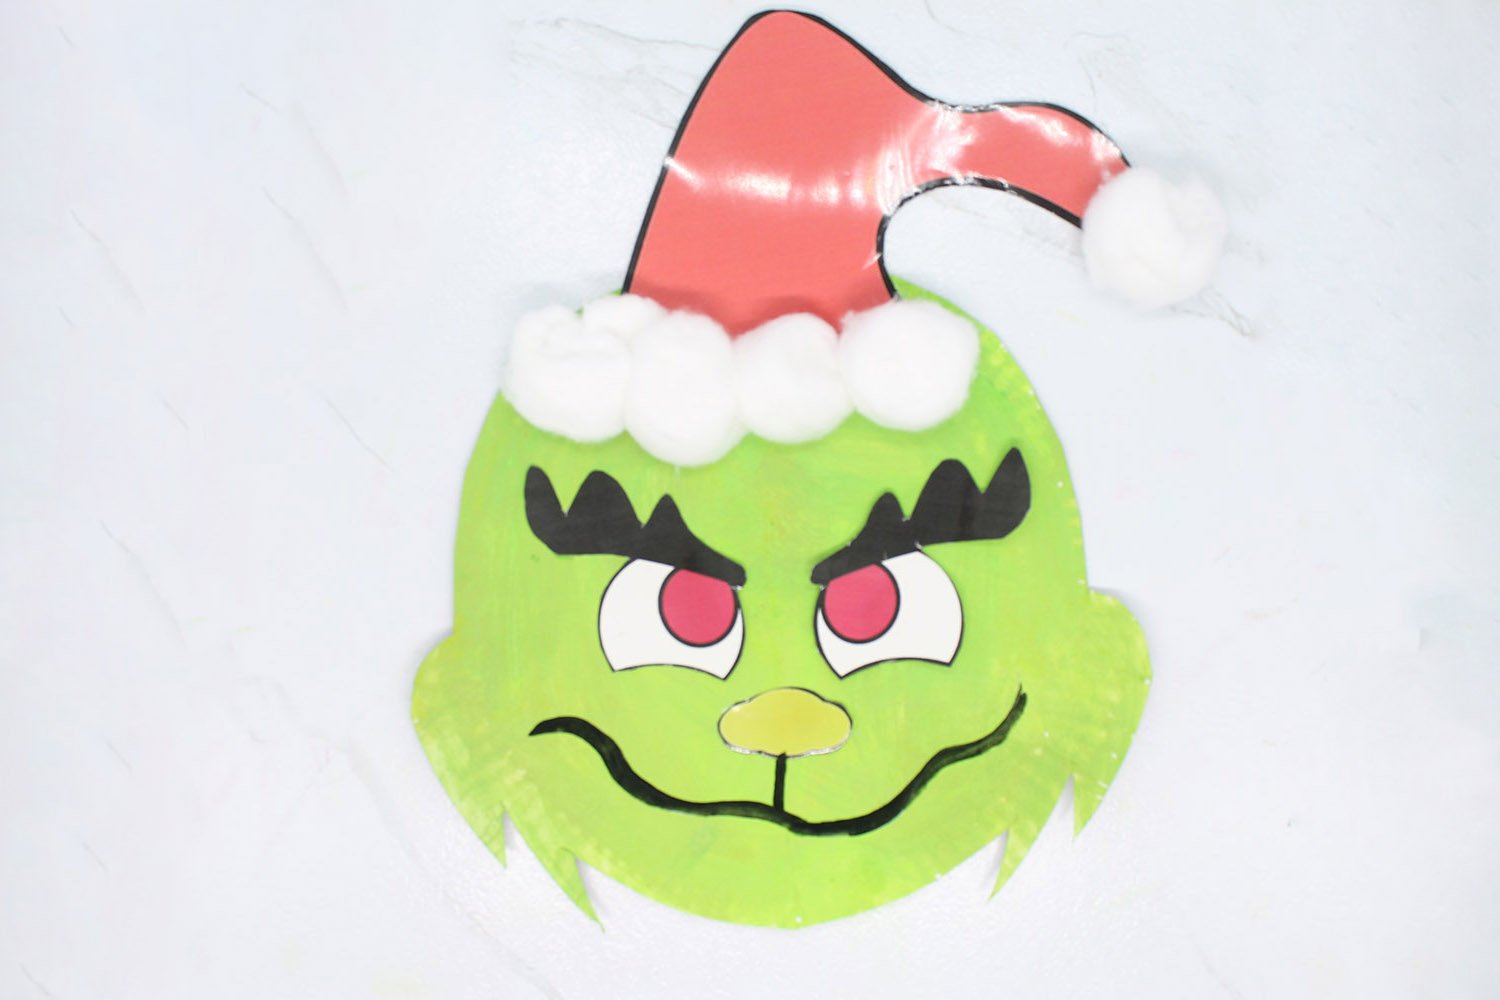
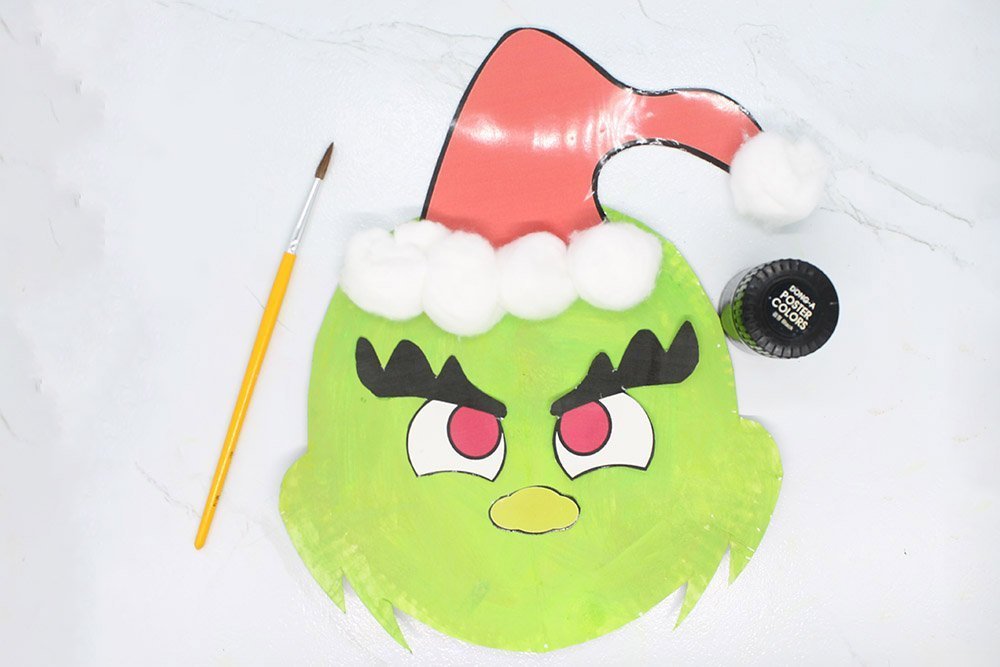
Then paint the border of the face to give it a crisp look.
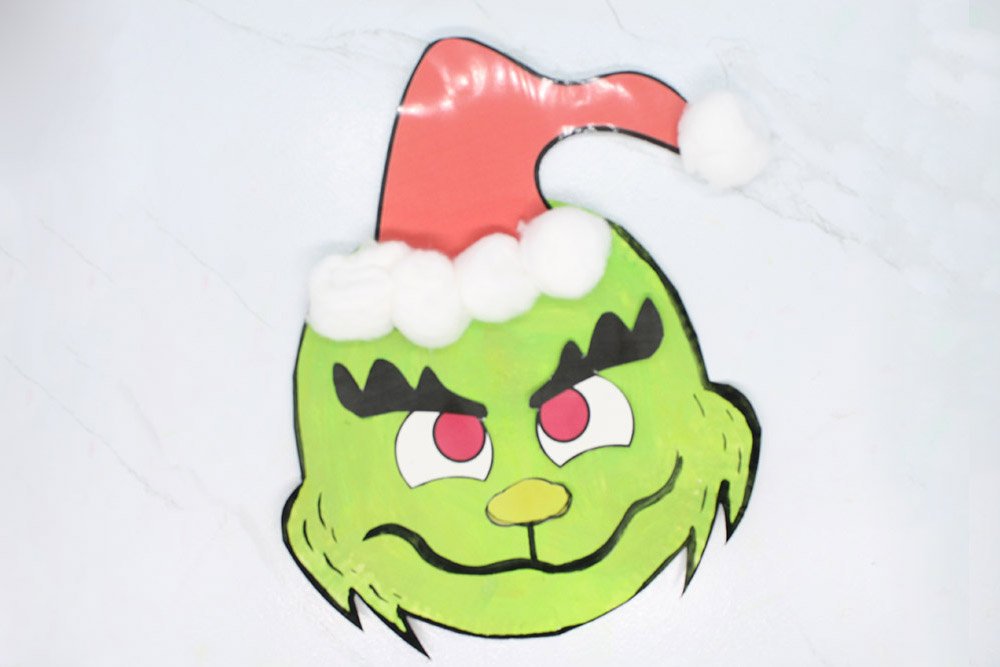
You have successfully made a paper plate Grinch. We hope that you enjoyed making this artwork.
Please check out our other wonderful paper plate crafts- we have dozens of them! Also, don't forget to drop a comment below about your experience.


I couldn’t get that smug face look. Mine looks more happy 😒
Nice! Like the printable you gave 😉
Thanks, DIY, mine looks pretty much like yours
I used a black marker for the lines and to me it looks the same with yours
My daughter made this the other day, and now she finds it creepy… had to keep it away from her but I’ll keep it close to me and not throw it away. Hope you see this babe comment babe, luv you 😍 🥰