Colorful Paper Plate Hot Air Balloon | Craft for Kids!

Introduction
Do you want to create a decoration or an artwork that features a hot air balloon? You’ve come to the right place as our paper plate Hot air balloon is eye-catching, inexpensive, and fun.
You would begin the craft by creating a hole in the middle then you would paint the paper plate. Lastly, you would then add the yarn to create a beautiful effect.
Kids would surely love making this paper plate balloon as the end result is beautiful and therefore more rewarding.
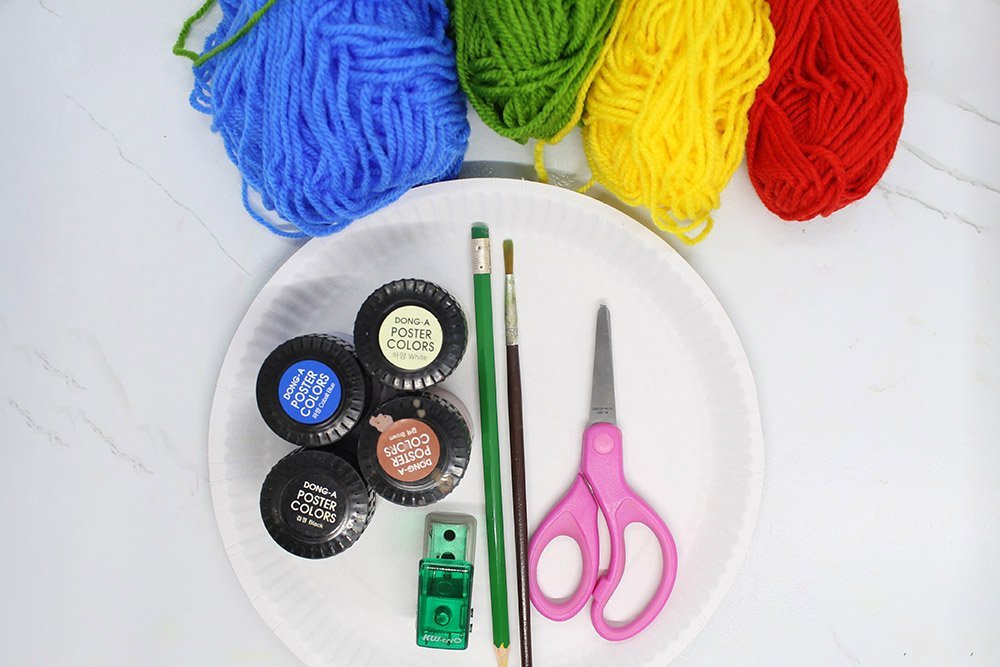
Tools
- A small puncher
- Pencil
- Paintbrush
- Scissors
Supplies
- Paper late
- 4 Colors of yarn (Blue, Green, Yellow, and Red)
- Poster color (Blue, White, Black, and Pink)
Ready the Paper Plate Hot Air Balloon for Painting
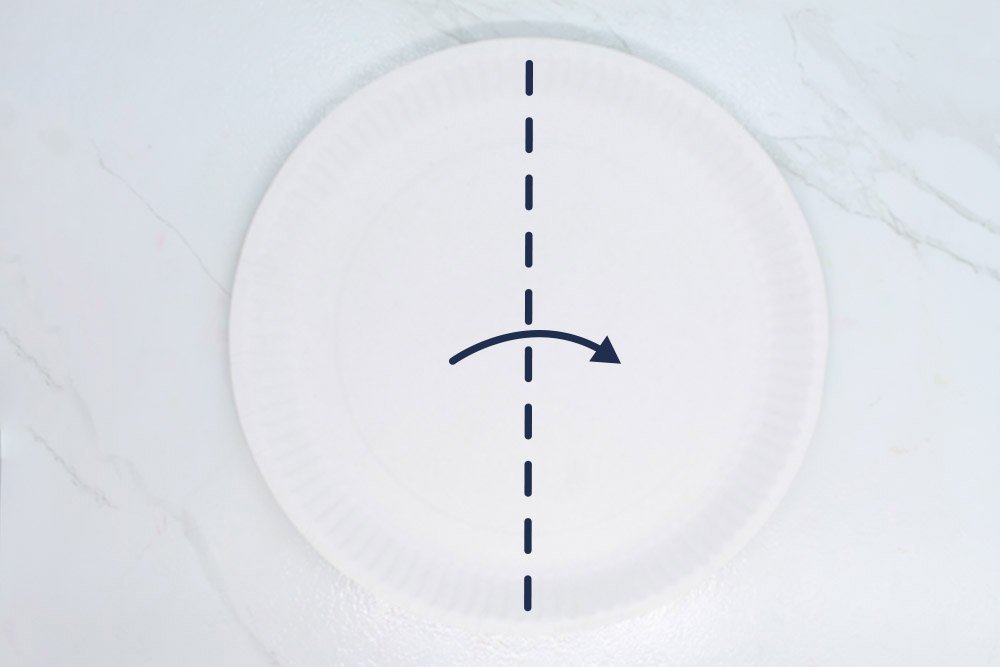
Fold the paper lengthwise. You would want to work with the back side of the paper plate for our next goal.

The goal is to cut a circle just slightly above in the middle. And you can accomplish this by drawing a semi-circle just on the upper part of the paper plate. Then follow and cut the mark you had just made.
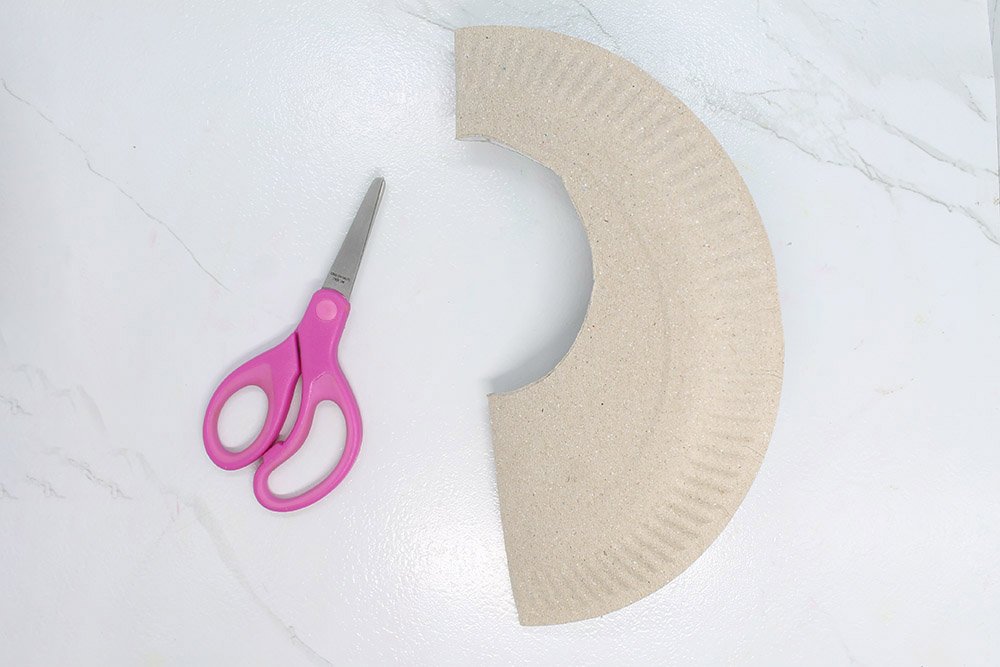
After you have cut a semi-circle out of the folded paper plate, the next step is to unfold the paper plate . Doing so would reveal a nice circular hole in the circle.
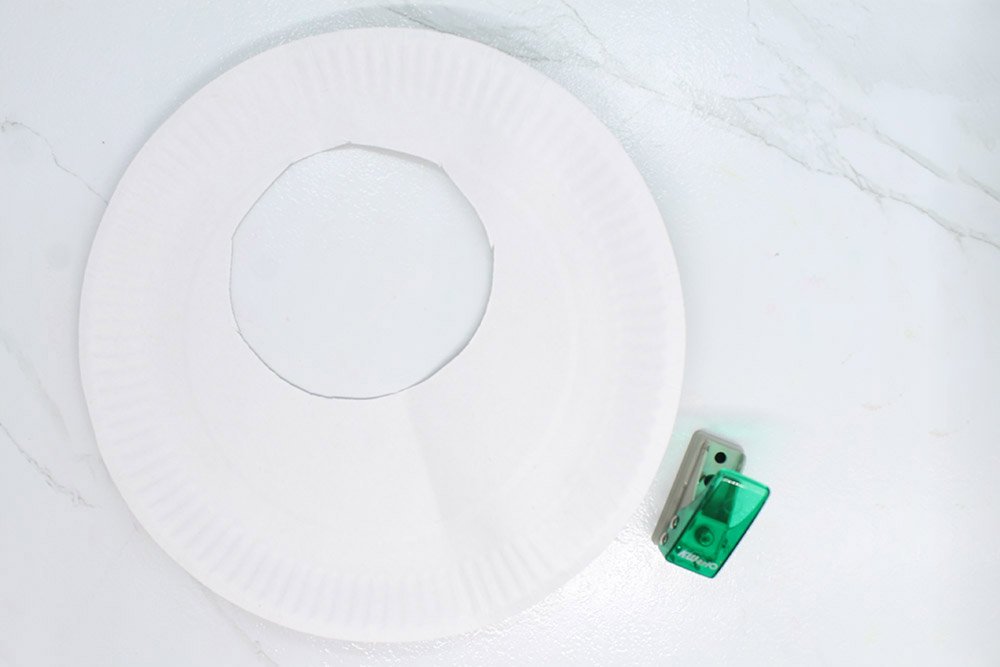
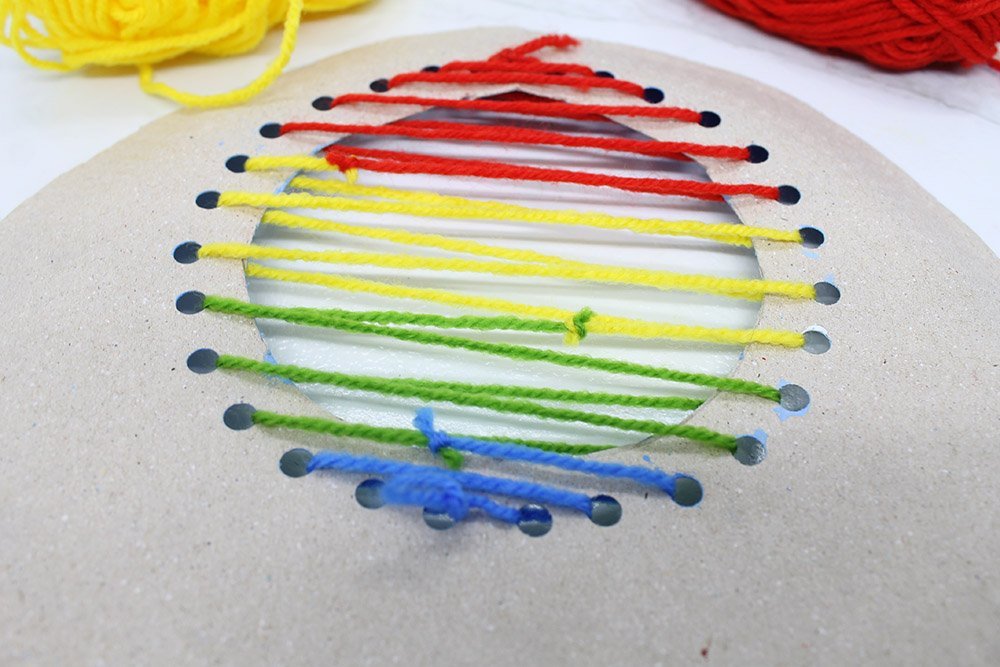
Our next objective for this activity is to make small holes around the circular hole. Use a pencil to draw thirty dots around the circle so there would be a guide later when you start using the puncher.
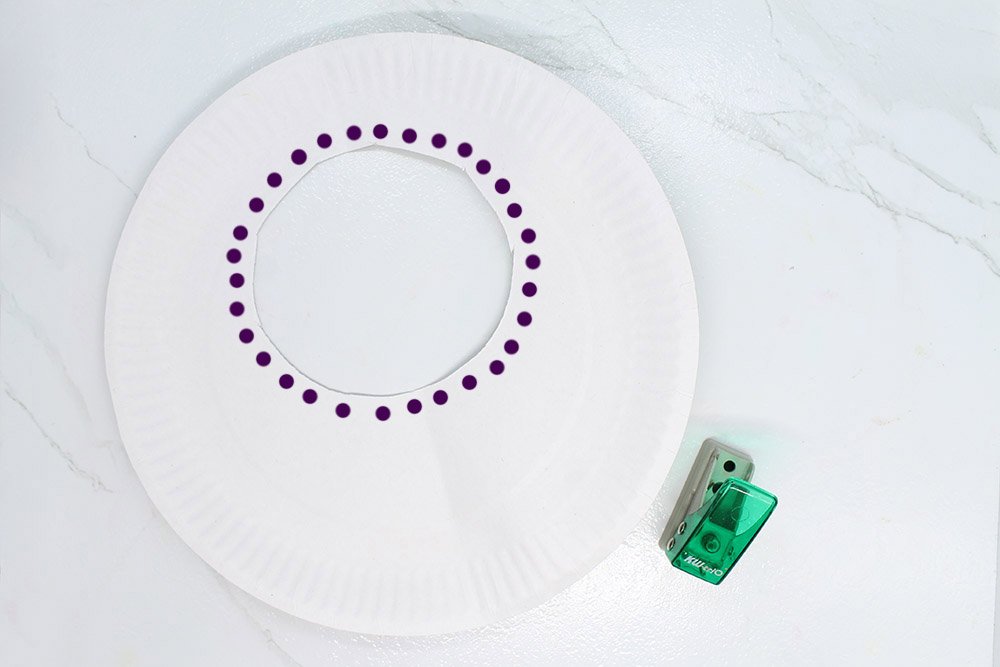
Use your small puncher to make holes. The reason why we make these holes is so we can insert threads of yarn into those holes. This would give the paper plate craft a wow-factor later on.

After you are done making around thirty holes or so you can now proceed to the next step. Good job!
Draw the Outlines of the Shapes
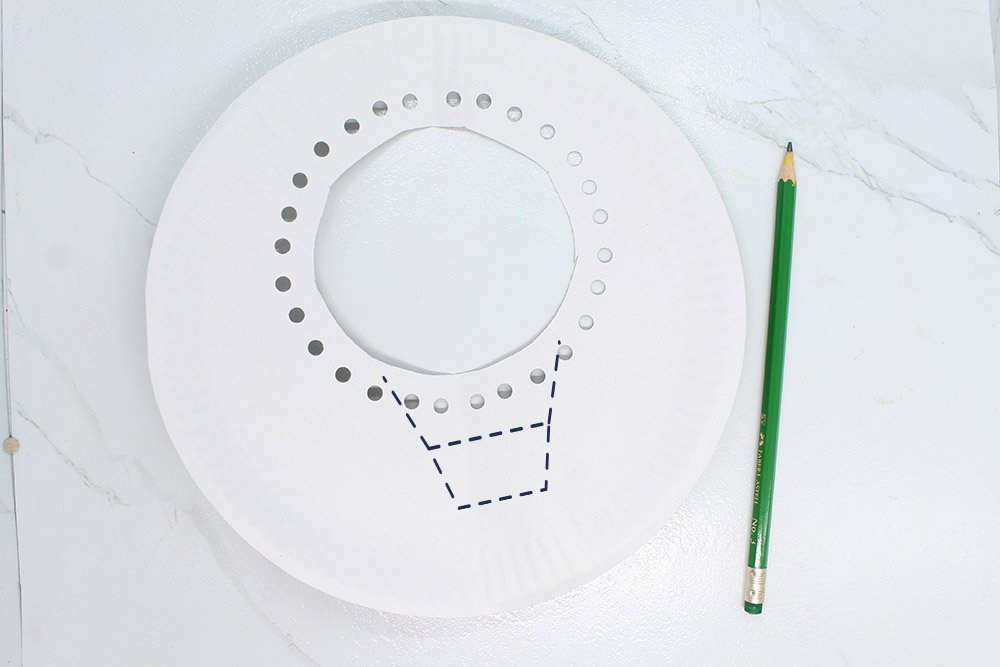
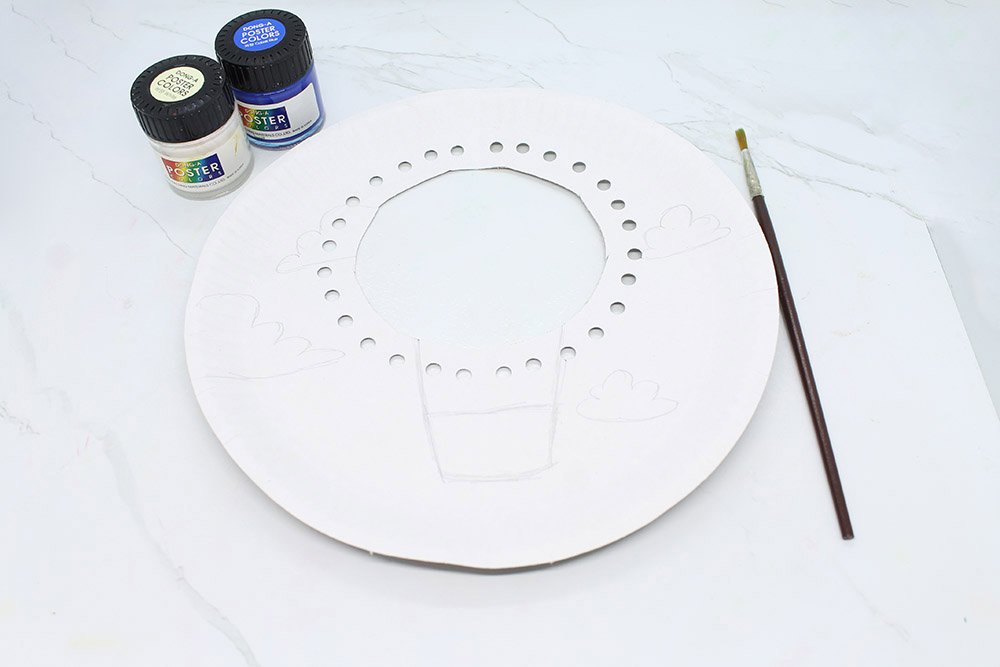
The paper plate balloon must be visually appealing so they could be used as decorations at a party. Start by drawing the basket and ropes of the hot air balloon paper plate.

Then draw the clouds as part of the background. The clouds, later on, would give that artistic appeal.
Paint the Paper Plate Hot Air Balloon
The next step is to ready your paintbrush and poster colors.
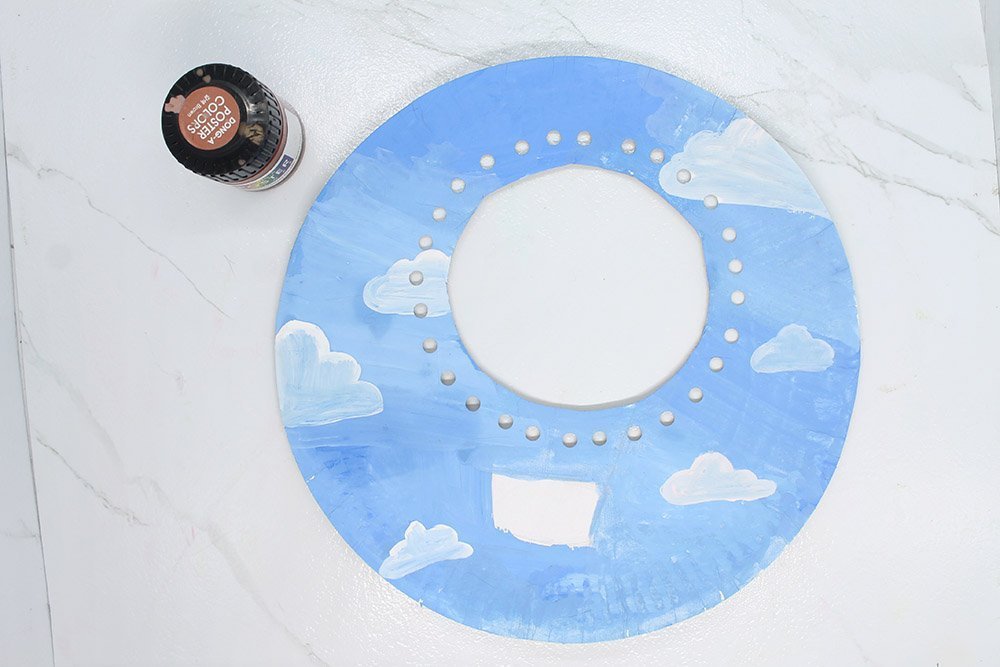
Paint the paper blue so it will give an impression of a bright blue sky. Use even strokes, and make sure you try to stick with one direction.
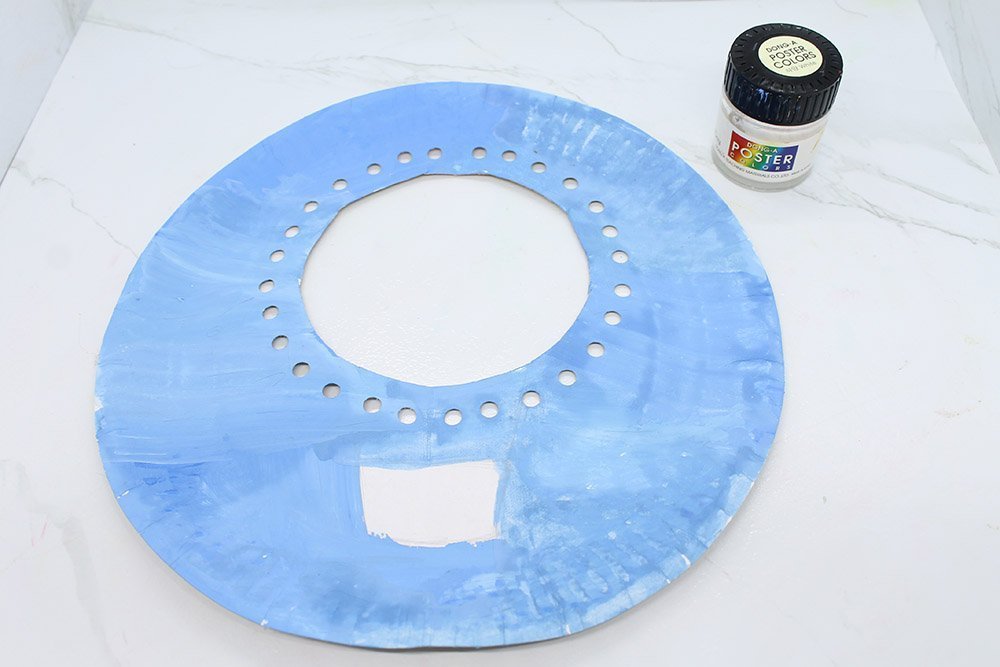
Next, paint the clouds into your paper plate after the blue paint has dried a bit. Although the outlines might not be visible anymore it would still help. Try to remember where you drew your clouds.
Tip: A bright blue sky, and white fluffy clouds reminds people of a warm sunny day. While, as an option you can try, grey clouds and a darker sky reminds people of rain.
Our next step is to paint the basket brown. Be careful not to paint outside the basket.
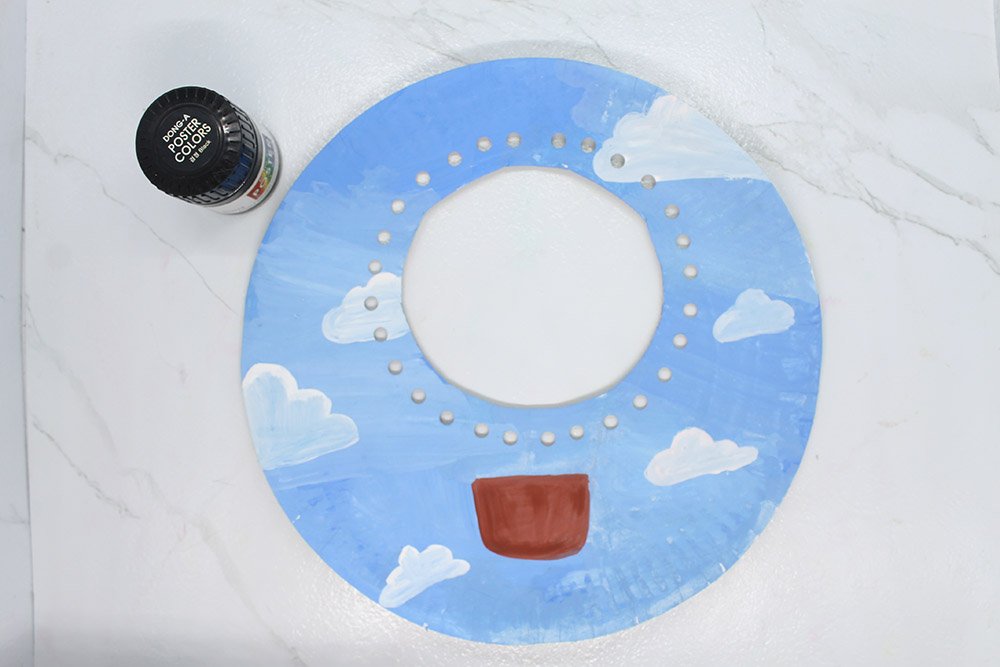
Use the black paint to draw the ropes and details to the basket. This makes the basket look more realistic.
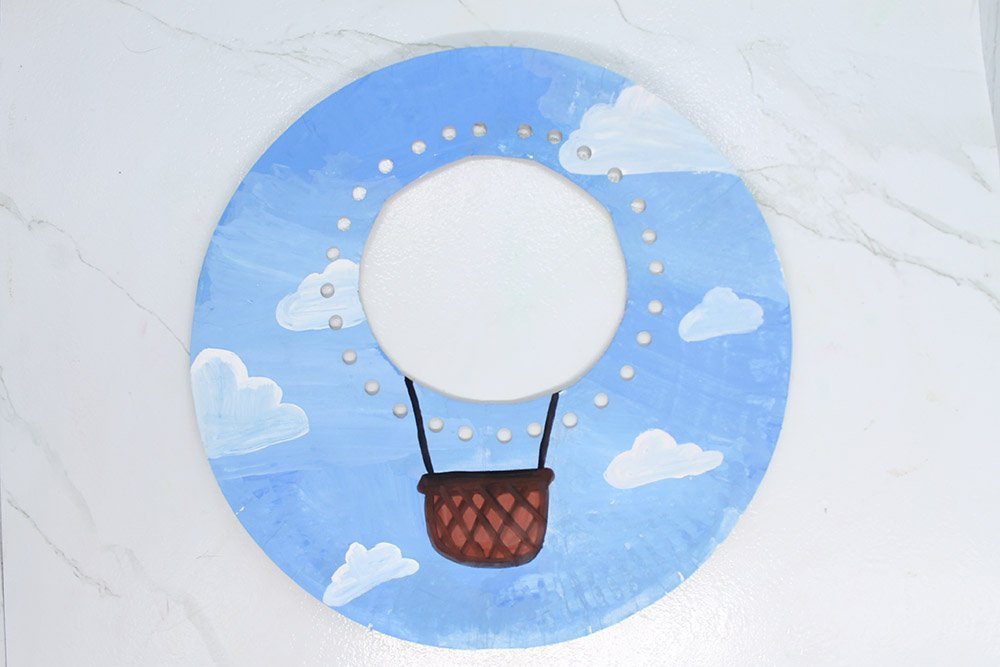
You're halfway through, good job! You will use yarn in the next step to make the balloon pop (in a good way). It'll look visually pleasing once you complete the activity.
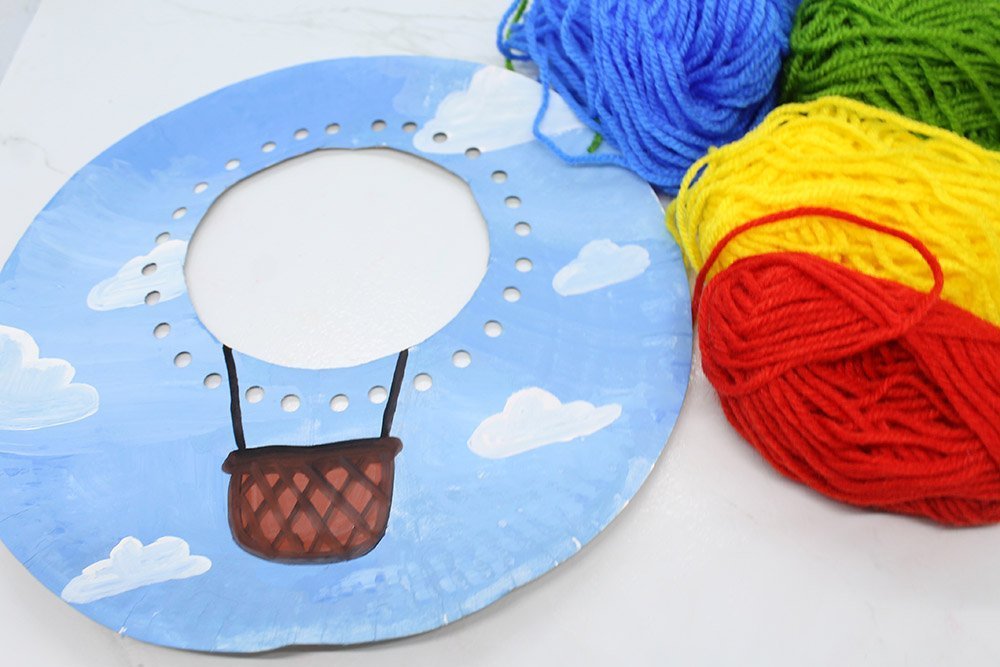
Insert the Yarn into the Holes
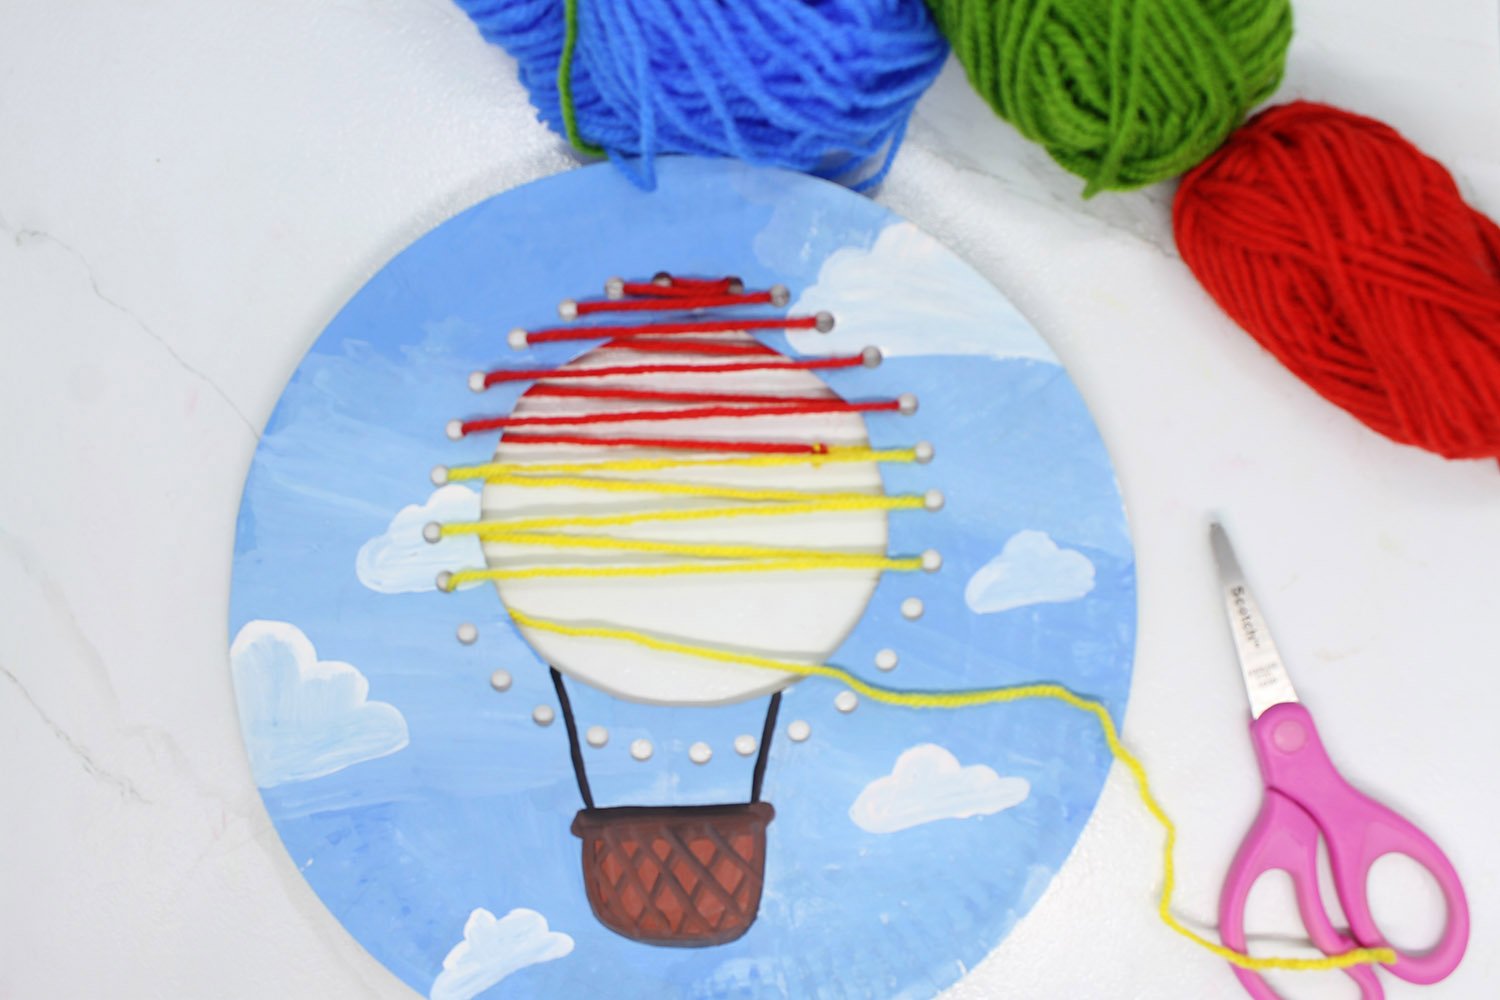
You would now start to make the most eye-catching part of the paper plate art. Firstly, gather the yarns.
Cut the yarns so that they will be around two feet in length. You would most likely use less than 2 feet of yarn for any color though.
Focus on the right topmost hole first. Insert the red yarn into the right hole then insert it into the left top-most hole once it reaches the front side. Remember to face the front side the entire time.
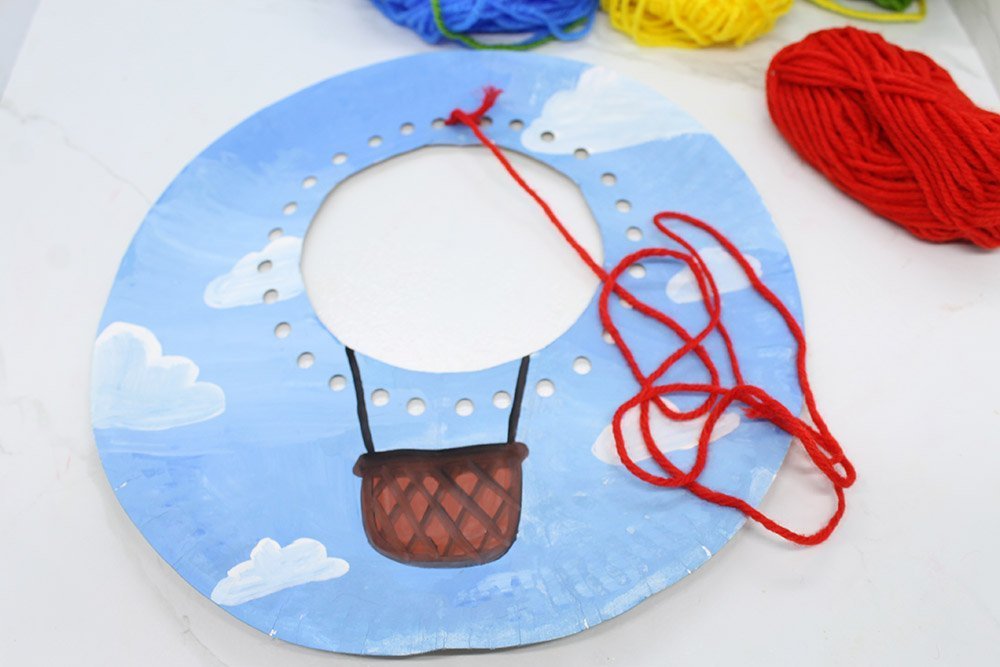
Tie the red yarn in place. The knot should be located on the backside.
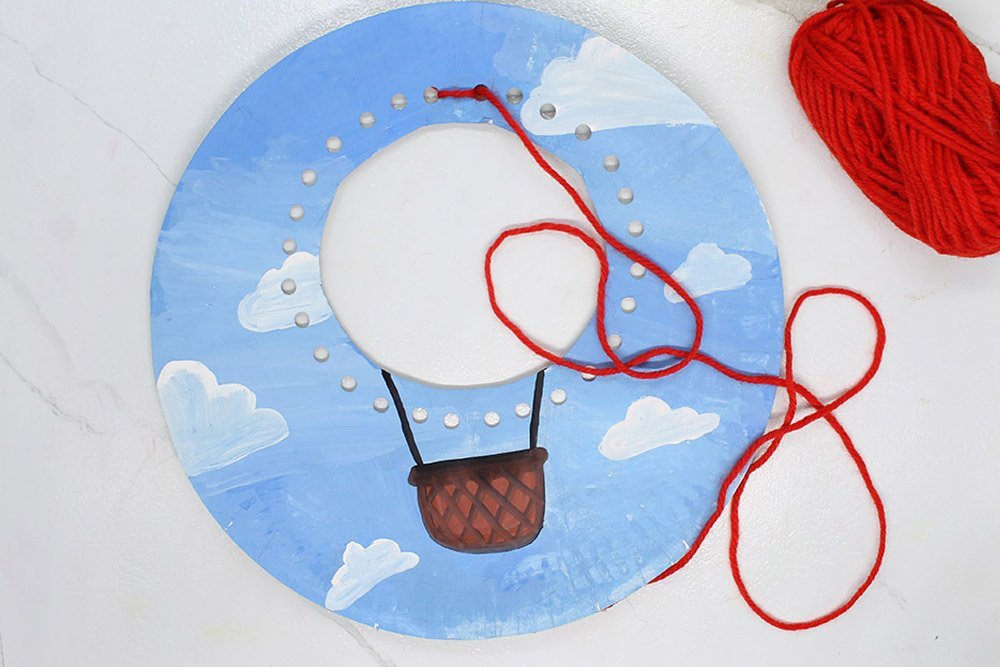
Insert the yarn into the next holes making a pattern like the one shown.
At the fifth hole, tie the red yarn with the yellow yarn. This method of tying one color of yarn into another allows us to use multiple colored yarns. Awesome, right?
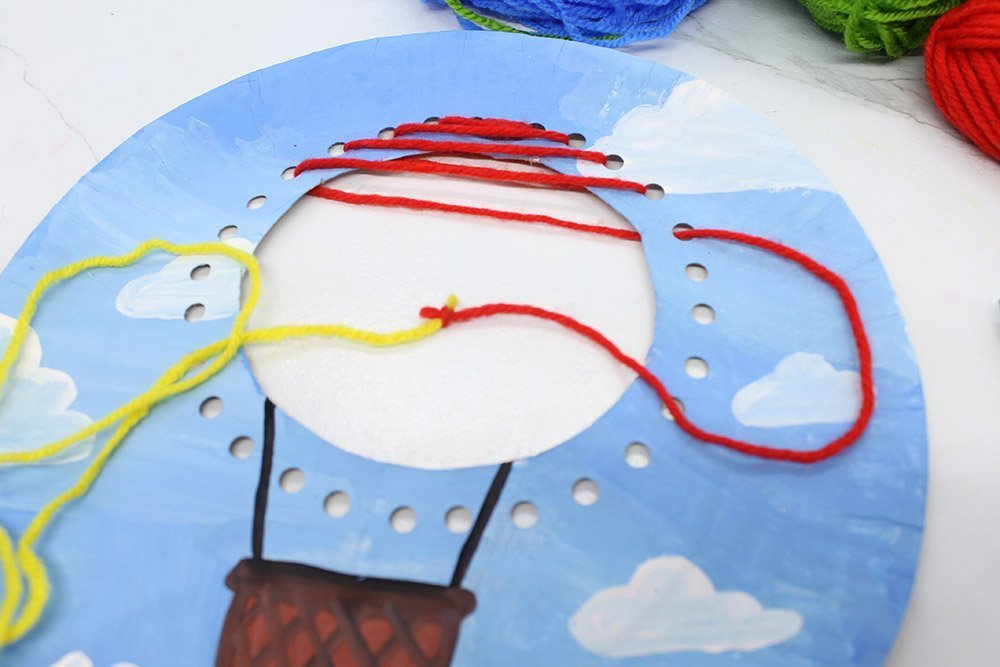
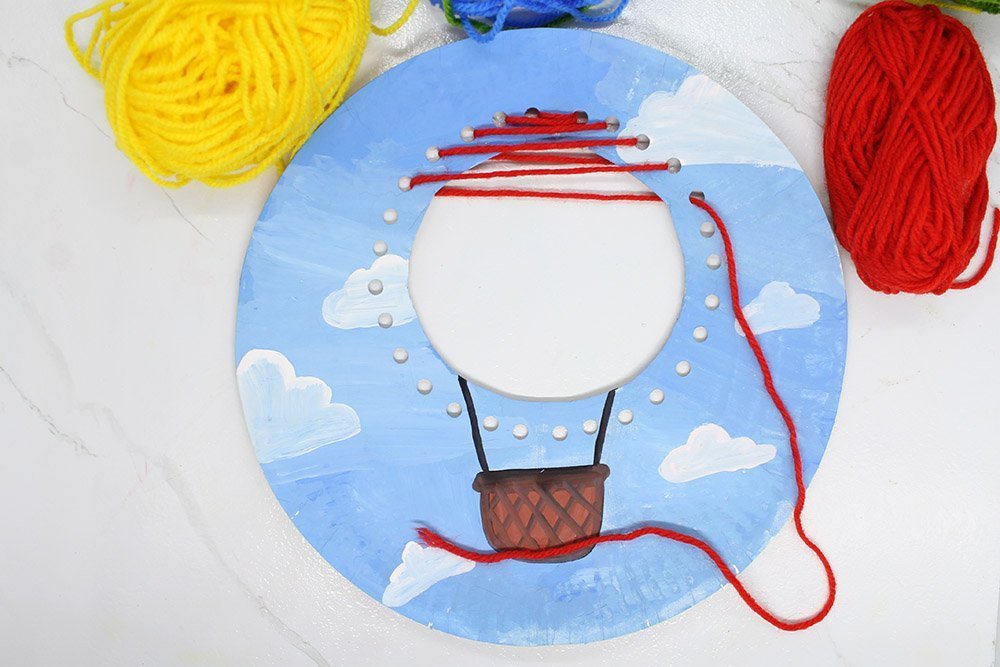
Continue following the pattern until you reach the 9th left hole.
Connect the green yarn with the yellow one.
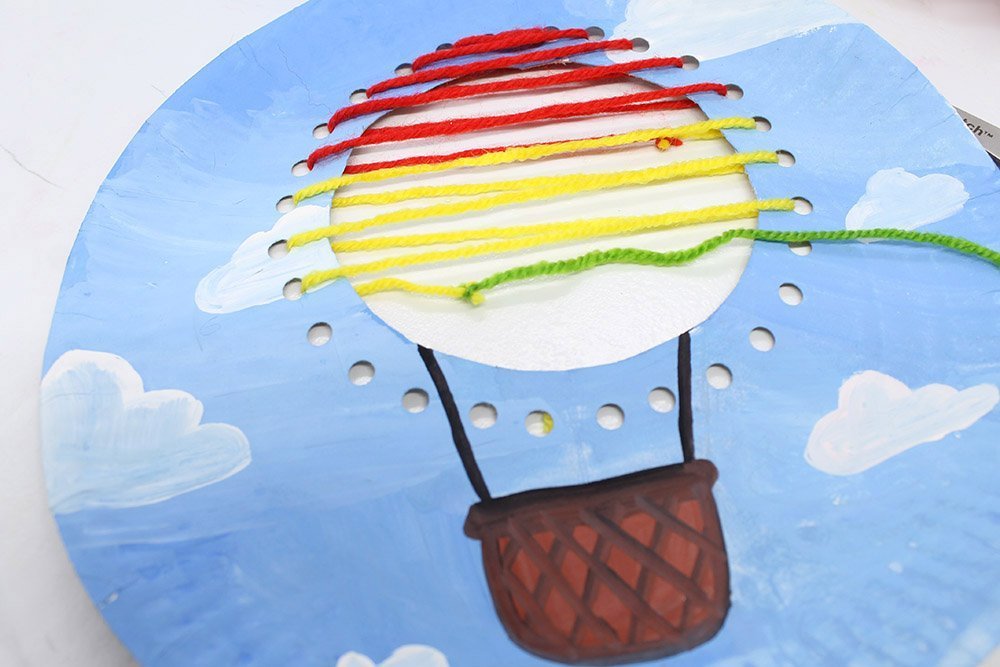
Continue the pattern until three pairs of holes are done. After which, we connect the blue yarn with green.
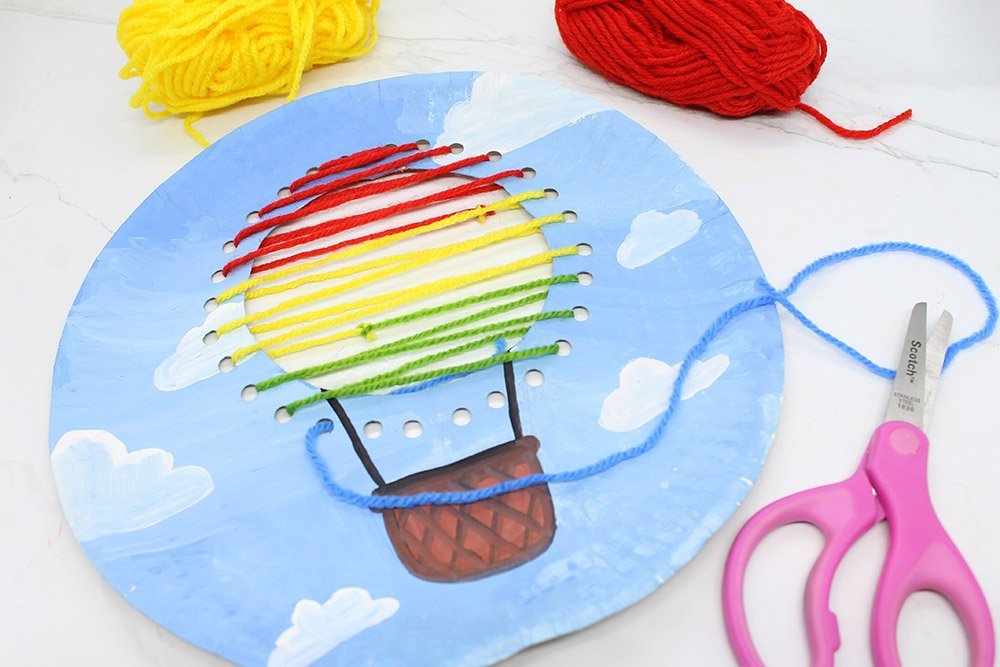
Fill the the rest with blue yarn.

Tie the yarn firmly in place.
The yarn should be straight and tied securely. The backside of the craft should be from extra yarn.

Viola! You now have made a challenging piece of art. But you're paper plate balloon is now done.
Extra Tips
- Dealing with the yarn might prove a bit tricky so asking someone for help would be alright. If you are having trouble, consider it as a challenge.
- You might need to cut the yarn if it's too long.


Mesmerizing at times to look at something pretty that i made
mine was okay👍🏽but could have been better. I think thats on me
Amazing!
Will recommend this to my girlfriends
It might seem difficult but the gyude made easier to me