Origami Butterfly Step By Step Instructions

Introduction:
This beautiful origami butterfly would make an awesome décor anywhere in your house. Making a 3D origami butterfly can be quite tricky to make, but with the help of this origami instruction, you can easily have your own. To make this intricate paper butterfly, it is better to use a sturdy piece of paper with a color on one side. That way it is easier to follow the instruction below.
Crease the origami paper first
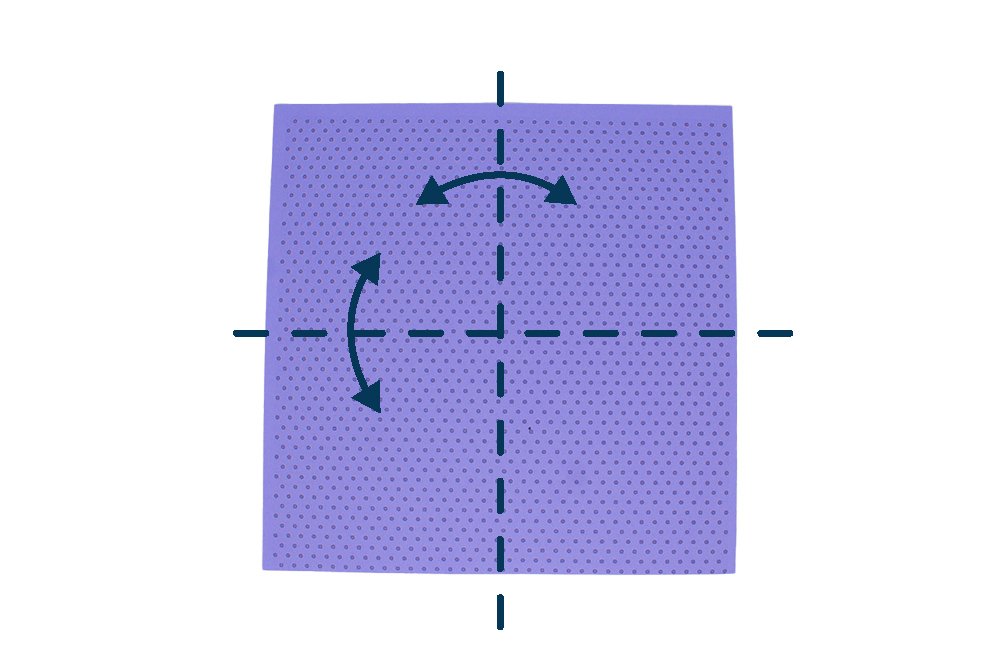
You will need a square piece of paper to make this origami butterfly. Fold the paper lengthwise and crosswise in half. Crease the paper well and unfold.
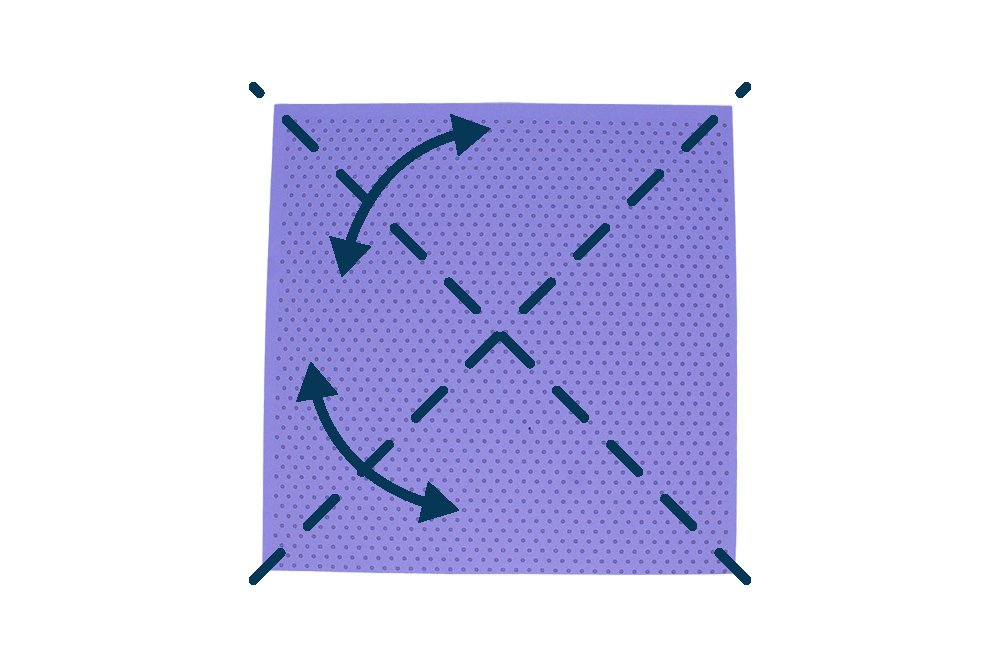
Diagonally fold the paper along the dashed lines. Crease the origami paper well and unfold.
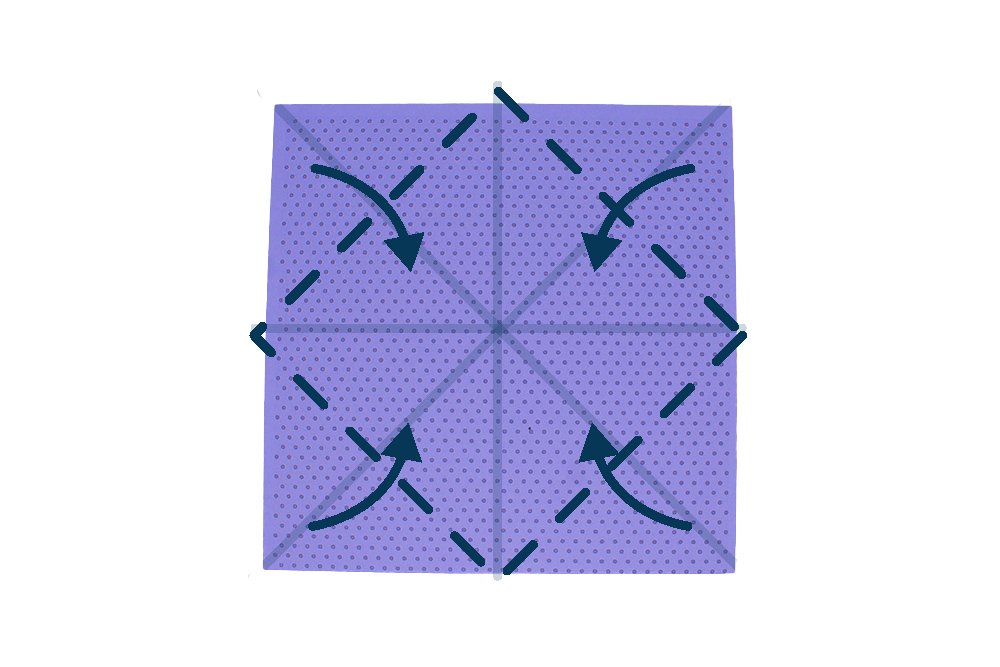
Bring all the four corners of the paper to the center. The center is the intersection of all the crease lines made in steps 1 and 2.
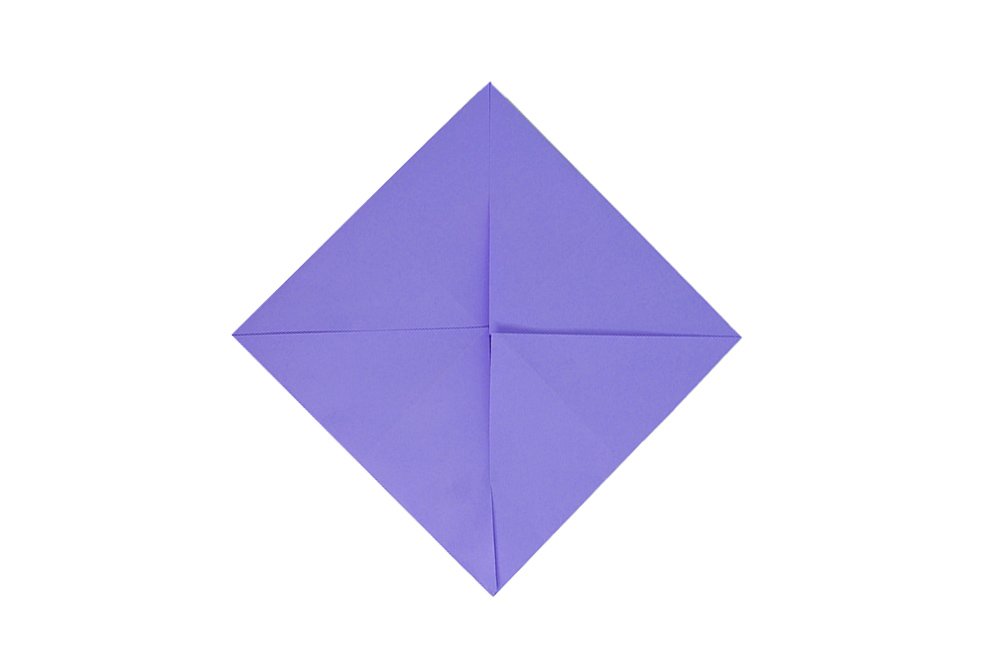
Turn the origami paper to the other side.
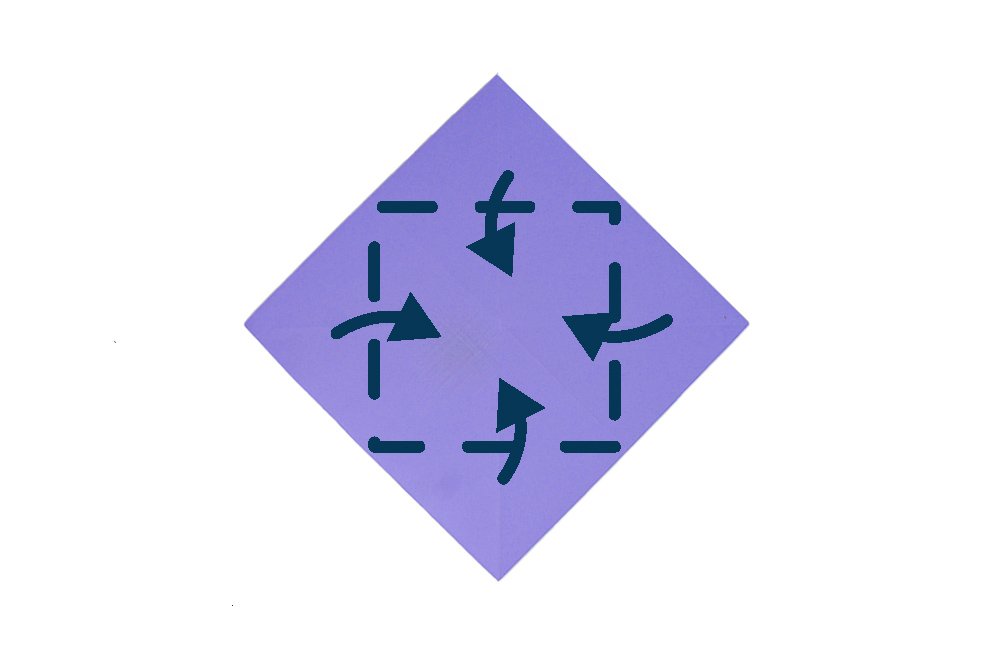
Again, bring all the four corners of the paper to the center.
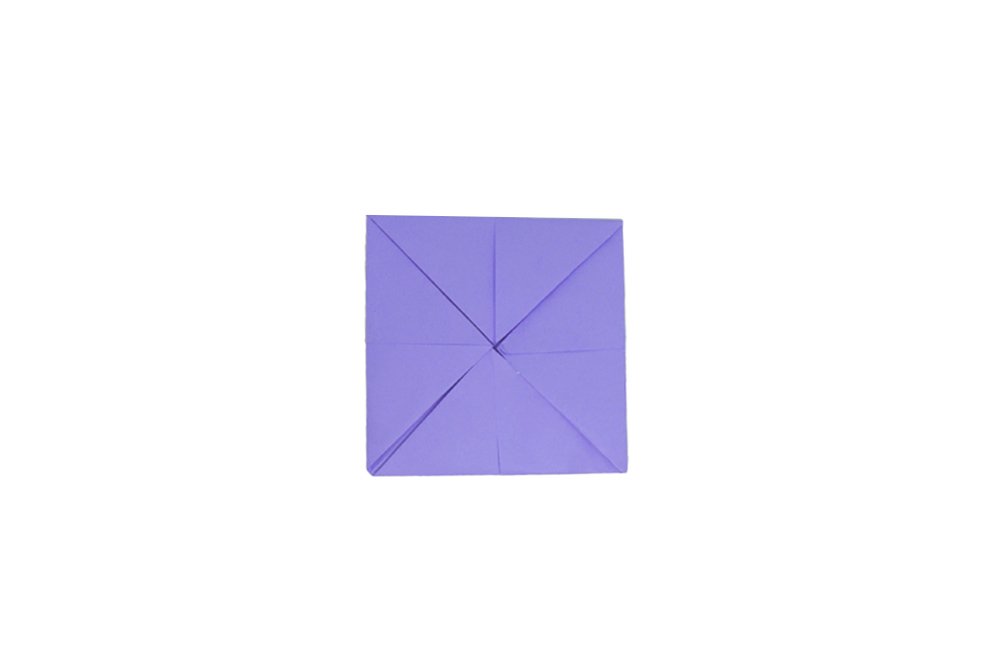
Unfold the origami paper until the first step.
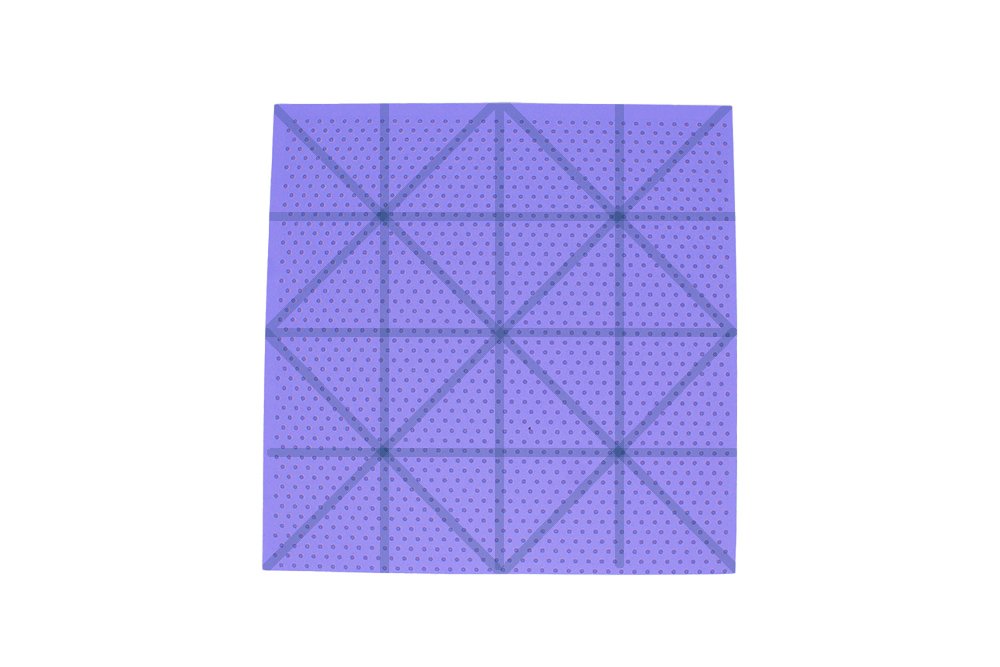
The paper should have crease marks like the image above
Build the base of the origami butterfly's wings
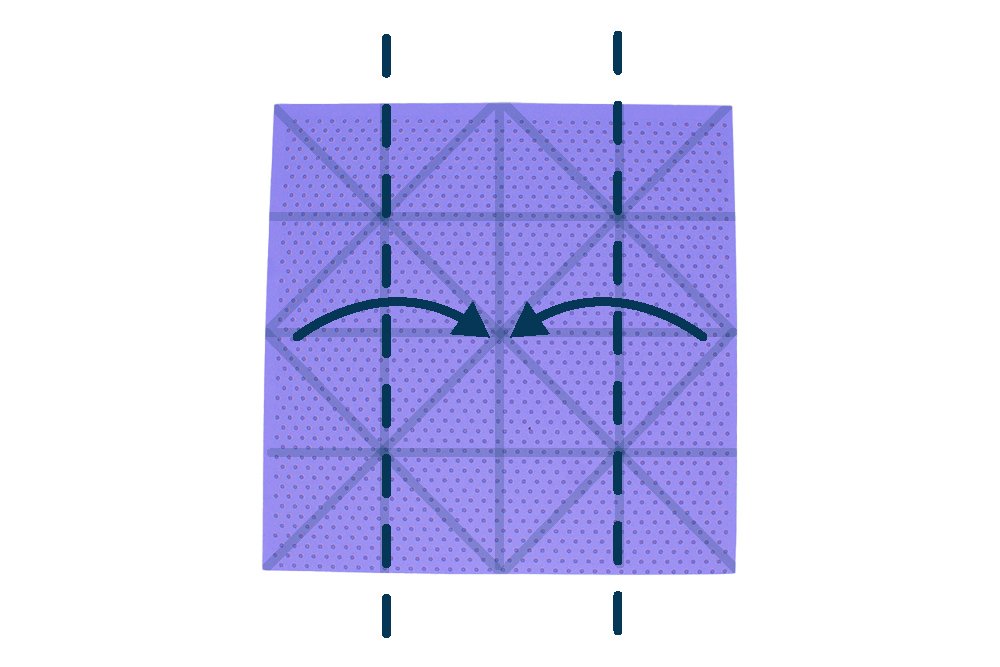
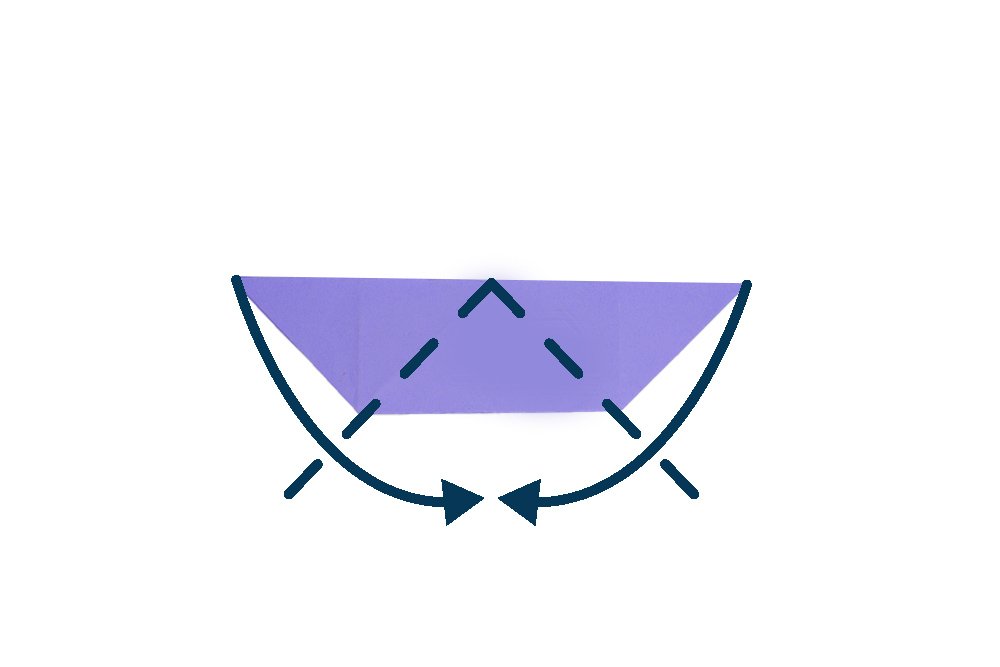
Fold the left and right sides along the dashed lines.
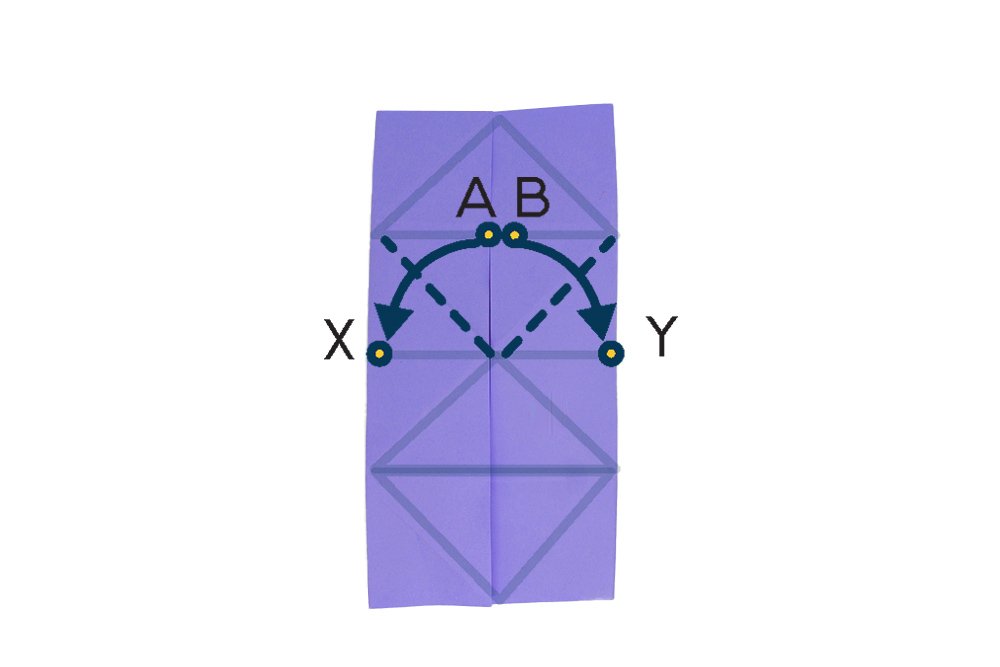
Fold point A down to point X. Do the same on the right side by folding point B down to point Y.

Squash the paper as you fold.
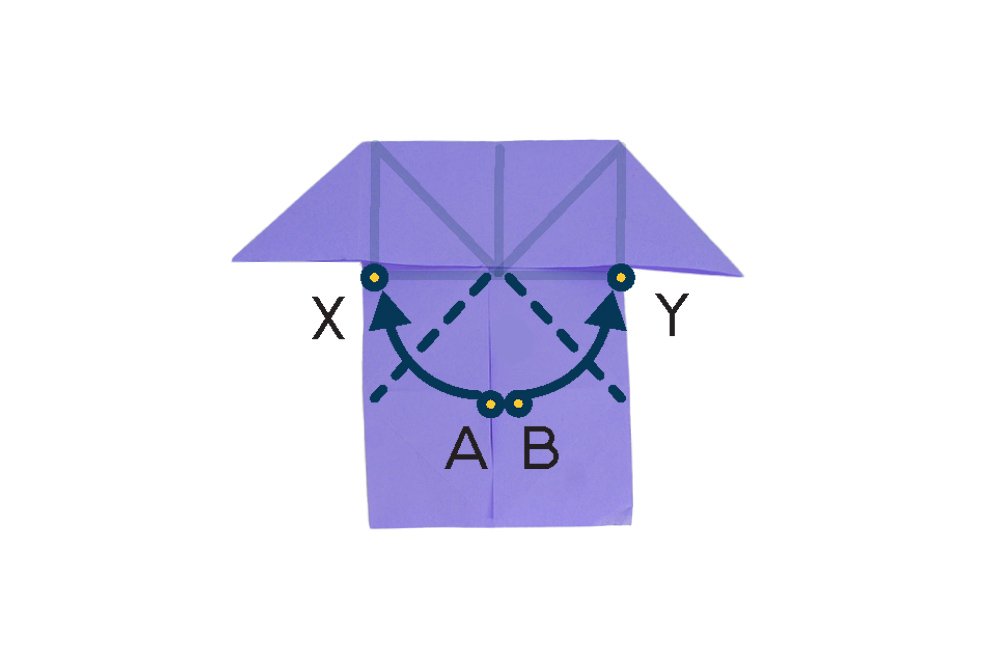
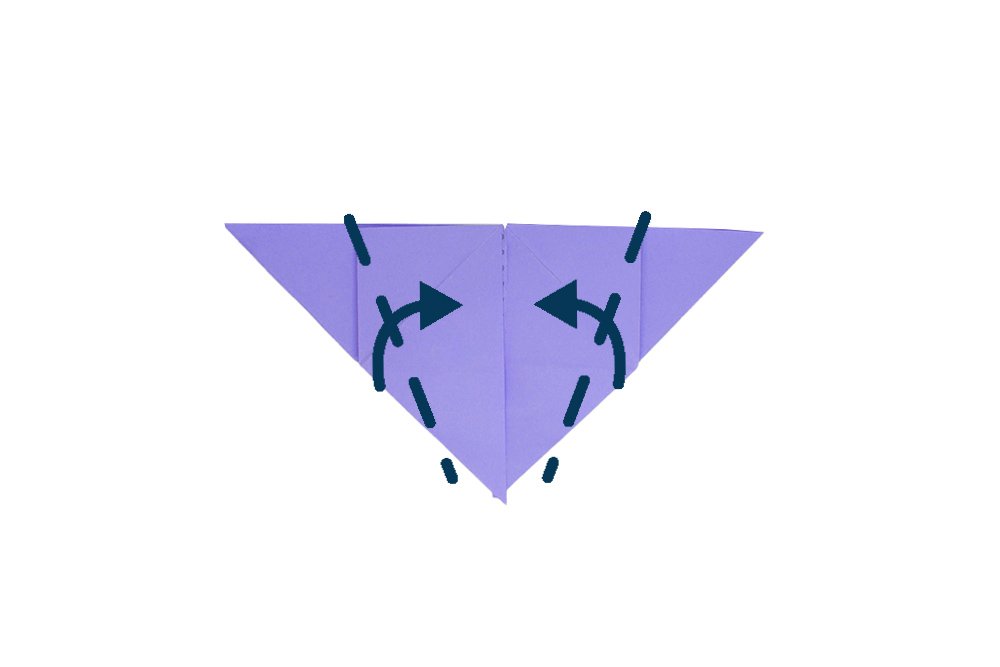
Repeat the previous steps on the bottom part of the paper. Fold point A upwards to point X. Do the same on the right side by folding point B upwards to point Y.
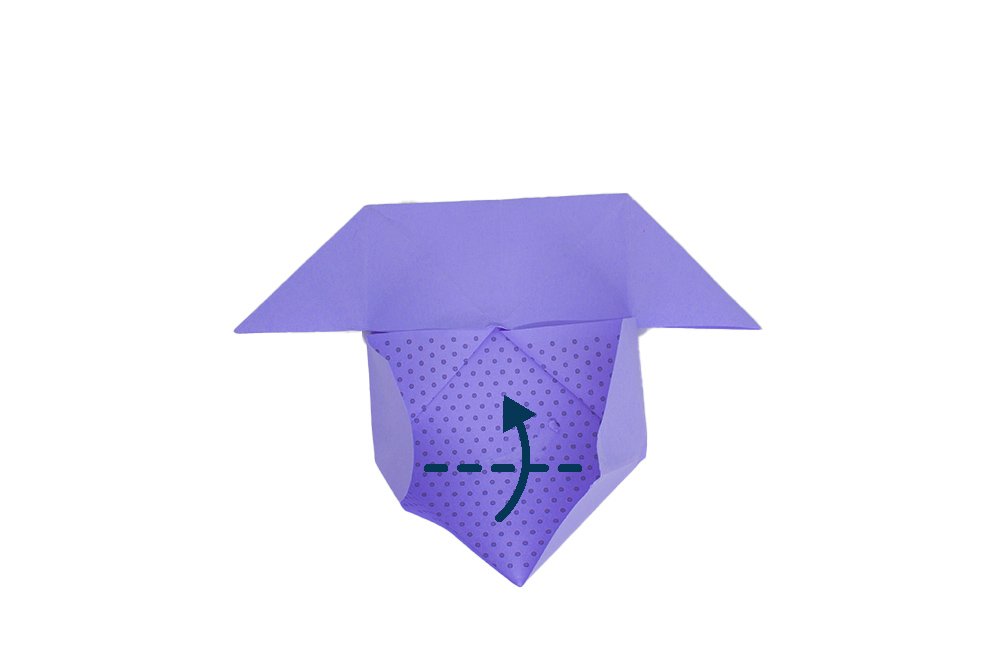
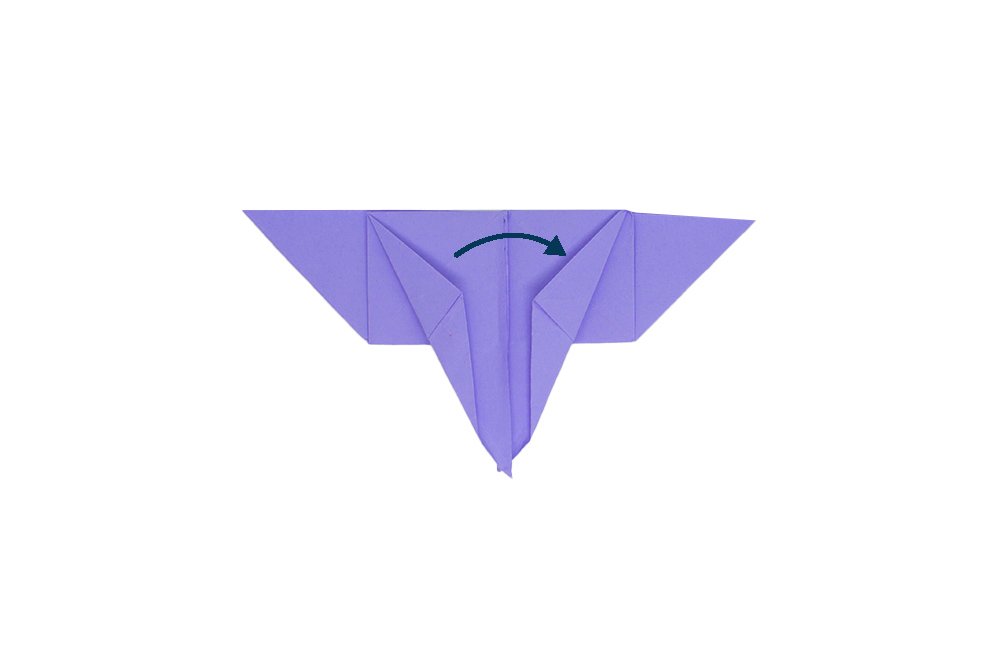
Fold the bottom part upwards. Follow along the dashed lined as shown.
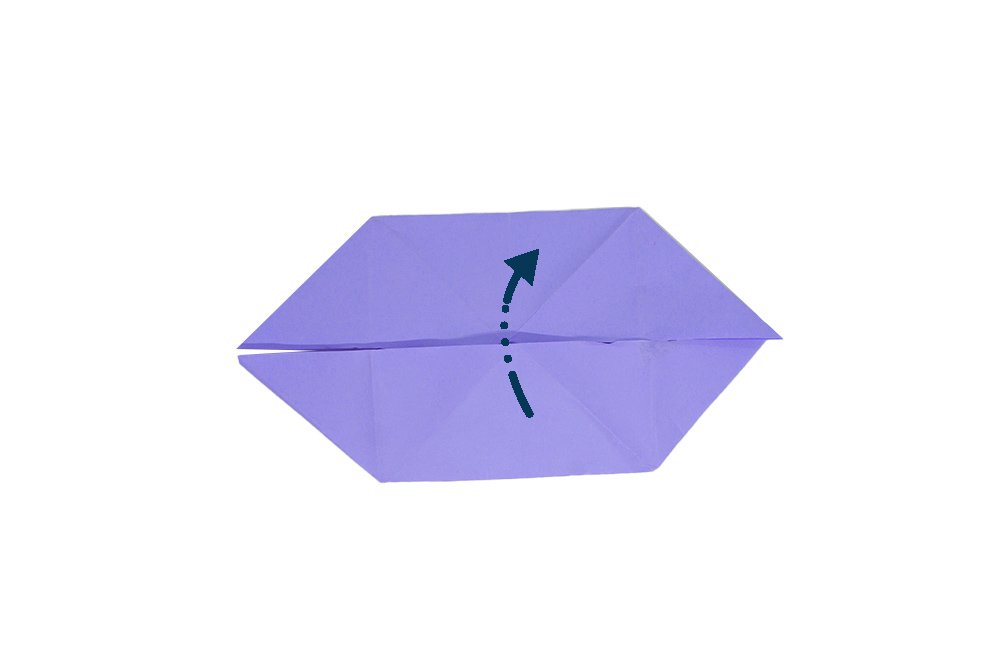
This will be the wings of the butterfly. To make it look like a 3D butterfly, mountain fold the paper in half.
Add some depth to the wings
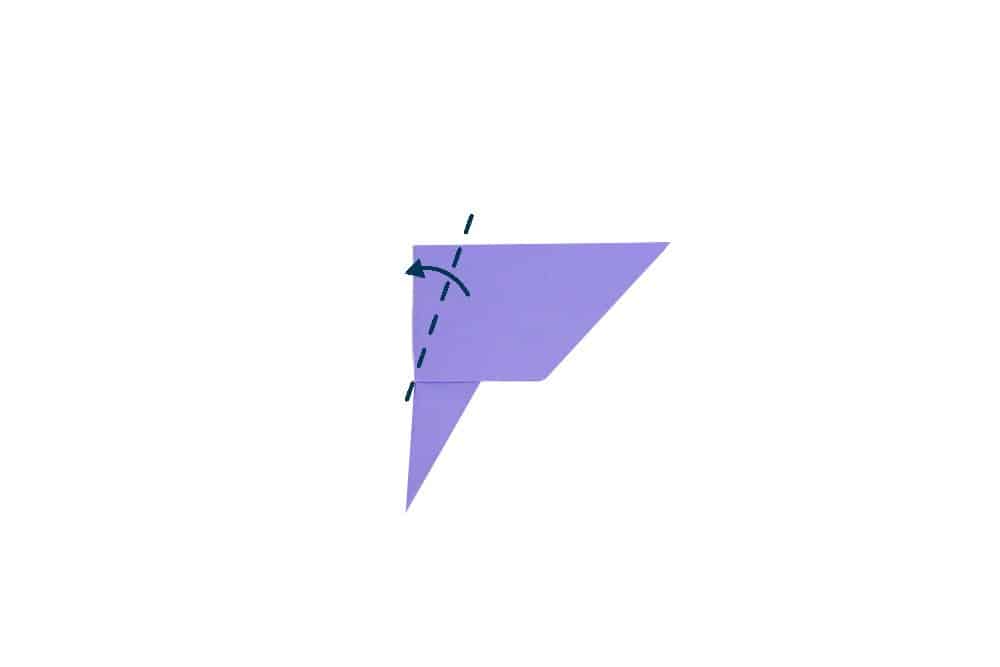
Fold the top corners of the front wing diagonally to the middle.
Diagonally fold the top layer as shown in the image above.
Mountain fold the back wing of the origami butterfly in half.
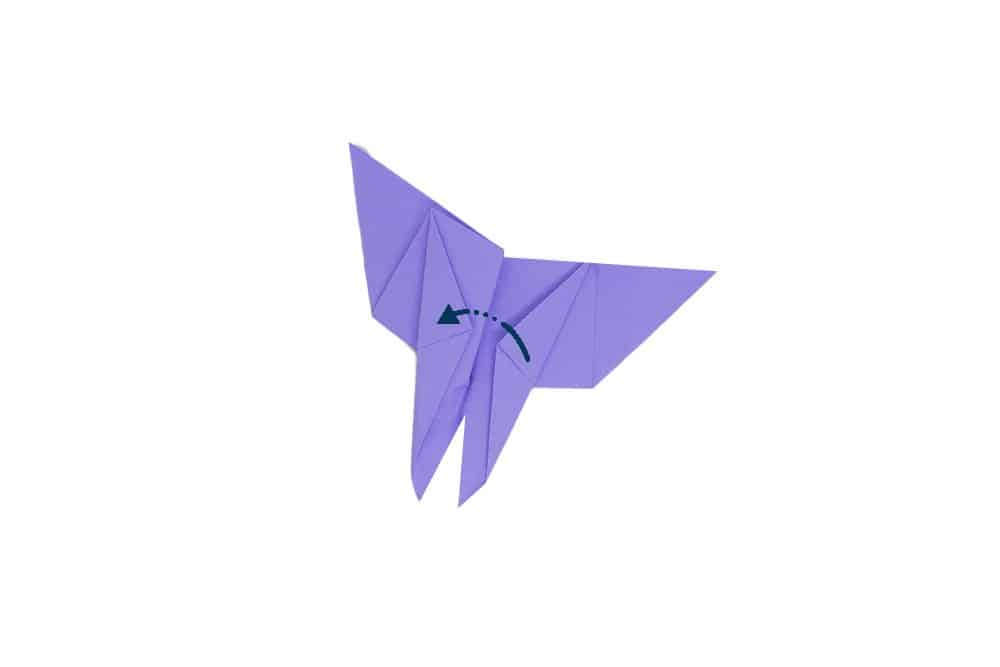
To make the origami butterfly more three-dimensional, fold the front wing diagonally to the left.
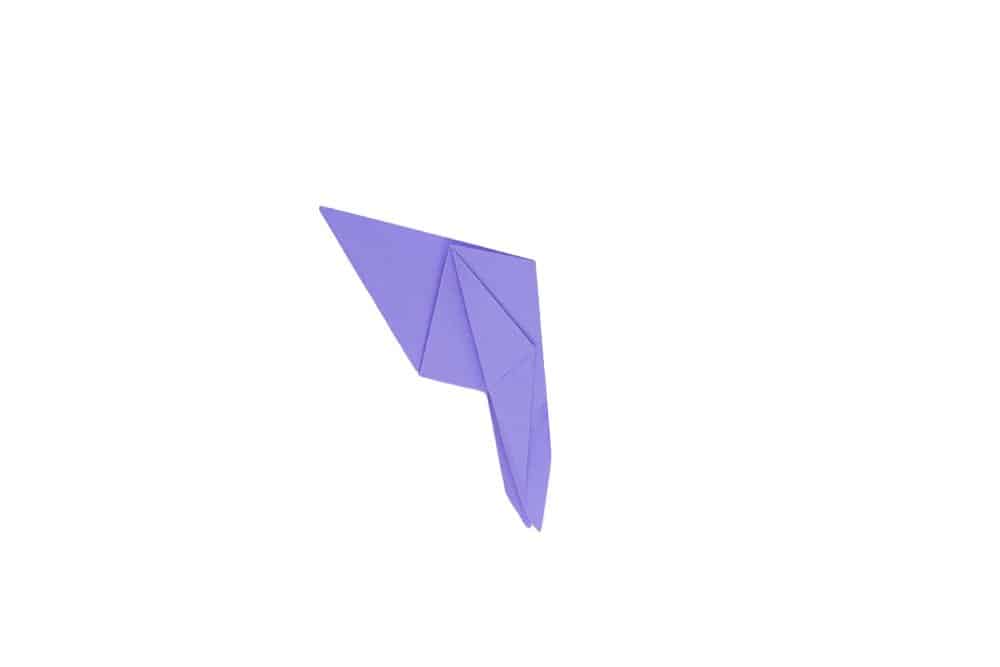
Fold the right wing to the back.
You’re almost done! Now open the wings out.
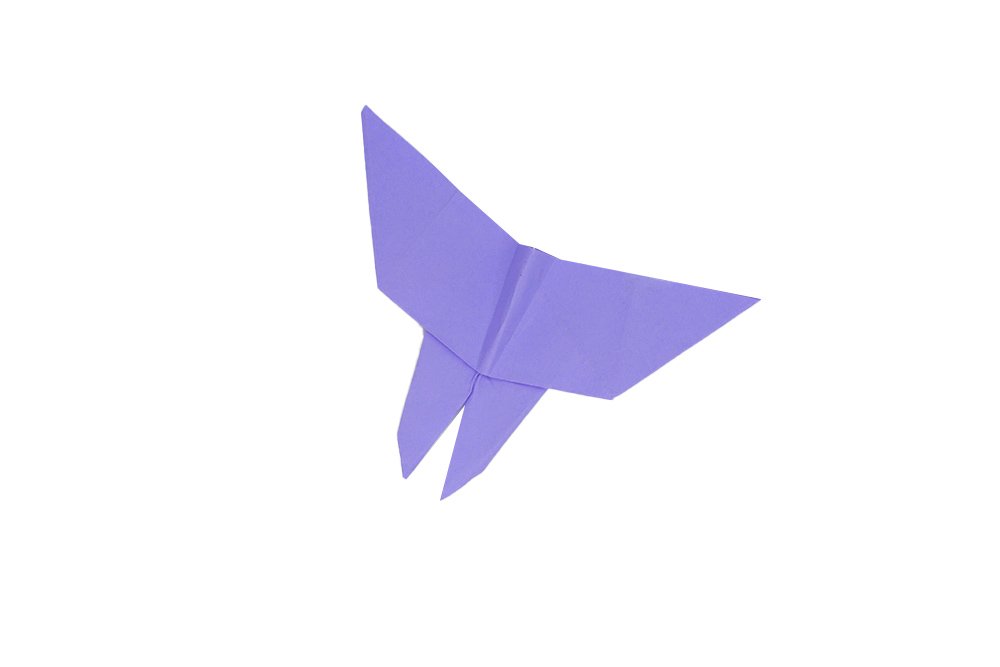
Your 3D origami butterfly is done!
Extra Tips
- Make lots of these paper butterflies and turn them into a beautiful room décor.
- Try making a butterfly put of a dollar bill! You can find how to make one at are dollar origami bill section!

I can’t believe this is actually made in two minutes
😲wow 🤩 and it’s beautiful✨😍😊
I actually did this with normal paper and it still worked out its so perfect tysm ❤
I LOVE making mini versions of these and then tying them onto clear string and hanging them from the ceiling 😍
wow super cool
coolio!!!