Create an Origami Sitting Dog Instructions in 15 Steps

Introduction:
There are a lot of ways to make a paper dog. One way is this 15-step origami instruction that resembles a dog sitting once finished. To make this origami dog, you will be needing a sturdy piece of paper. That way, the dog can sit on its own, once finished.
This is an intermediate-level origami but any beginner can successfully create this with the help of the instructions. And oh, if you like dogs then do know that we have other origami dogs on this website.
Enjoy reading the guide!
Fold the paper Into a triangle
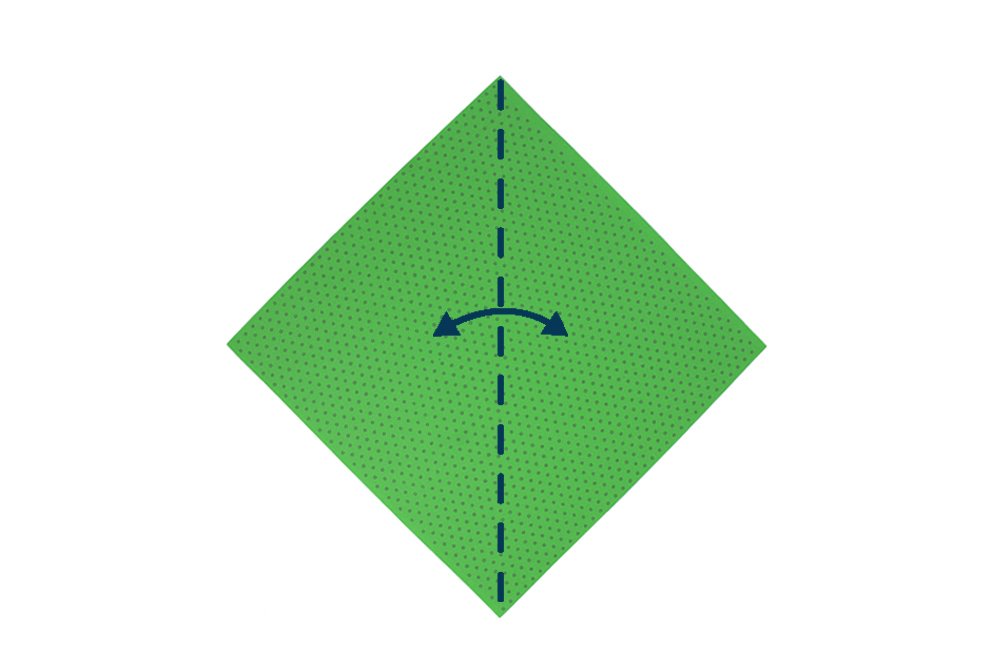
For the first set of steps you will be folding the paper into a scalene triangle. Start with a square piece of origami paper and lay it on a flat surface. Fold it in half as shown. Crease the paper well and unfold.
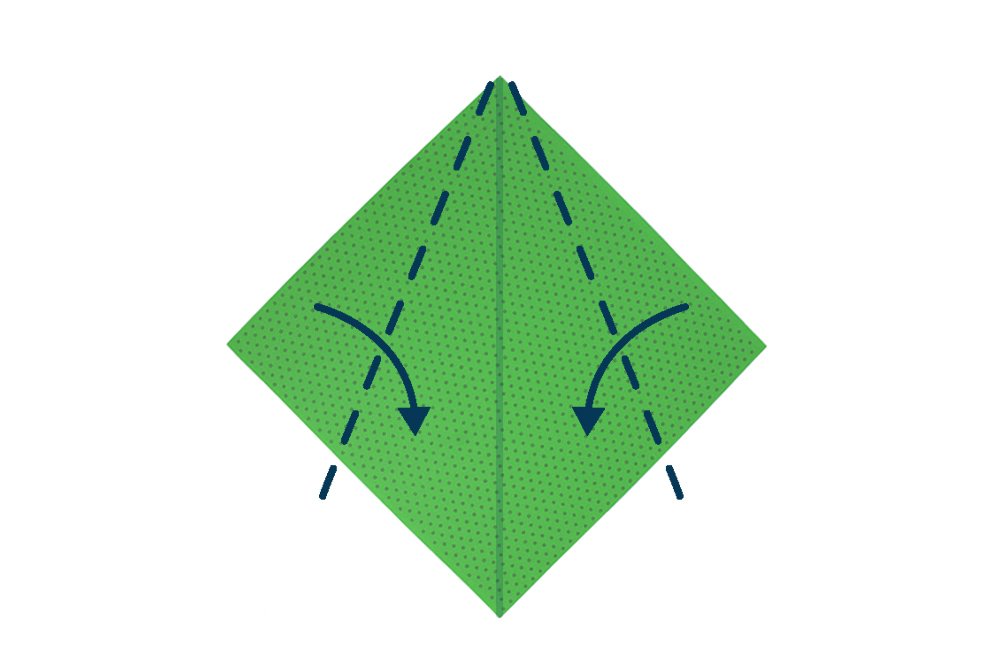
The second step is to fold the left and right corners to the center crease line.
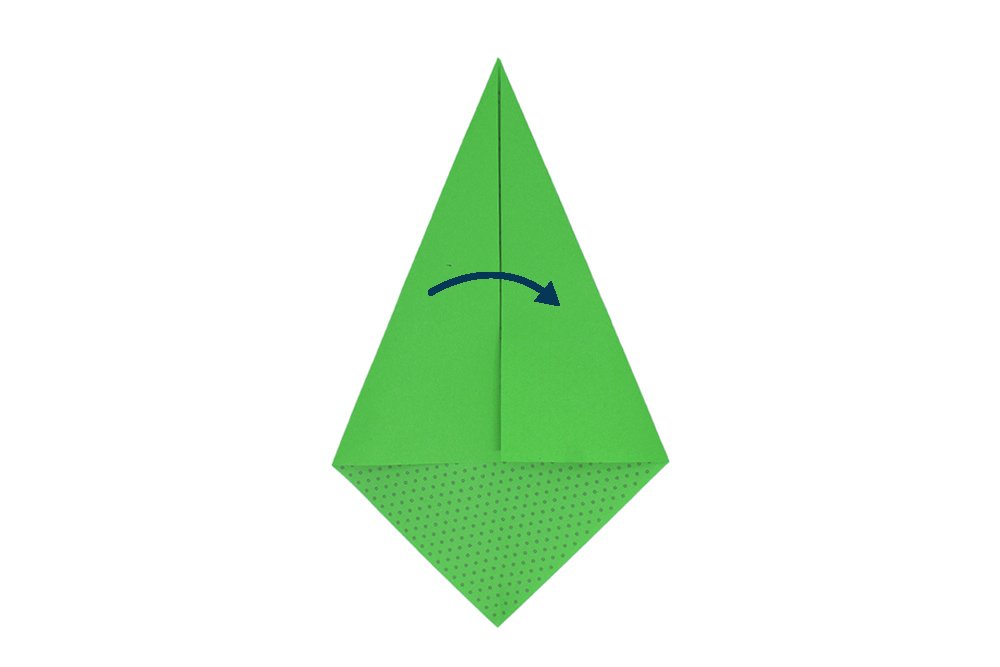
Vertically fold the paper in half as shown.

This is what your origami paper should look like now. Time for the next group of steps!
Make the head of the origami sitting dog

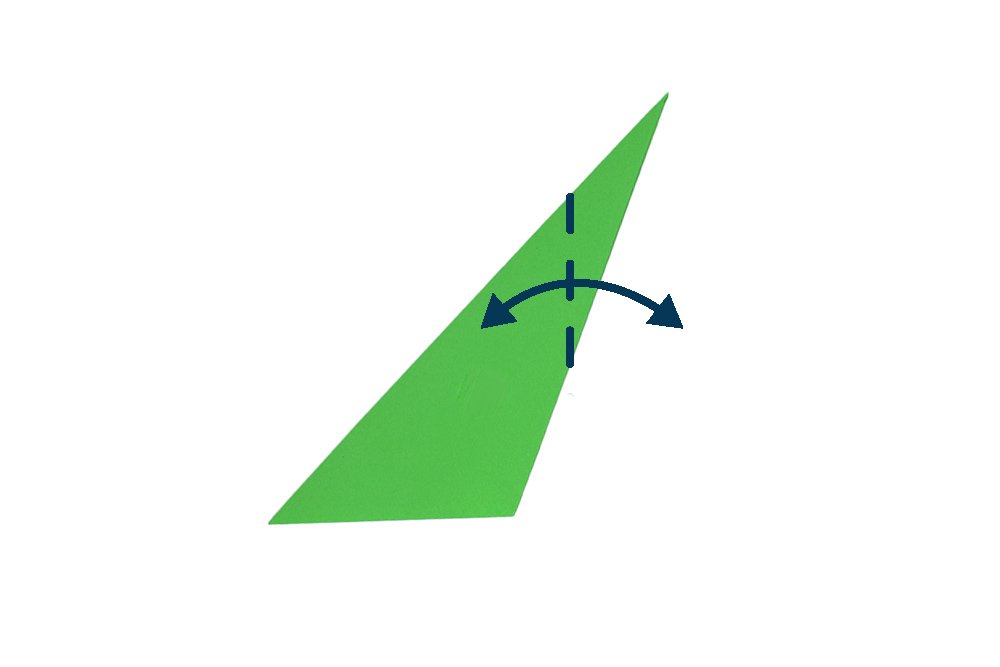
Rotate the origami paper 45 degrees clockwise.
Bring the top corner to the left as shown. Follow along the dashed line as illustrated. After that, crease the paper well and unfold.
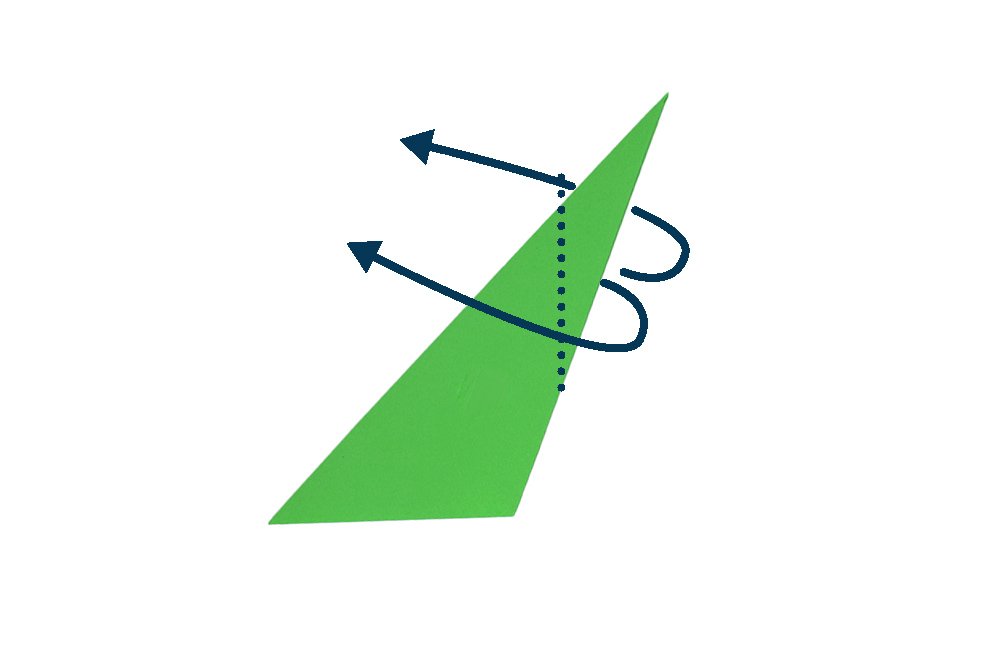
Make an outside reverse fold along the crease line. Make this fold by prying open the layers along the crease line made in the previous step. After that, flip the layers inside out.

Crease along the dashed line as illustrated above.
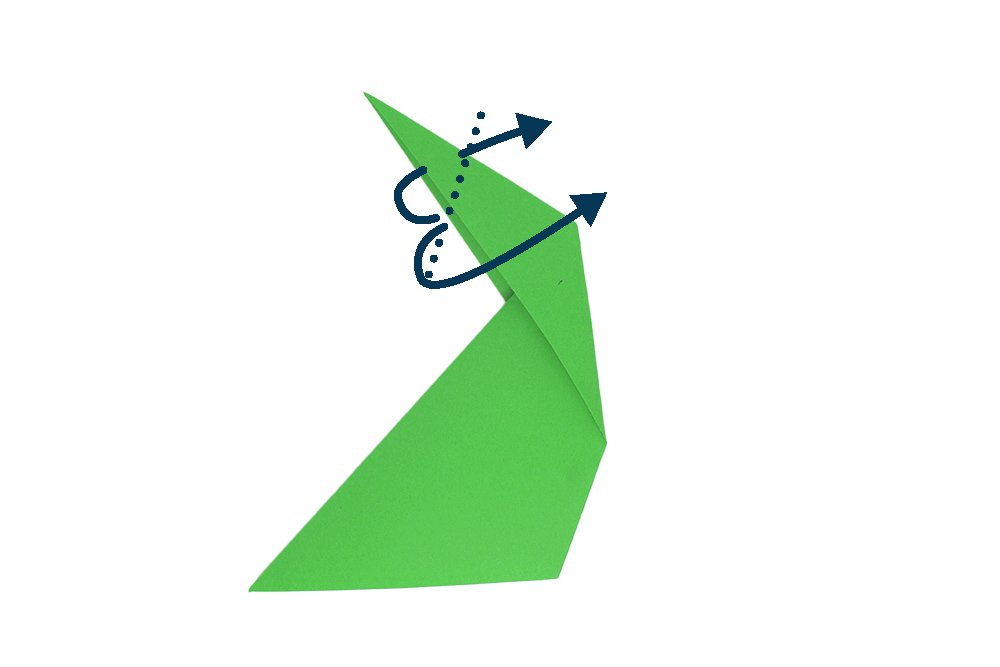
Make another outside reverse fold on the crease mark made in the previous step.
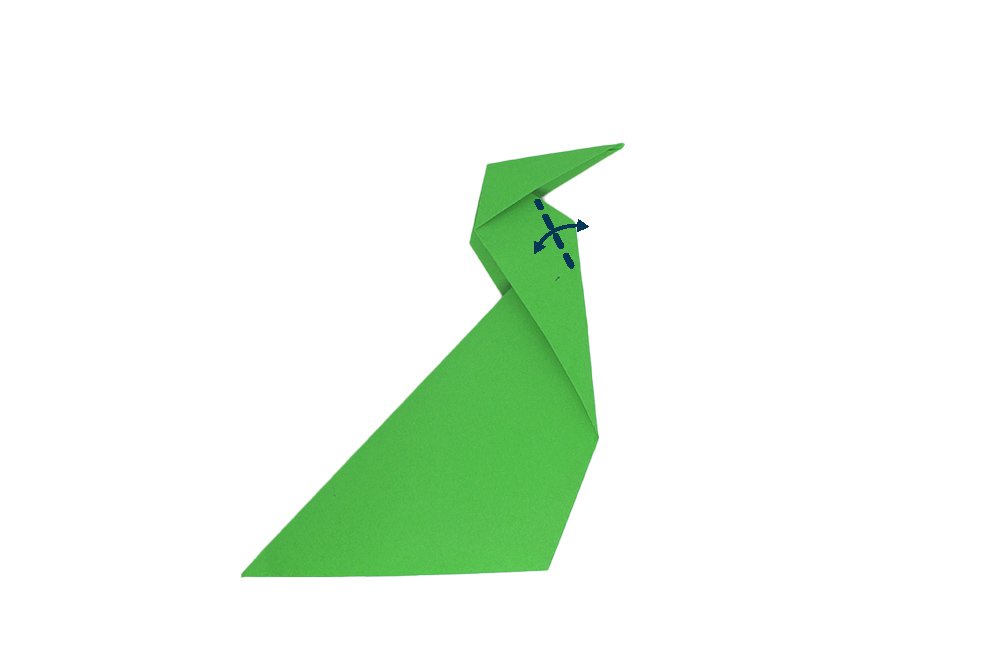
Slim down the dog by making a crease line along the dashed line.
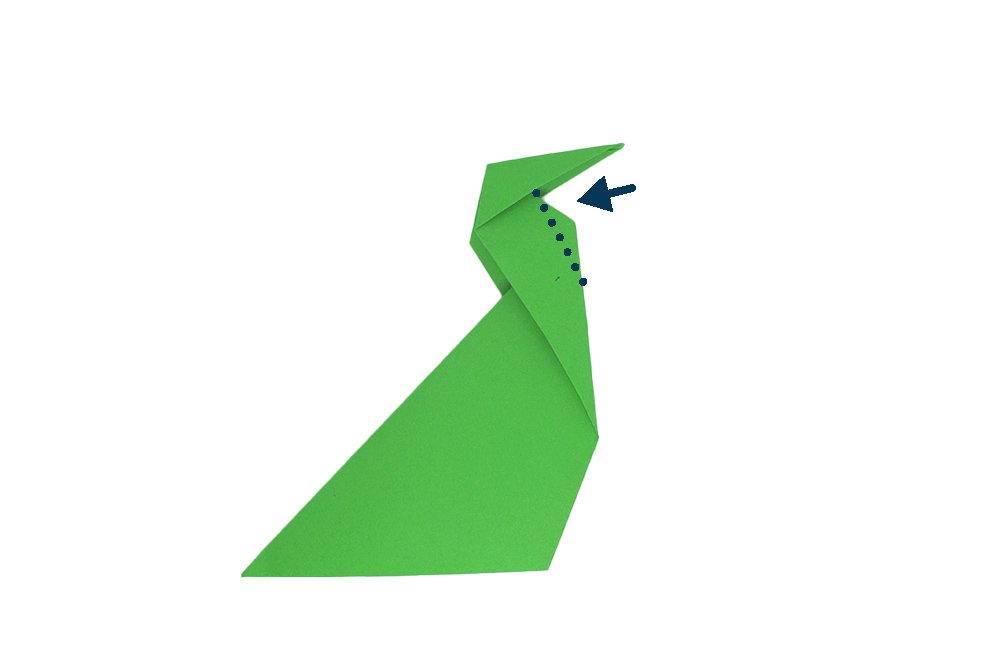
Below the head of the dog, “sink” along the dotted line as shown.
Please refer to the two images above in order to continue making the sitting dog's head.
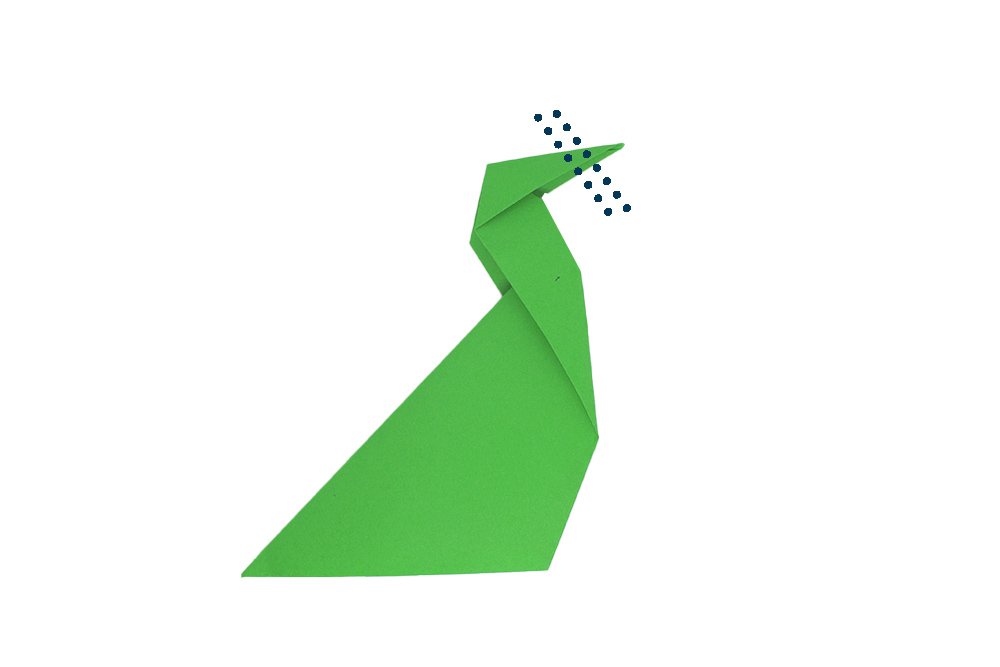
Make a crimp by folding in and out along the dotted lines.
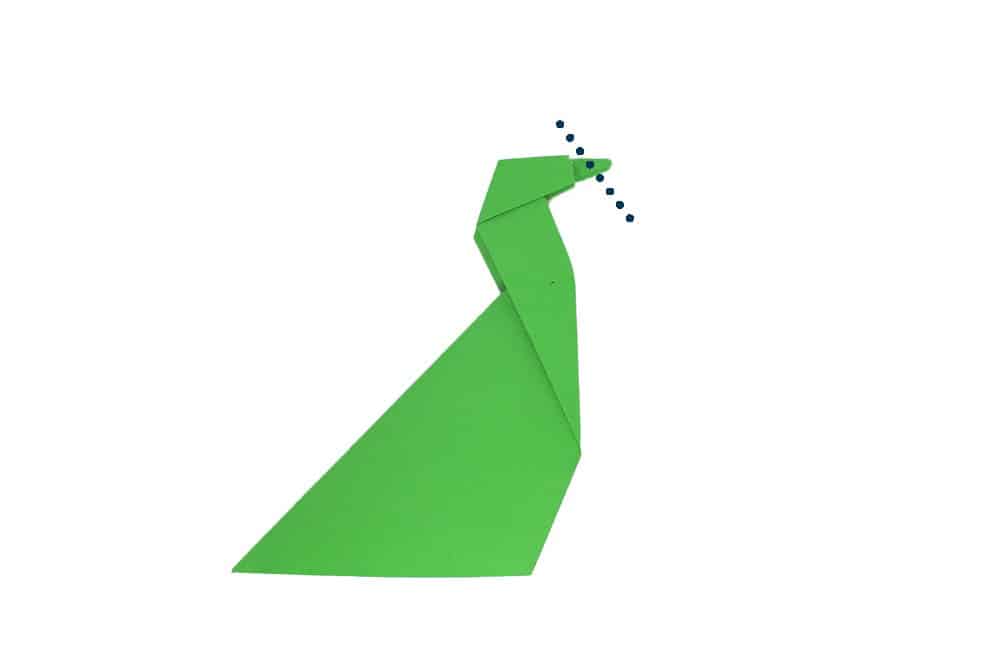
Make the dog's snout smaller by folding the tip at the back.
Make the tail of the paper sitting dog
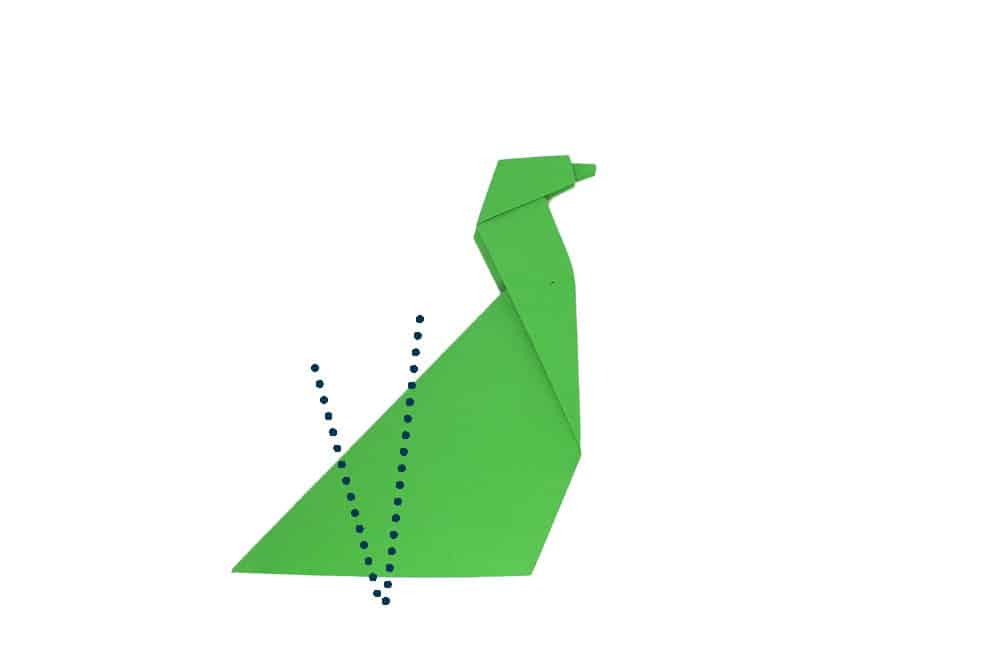
Make an inside reverse fold along the dotted lines. This will be the tail of the dog.
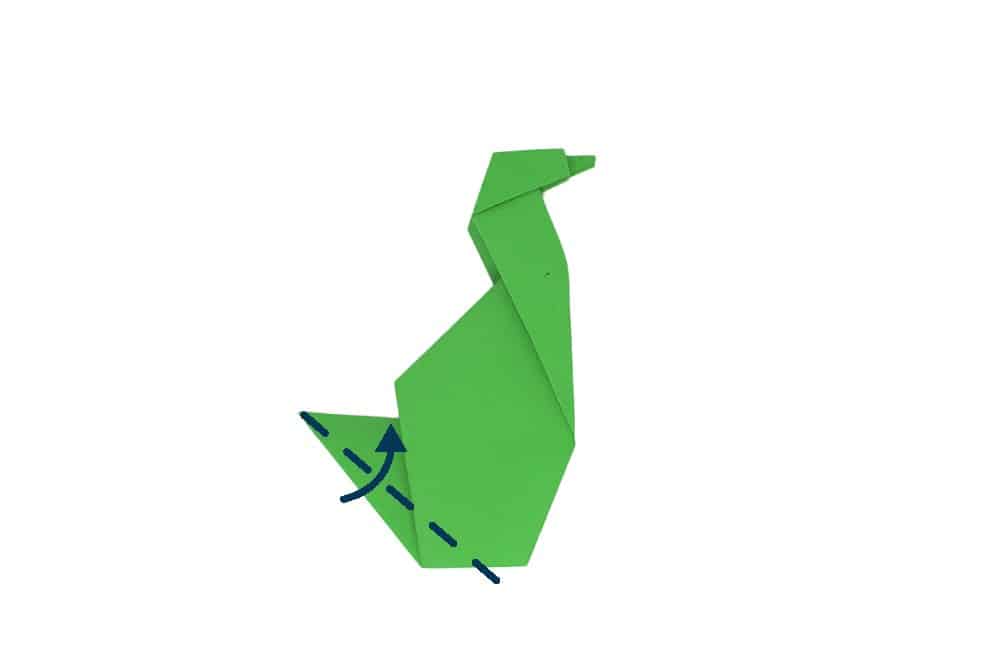
Lastly, fold the bottom left corner upwards.
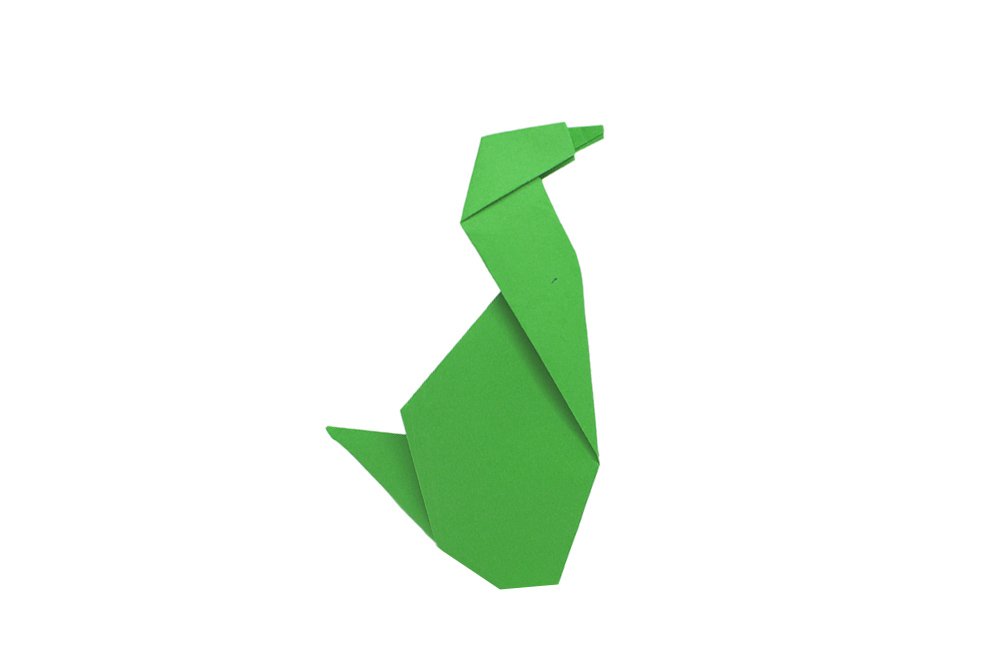
Your origami sitting dog is done! You can make another awesome origami dog on our catalogue. There are many versions of dog origami, Discover new ways here!
Extra Tips
- Apply enough pressure when making crease lines and make your lines straight.
- Make sure to make straight folds, and apply enough pressure all the way when folding.
- Make sure to follow the steps closely. Focus but don't forget to have fun.


Noice!
I have to look reeeeeeeeeeeeeeeeeeeeeeallly closely to figure out it’s a dog!
IKR. but it is sitting so that might be the reason why
kinda hard but cool 😅
cool! what a unique way to make a dog