Easy Paper Plate Rainbow Stand Decoration

Introduction:
Create this cute paper plate rainbow that you can use as decoration. It’s a super simple project that kids can do with their parents or guardians. It’s a great activity for preschoolers and beginners. It is an educational activity that kids can learn how to differentiate colors.
What’s great about this craft is that it can stand on its own. You can use it to decorate any shelf or table!
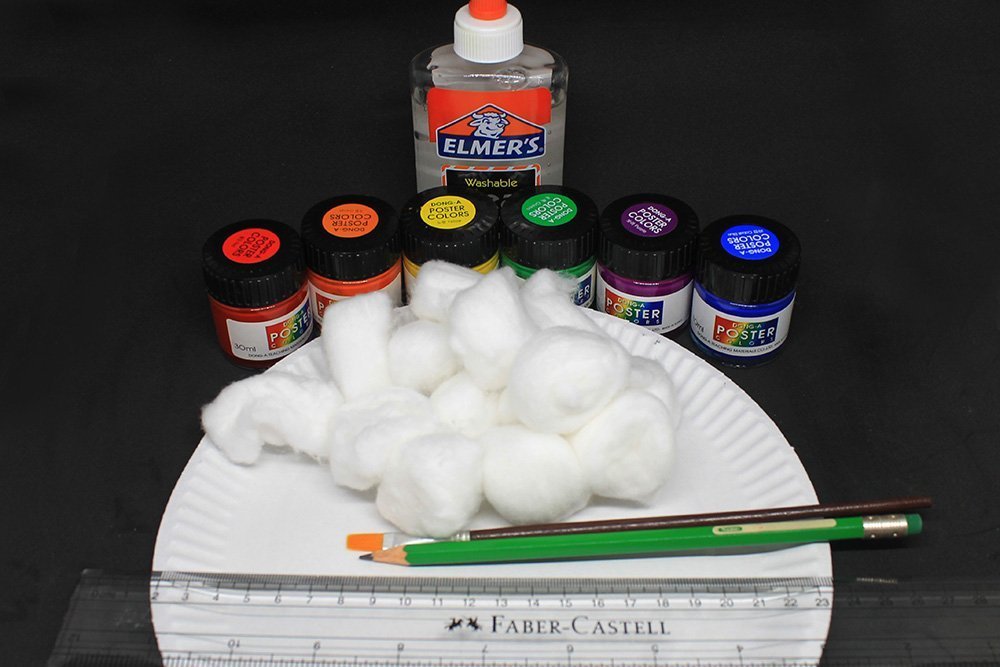
Tools
- Ruler
- Pencil
- A slim paintbrush
Supplies
- Paper Plate (For this tutorial, we used a 9-inch paper plate)
- Poster/Acrylic Paint – red, orange, yellow, green, blue, purple
- Cotton balls
- Glue
Create the base of the paper plate rainbow stand
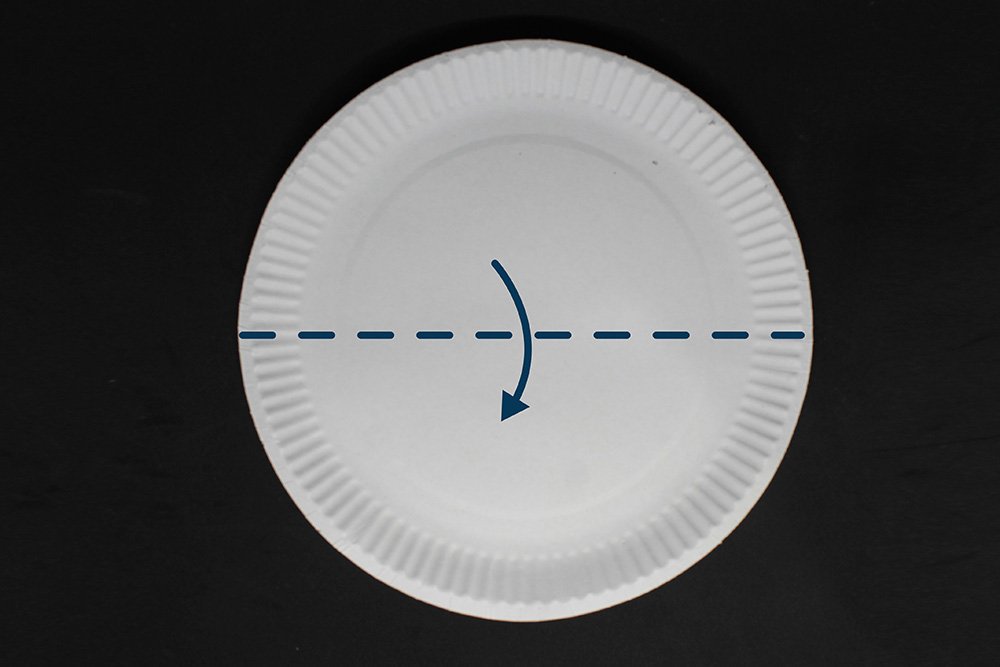
Face the front side of your plate. Fold the paper plate in half. Crease it well and unfold.
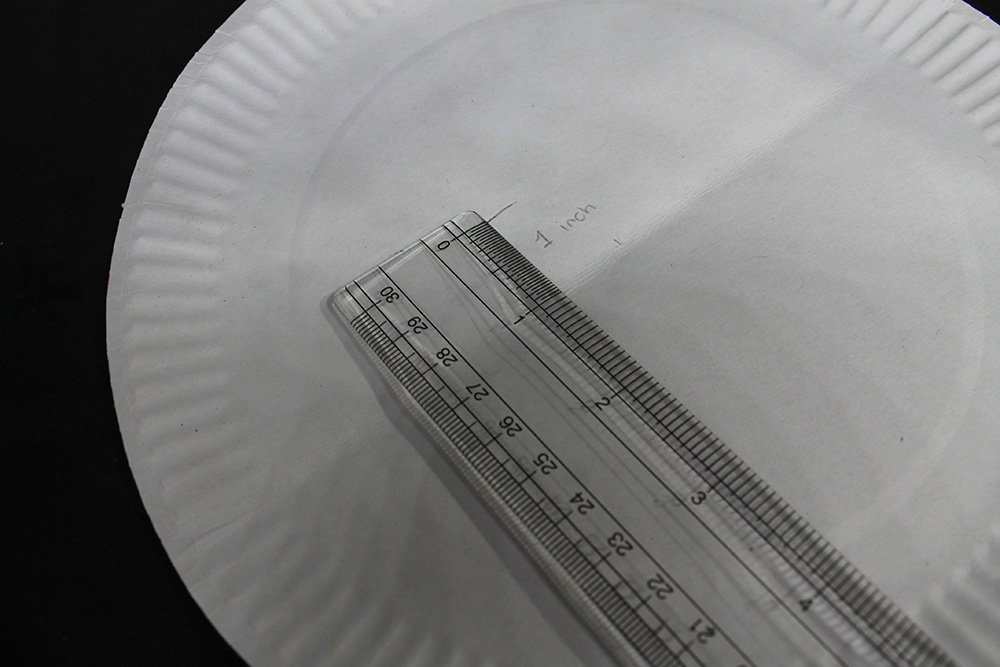
After making a crease line, mark an inch on each side of your crease mark.
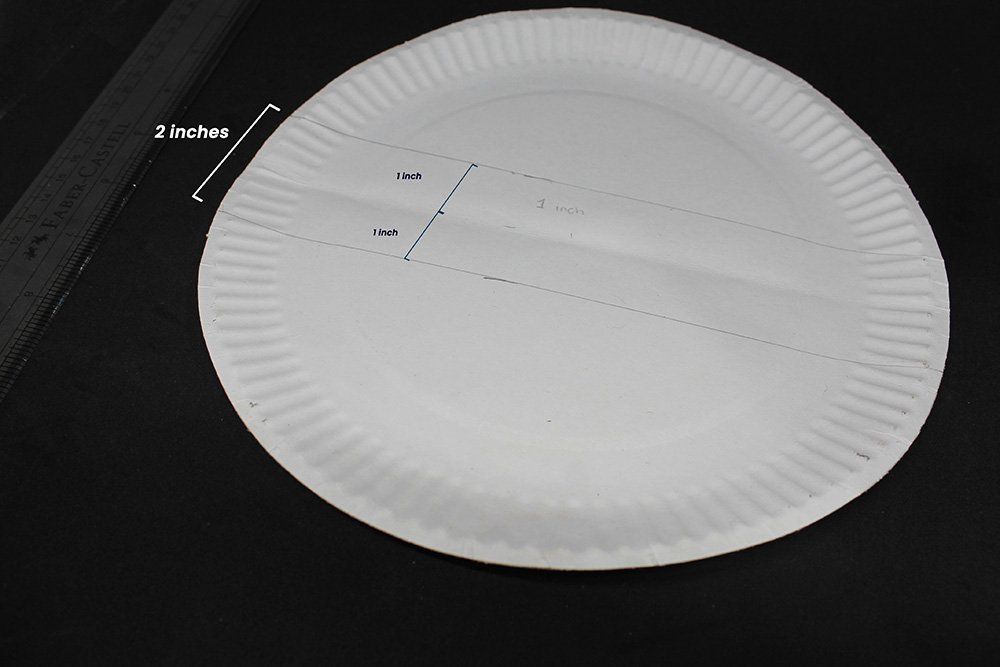
Draw a straight line on each 1inch mark using a ruler. See the photo above for guidance.
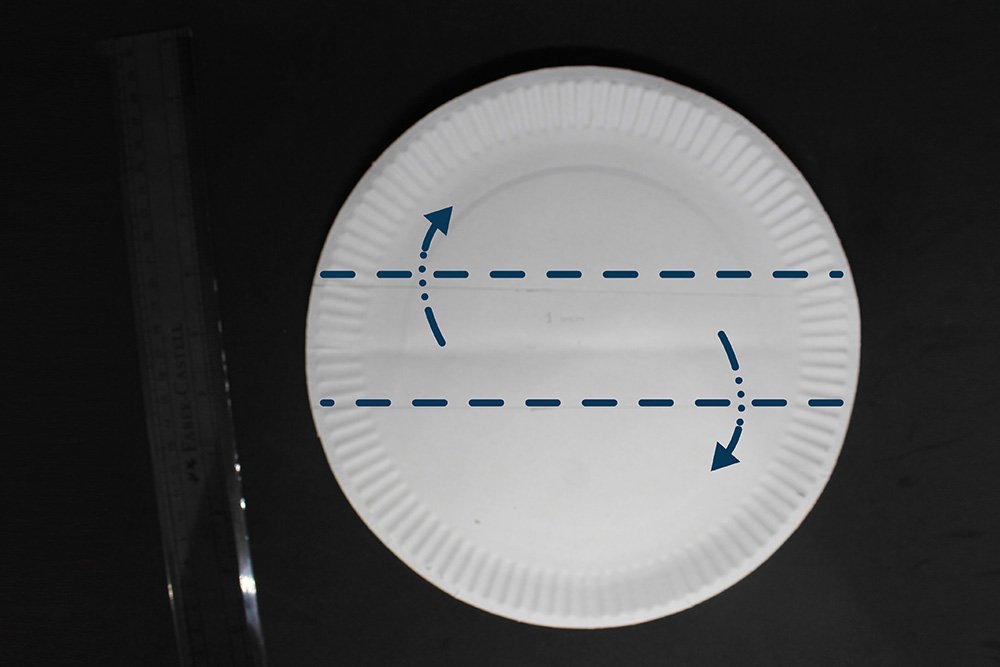
Mountain fold along the straight line made. It should look like a taco shell once folded.
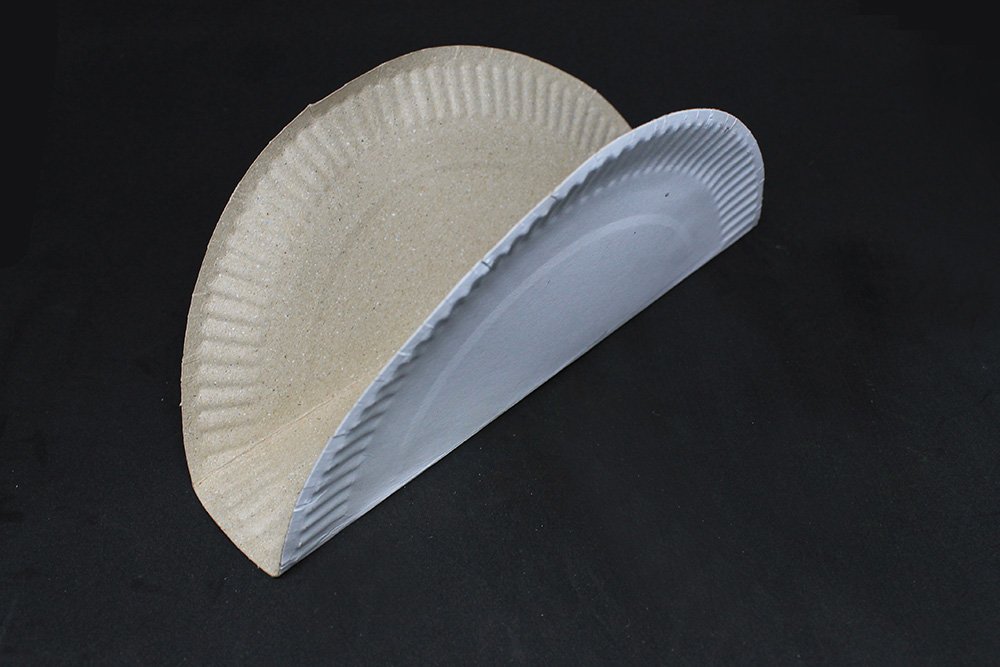
The rainbow base stand is now finished!
Paint the plate to make the rainbow
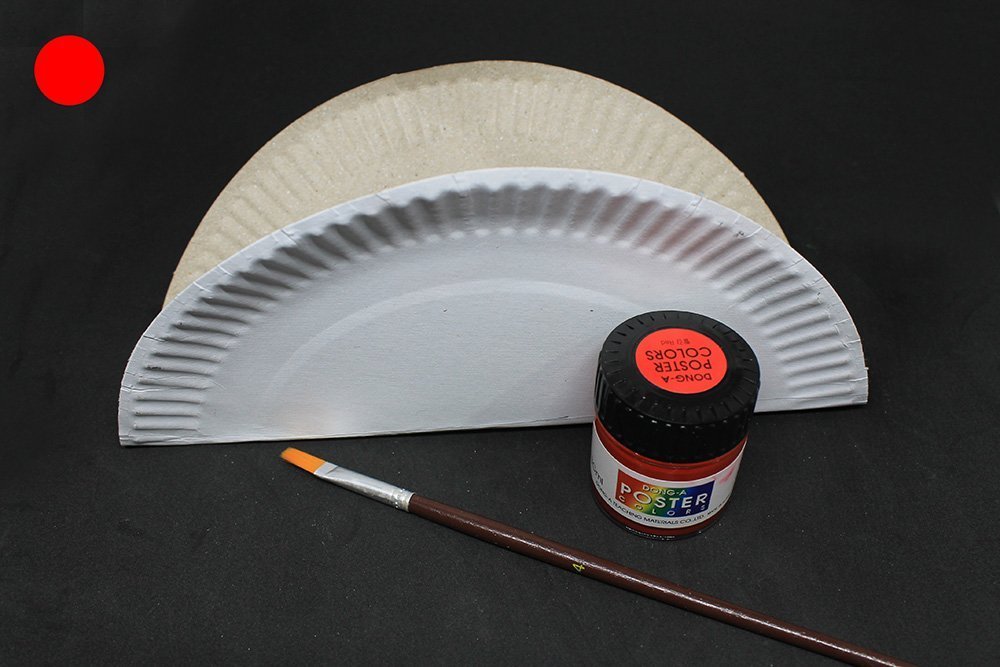
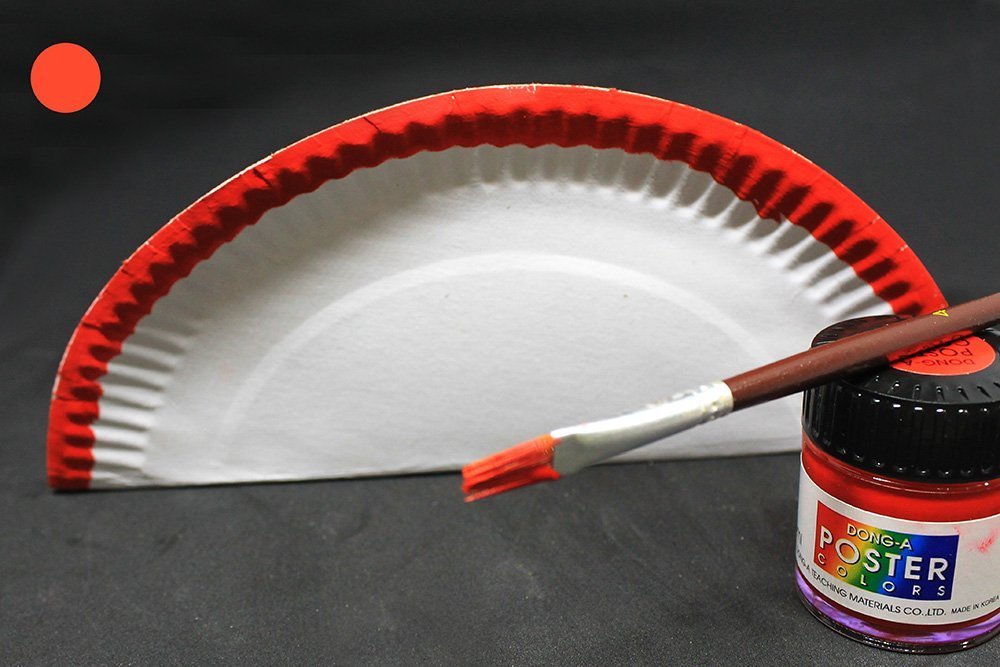
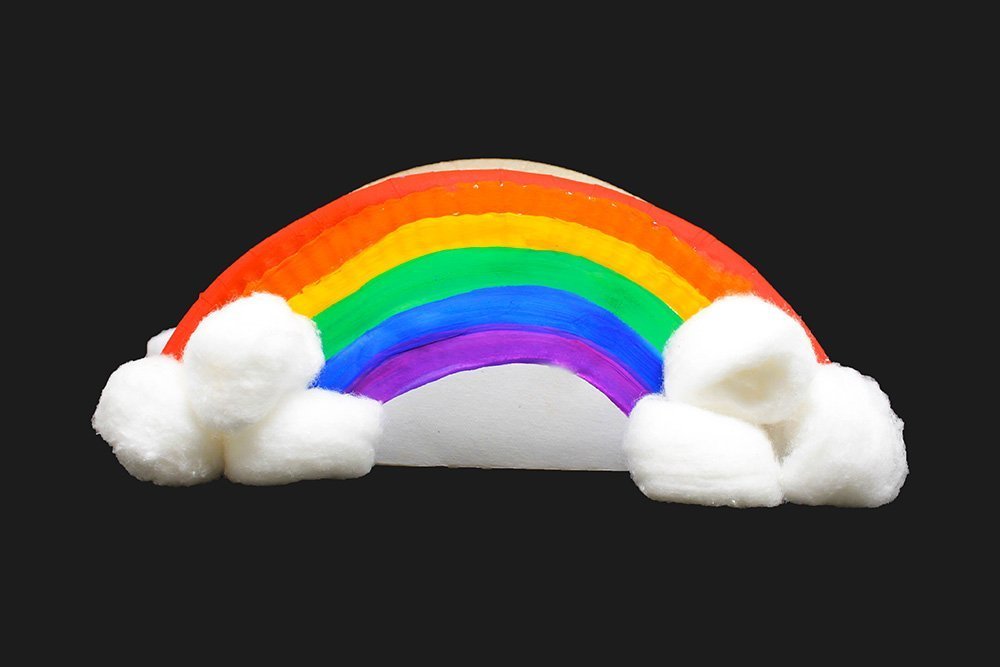
Using red paint, paint a line on the edge of one side of the paper plate.
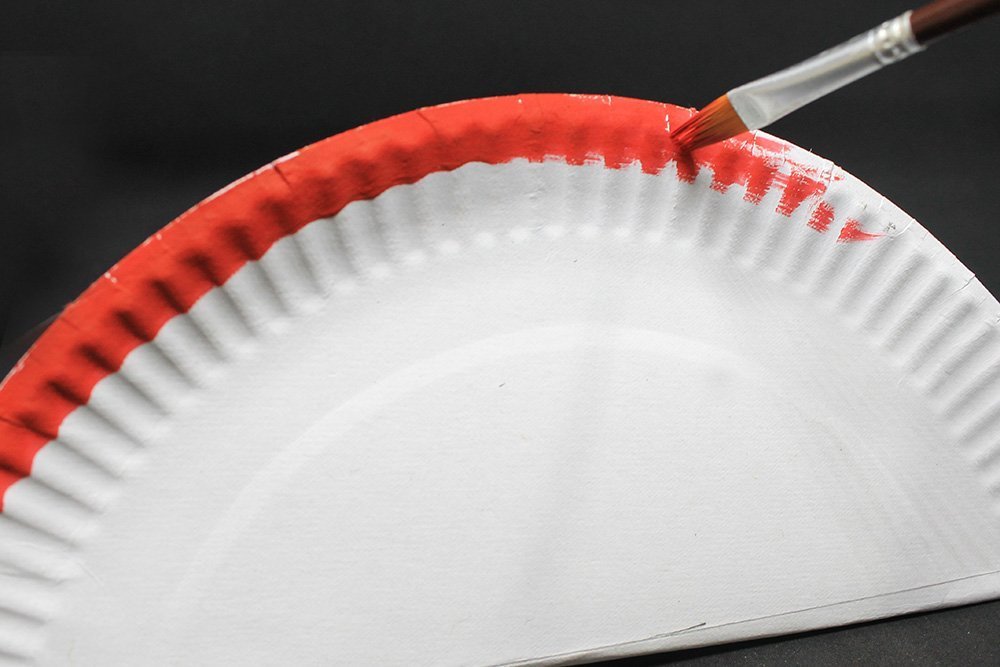
Paint it closely to the border following an arch path.
Now paint an orange arch line below the red arch.
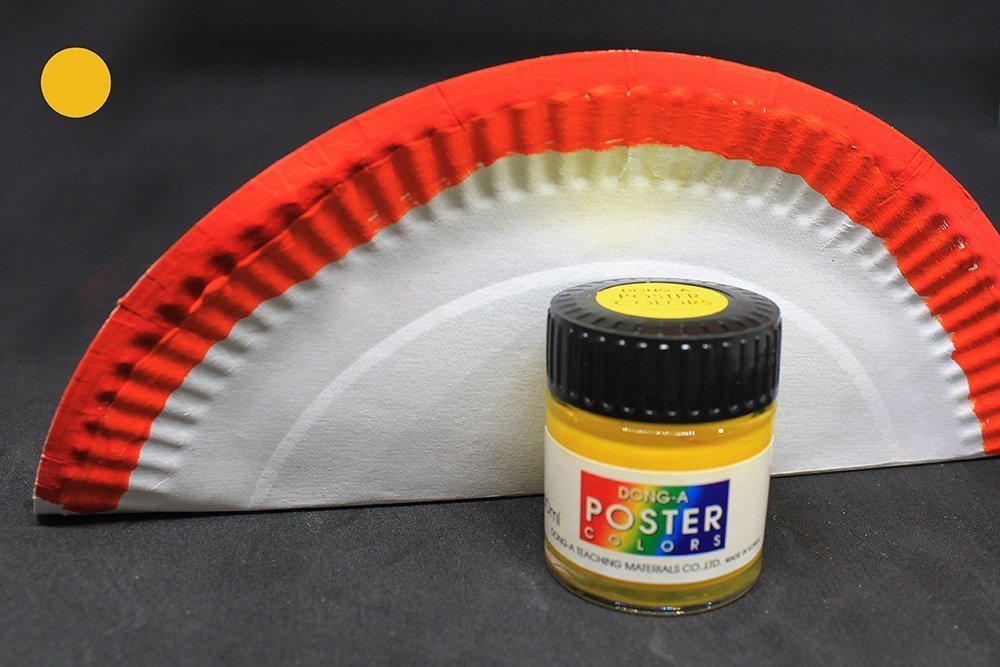
Paint a yellow arch beneath the orange line.
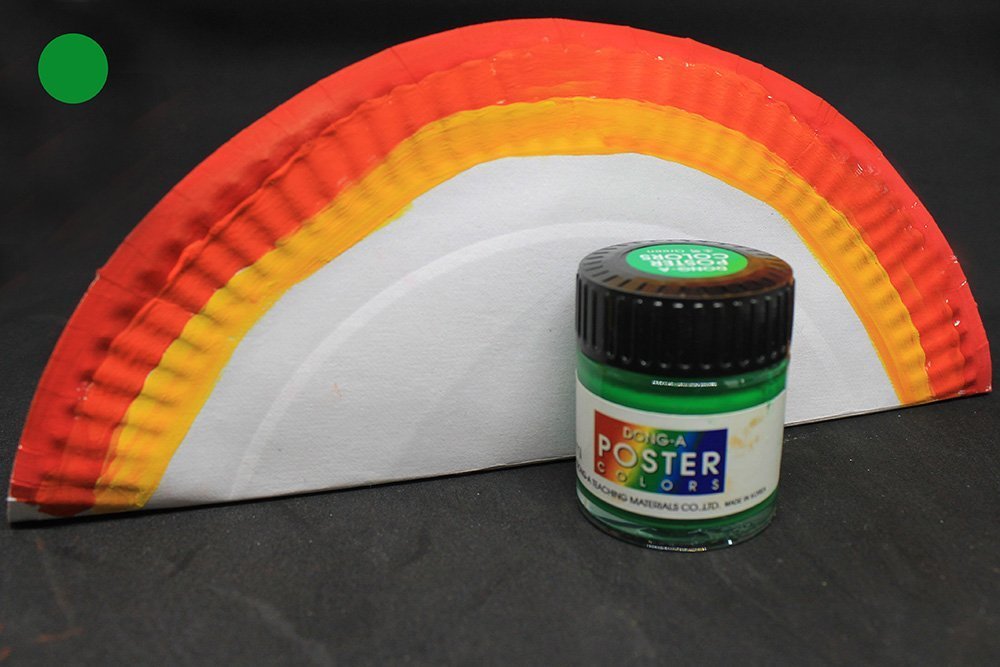
Next, paint using some green paint.
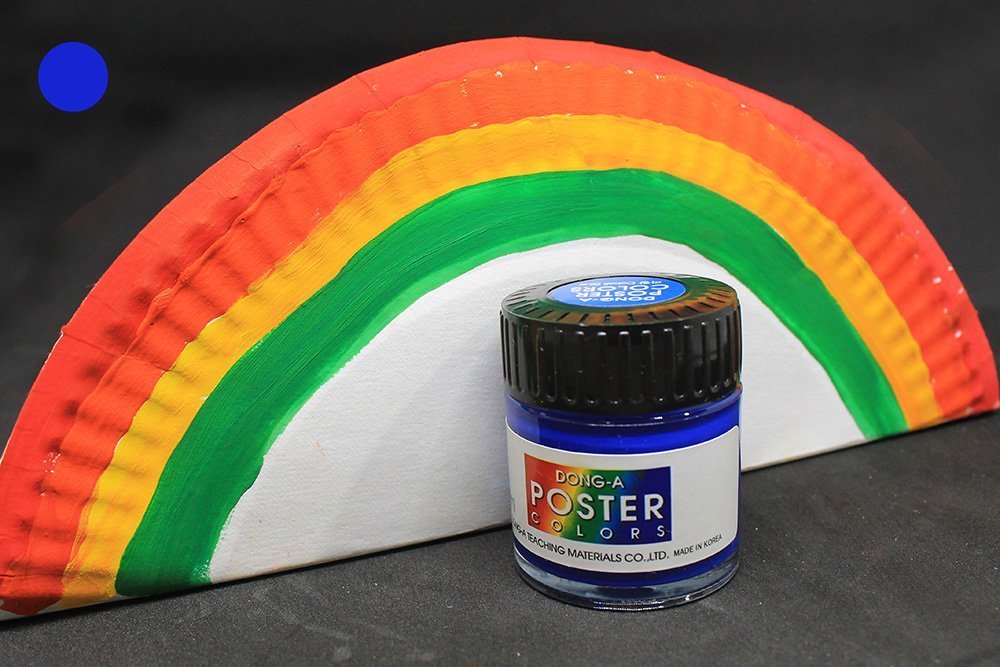
After green, paint a blue arch beneath it.
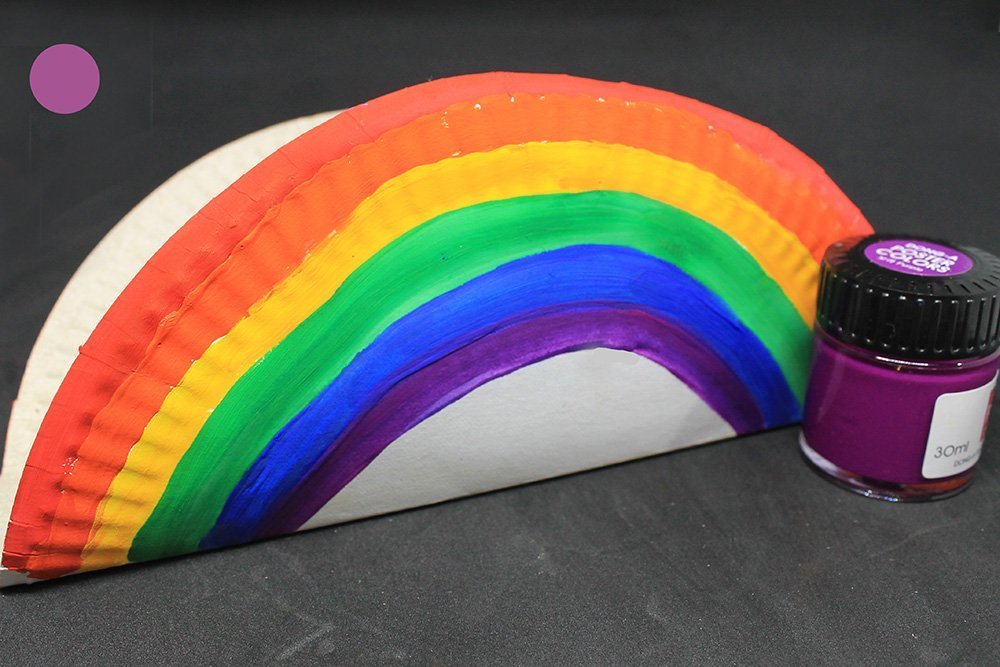
Last, paint a purple arch to complete the rainbow! Paint a rainbow on the backside as well to make it look nicer!
Make some clouds for your rainbow stand
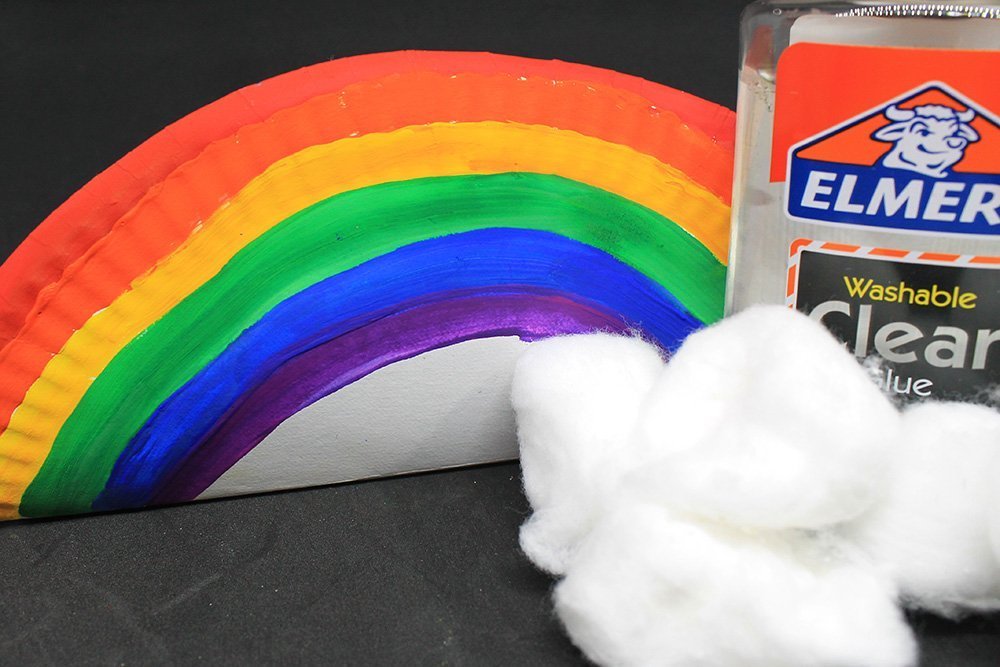
Grab some cotton balls and glue.
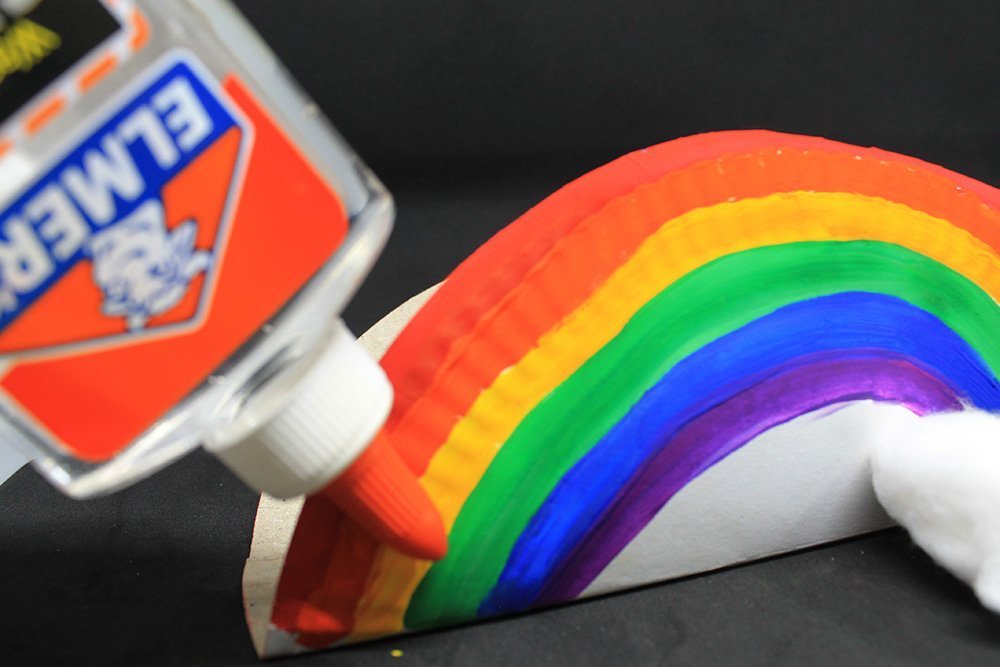
Put some glue on one end of the rainbow and stick some cotton balls there.

Put some cotton balls on the other end of the rainbow. It’s up to you how many cotton balls you put into making a cloud ( We used 3 to resemble a cumulus cloud). Just make sure that the number of cotton balls is the same on both sides.
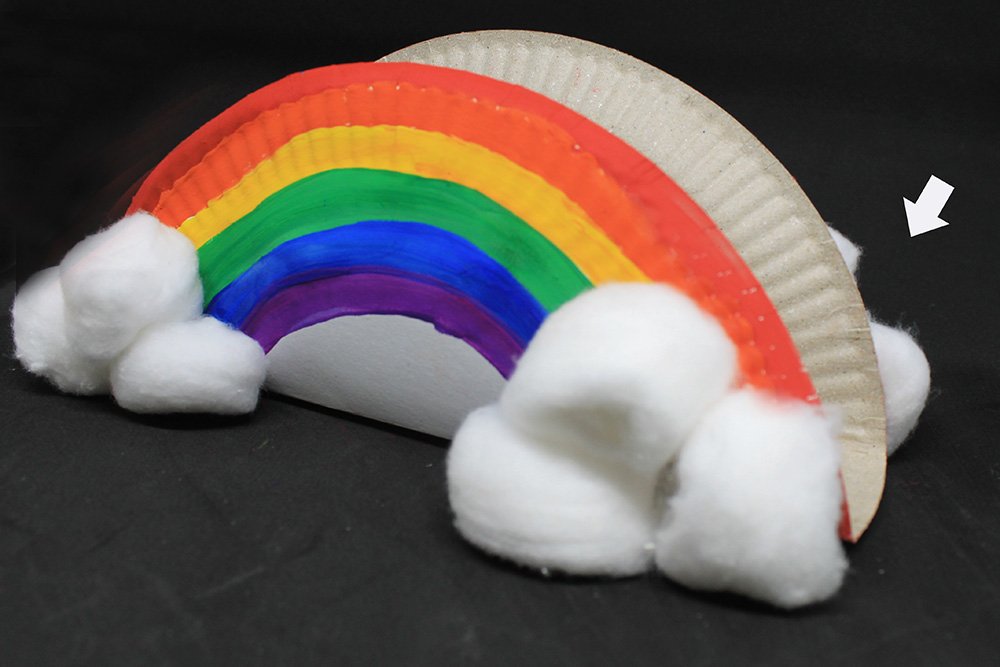
Your rainbow stand now has clouds! Do the same at the back. Make sure they have the same amount of cotton balls, or else one side will be heavier, and it would no longer be sturdy.
Your paper plate rainbow stand is now done!
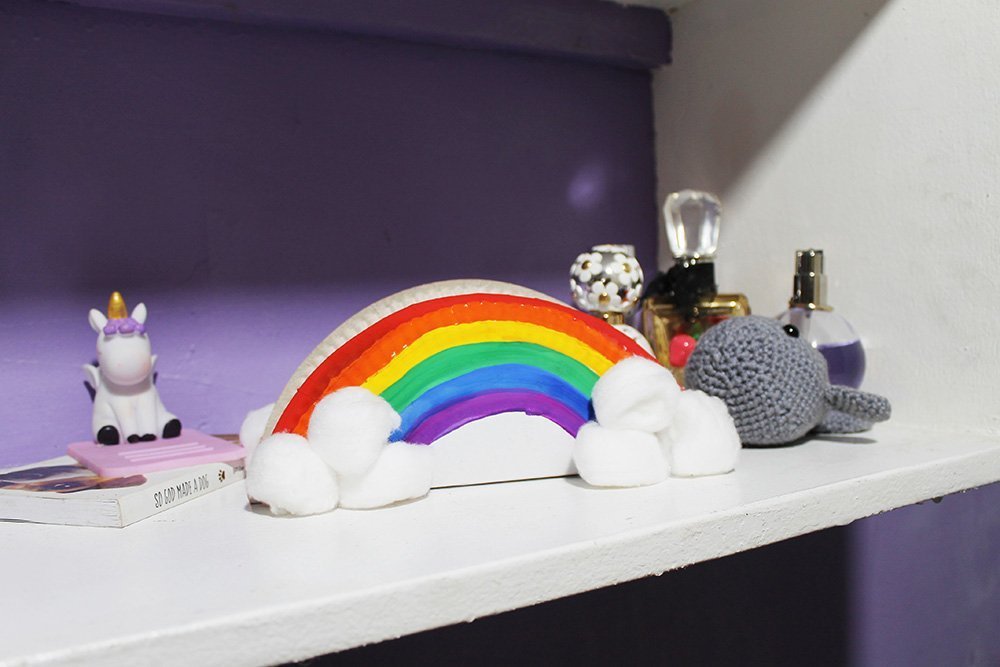
Since the rainbow paper plate can stand on its own, use it as a cute decor stand on any shelf or table!


Very simple idea. I thought she wouldn’t like it when she would finish it. glad that she did
This lacks the oomph factor, how to make it prettier?
lots of things say like glitters and markers. Don’t over do it though
Used spray paint 🤪
Didn’t have that much fun but there are a lot of articles to choose from! I gave five becuase I just think i was not in the mood today