Learn How To Make A Spooky Paper Plate Bat

Introduction:
Create this adorable paper plate bat using black paint and a bunch of googly eyes. A spooky craft that kids can do easily, this arts and crafts activity would be great to make, especially during the Halloween and fall seasons. It’s also a great activity for kids to learn some scissor skills and develop their creative imagination.
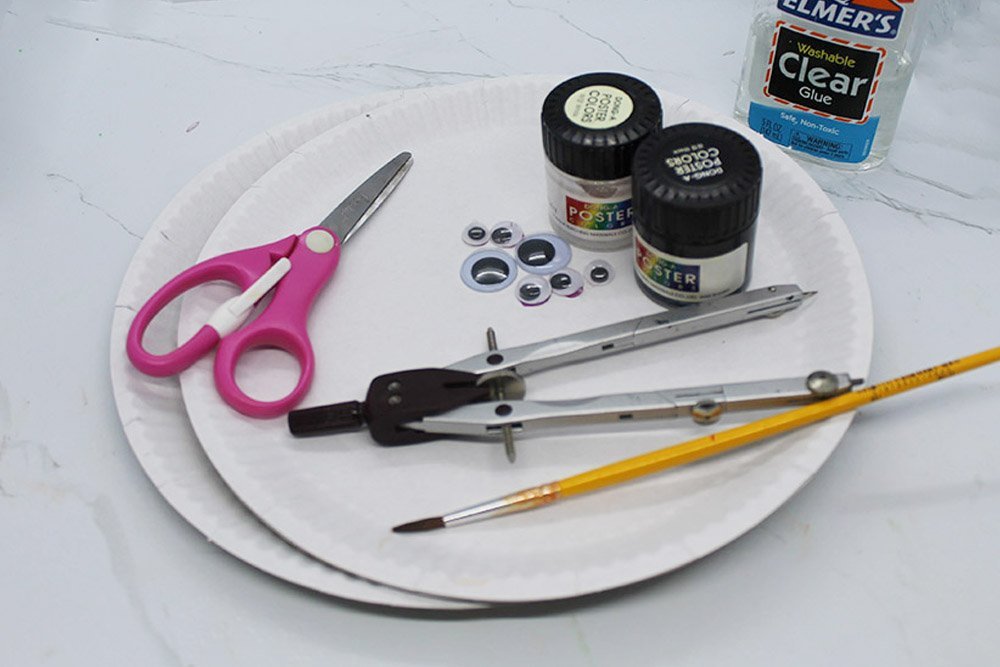
Tools
- Paintbrush
- Scissors
- Pencil
- Optiona: Compass
Supplies
- 2 Paper Plates
- Googly eyes
- Black pain
- White paint, marker, or chalk
- Glue
Create the base of the paper plate bat
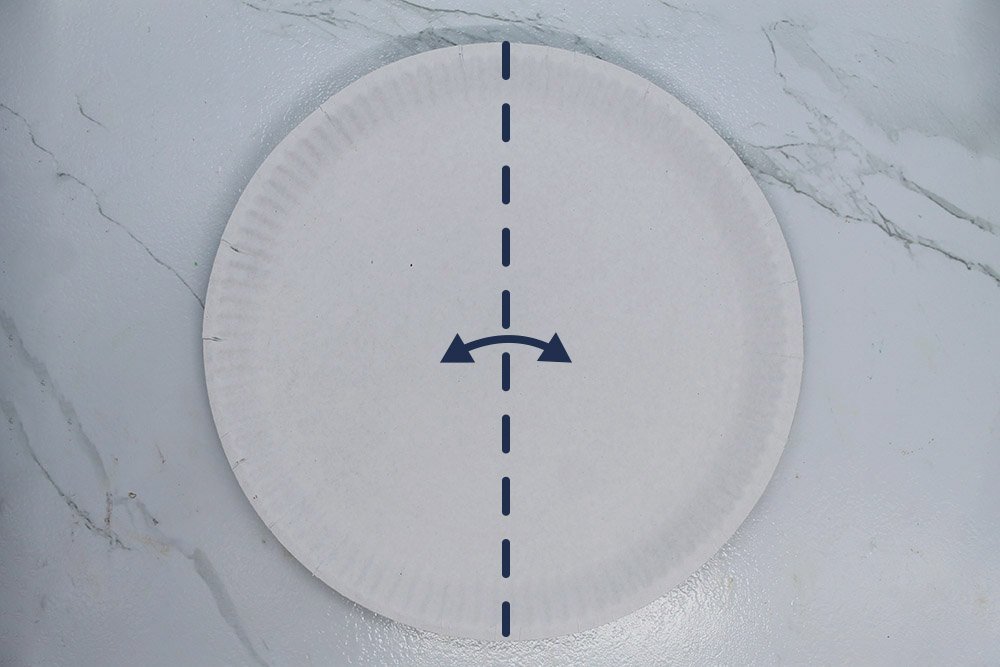
Grab a paper plate and fold it in half (follow along the dashed line). Crease well, then unfold it after.
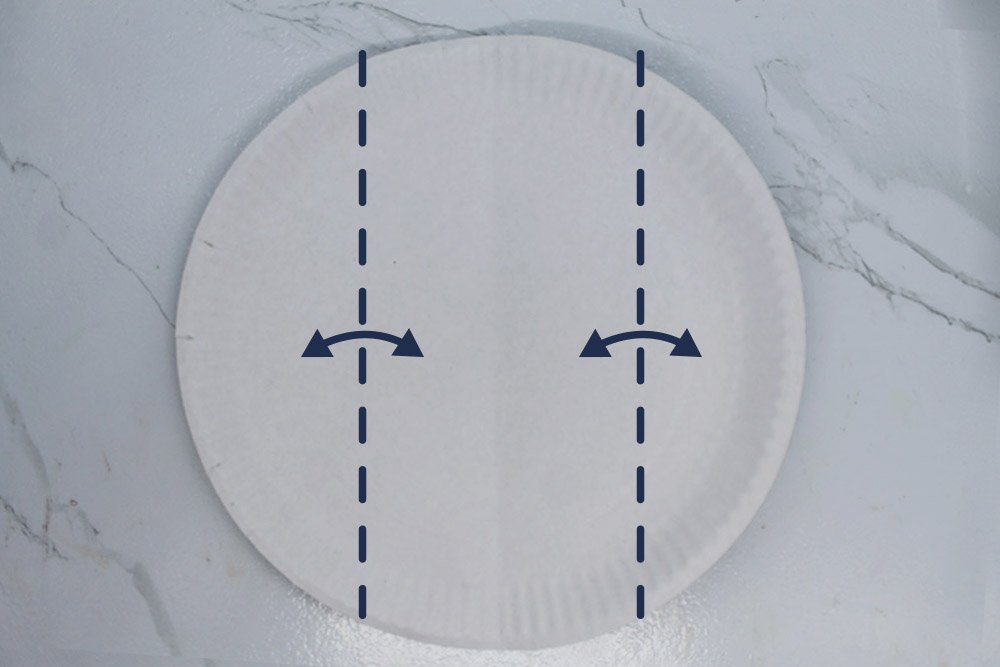
Fold the left and right edge to the center crease line made from the previous step. Crease it well and unfold.
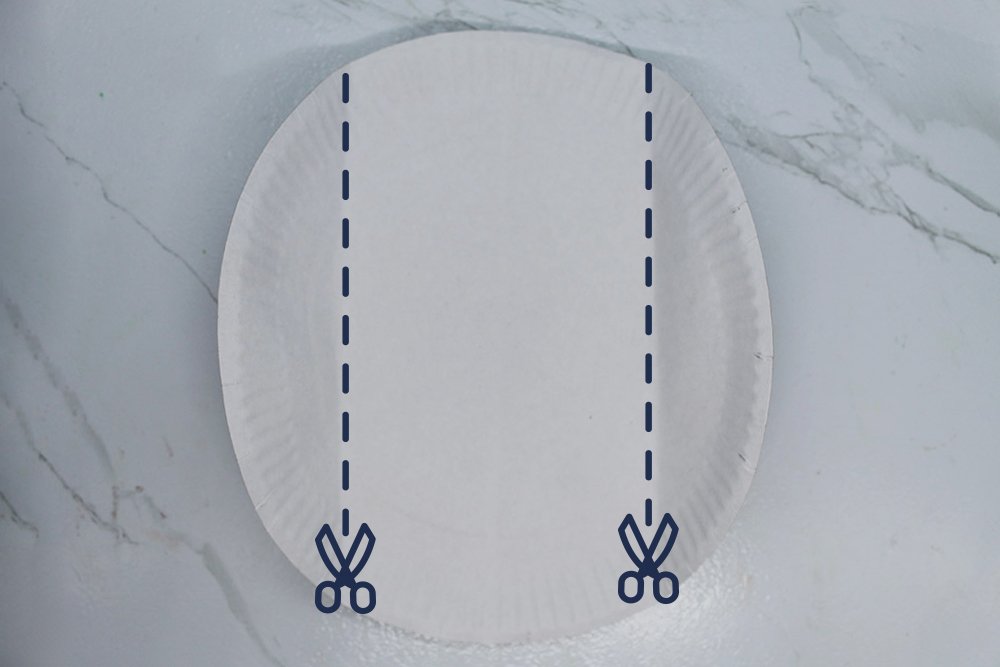
Cut the crease marks made from the previous step. Use the dashed line illustrated above as a guide.
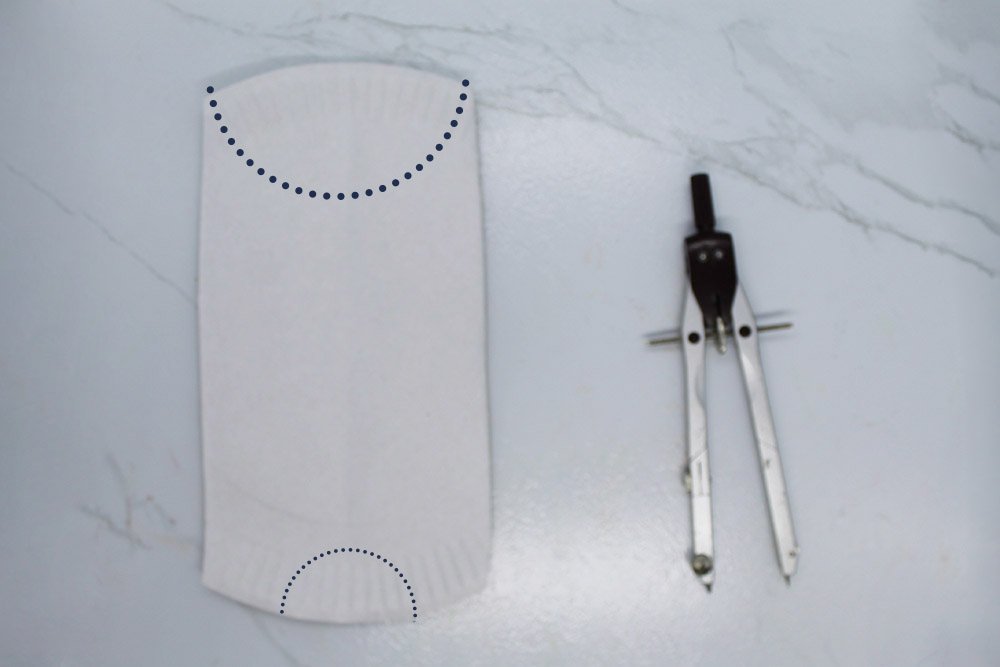
To shape the legs and horns of the bat, draw a semi-circle on the top and bottom ends of the paper plate. Follow along the dotted line on where to draw.
You may use a compass to draw a perfect circle.
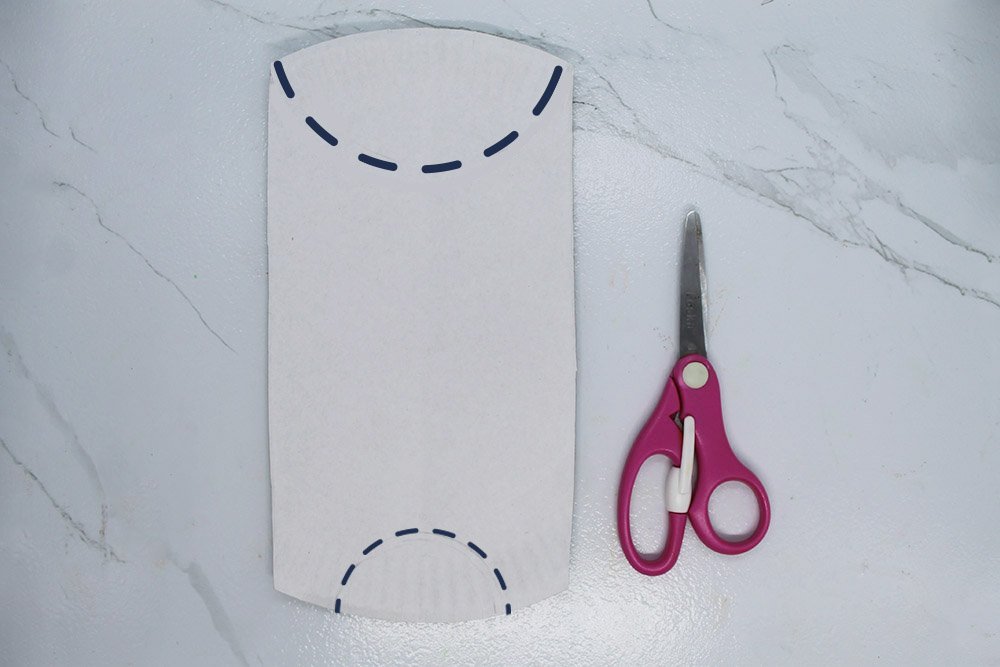
Cut along the pencil marks (dashed line) made from the previous step. Once cut, the body of the paper plate bat is done!
Color the paper plate bat
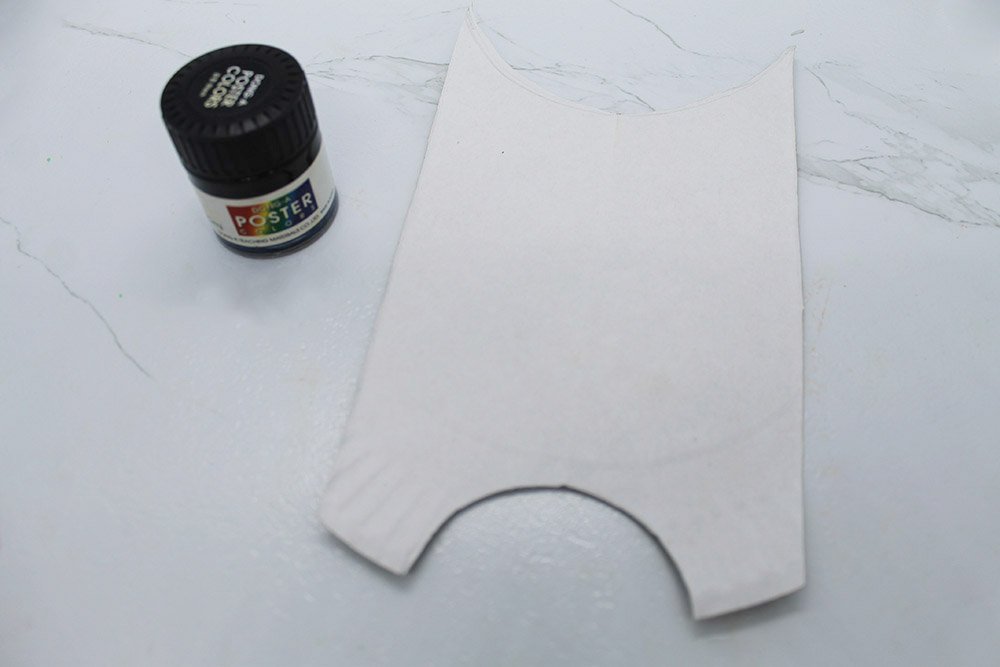
Using black paint, paint all over the paper plate base.
Besides black, you may use a different color for your bat craft! Bats come in different colors, so it’s up to you (or your child) what color your little friend would be!
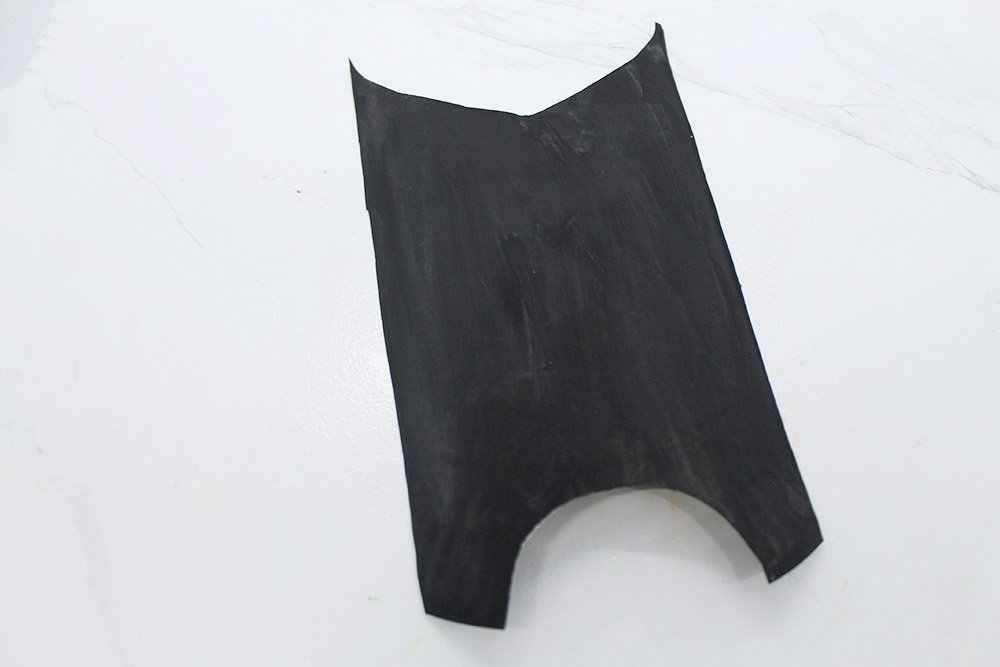
After painting, set it aside to dry.
Make the wings
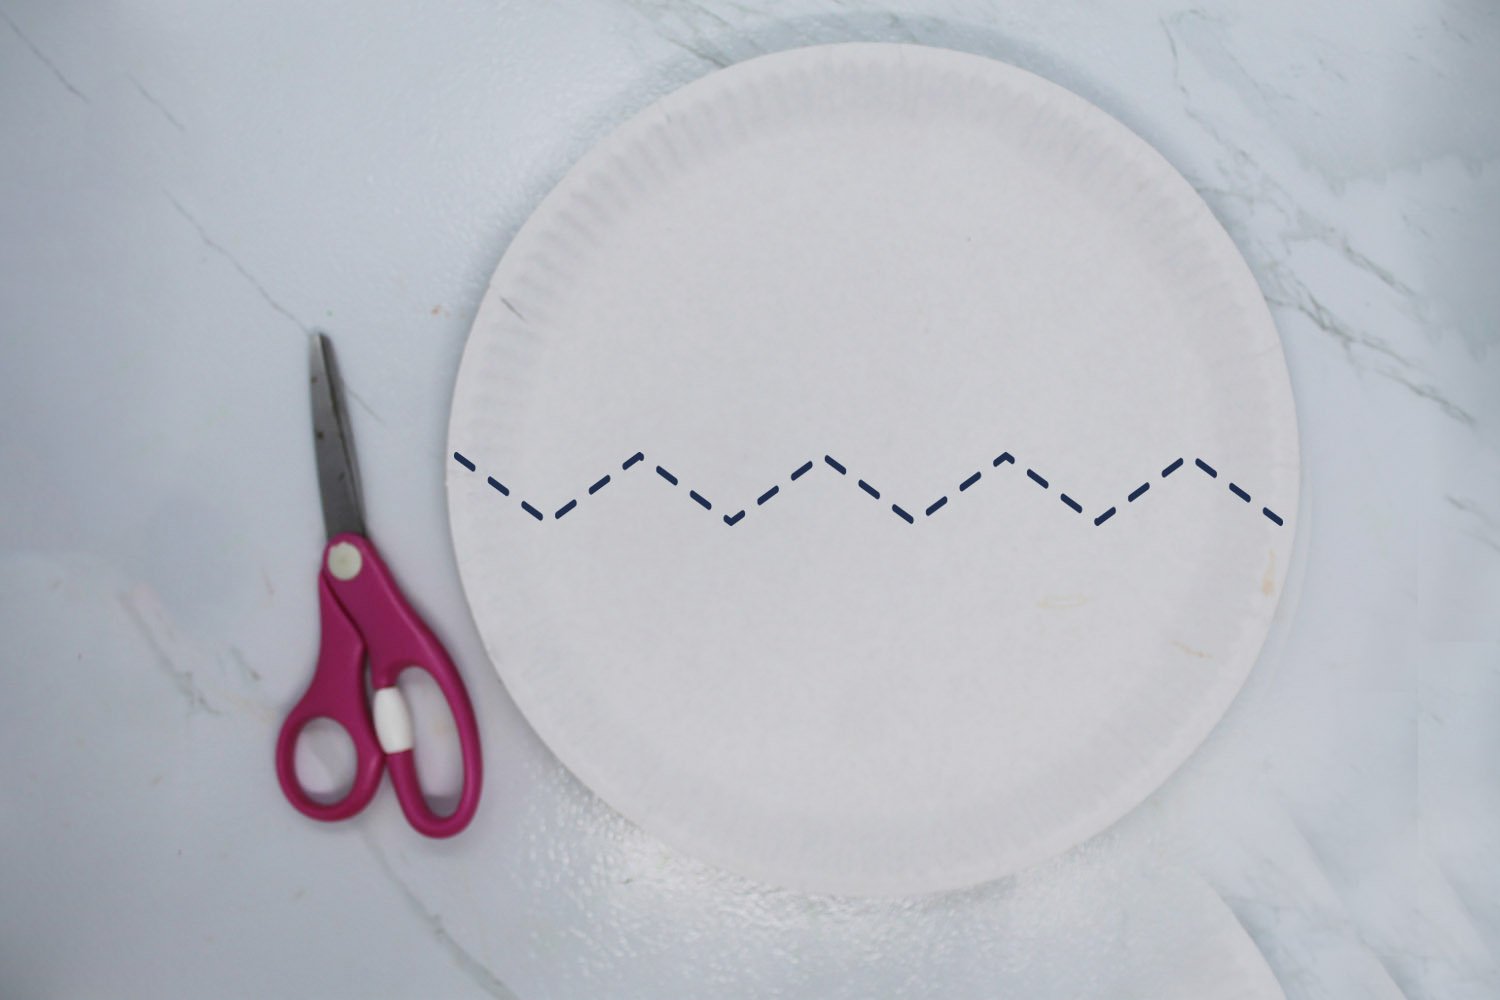
It’s effortless to make bat wings from paper plates! All you need to do is to cut the paper plate in half on a zigzag pattern.
You may draw a zigzag line on the middle first before cutting if that’s easier.
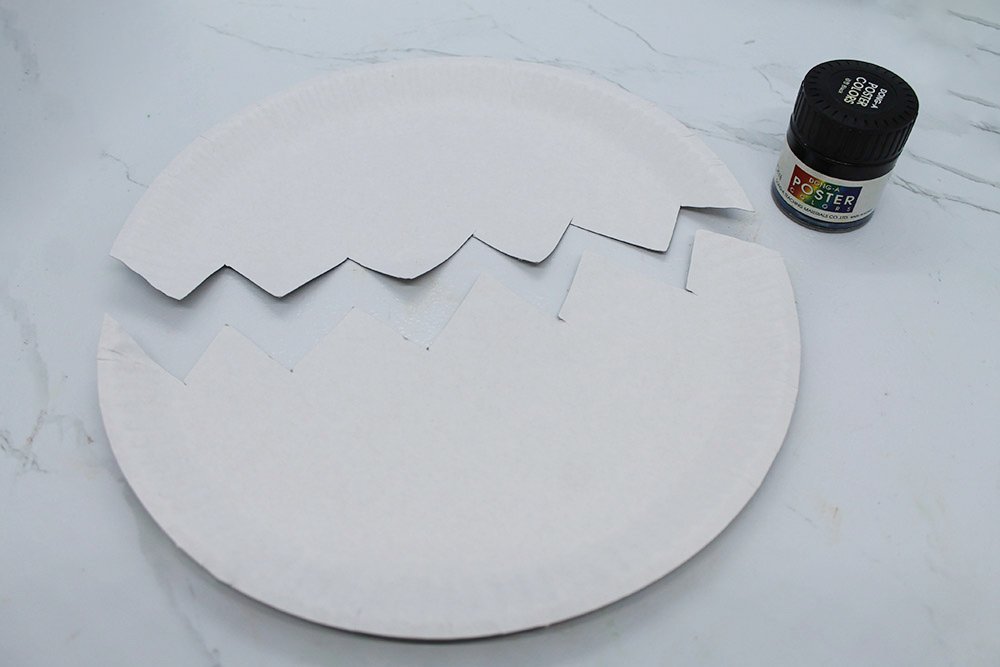
Paint the wings with the same color as the body of the paper plate body.

Once painted, set it aside to dry.
Give your winged friend a face.
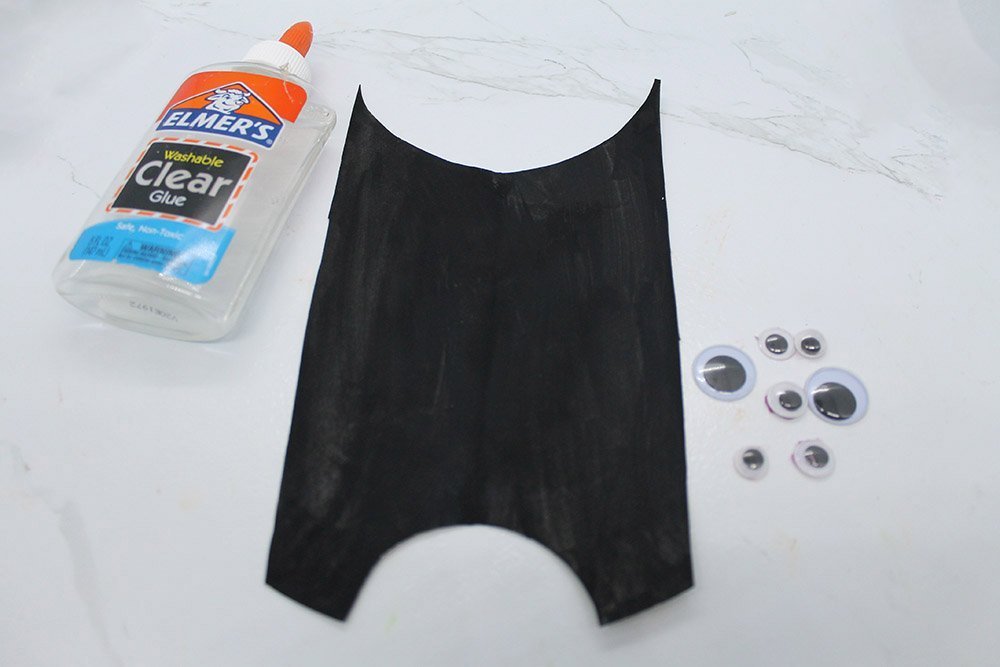
Stick some googly eyes on the upper part of the paper plate.
It’s up to you how many eyes you want for your friend. We decided to give it many eyes to make it super cool and unique! You can give him a pair of eyes or just one if you’d like!
If you don’t have googly eyes available, then another option you can do is paint eyes on the bat.
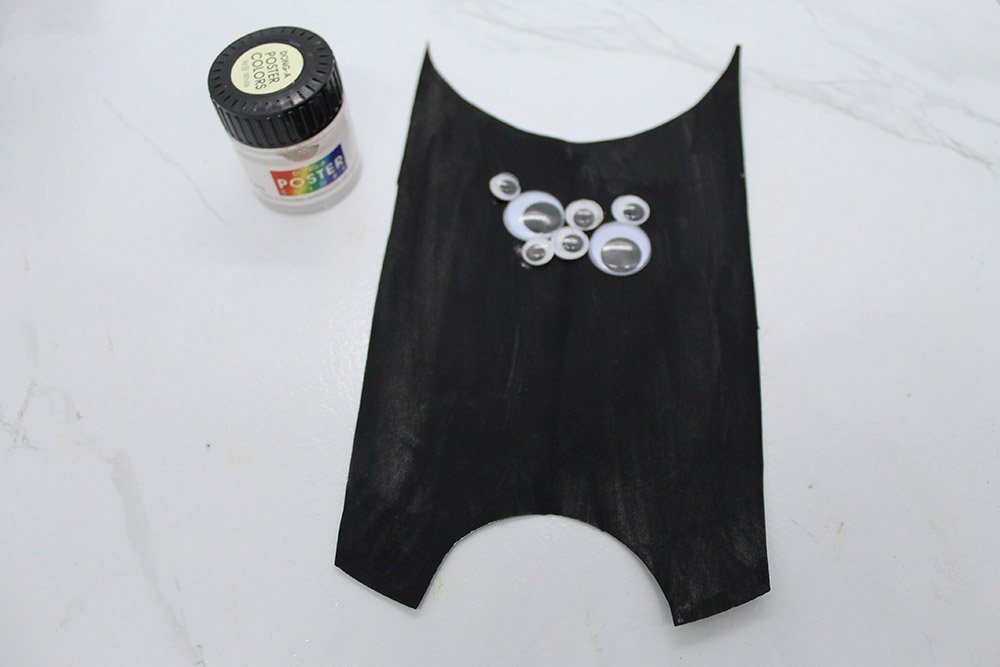
Using white paint, marker or chalk, draw a mouth on the paper plate base.
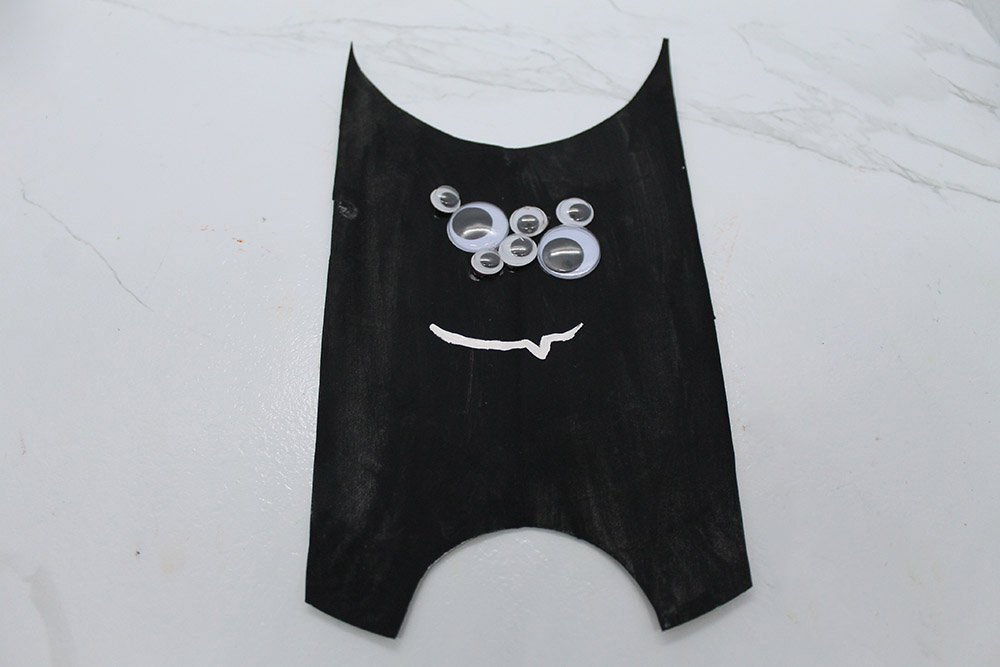
Give it any expression you think would suit your little friend! To fit the Halloween theme for this activity, we gave him a vampy grin!
Attach the wings

Stick both paper plate wings on the back of the paper plate base.
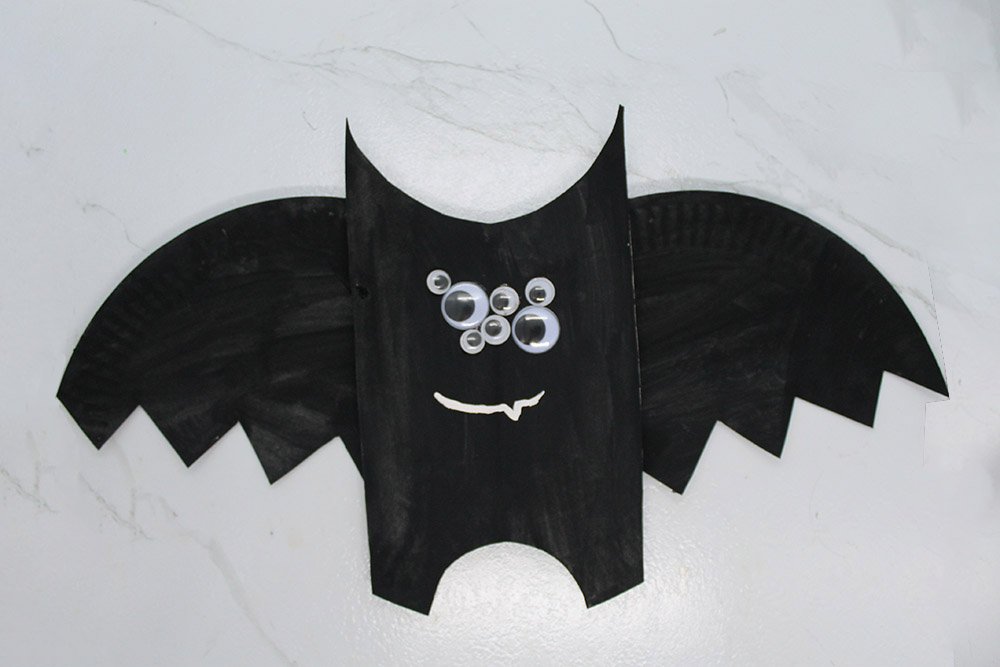
The paper plate bat is now finished! Stick it to a wall or attach a string on top if you’re going to use it as a decoration!


The eyes make it really creepy
WEll written and the pictures makes it easy to understand the end product looks good to, thumbs up
Thanksss
Straight out of the Monster Inc franchise. My kid loves it 😃👏👏
Wonderfully shown- would definitely look good in halloween!