Paper Plate Mickey Mouse Craft Guide | Simple Art Ideas for Kids

Introduction
Do you want to know how to make a good-looking paper plate Mickey Mouse? If so, you have come to the right place as this guide will show you how to make one clearly and simply.
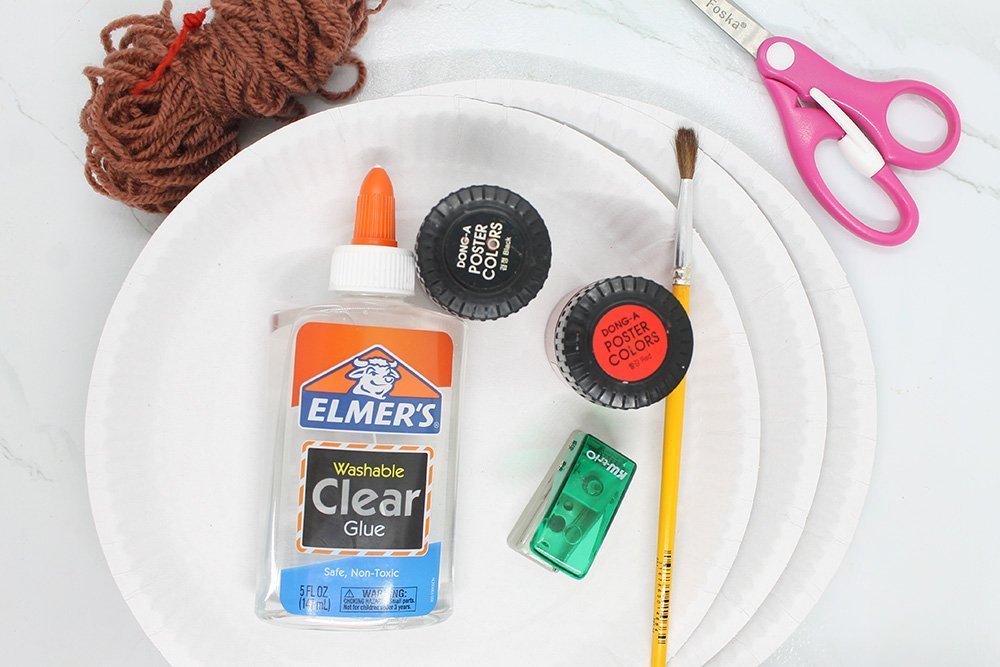
You need a few common art supplies and some tools to do this activity.
What’s great about this mouse craft is that it can be displayed prominently as it can be hung on a wall. But what makes it better is that it can hold some of your art materials and such!
Also, this paper plate idea incorporates painting, cutting, gluing, and even a little bit of drawing. And there are steps wherein you are encouraged to be creative! So, our kids will surely love this! Enough talk, and let’s begin making the craft.
Tools
- Paintbrush
- Small puncher
- Scissors
- Binder Clip
Supplies
- 4 Paper plates
- Poster color (red and black)
- Glue
- Yarn
Make the Ears of the Mouse Craft
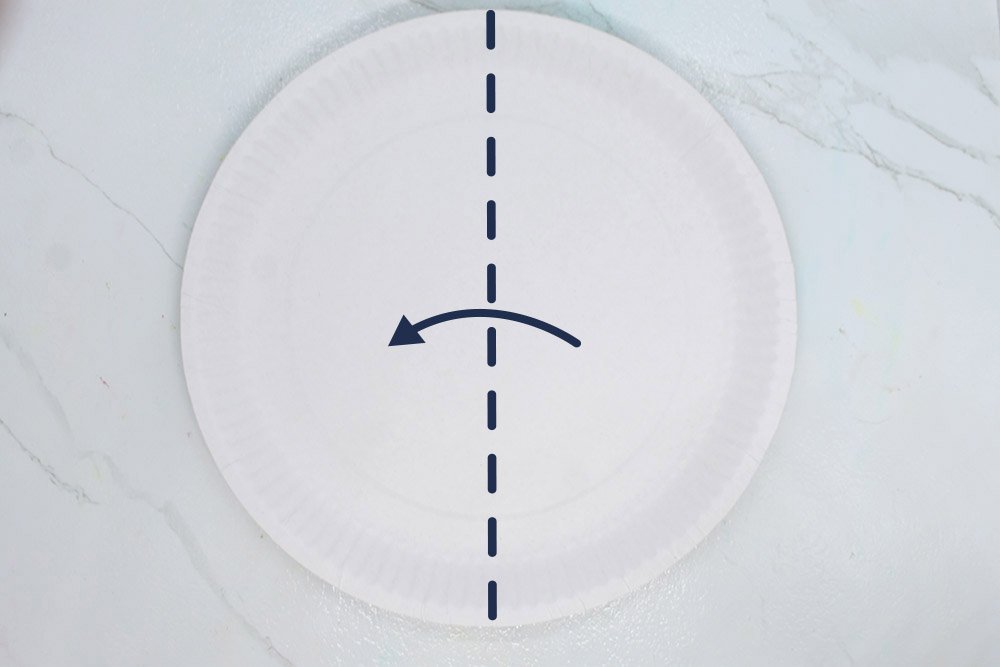
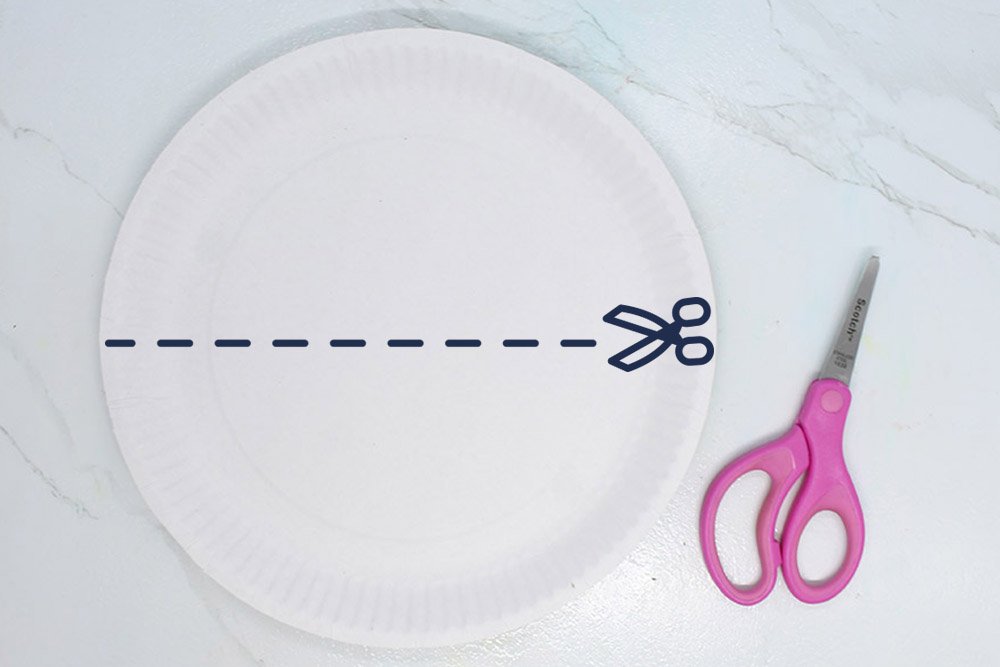
Welcome to the guide. If you want to create a paper plate mouse the first thing to do is to get a paper plate, and put it in front of you.
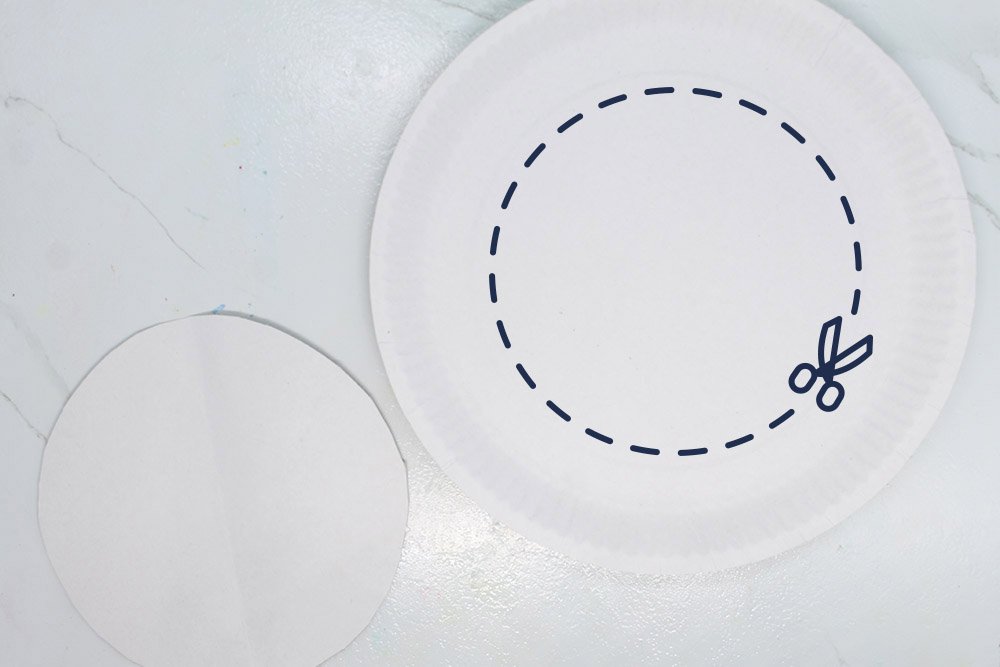
The next step is to fold the paper plate in half. Make sure to face the backside of the paper plate after you folded the paper plate.
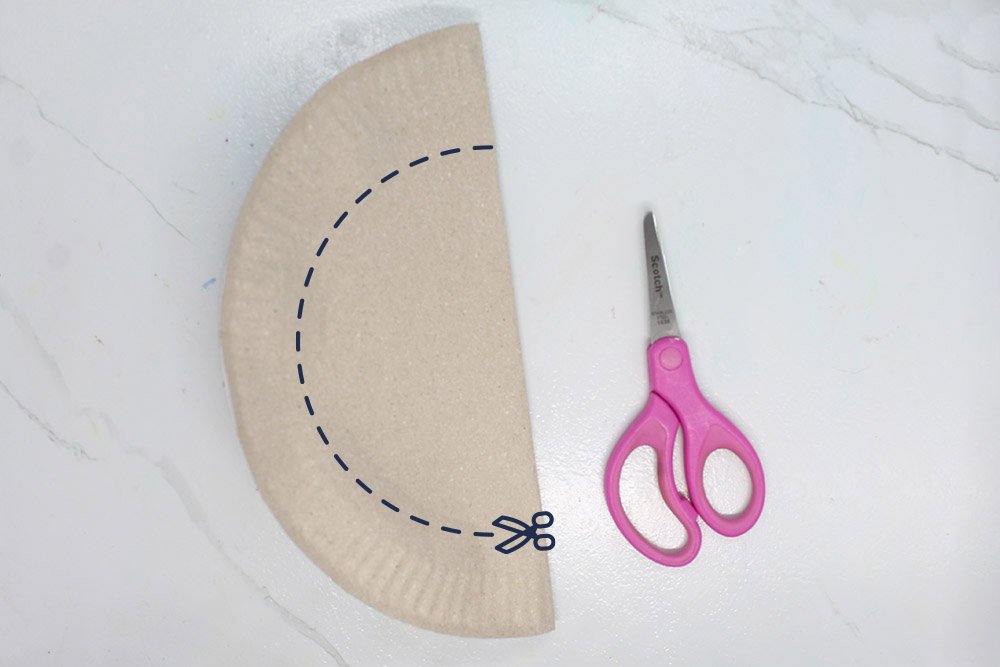
Make note of the dashed lines in the previous image then cut. The goal is to make a smaller circle so you can make one ear for the mouse activity.
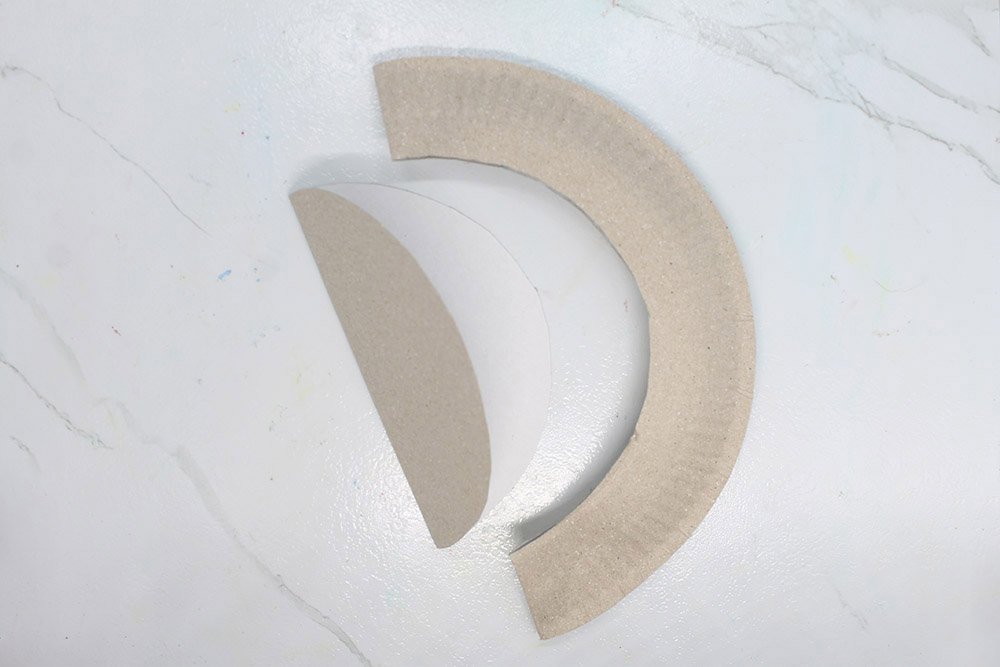
You have now made a smaller circle. The next step is to make another one. But remember, you want symmetrical ears so the circles must be of the same size!
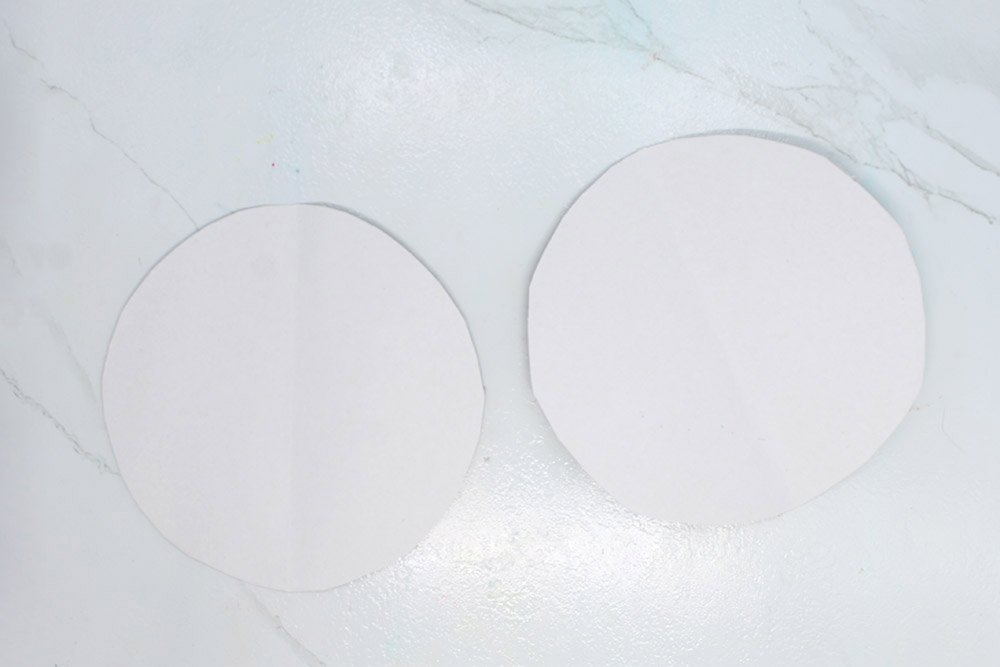
You can repeat the previous steps or cut directly. Make use of the last image with dashed lines as a guide if you decide to cut a smaller circle directly. What's important is to make small circles of the same size.

Great job- time to get some black paint! This paper plate craft is a long way from being finished. But it's simple and before you know it you have made it.
Paint the Ears and Face of the Paper Plate Mickey Mouse
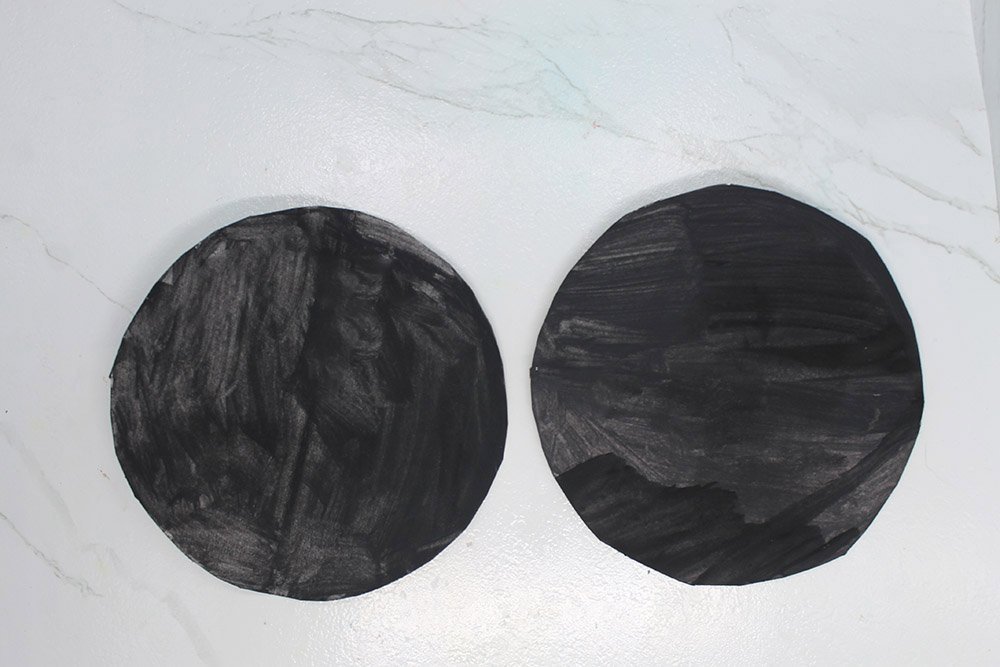
Paint the two ears evenly black. Put them away after in a safe place where they can dry.
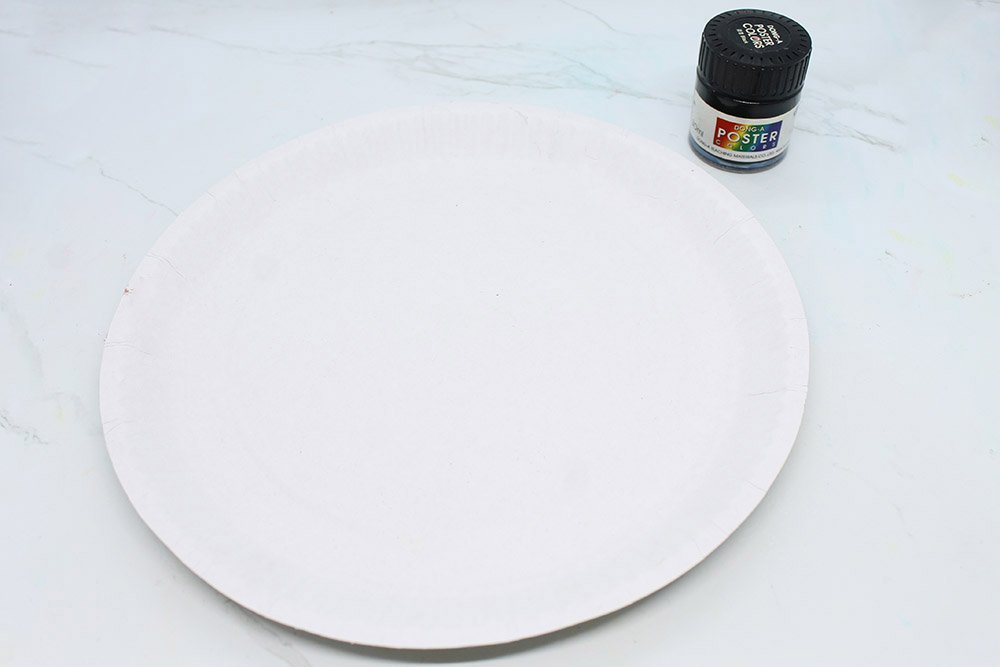
Get some black poster paint as you will use them again. Also, get the other paper plate. This artwork serves a practical purpose as a bag as you will see later on.
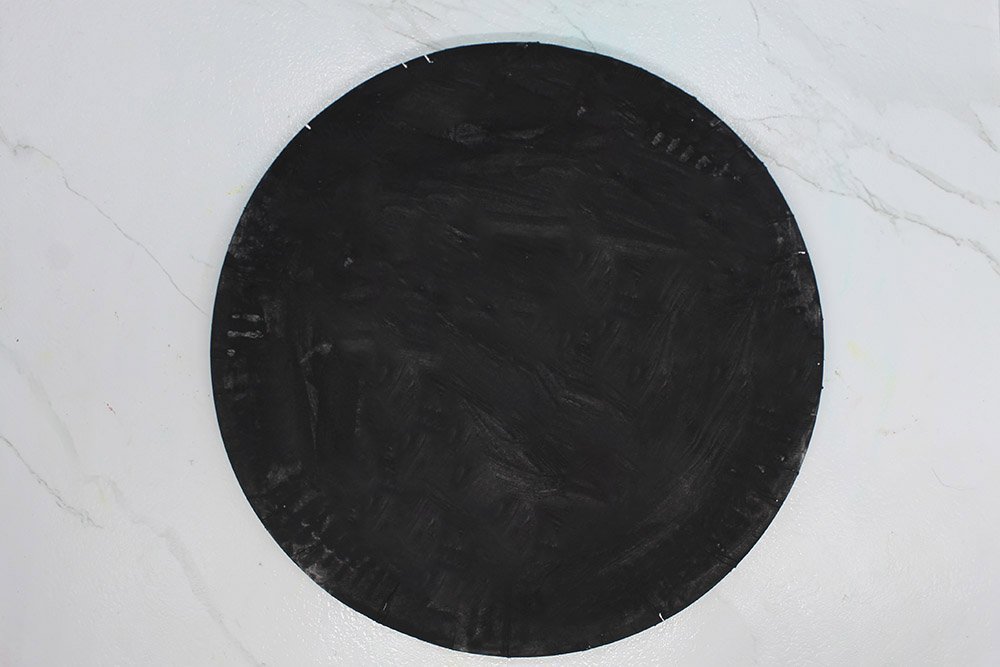
Then paint the paper plate evenly. The goal is to make the ears and face look the same color. However, you have the option to choose a different color like grey or brown.
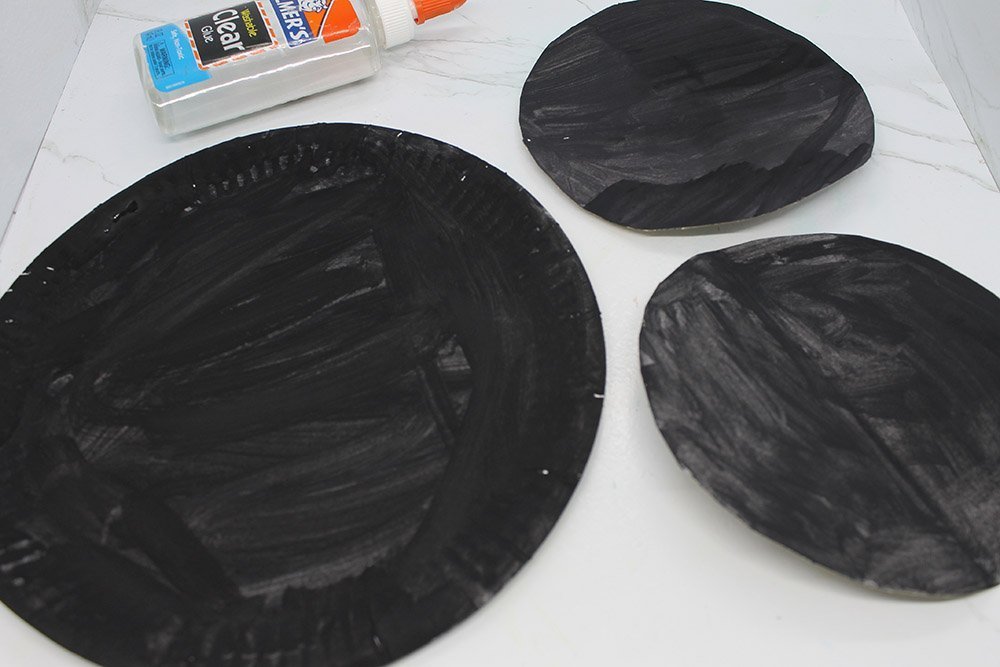
Let the paper plate dry for a while. Get the glue and ears as you will be working on them next.
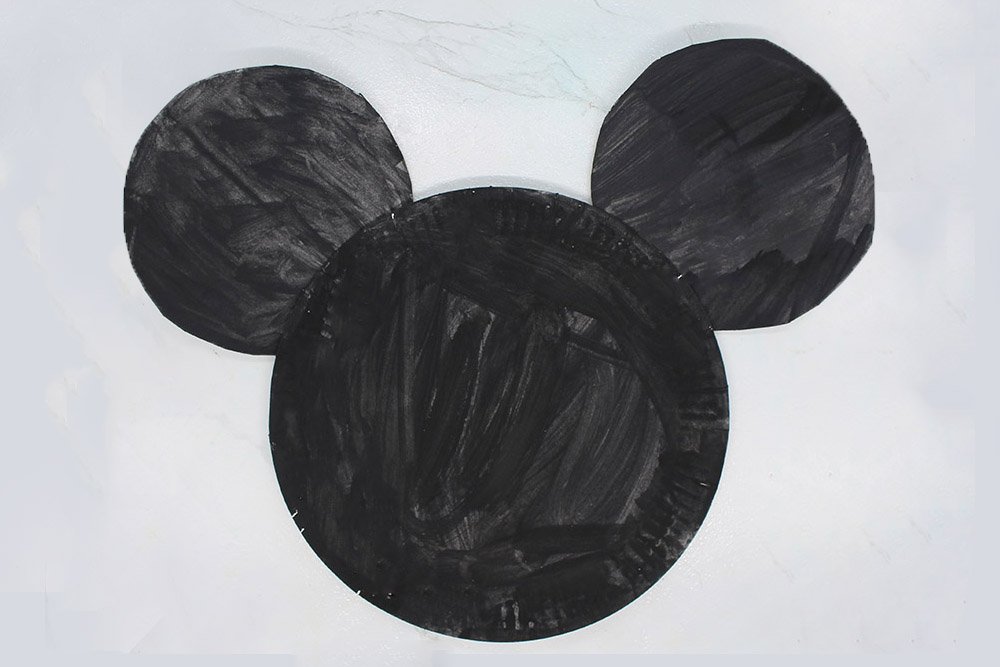
Glue the ears to the back of the paper plate and make sure to paste them at the backside of the plate. Also, you would want an adequate surface area to glue the pieces together so the bond will be strong.
Cool! You have made good progress-keep it up.
Make the Pouch of the Paper Plate Mouse
Get a pair of scissors and be sure to teach your child the proper way of handling scissors first. Also, to minimize injury use blunt-tip scissors.
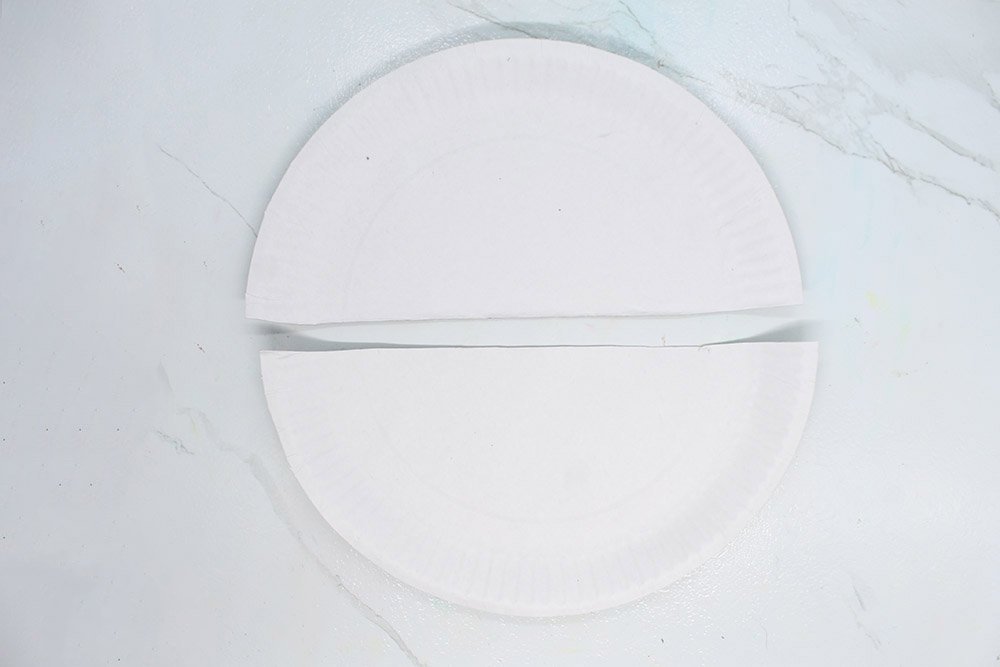
Make use of the dashed lines in the image above and cut the paper plate in half. You will need the two halves for this activity.
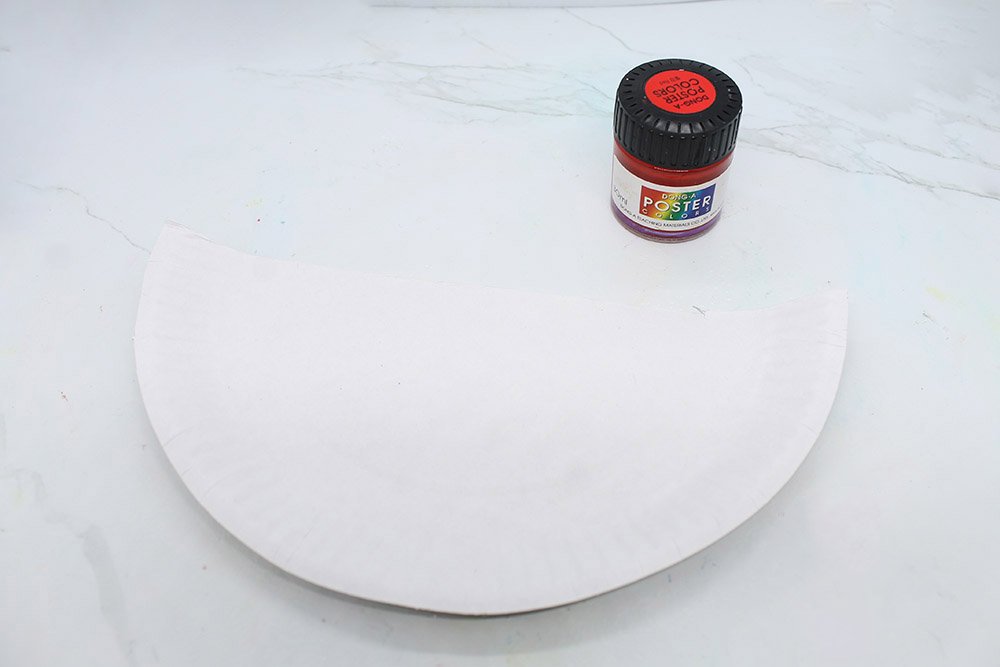
Get a red poster color and a good clean brush. Red is the chosen color for the snout in this example. But other color combinations are totally fine as well.
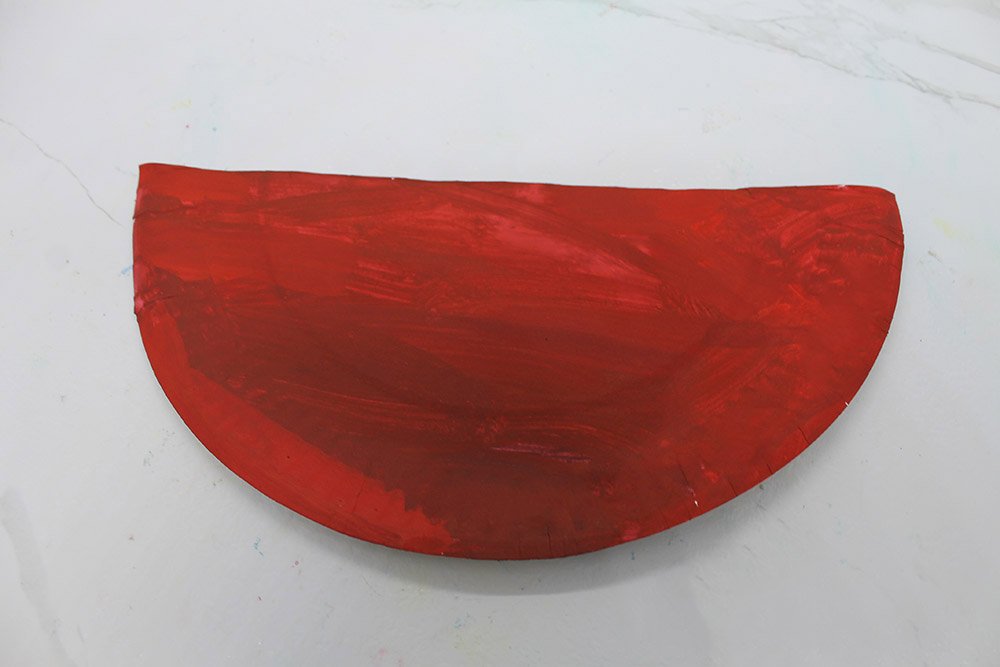
Paint the paper plate evenly with red poster paint, In case you are wondering, the snout and nostrils are what you are making right now.
But these two parts will make up the pouch. This is what sets this apart from other paper plate mouse crafts as it has added value.
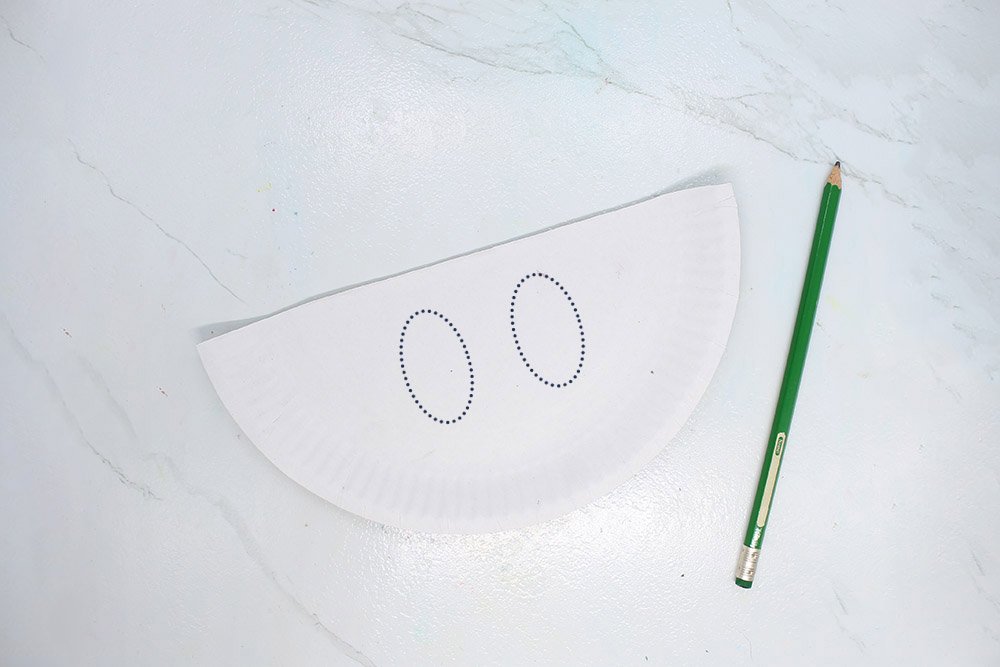
Take note of these two oblong shapes shown by the dotted lines in the image above. And, get a pencil.
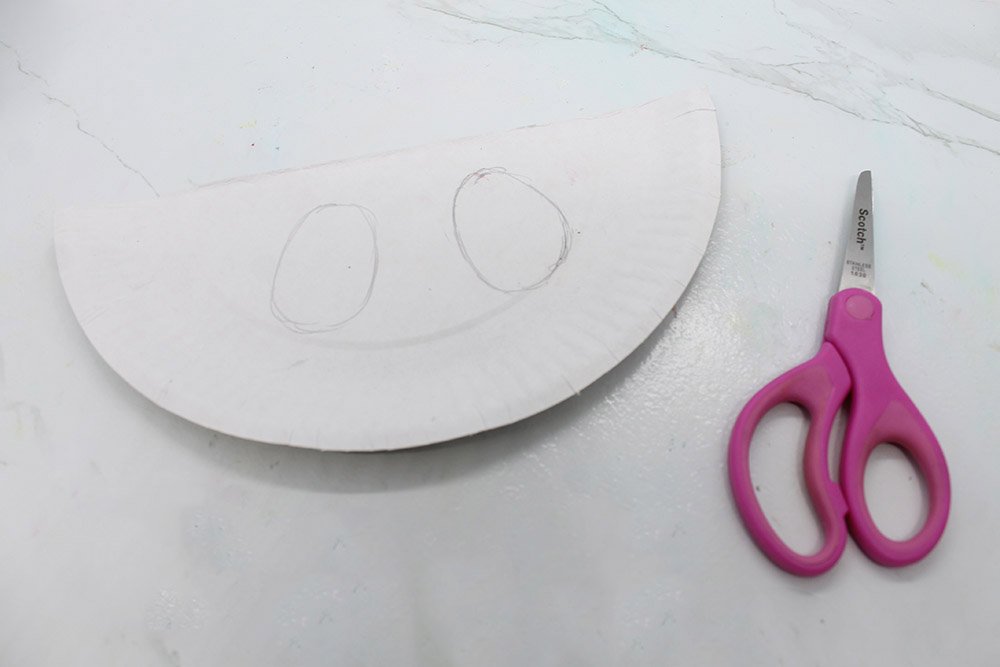
You would then draw the nostrils of the paper plate mouse as close as you could. This is another step wherein you could go for a slightly different look!
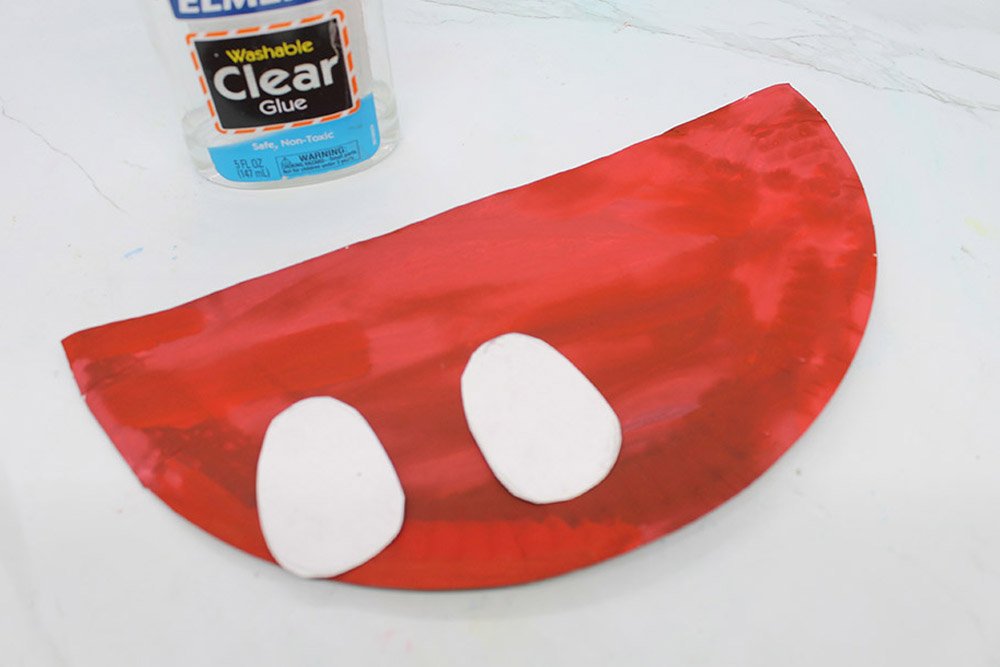
Then cut the shapes out of the paper plate. You might have noticed that there's no need to paint the nostrils in this instruction.
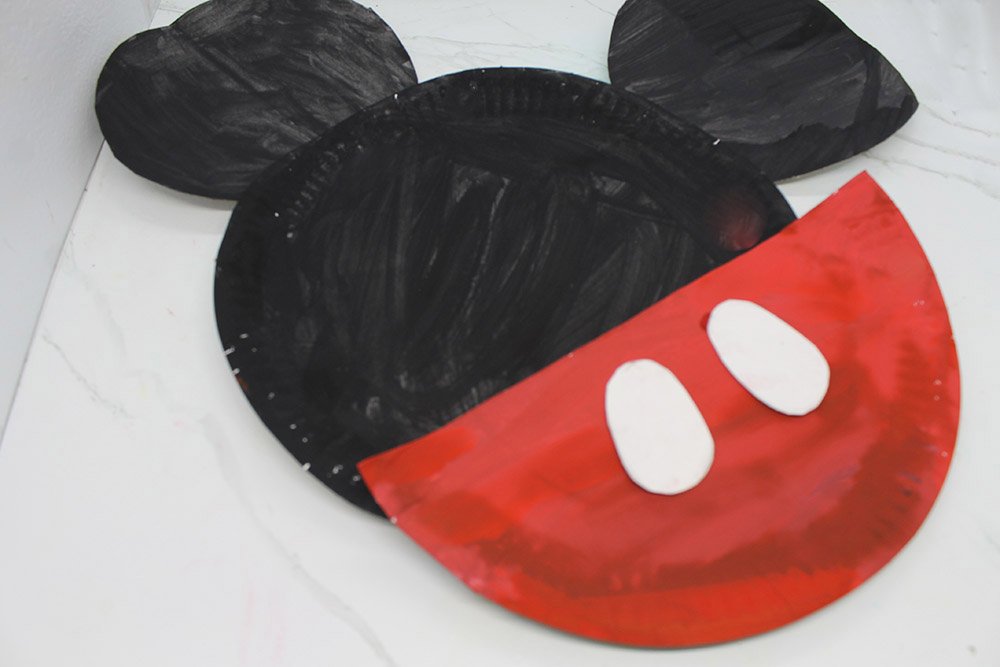
Get your glue so you could paste the nostrils on the upper middle part of the red snout to finish making the pouch.
You're getting pretty close to making this craft-good job!
Make a Pouch by Sewing the Snout
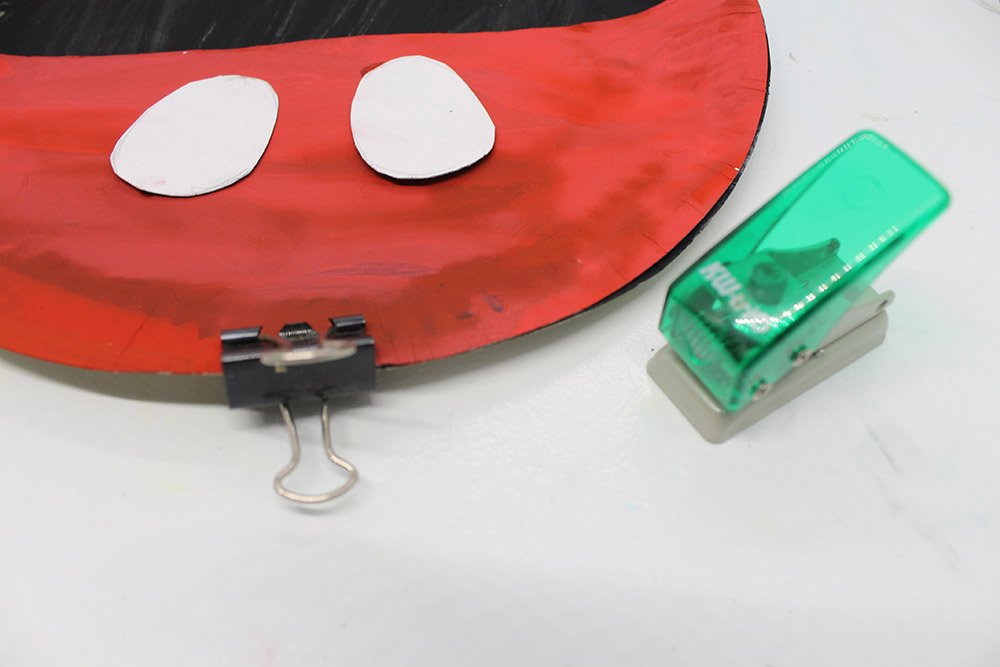
In sewing the pouch to the paper plate you need to use a binder clip first. Clamp the two pieces at the bottom middle part. And ready your one-hole puncher.
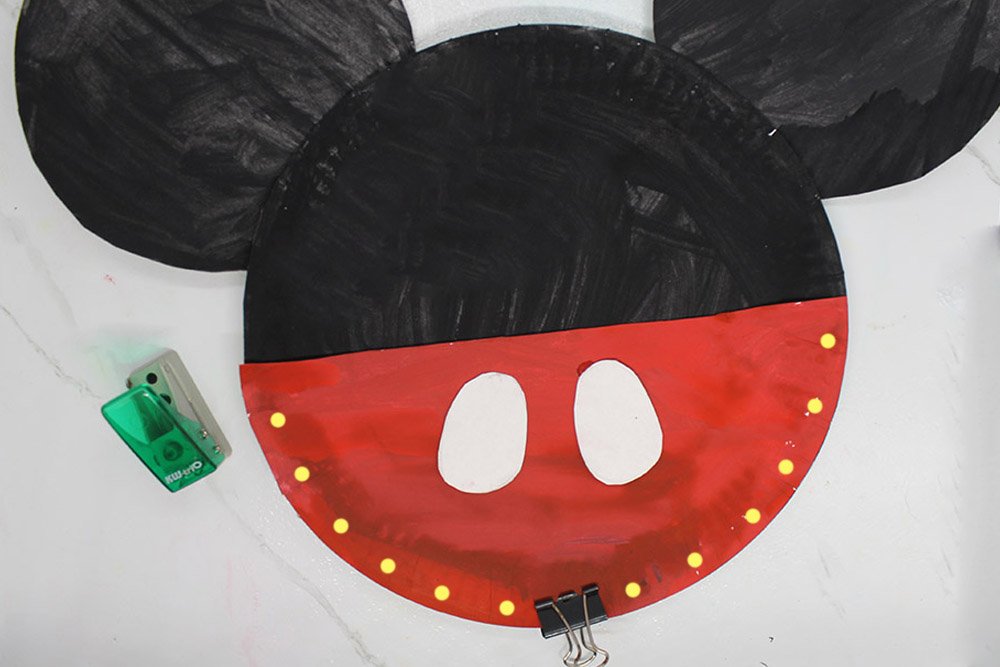
Please take note of the image above as you will make holes in the next step. There are 12 holes and they are arranged this way. What you should get are holes that are arranged in the same way for the paper plate and pouch.
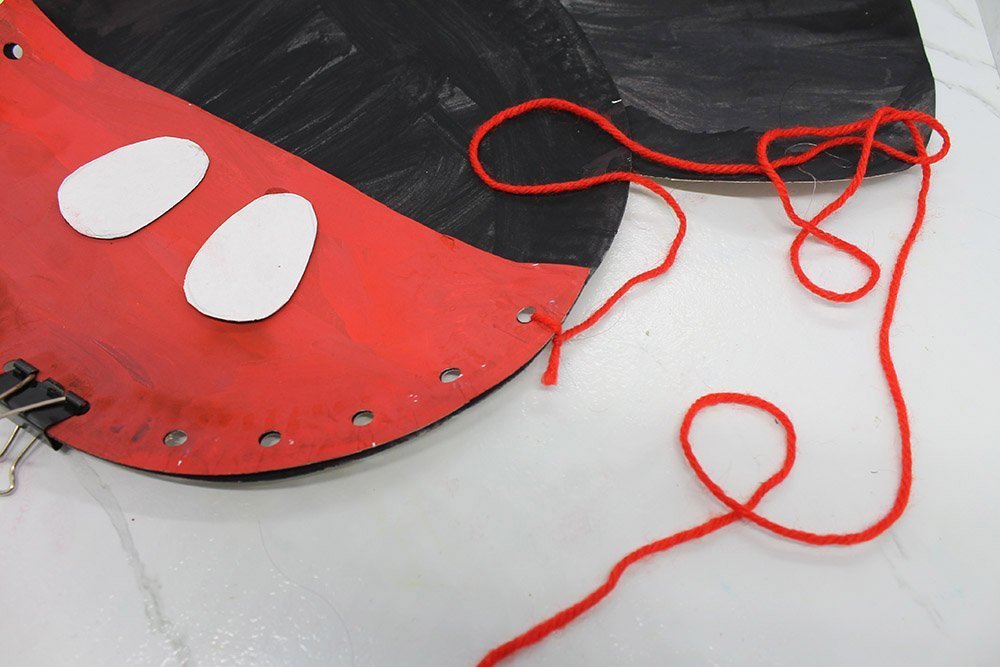
Make the holes with the puncher using the last image as a guide. And then get your yarn. Tie one end at the topmost right hole.
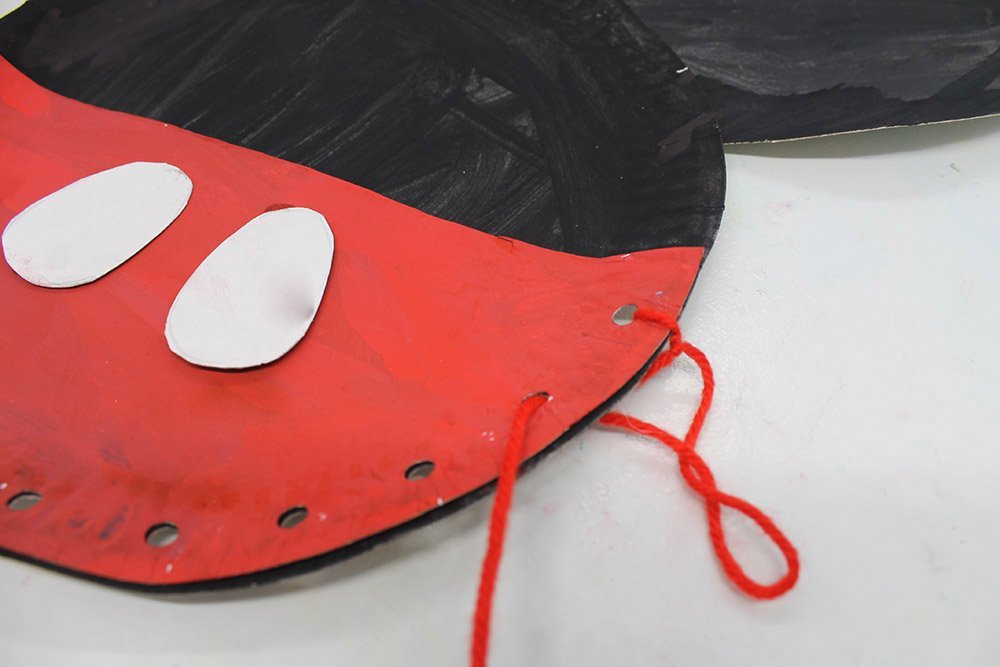
Then insert the free end of the yarn into the next hole. It should come from the backside of the paper plate and come out on the outside.
Pull out the thread outwards and then insert it from the backside. Pull the string towards you until you feel some resistance. Be careful not to overdo it else the craft might get dented.
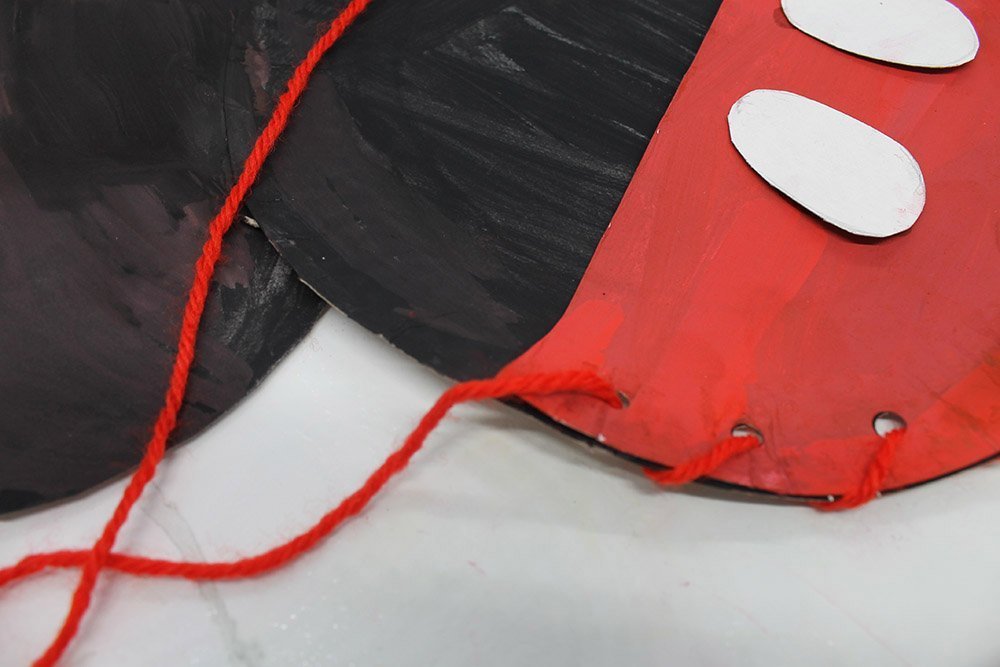
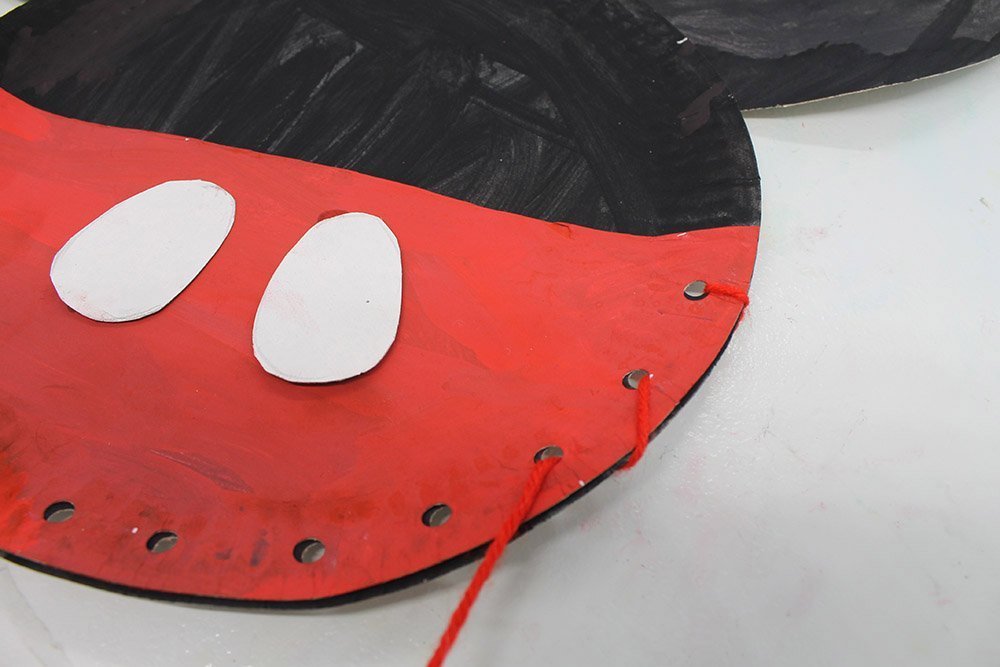
Repeat the process until you reach the middle hole. The goal is to make a strong enough bond between the pouch and paper plate.
And to finish the sewing process, tie the yarn to secure the pouch to the paper plate. Also, cut off any excess yarn but make sure to leave some for the last knot.
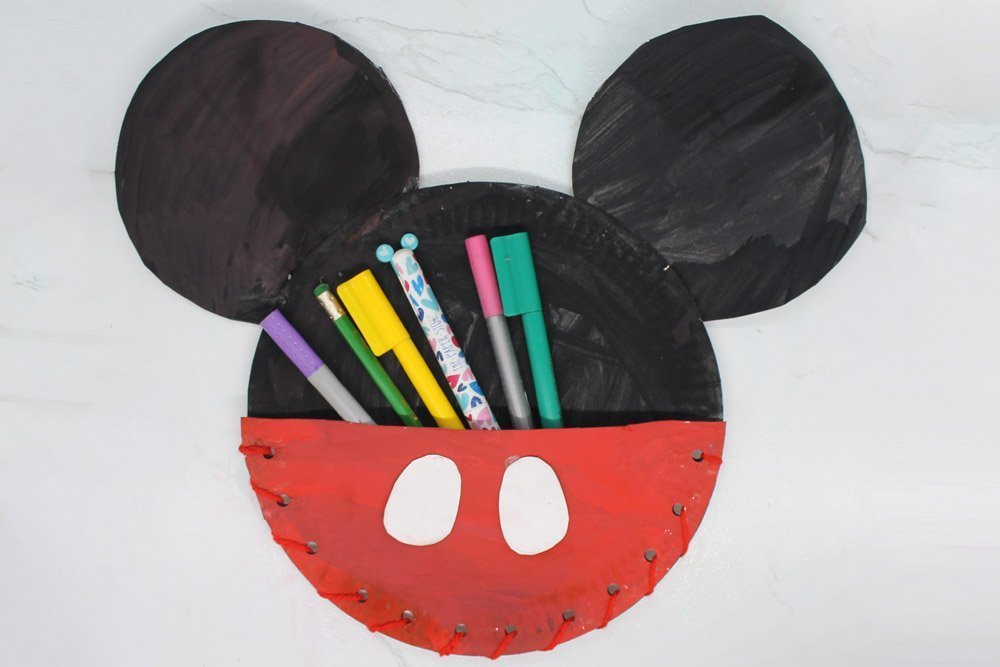
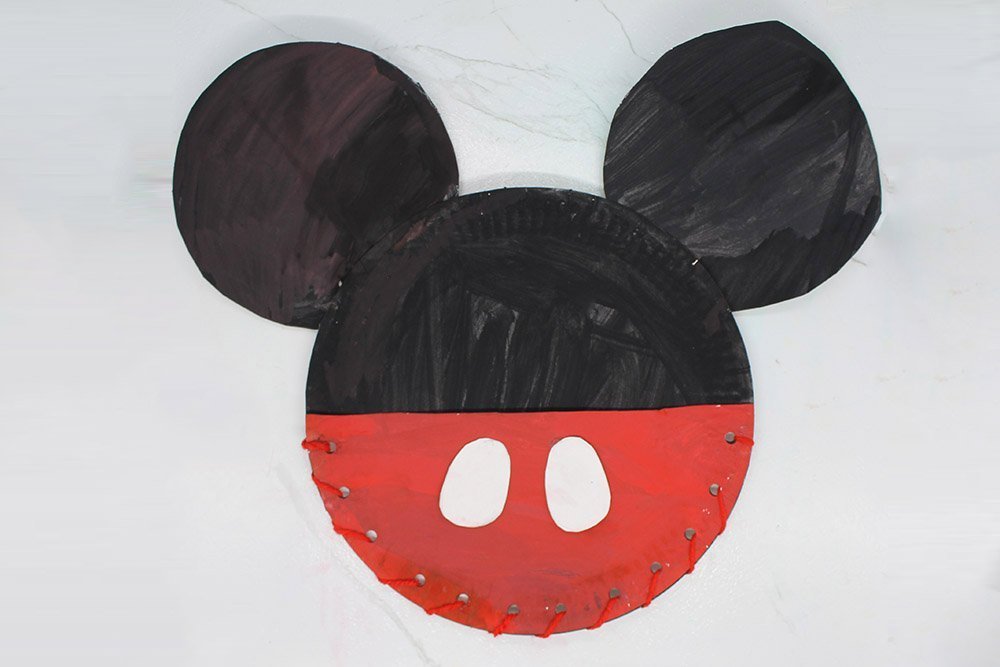
You could now put pens and pencils into the bag. Even small rulers are okay. But making a strap would make this craft hangable and therefore displayable!
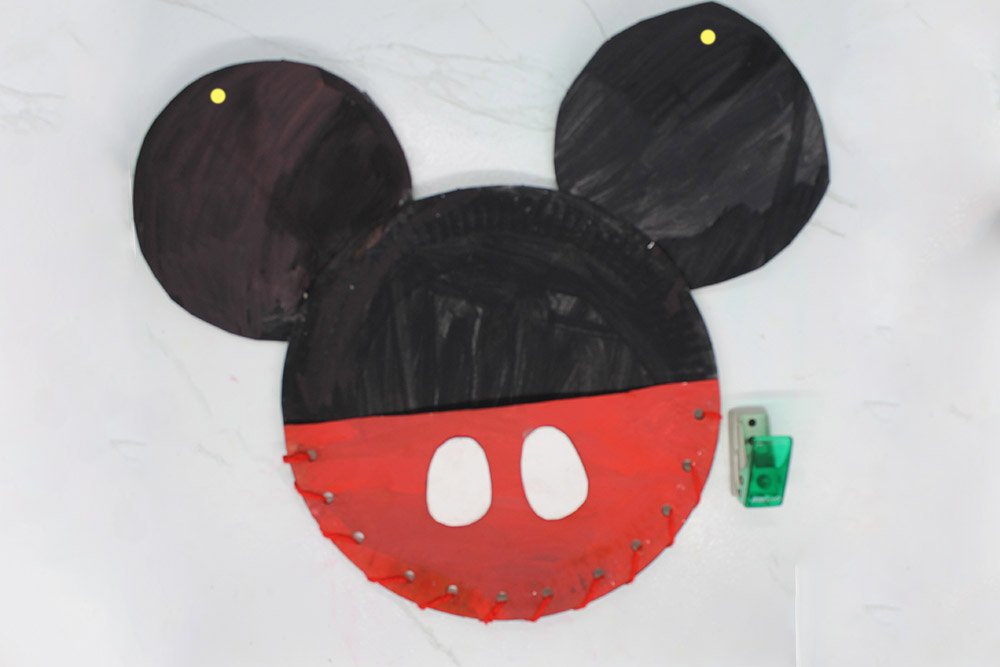
So that is what you are going to do. Mark two points as shown above where you could place your holes.
Make the Strap of the Mouse Craft
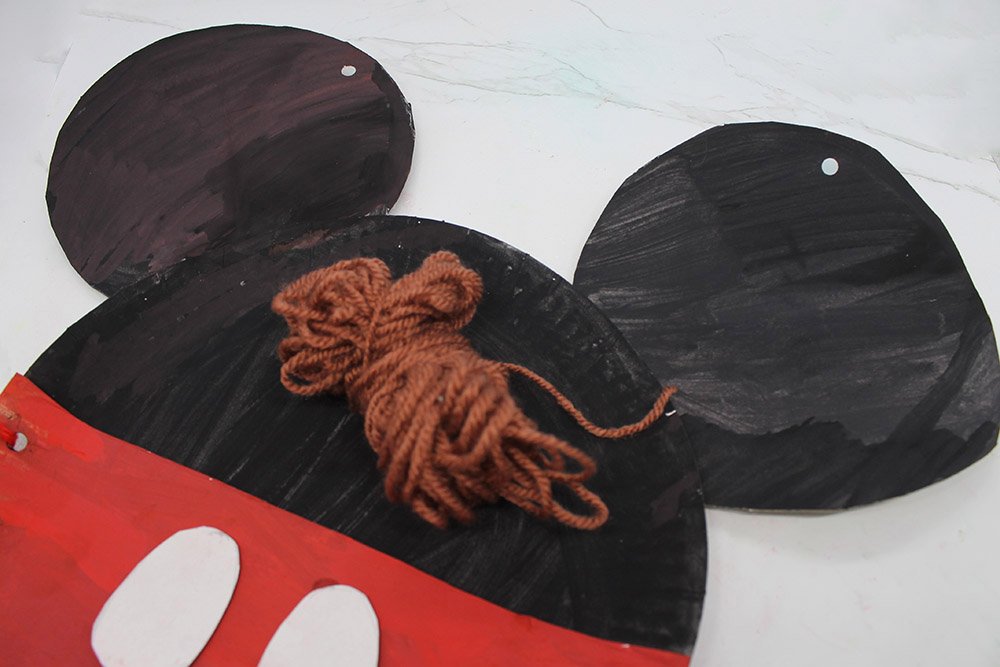
Make two holes on the upper part of the paper plate. Tip:It's probably a good idea to loop the yarn twice or more so as not to put too much pressure on the holes once the craft is hanged.
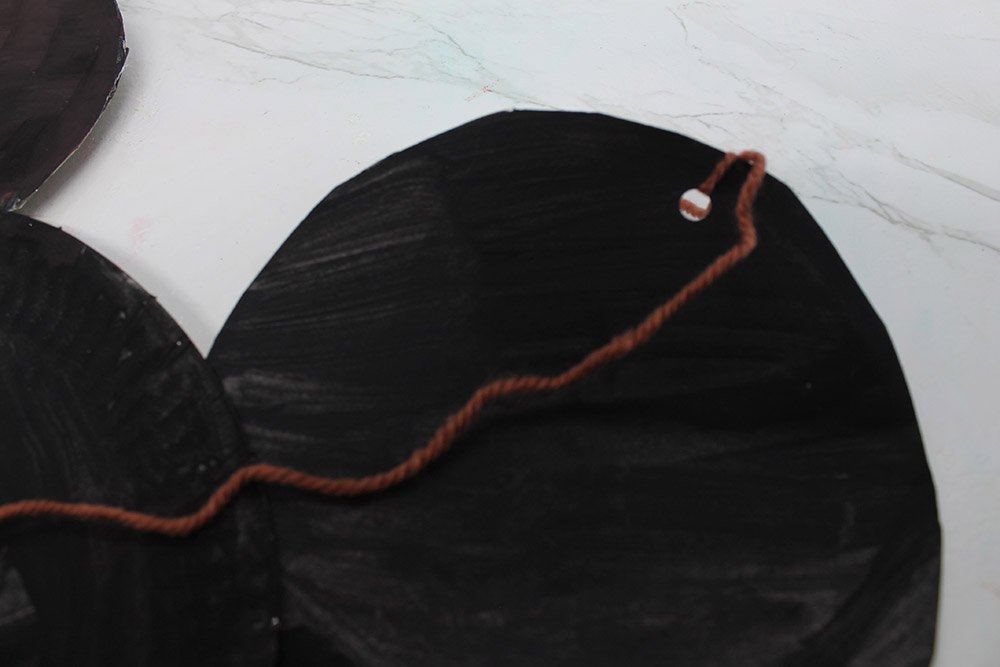
Tie one end of the yarn to a hole in the right ear. Be sure to have measured your yarn before you tie the other end.
Now, tie the other end of the yarn to the left hole. Loop the yarn the same number of times you looped the other end. This would be subtle but a good choice of color for the yarn would elevate the aesthetics of the craft.
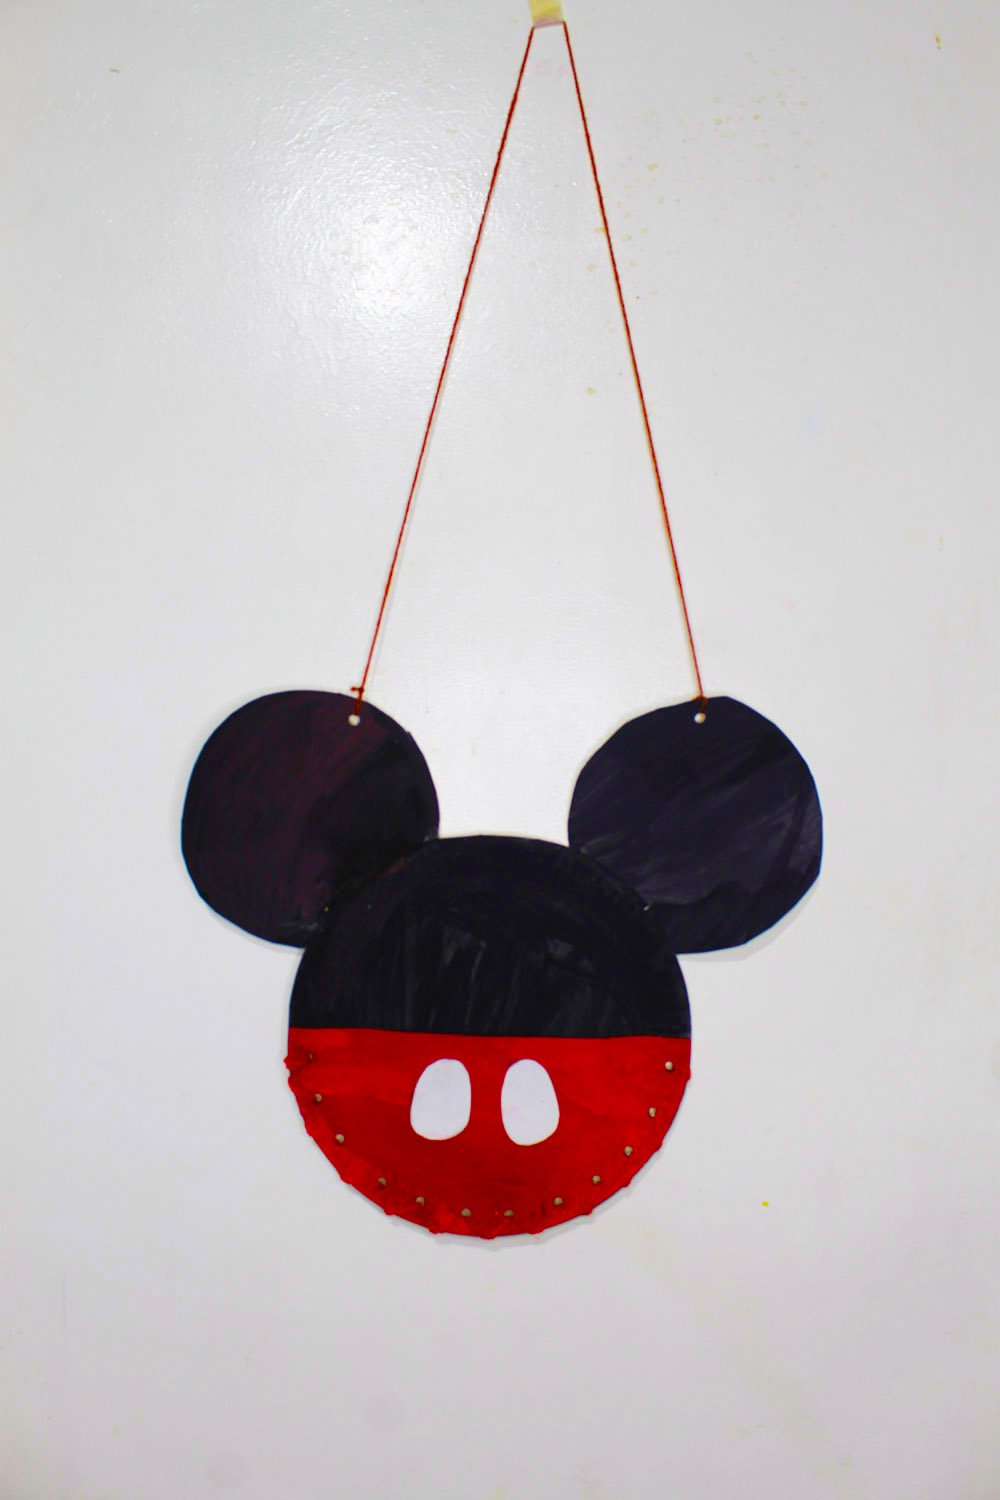
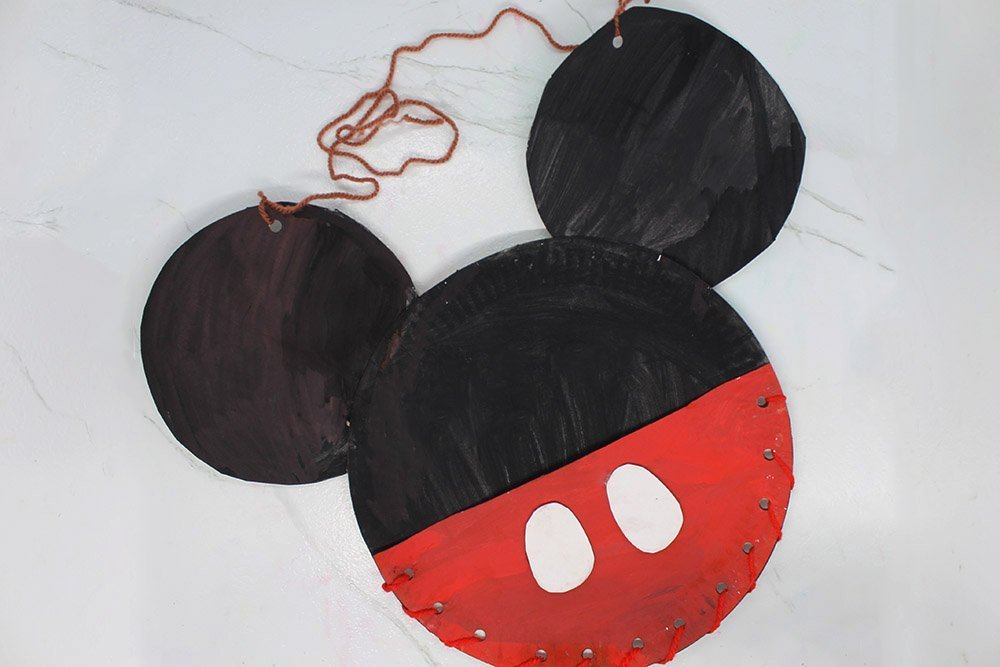
Hang the craft in a wall. It would be great if it is placed somewhere prominent. But it should be free from the elements in order to make this craft last longer.
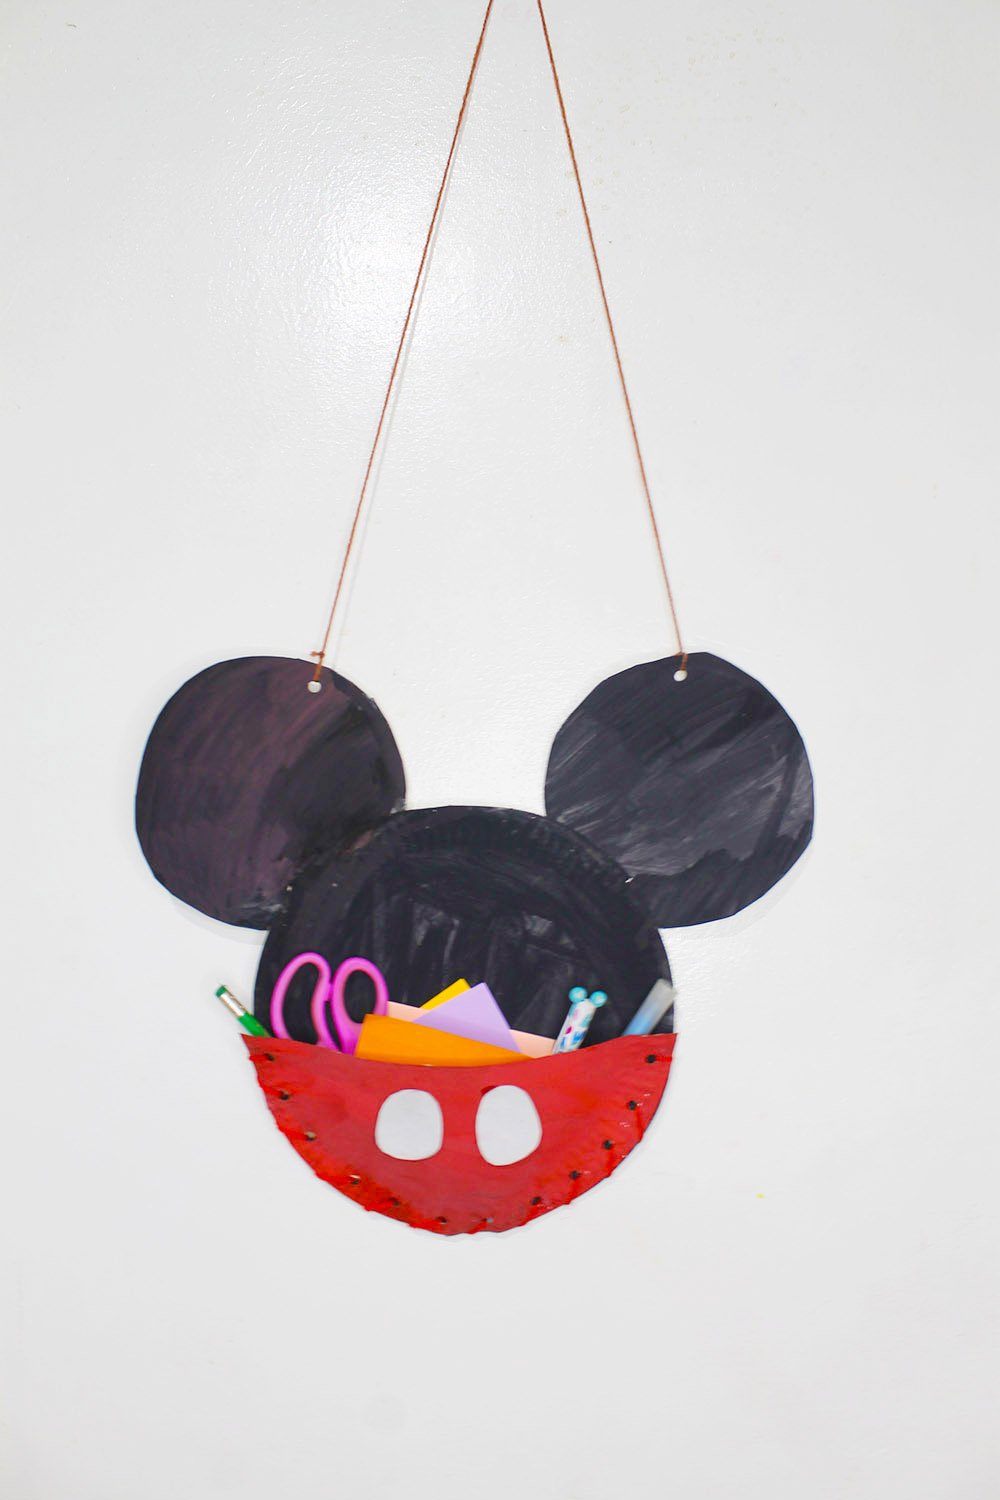
The last thing to do is to put in your art materials or whatever light enough things you might want. And that's it. Your paper plate mickey mouse is done!
We hope you had fun with our guide. If you want more awesome instructions checkout our dozens of paper plate crafts. Also, if you have questions or a particular step you like comment down below.
Extra Tips
- Make sure to teach your children the proper way of using scissors, and give them blunt nose scissors for added safety.
- You could reinforce your strap. First, you could cut a suitable length of yarn and fold it in half then tie together the ends. Proceed to the last step after doing this.
- Another awesome thing you could do is add more details to your paper plate mouse. Let your creativity shine! Maybe make a Minnie mouse paper plate craft or a pirate mouse. There's a lot of things you could make.


It was hard – but i did it 🙂
I really like the mickey mouse design. I was originally searching for a pouch.
I like how you can just look at the pictures if you want to go fast. But the writing makes it clearer and enjoyable too. MADE MINE EASILY
It took me awhile. overall i thnk this was a good kids craft
Thanksss diy
I’ve been browsing online more than three hours these days, but I never discovered any attention-grabbing article like yours.
It is pretty price sufficient for me. Personally, if all website owners and
bloggers made excellent content material as
you did, the web will be a lot more helpful than ever before.