Best Paper Plate Parrot Craft for Kids | Fast and Easy

Introduction
Welcome to our guide on how to create a quick and easy paper plate parrot. An important thing to keep in mind is that you can choose a different color for the body, wings, and tails of your parrot.
We start with creating the body of the bird. Then we move to creating the wings and tails then finally we put it all together to create a vibrant parrot.
This is a simple, affordable, and fun activity that will only need a few materials and tools. Best of luck!
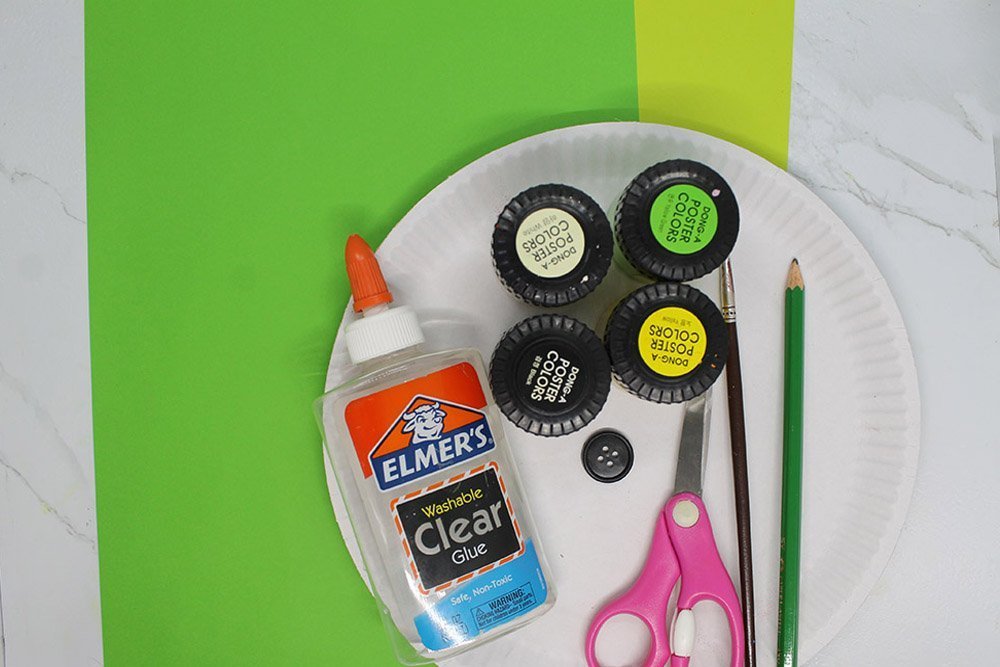
Tools
- Scissors
- Paintbrush
- Pencil
Supplies
- 2 Paper plates
- 2 Sheets of Construction Paper (Different Shades of Green)
- 4 Poster colors (White, Yellow, Green, and White)
- 1 Button
- Clear glue
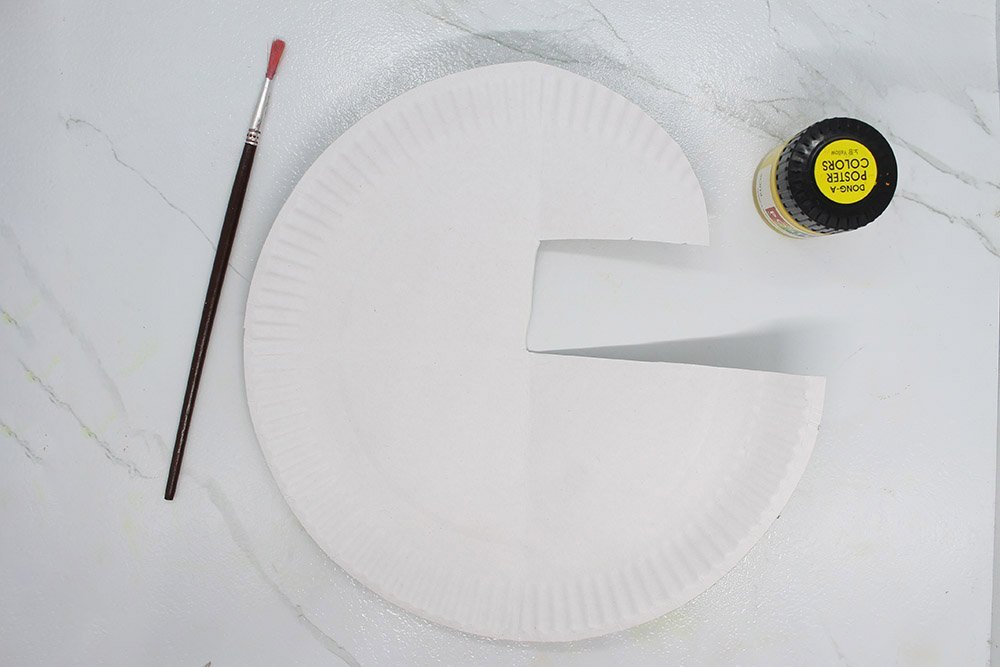
Shape the Body of the Paper Plate Parrot
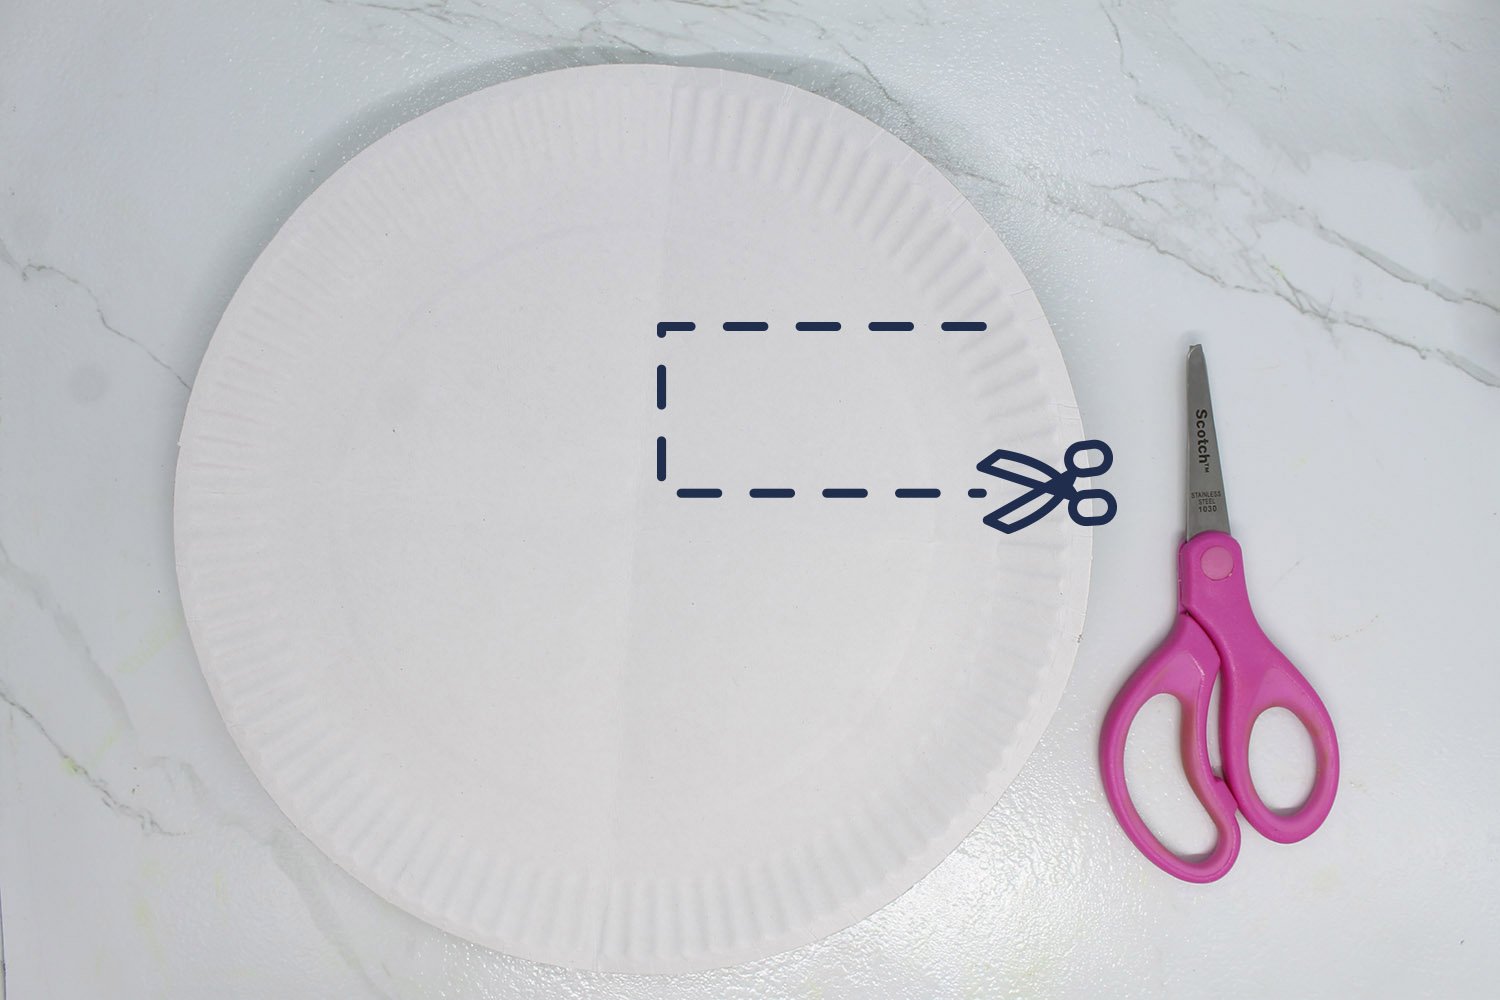
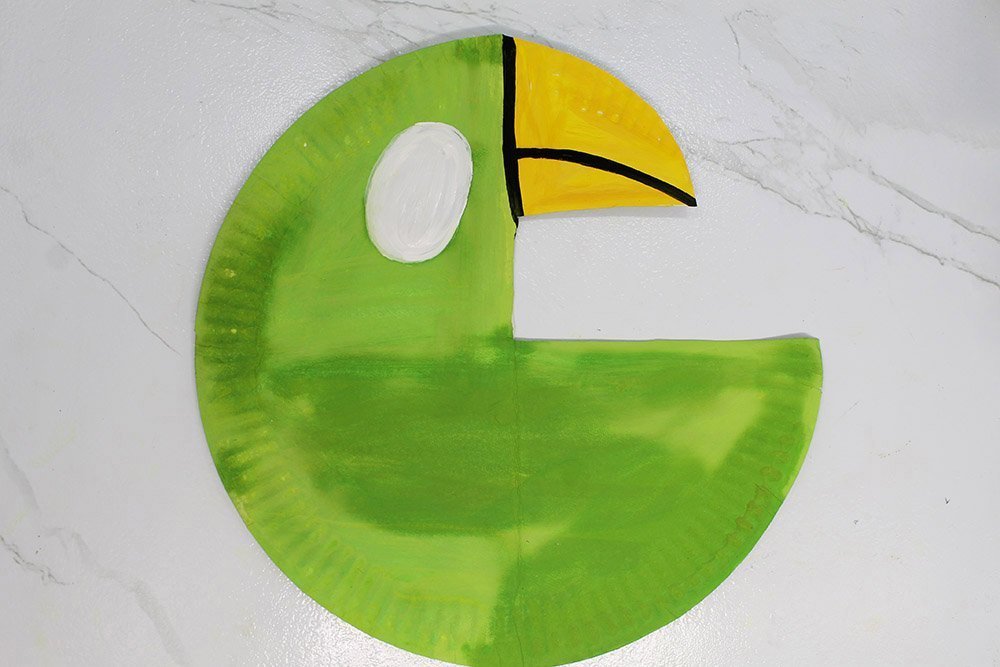
Let's cut away a rectangular part of the paper plate as shown in the image above. It would be much easier if you draw the shape with a pencil first.
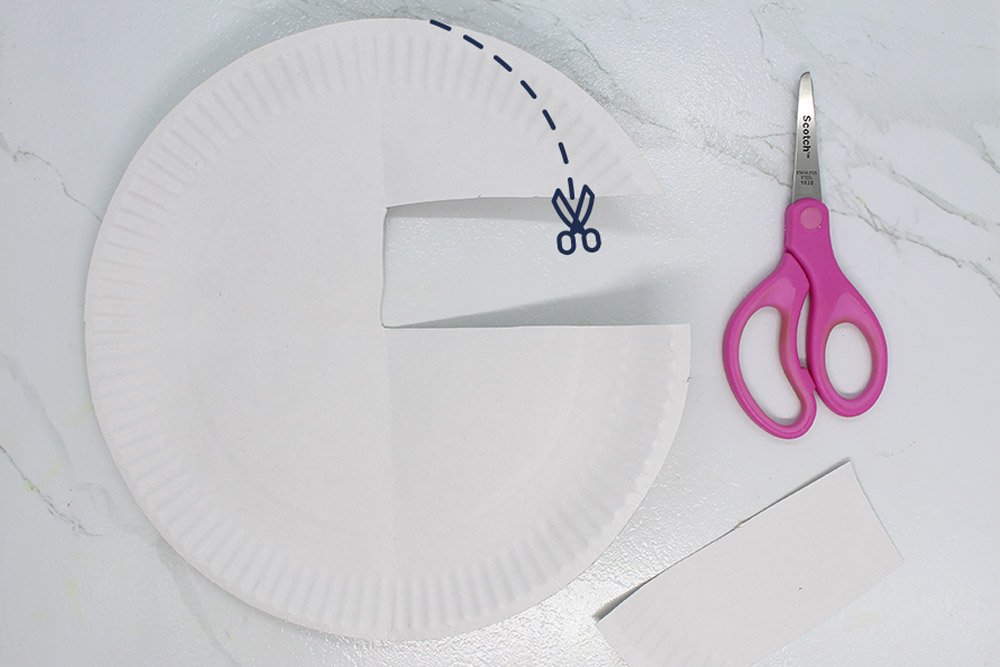
Take note of the curved line in the picture above. Cut your paper plate to make the beak of the parrot.
Remember, it is always better to have a line to follow when cutting. But If you are skilled at using scissors then you could definitely cut right away.
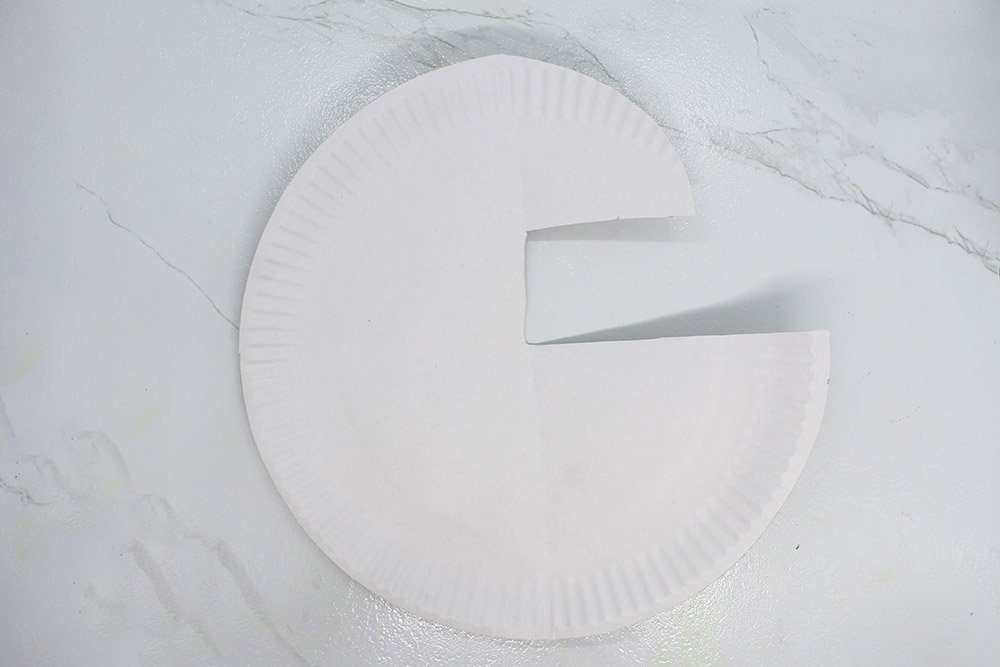
The shape of the parrot paper plate is complete. Good job.
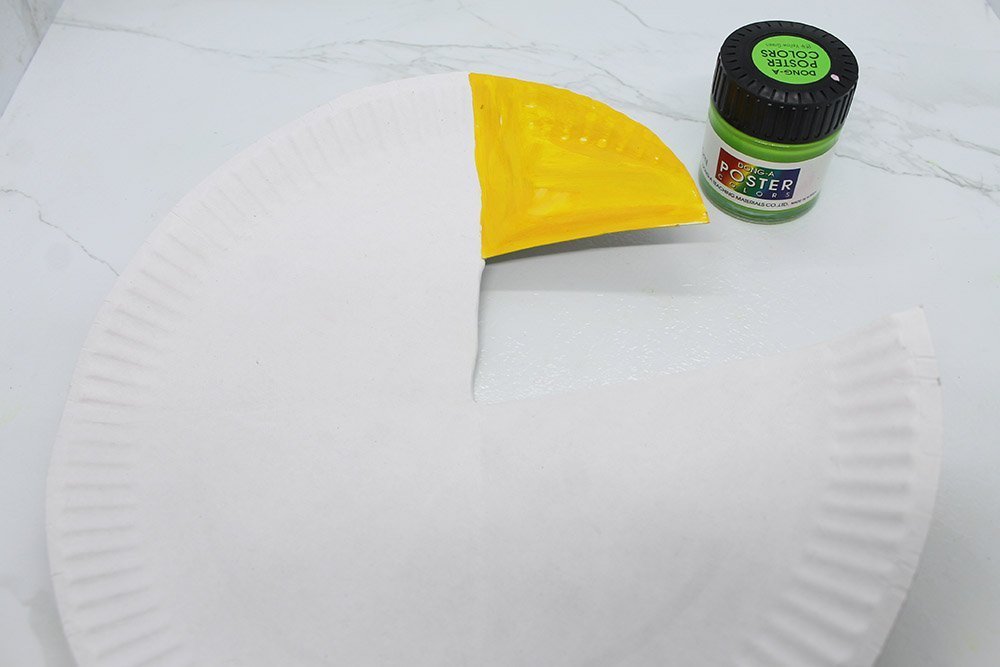
Paint Your Paper Plate Parrot and Add the Details
Let's get our yellow poster paint and start painting the beak. A bright yellow beak will make a good contrast to a green body.
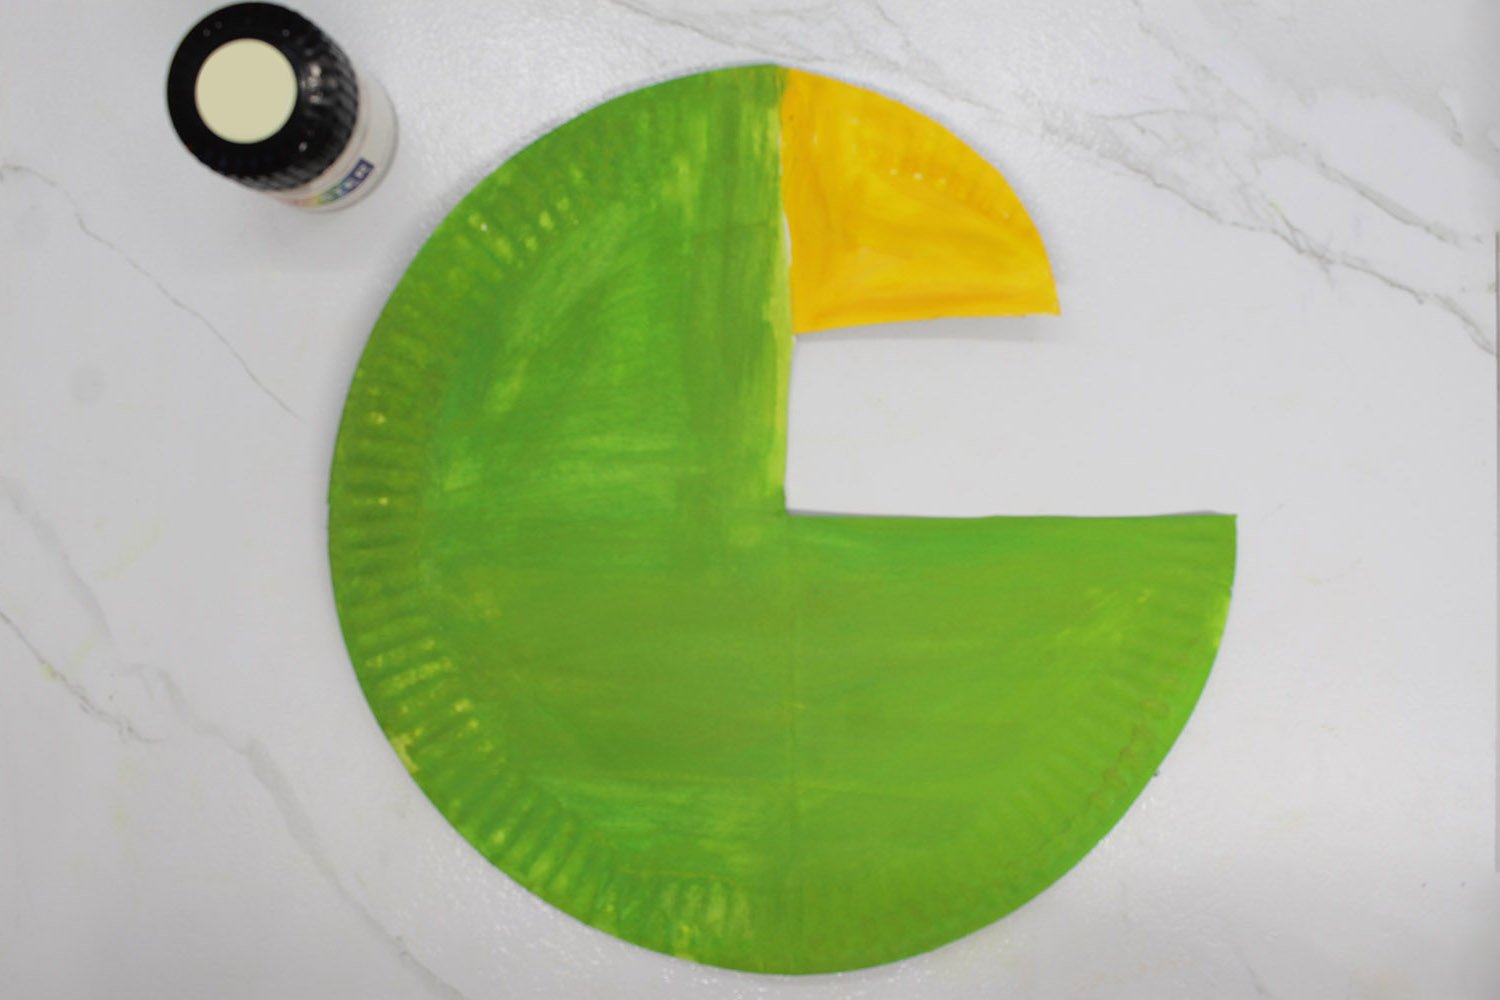
Now it's time to color the body of the parrot. In this case I used green. But orange and blue are two good choices too.
To make the eyes, use white poster paint to create an oblong shape. Place it near the beak but not too close else the parrot would look funny.
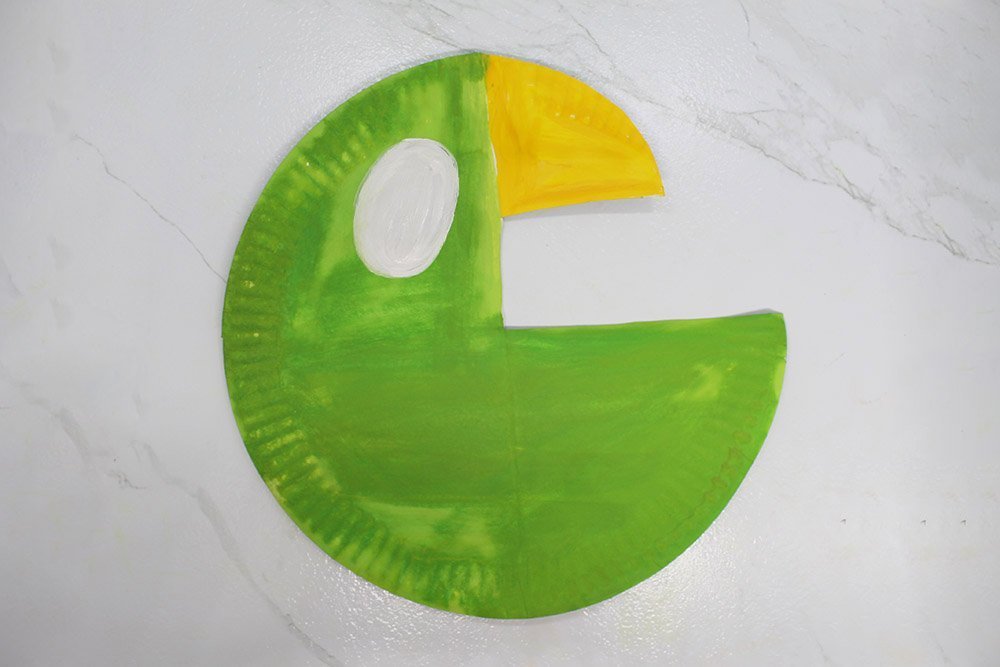
Then, you can create the lines in the beak to make it more realistic. This detail makes the artwork more pleasing to eyes.
Finish the eyes with a black button. Use glue to stick the button on the upper part of the parrot's eye.
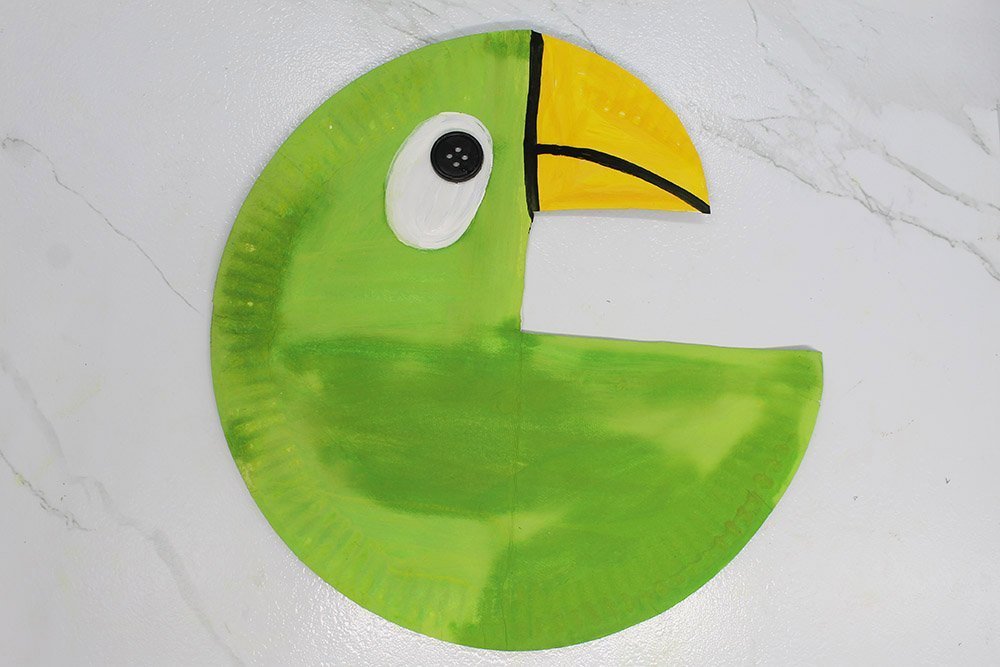
Nice job! The face and body is done. Next, you will be creating the wing/s of the parrot.
Make the Wing/s of your Parrot
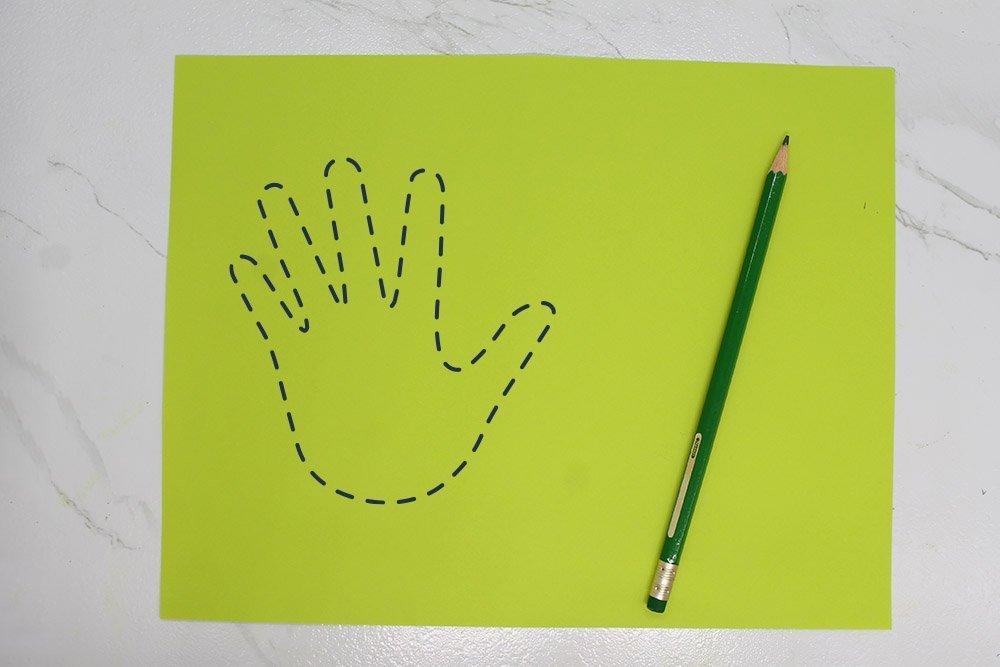
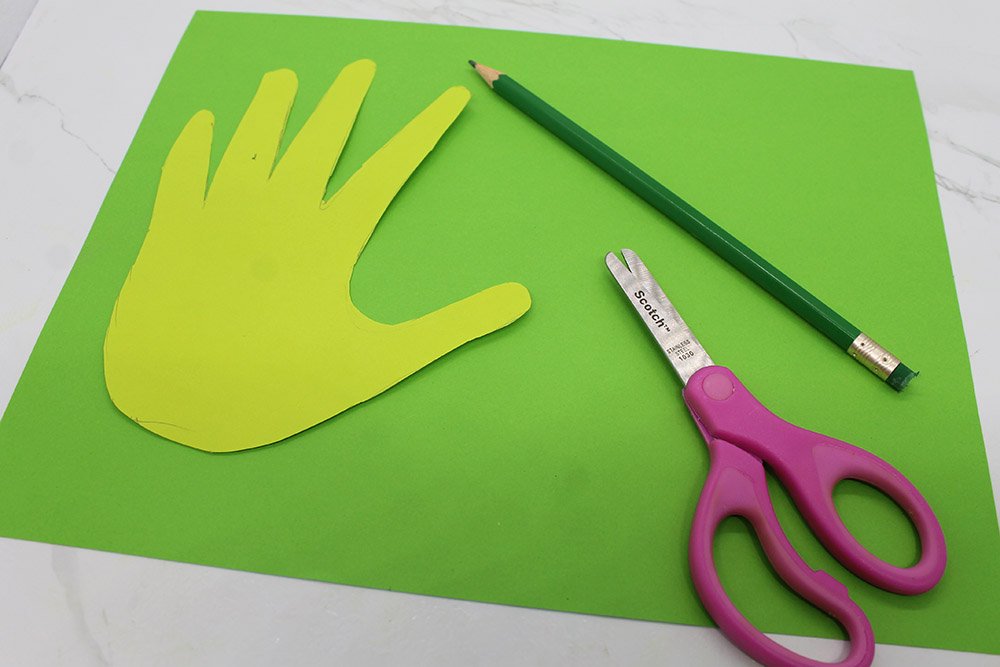
Put your left hand on top of a construction paper and trace. Doing so will make drawing your hands easy.
What's cool about this craft is that its your own hand that will be the shape of the wings!
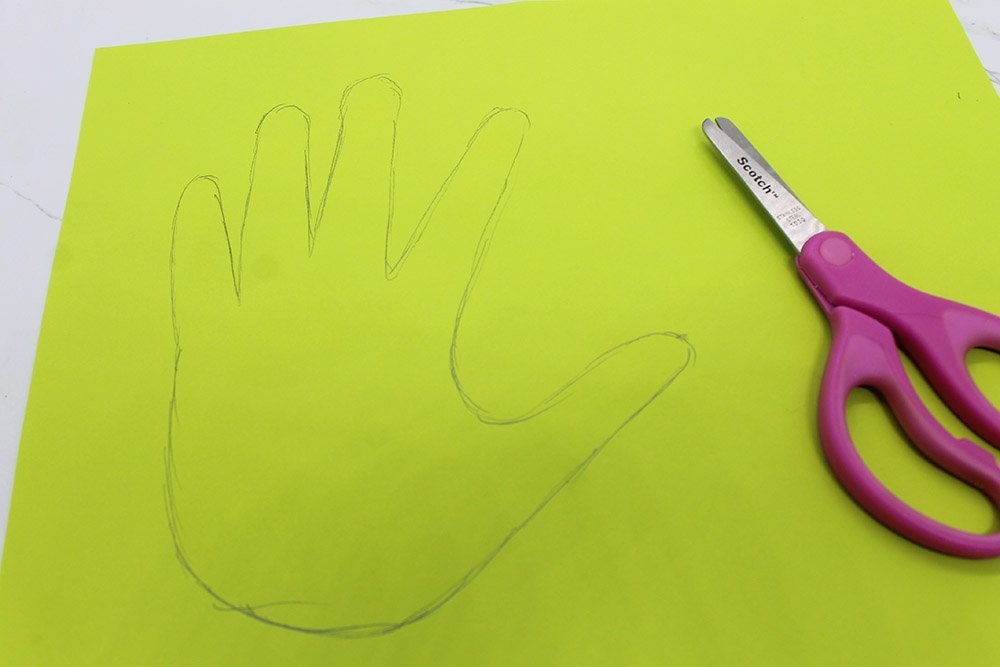
Time to carefully cut the hand shape.
At this point, you are close to making the wings. Good job!
Then you can trace another hand shape for our paper plate parrot. Use the same hand as before.
Another way to make another wing is to use the one you just made. as a guide.

Again, cut out the shape.

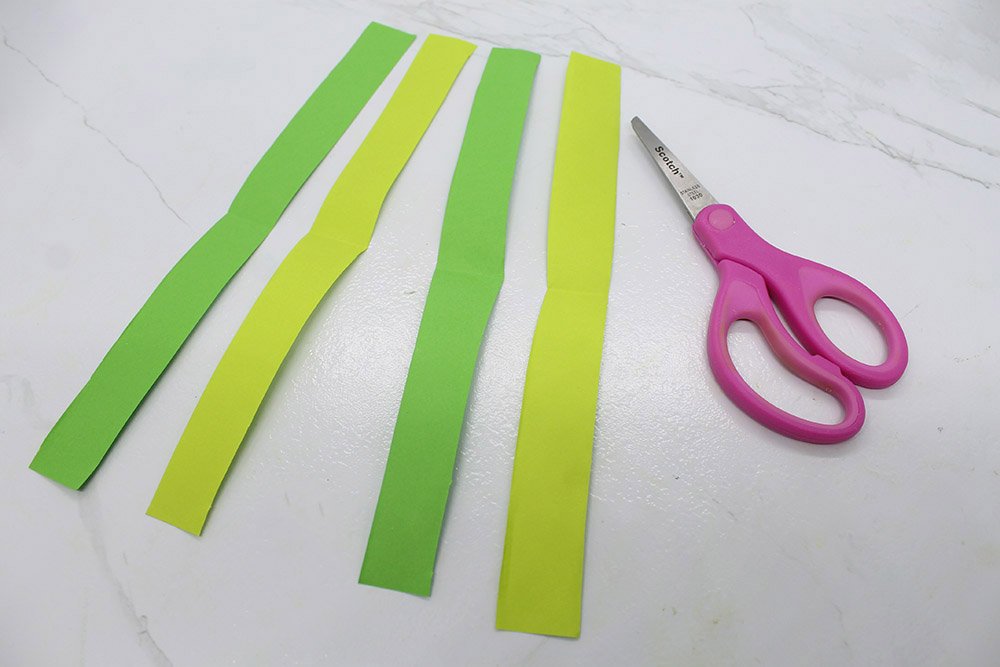
You now have two hand shapes of different shades.
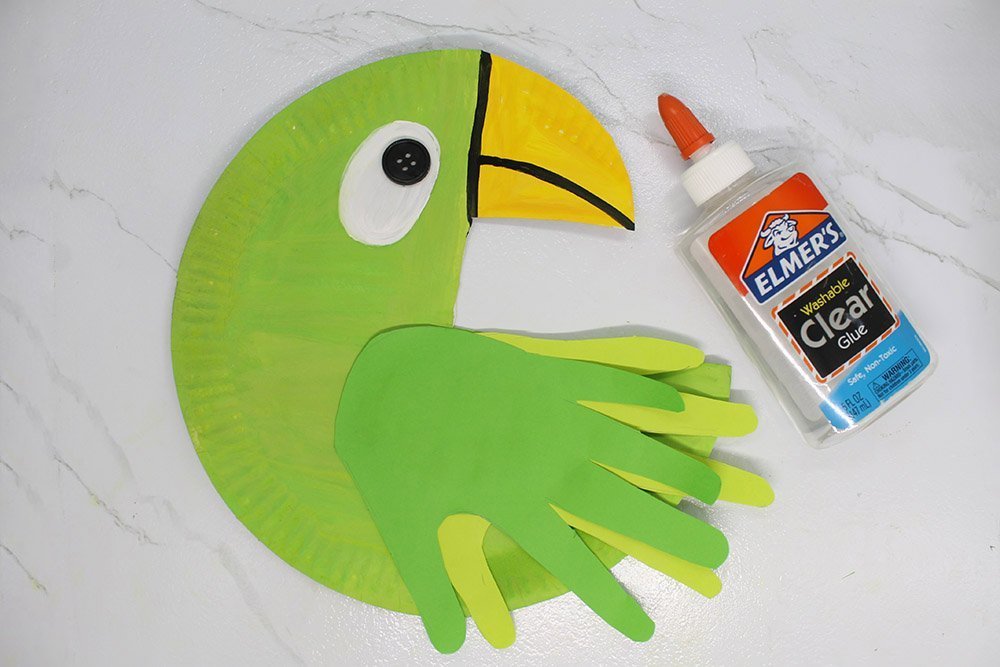
We'll use glue to attach the wing/s of our parrot. Almost there!
Create the Feather Tails of the Paper Plate Parrot
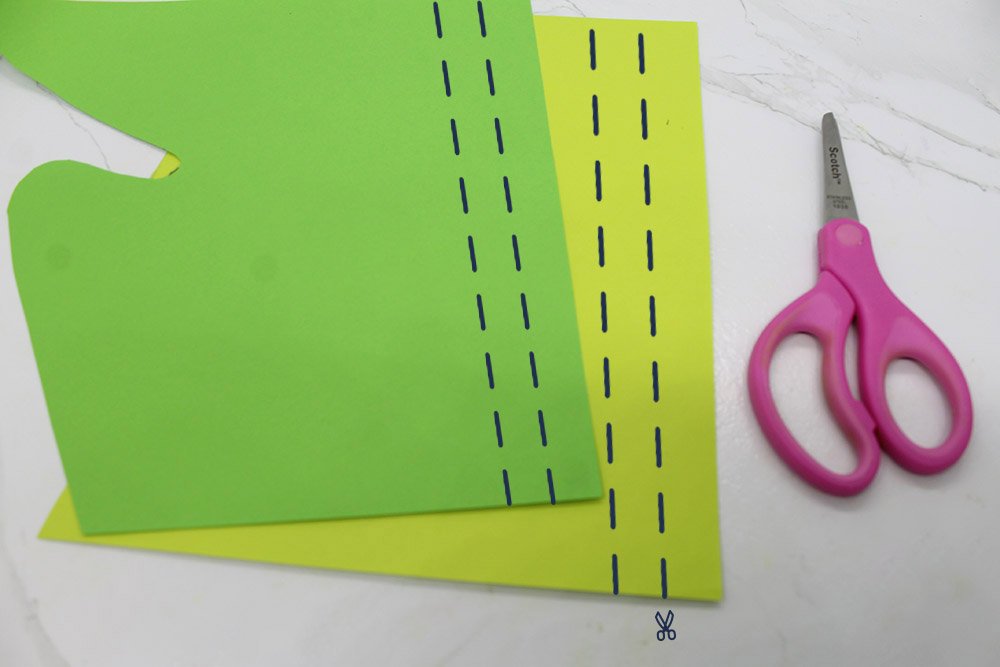
Let's make four strips out of the remaining construction papers. Make two from each paper.
After cutting the construction papers, our next step is to attach them with glue at the back side of the paper plate.
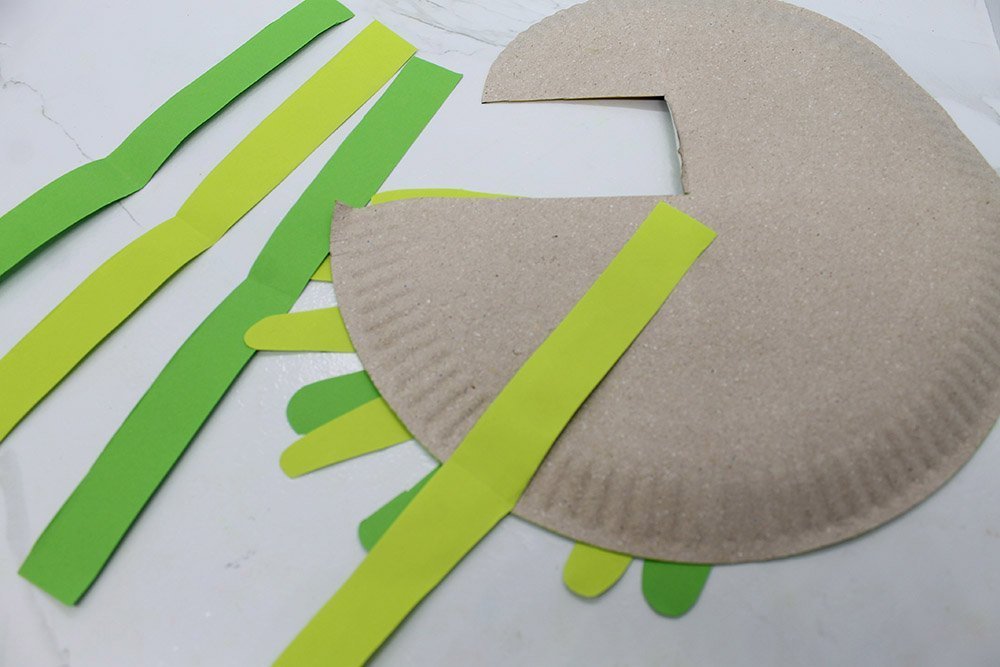
Glue one strip of paper to the back side of the bird. It should be directly below the baste of the beak.
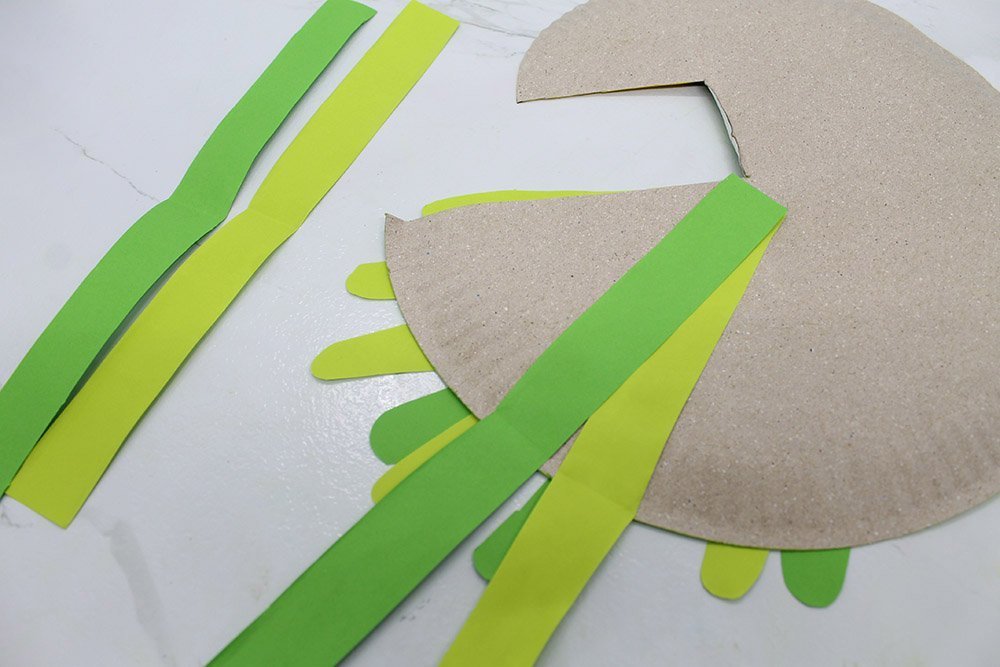
The next strip should be on top of the last one. But change the angle. You want every strip to be seen.
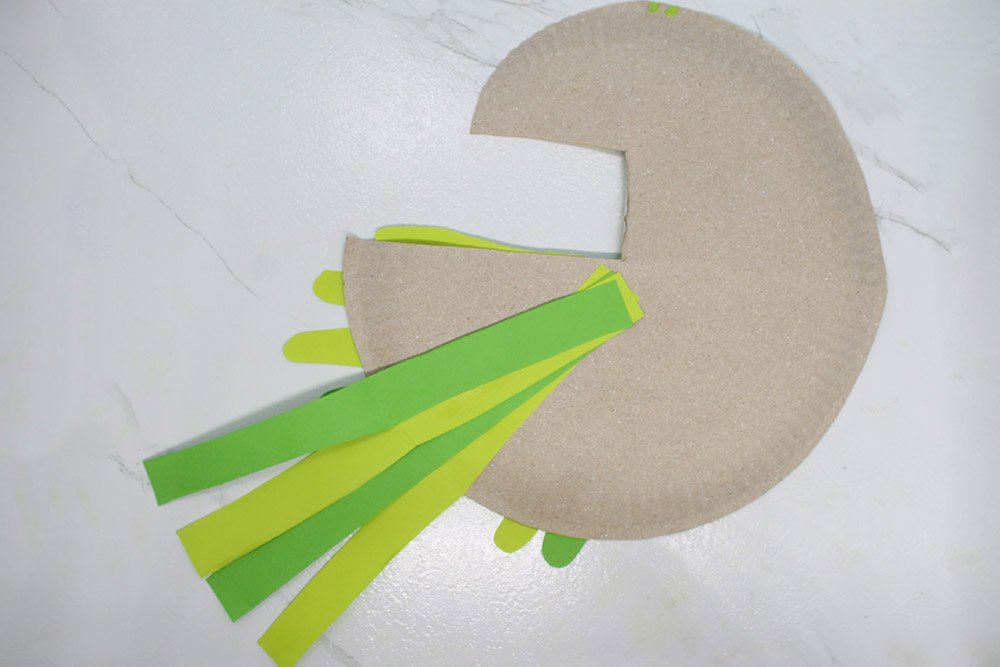
Do this until the last strip is glued. After doing this, the tail feathers would be completed.
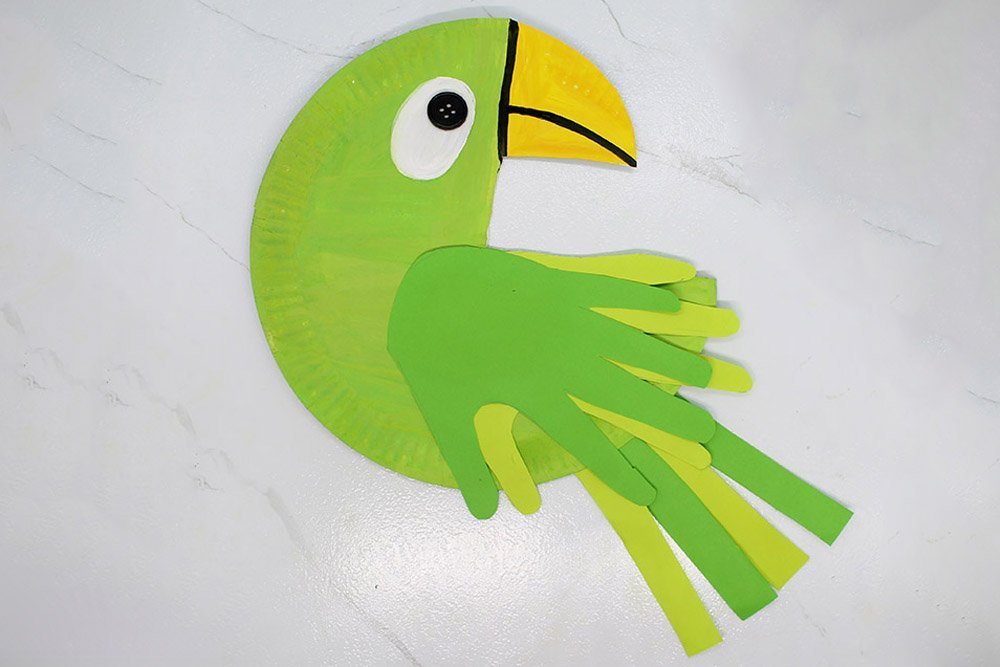
Congrats! You have now made a vibrant parrot craft. Show this to your friends or put in your garden as a decoration.
Extra Tips
- Don't use too much glue because it could ruin the papers
- Maker sure to cut correctly the wings and tails. If you are having trouble getting a perfect cut it's okay. Keep on trying.


I remember the last time I traced my hand was when i was a bit younger than my daughter is now. <3 ahhh kids can take u back to ur own childhood
I love how you can let your creative side glow with this parrot craft! 5🌟
I wish I can see your artwork and me share mine 🙁
Definitely easy and fast to make, and not false advertising. Enjoyed making this so props to uou guys!!
Thankss for making this 🦜 easy for me and kid. Couldn’t go to the zoo so decided to make one just for now till restrictions lessen. More power sirs/mams