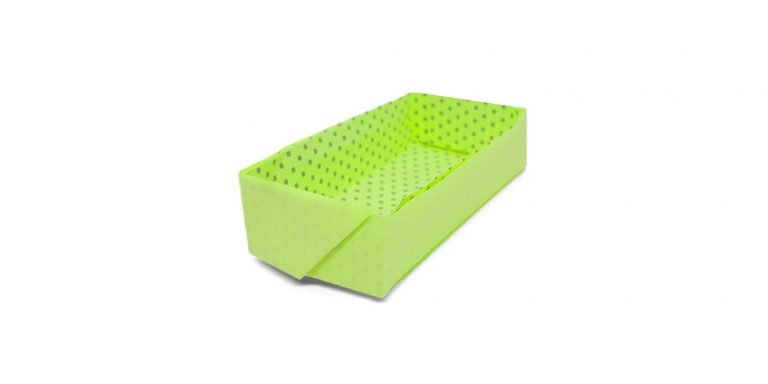
Introduction:
There are many ways to make origami boxes. One easy way is to make one with a rectangular piece of paper, although this guide makes use of square paper. Just make sure the paper is sturdy enough so that it can be used to store small items.
You may also use a paper similar to the one illustrated below. A paper with one color on one side is easier to follow and it looks a lot nicer once finished.
This is a short process and is perfect for those who are just dipping their feet in origami. If you like to take on harder challenges just be sure to check out our origami catalog </a>!
Make the base of the origami box
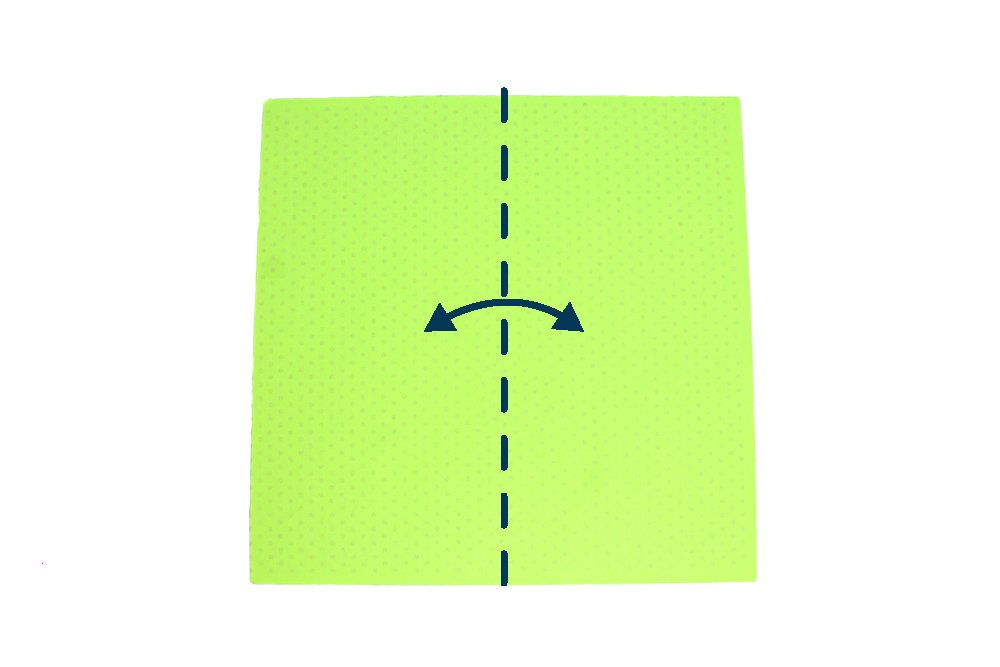
Fold and unfold along the dashed lines. In other words, fold it in half lengthwise and then unfold to make a nice crease mark.
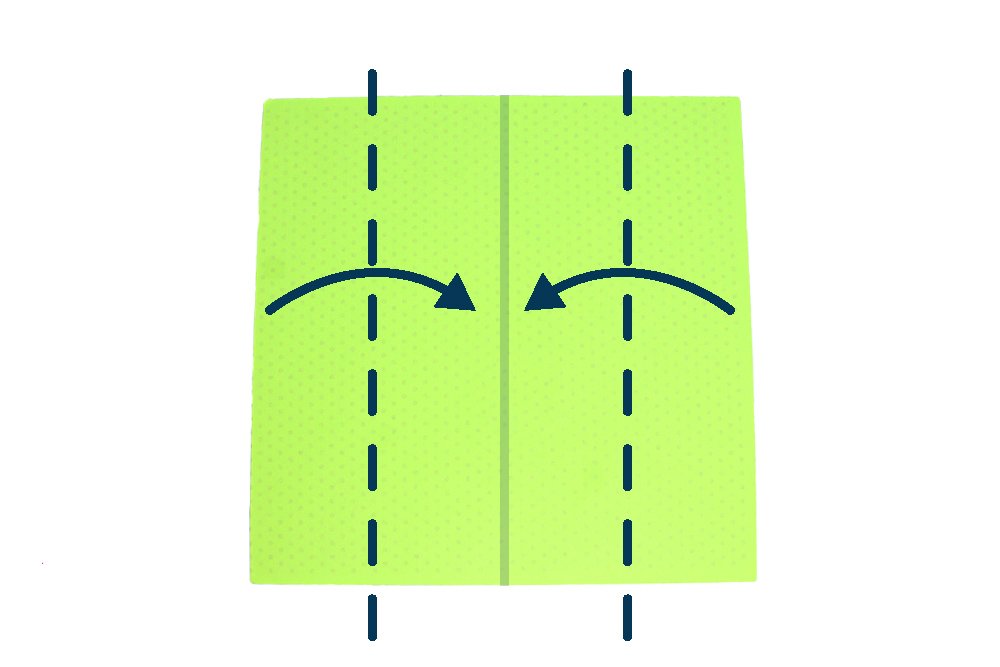
Fold the left and right edges towards middle.
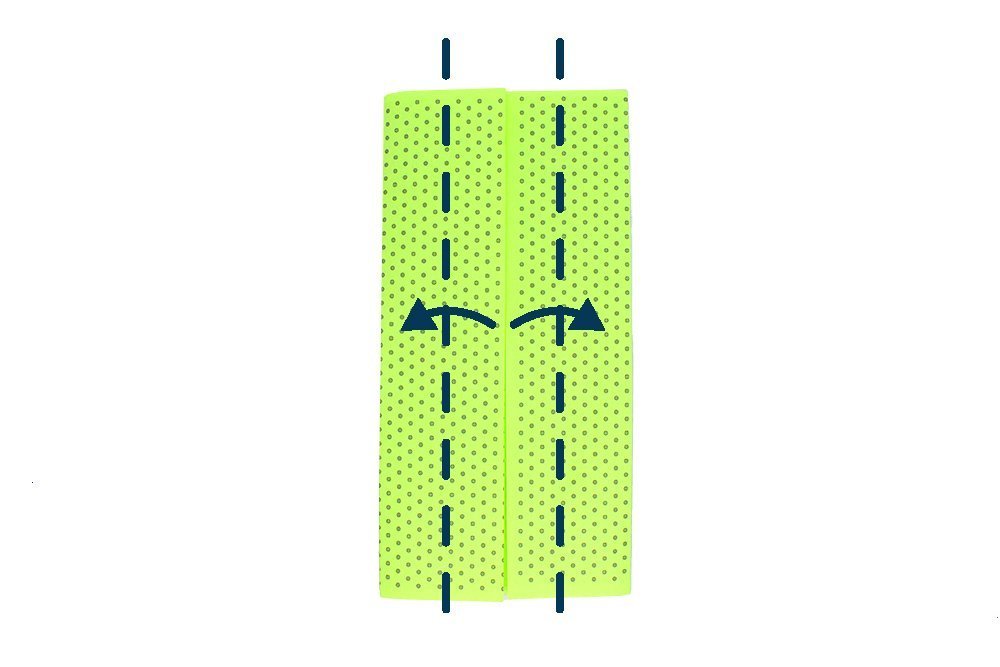
Then fold the top layer along the dashed lines.
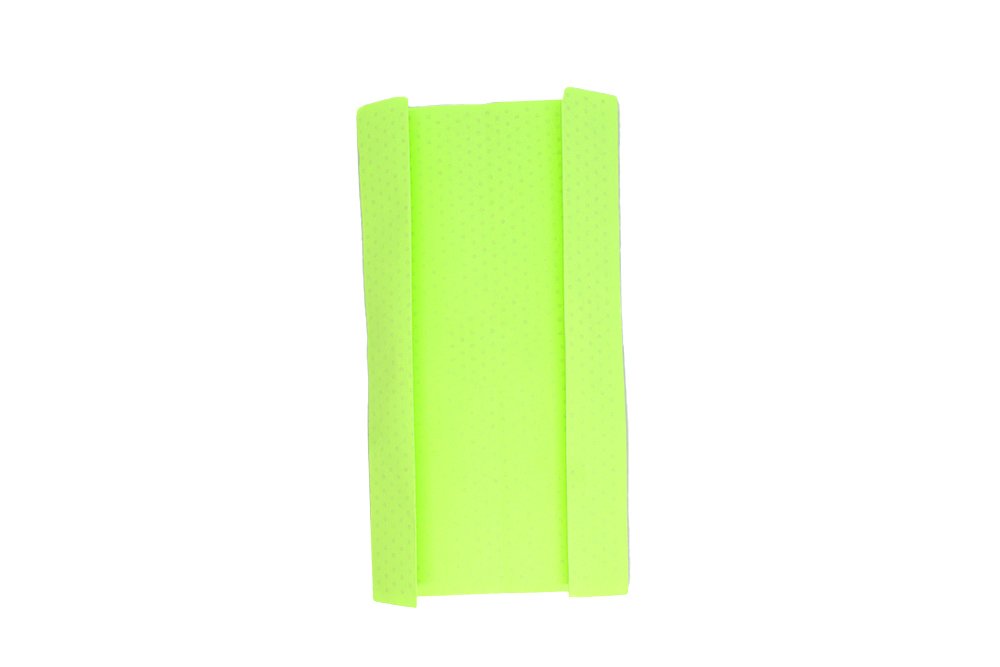
This is what your paper should look like now. Now, flip it over.
Form the corners and sides
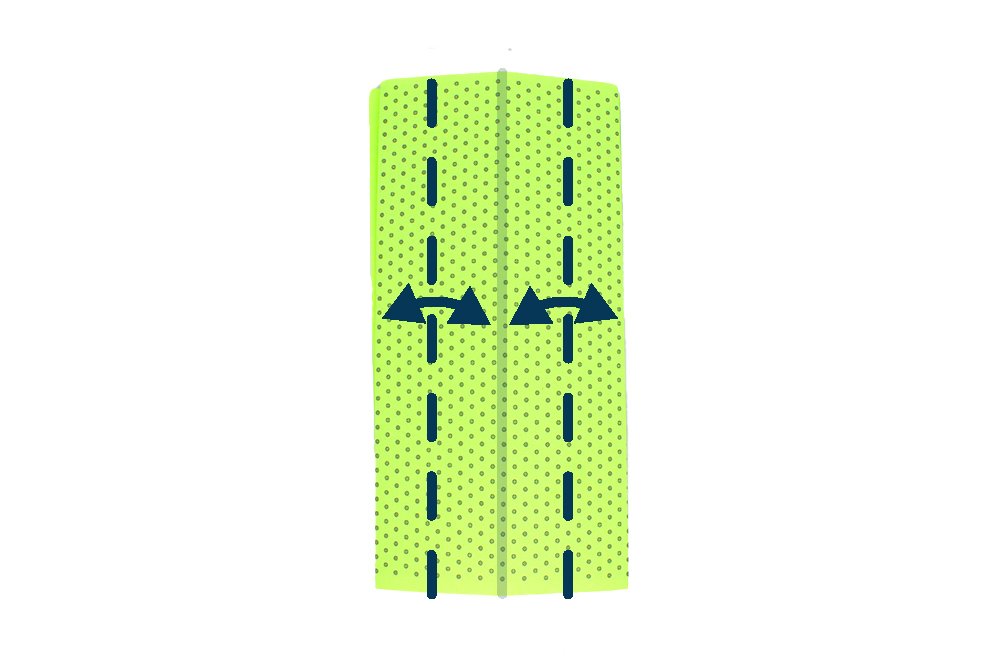
Bring the left and right edge to the middle crease line. Unfold to make some crease marks.
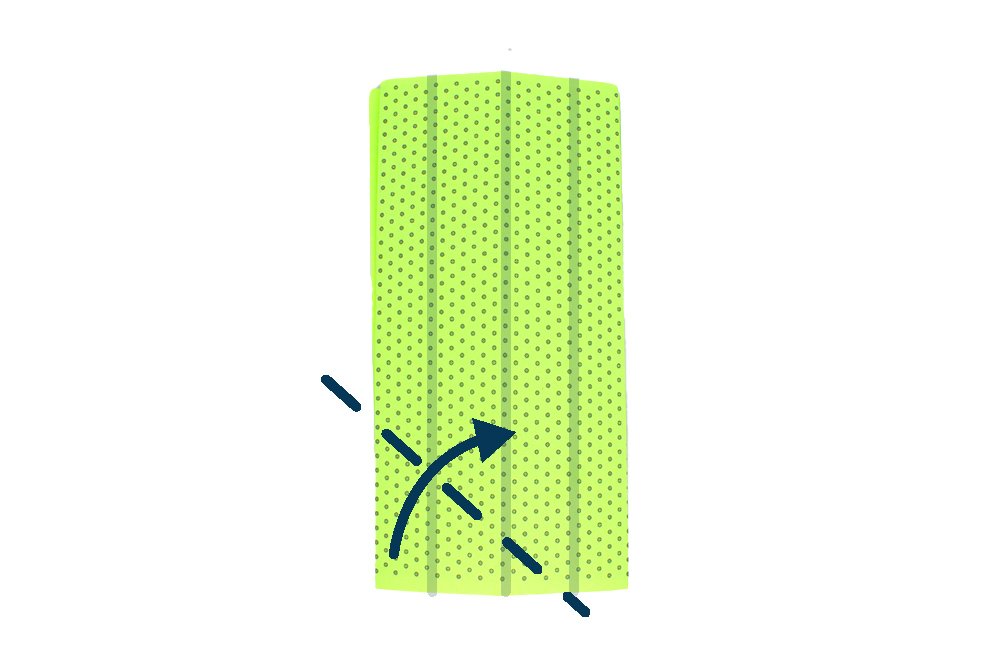
Fold the lower left corner towards the middle crease line.
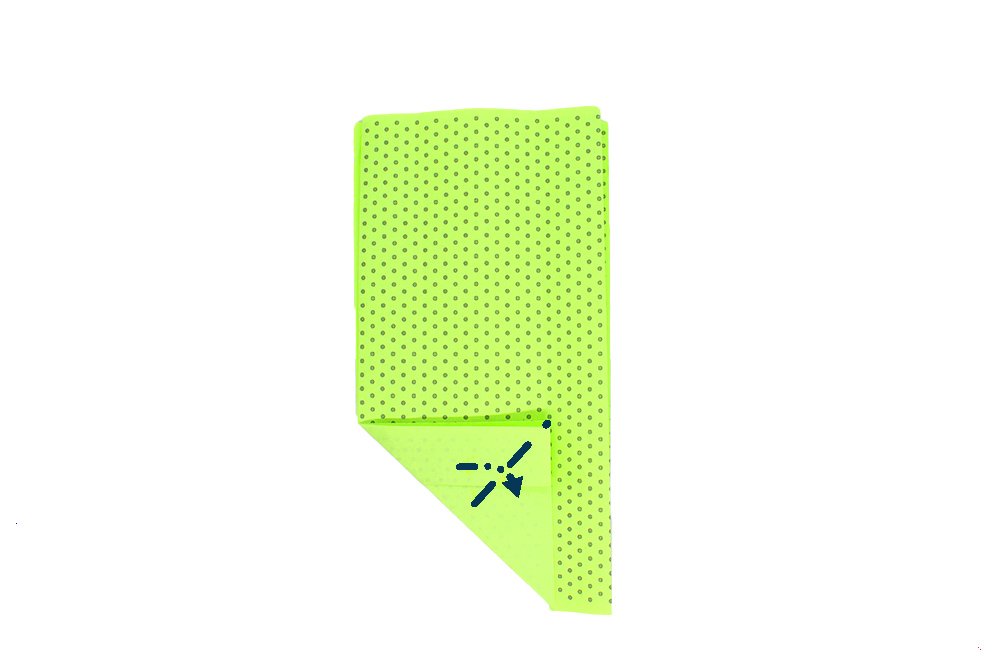
Fold the corner under.
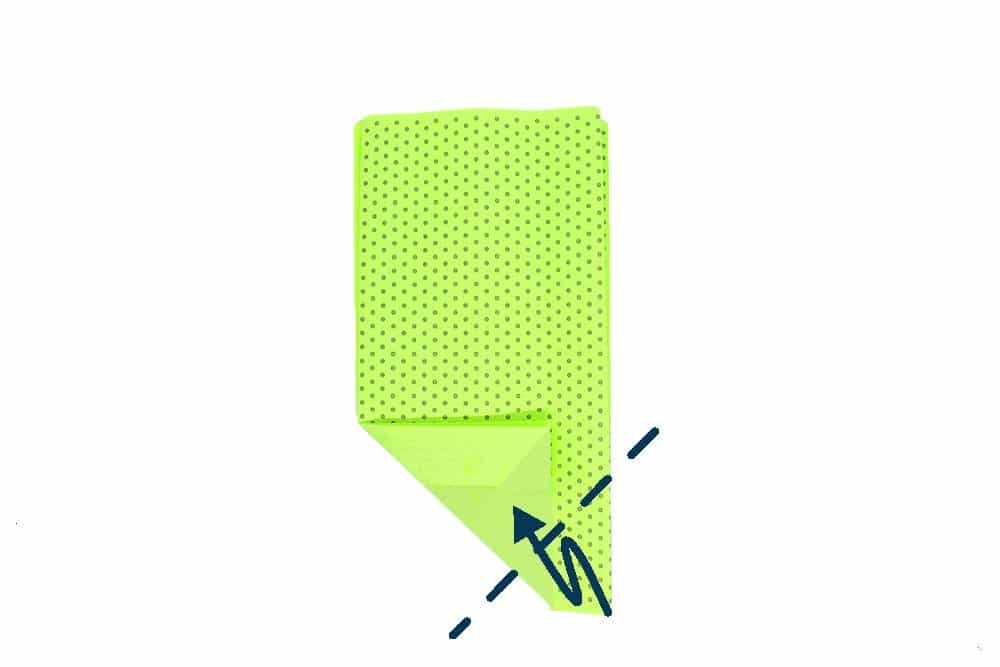
Tuck the bottom right corner to the flap.
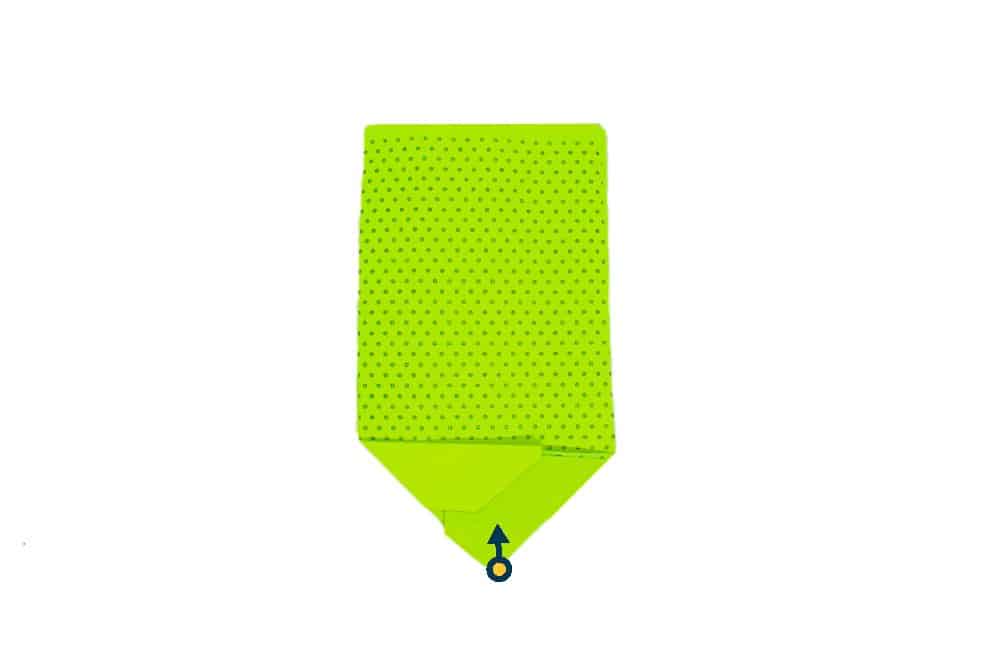
Tuck the bottom corner, designated by the yellow dot, to the flap.
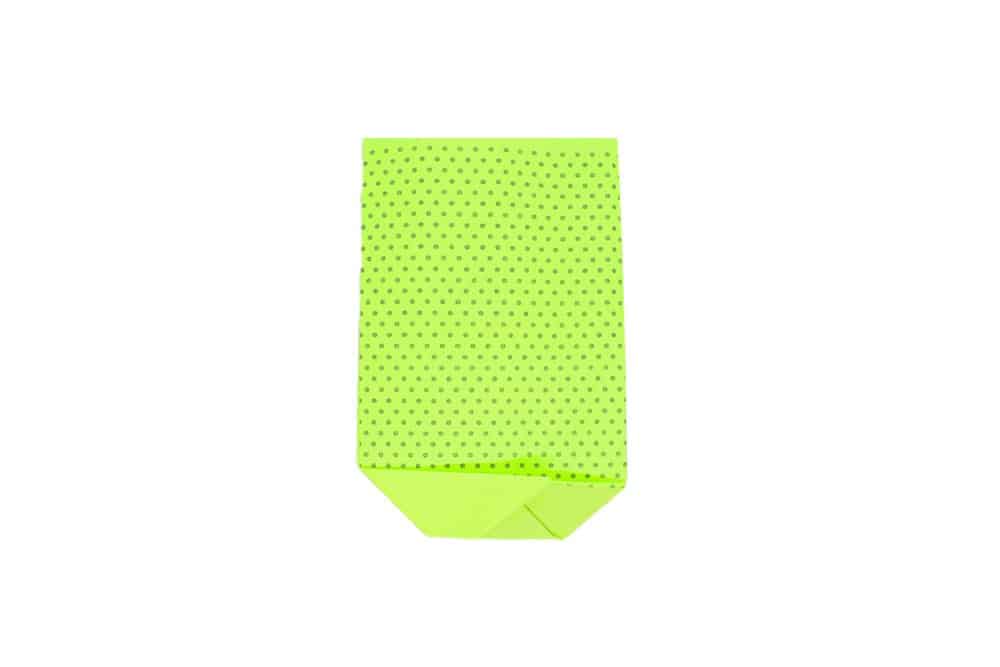
Good job! This is now what your origami paper should look like. It's now time to finish the origami. Repeat the steps made in the lower part to the upper part of your model.
Shape it into a 3D paper box

Slowly lift the sides out. As you lift it outwards, it will form into a box.
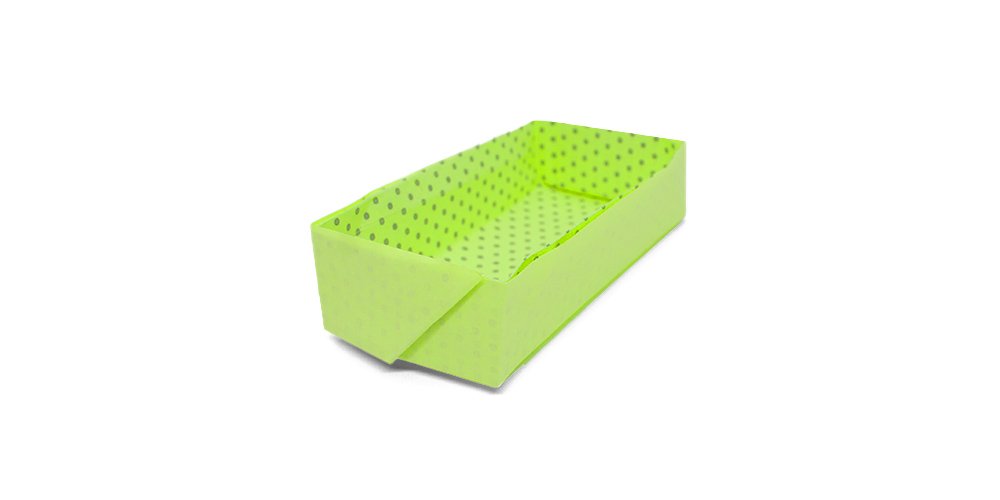
Ta-dah! Your origami box is finished. Store anything you like once finished. Experiment with different sizes of paper and different methods to make boxes.
Extra Tips
- Decorate the box after. Grab your coloring materials and decorate the box however you want. You can even stick some stickers to make it extra fancy!
- Use this as a gift wrapper! Instead of using a plain piece of origami paper, use a decorative wrapping paper. Just make sure that it's sturdy enough to withstand folding and creasing.
- Follow the steps closely, stay focused, and enjoy!
- Make sure to crease and fold properly. Apply enough pressure always.
- Once you have finished making this paper box, you can make it extra secure with adhesive. Use some tape or some glue to stick the sides together.
- Use a stronger type of paper if you want your box to be functional. You may use a thin piece of cardboard to make this box extra sturdy.
- Want to make a lid for this paper box? Get a slightly bigger piece of square paper and repeat this tutorial. This can store your little trinkets nicely without the contents spilling.


