A Simple Origami Lily Making Guide

Introduction:
Lilies are beautiful and elegant flowers that make great statement pieces and decorations anywhere. In this origami tutorial, we are going to make an elegant origami flower of a lily. An origami lily can be quite tricky to make, but this step-by-step instruction will help you make an intricate paper flower.
For this instruction, use a thin piece of origami paper. That way, it is easy to curl the petals of the origami. It is also better to use origami paper with color on one side to follow the instructions much clearer. Once finished, it would make a beautiful decoration anywhere or in any event.
Enjoy!
Make a Waterbomb Base
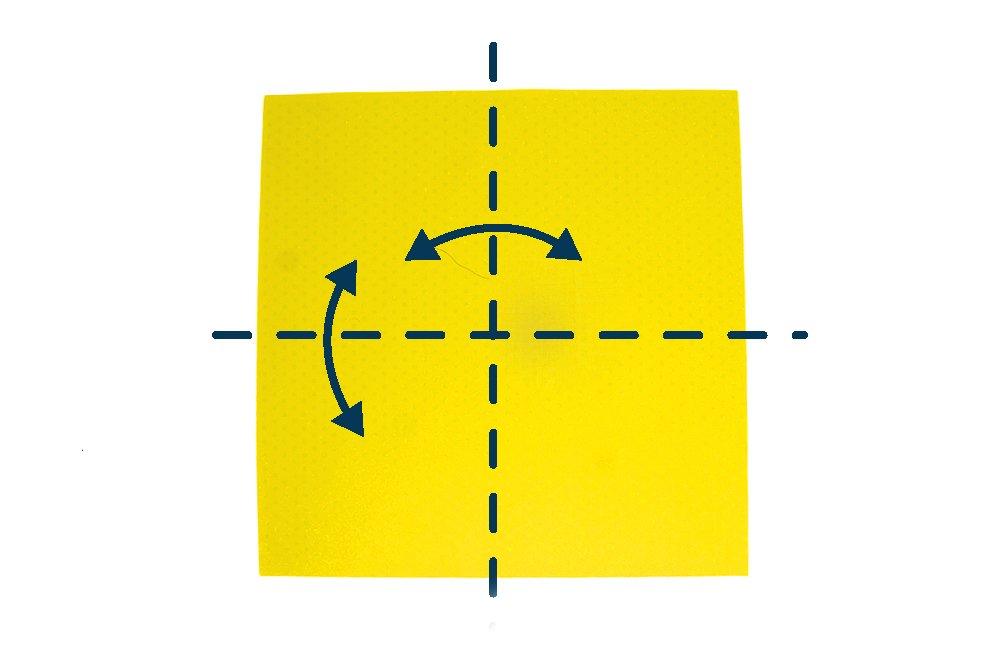
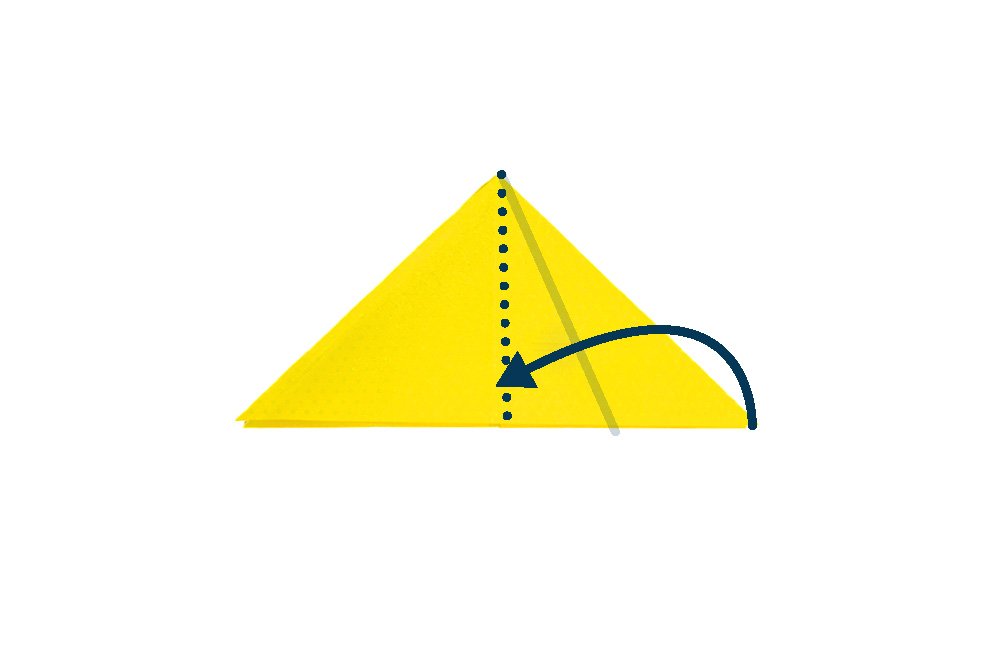
To make this origami lily, get a square piece of origami paper and lay it on a flat surface. Fold the paper crosswise and lengthwise in half. Crease the paper well and unfold.

Diagonally fold the paper along the dashed lines. Unfold after.
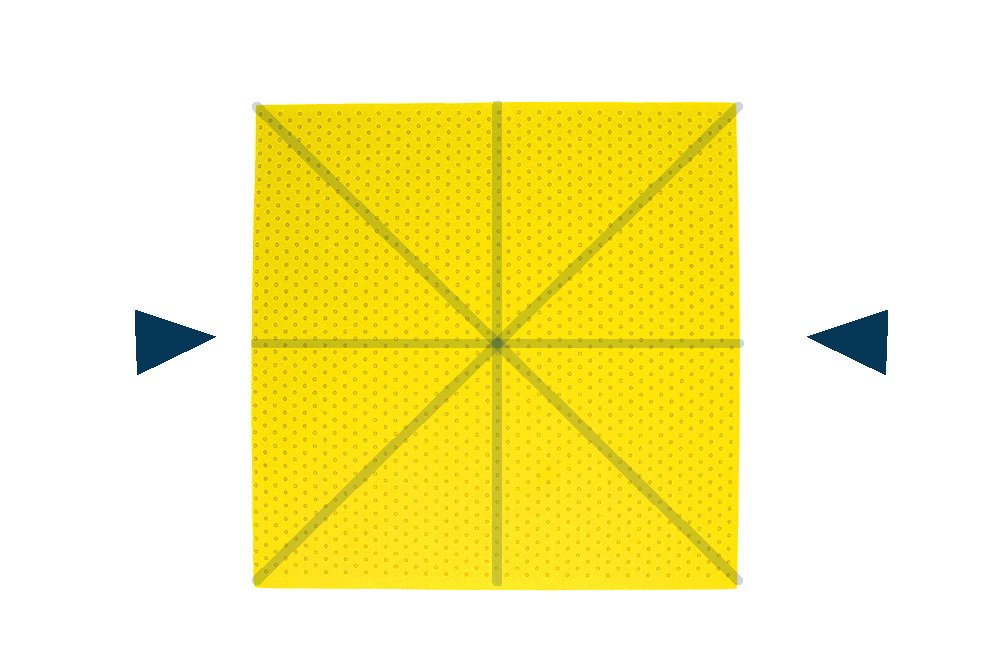
Start forming the waterbomb base by pushing the paper from both sides as shown by the arrows.

As you push the sides in, the background triangle should form.

Hold it down as you continue to bring both sides together.
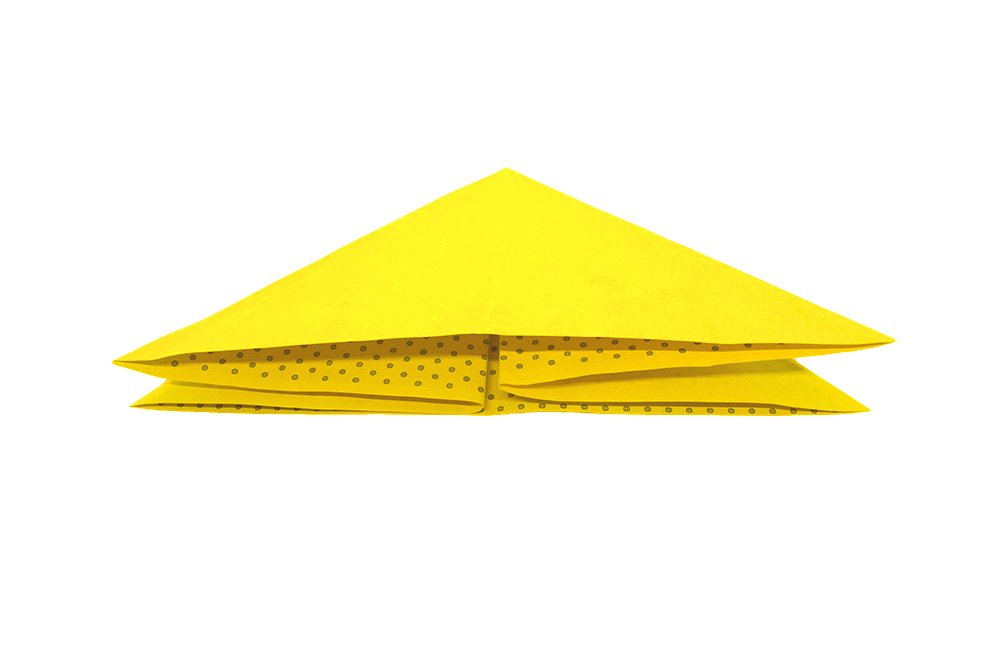
Finish the waterbomb base by squashing down the paper to flatten. Great, time to move on to the next set of steps.
Fold Diagonally and Make Creases
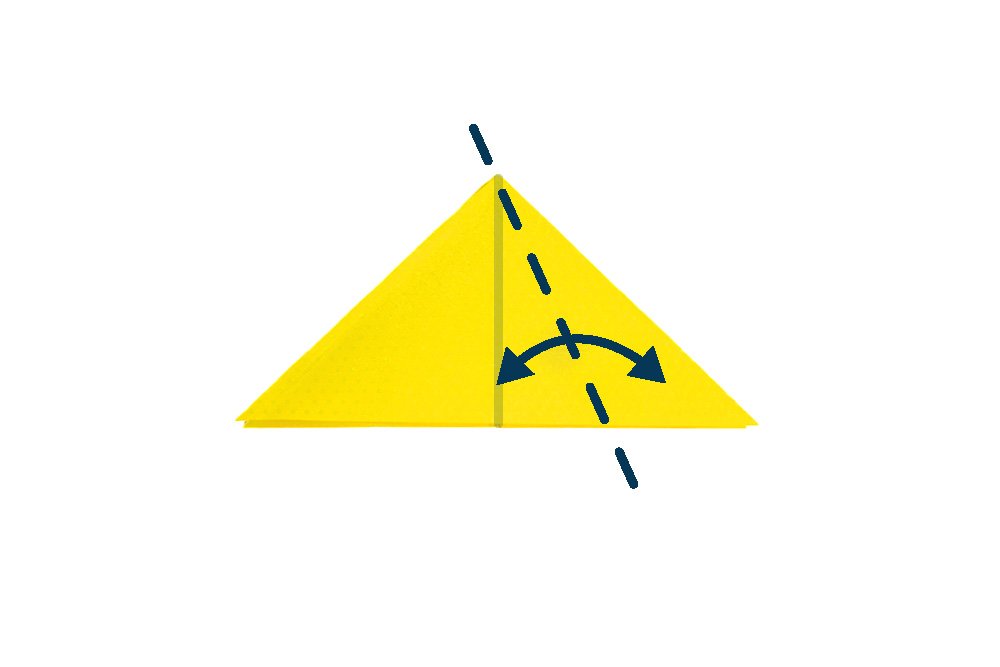
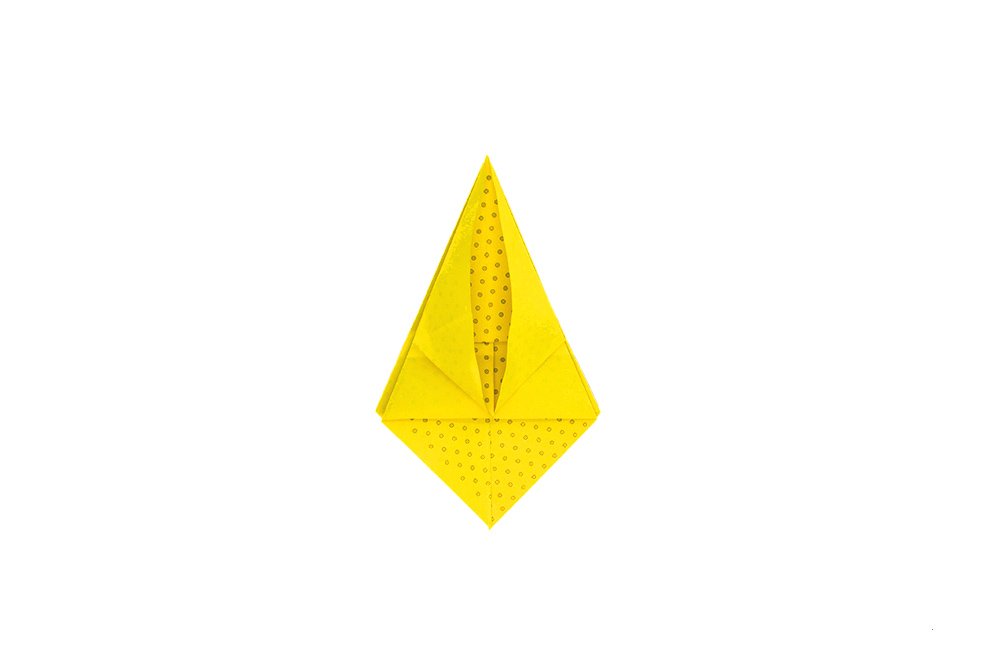
Fold along the dashed lines of the top layer triangle to the center. Crease the origami paper well and unfold.
Using the middle crease as a guide, lift the right corner flap to the middle. Make sure to lift the top outer flap ONLY.

Once you have lifted the flap, squash it down to flatten. Then repeat the previous two steps on the left, right, and back side.

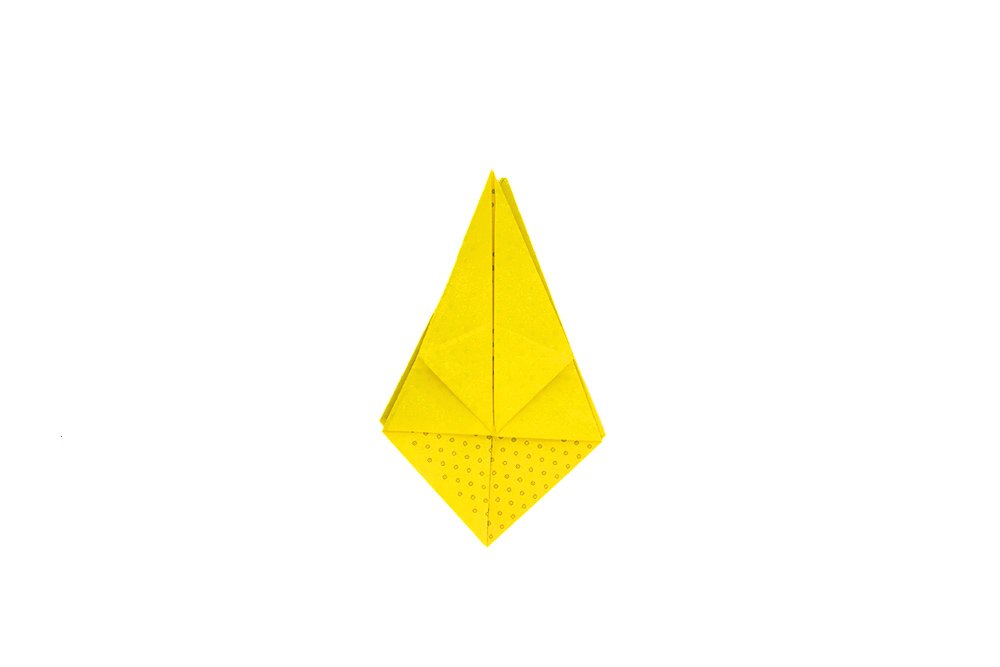
Bring left and right corner to the center. Crease well and unfold.

Fold the piece in half as shown. Crease well and unfold.

Now that the crease marks are made start proceeding to the next set of steps. Using the creases made in previous steps as a guide, lift the bottom flap (uppermost layer only) upward.
Finish the Origami Lily
Lift the bottom corner till you reach the top point.
Repeat the previous three steps on each of the other (back, left, and right) sides.

Fold each of these triangular flaps downwards on ALL four sides.

Fold the outer flaps along the dashed line as shown, then squash it down.

Repeat previous on the left, right, and back sides of the origami piece.

Unfold each petal of the origami lily, prying open all the four top flaps.

Start with one side and proceed with the other three.

Your origami lily is finished! Slightly curl the petals of the paper flower to make it more realistic.
Extra Tips
- Make sure to follow the steps closely. But don't forget to have fun!
- Fold straight and apply enough pressure.
- Don't forget to check our other origami guides.


So hard, i had to give up but I’ll probably come back to this. Any other tips fellow origami enthusiasts??
Awesome guide, take my stars sir
Helped a lot for my Mother’s Day card covering. Than
Wonderfully made and explaned
Hmmm, im sure the guide is good enough but my product certainly isnt