Paper Plate Rudolph the Red-nosed Reindeer

Introduction:
Create a Paper plate Rudolph the red-nosed reindeer using paper cups. Paper plates and paper cups are such versatile materials that can be used anytime in crafting if you’re looking for a fun Christmas activity that kids can do with some guidance from their parents or guardians.
Tools
- Paintbrushes
- Pencil
- Black marker
- Scissors
Supplies
- Paper Plate
- 3 Paper cups
- Red, brown, black, and white paint
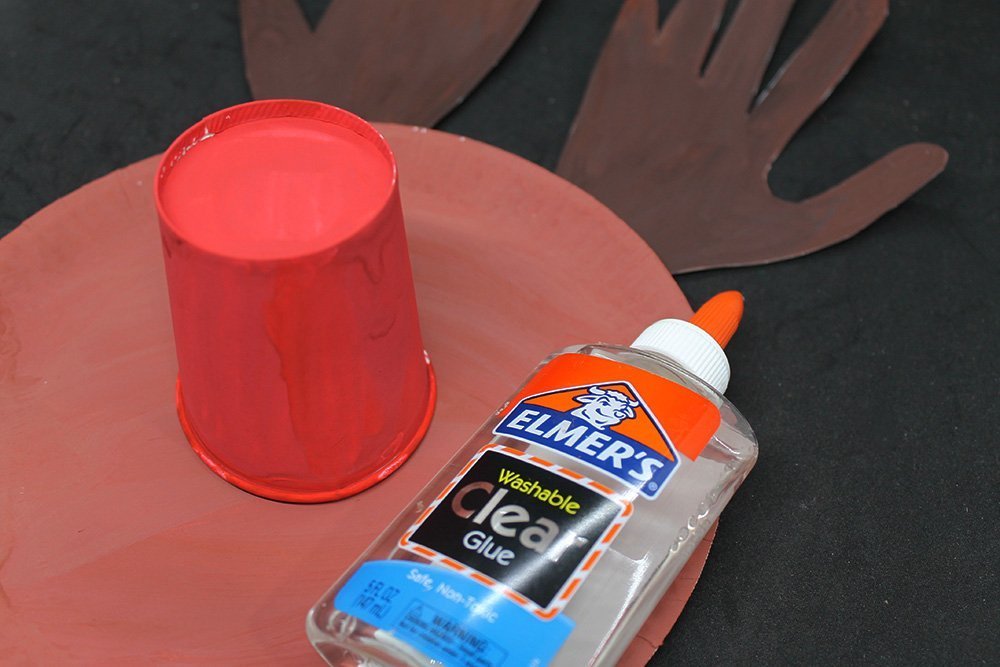
- Glue or Hot glue
- Cardstock paper

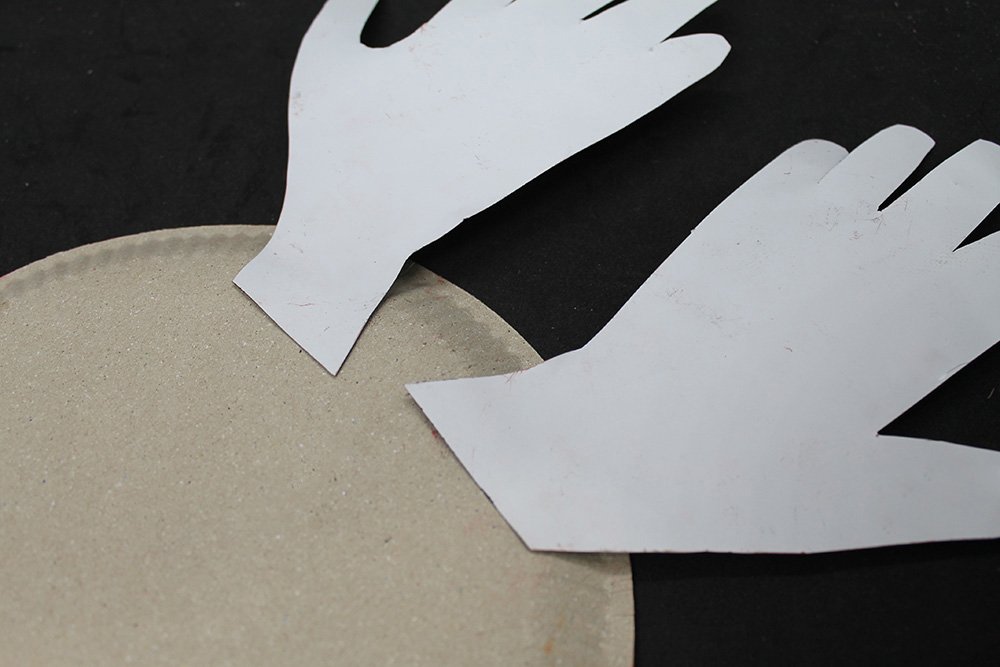
Create the antlers using handprints for the paper plate Rudolph the red-nosed reindeer

Trace both left and right hands, including wrist, on a piece of cardstock paper.
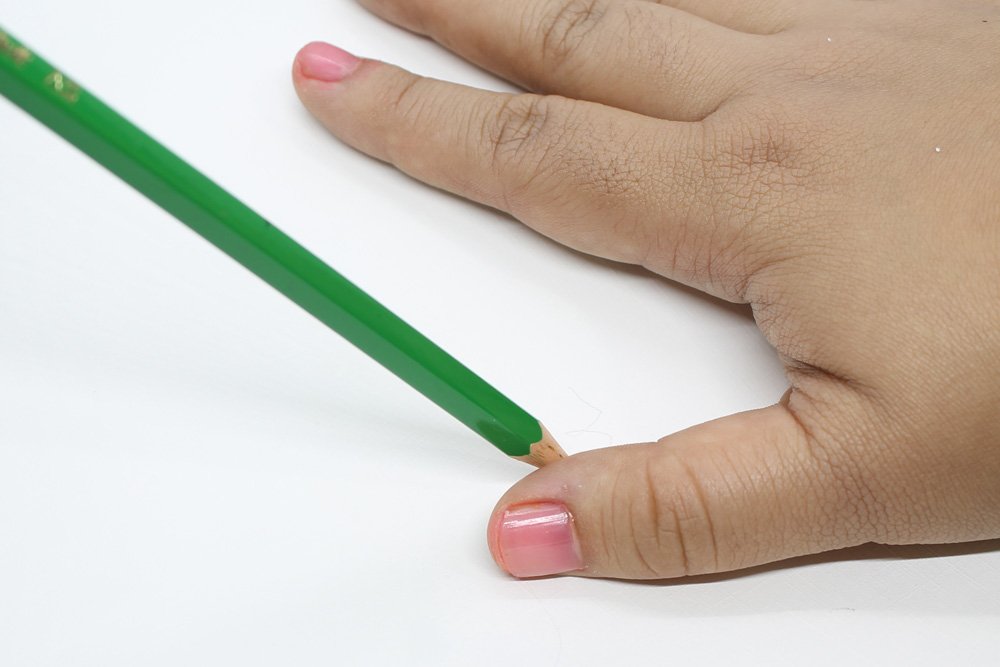
Put the right hand on the right side of the white paper to trace. Make sure you have enough space to make a tracing of the left hand.
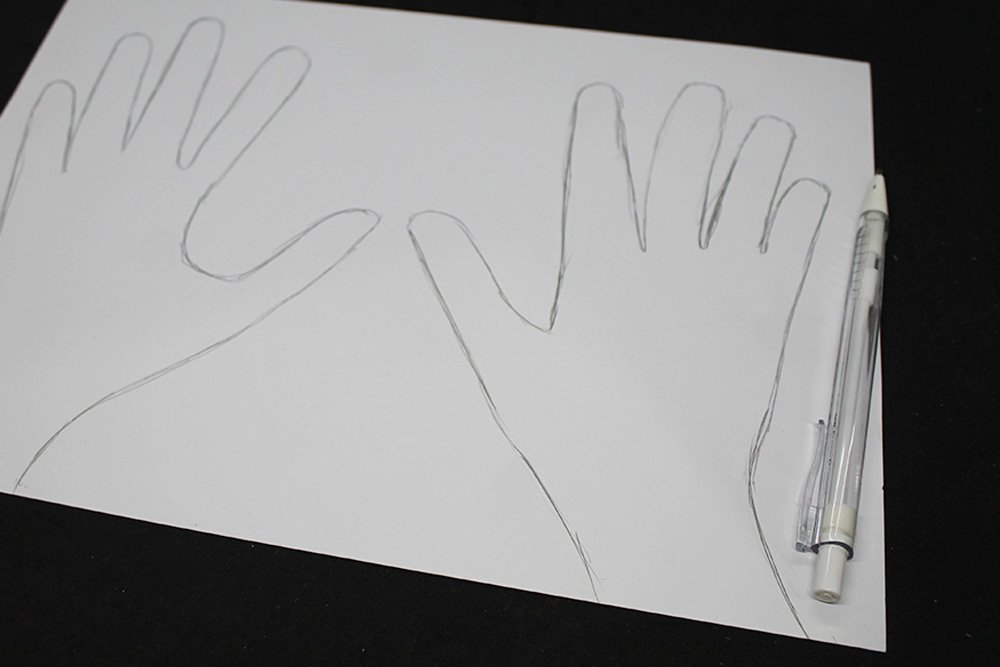
The traced right hand should look similar to the picture above. Repeat the previous step but this time, use the left hand. Don’t forget to include the wrist when tracing.
Paint the antlers

Once you have outlined both hands, paint it over with some dark brown paint. Mix brown and a little bit of black to make dark brown.
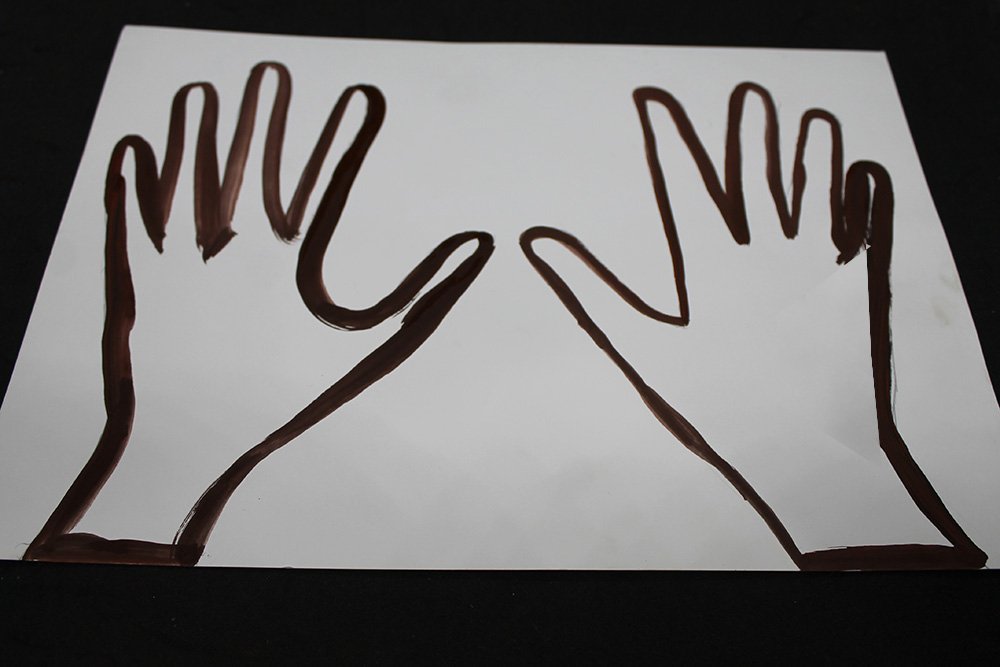
Start painting by outlining the hand first, then painting inside. That way, the painting of the hand looks neater.
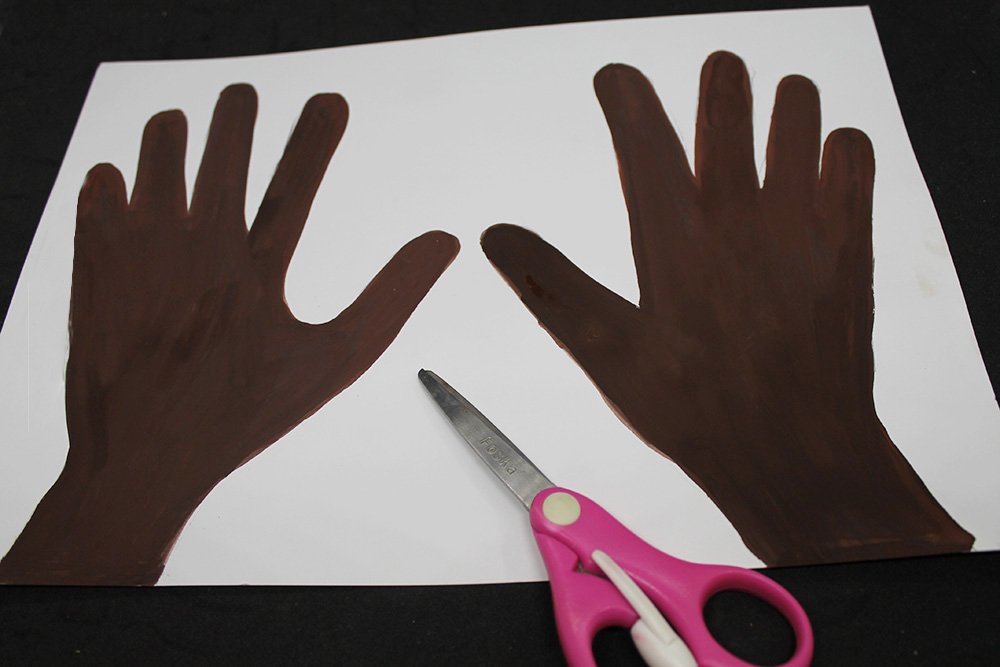
Cut the silhouette of both hands using a pair of scissors.
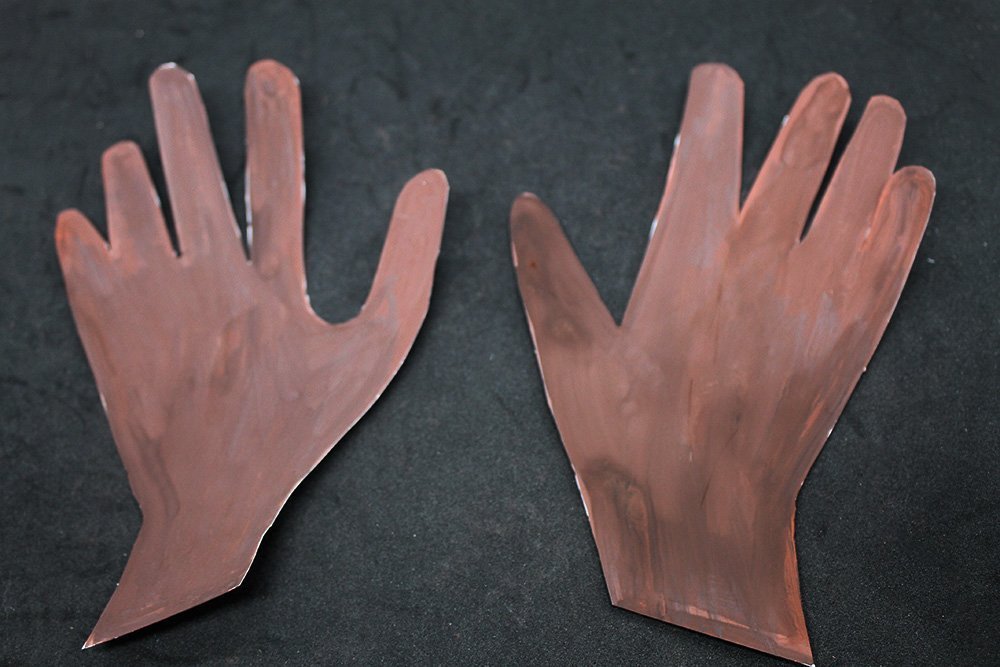
Done! These brown-painted hands will be the antlers of the paper plate Rudolph.
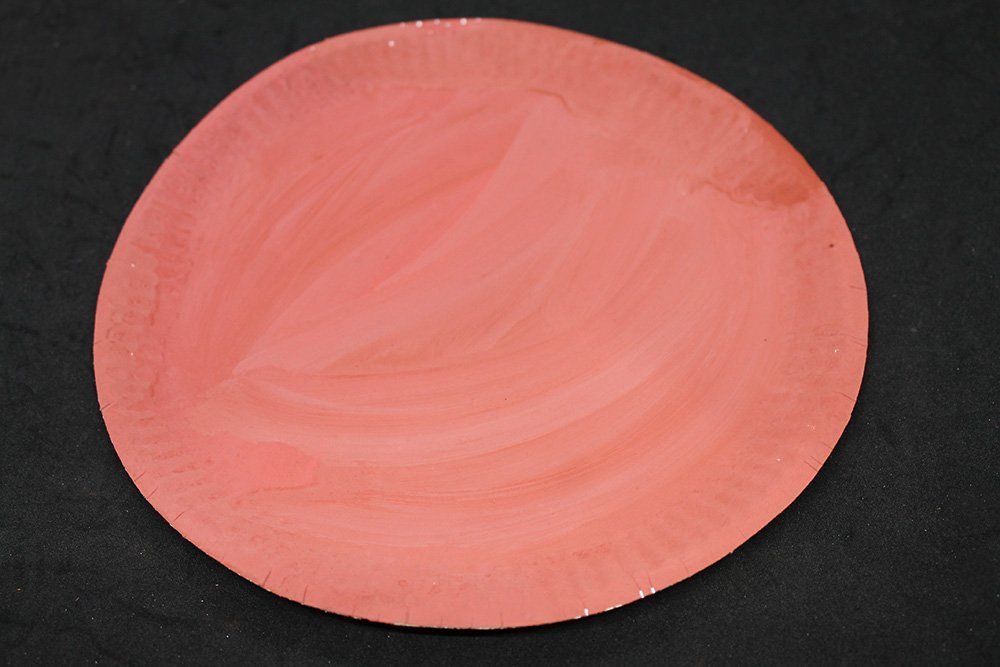
Make Rudolph’s big red nose with a paper cup
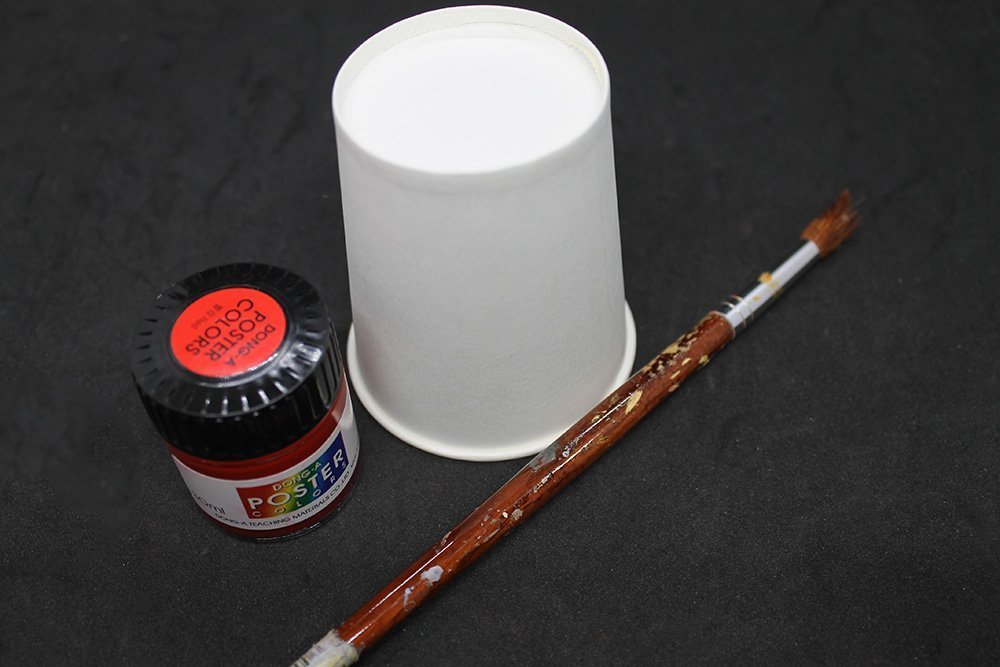
Grab a cup and paint it red all over.
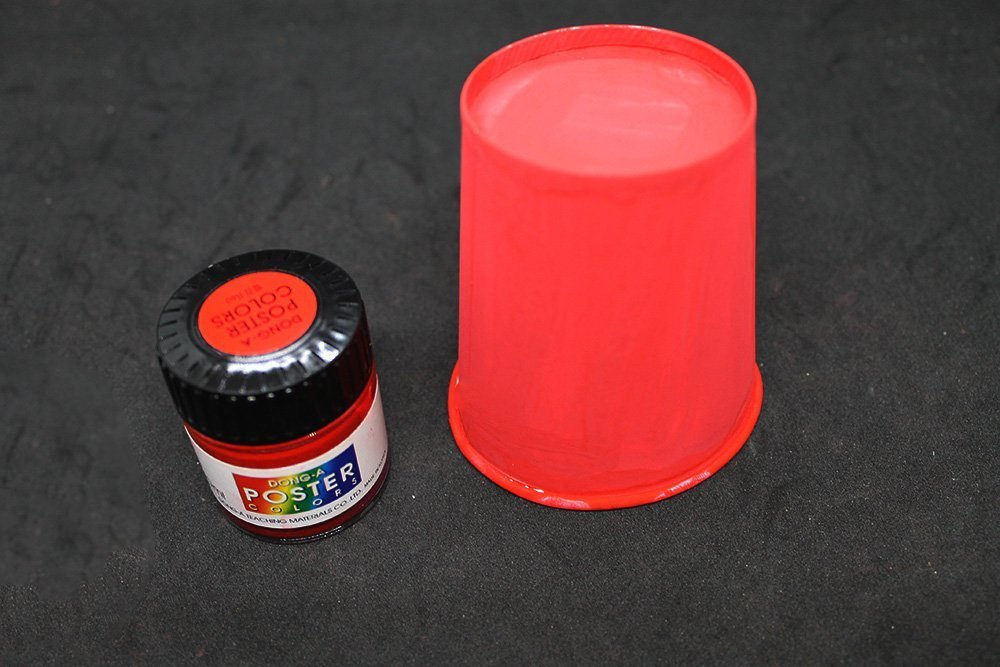
The cup should look like the sample image above. This will be Rudolph’s nose.
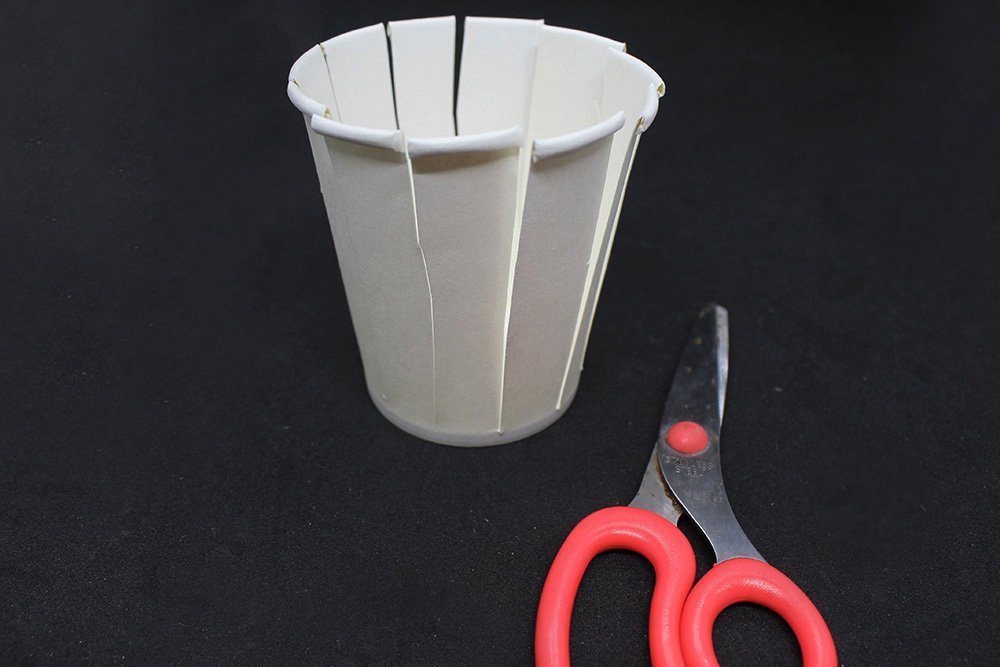
Create Rudolph’s eyes with paper cups
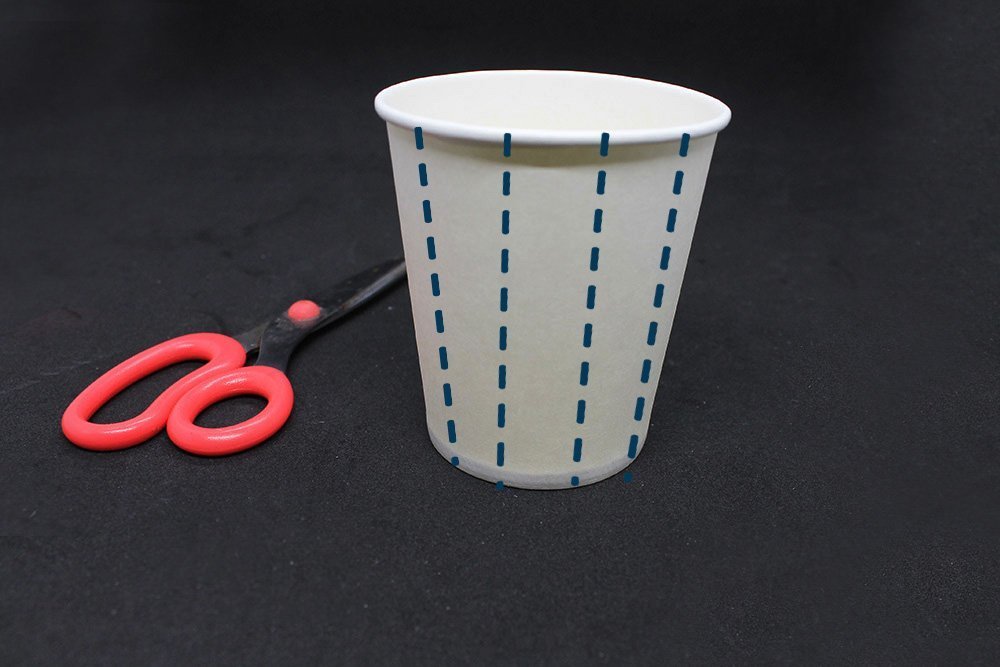
Get a piece of paper cup and cut it vertically. Do it on all sides of the paper cup except the bottom. Use the dashed lines illustrated above as a guide.
Your paper cup should now look like the sample image above. Pull down each strip to make the petals of the flower.
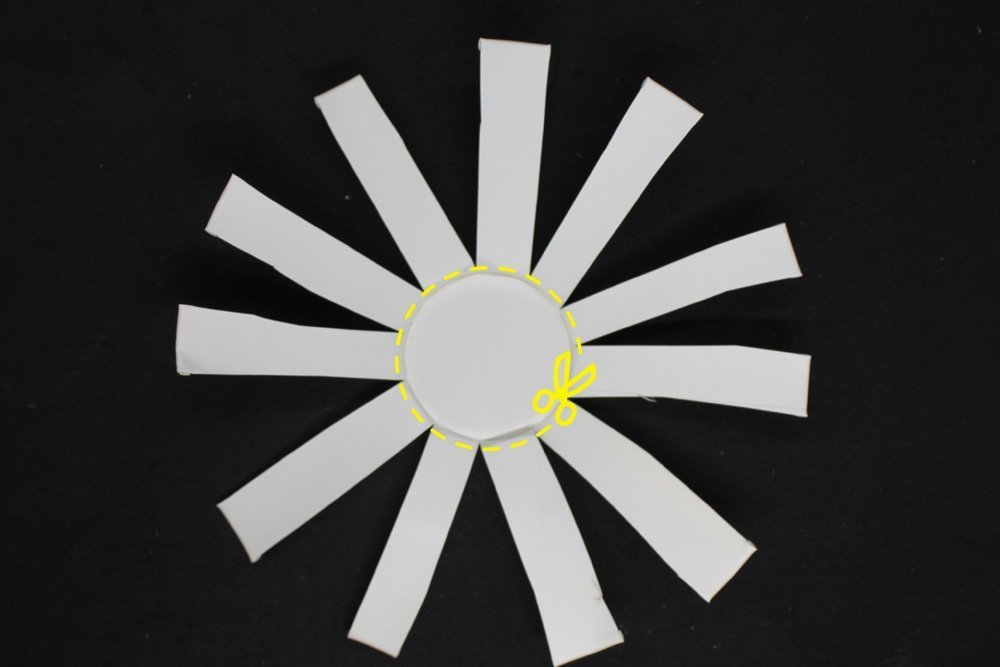
Flatten it, so it looks like the sample image above. It kind of looks like a flower. Snip off the petals so that the base is only what’s left.

Repeat this step on another cup.
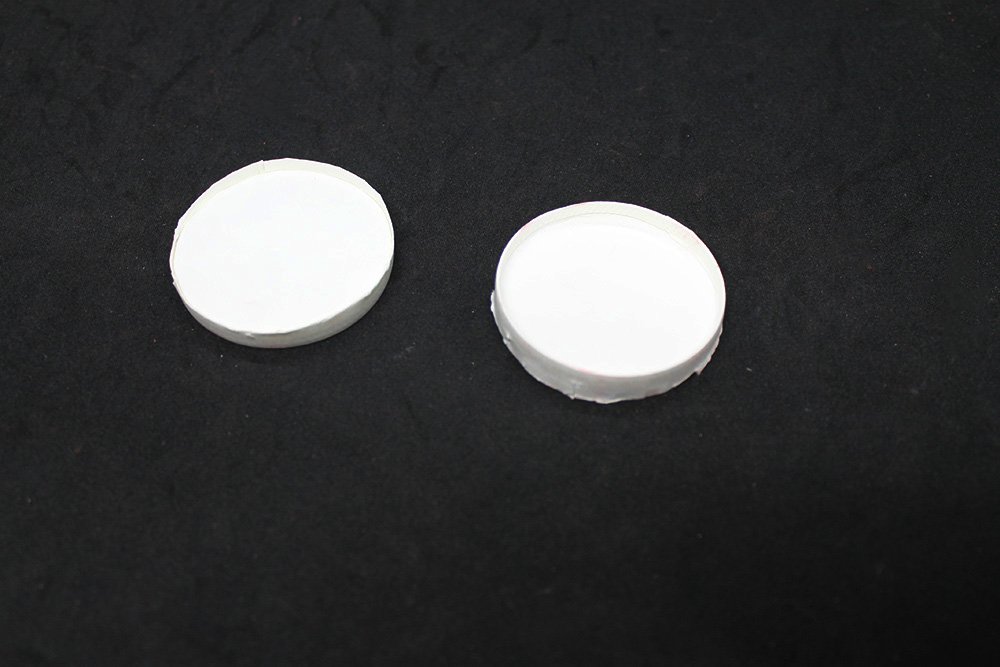
Once finished, this will be the eyeballs of Rudolph.
Draw the iris of the eyes using markers.
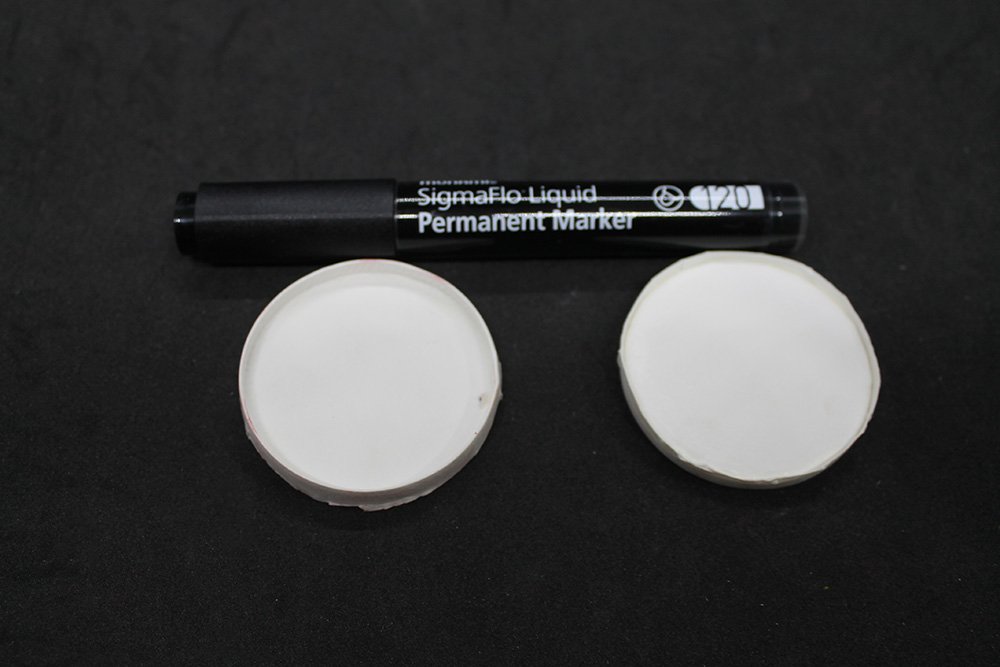
Get a marker and draw some pupils on the eyeball paper cups.

Fill in the outline with black.
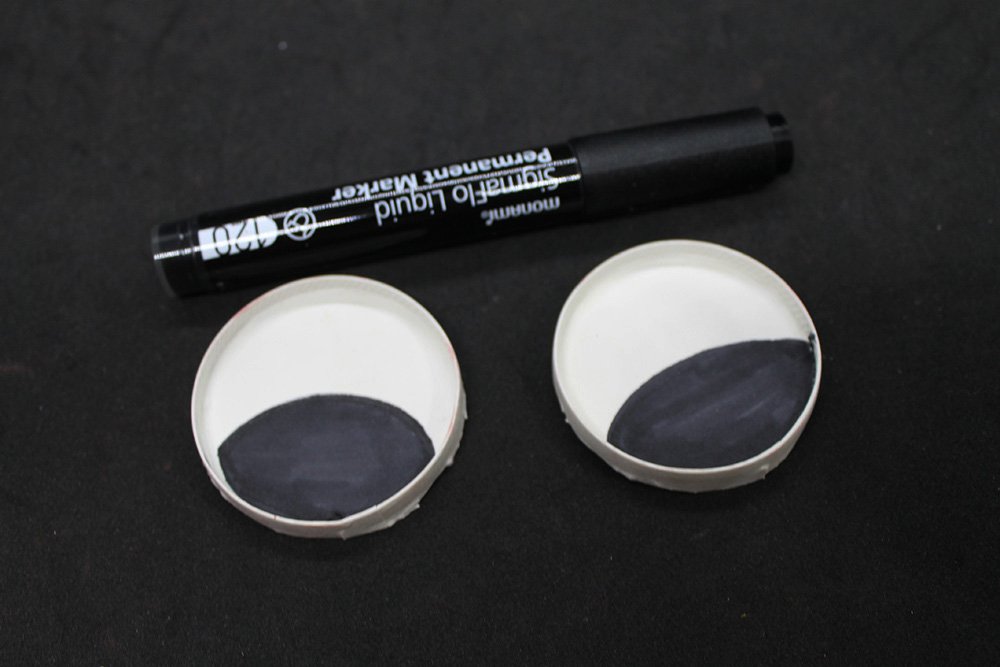
Rudolph’s eyes are now done.
Paint the deer’s head

Get a paper plate and paint it all over with brown paint.
Set it aside and let the paint completely dry.
Assemble the paper plate Rudolph the red-nosed reindeer

Grab the paper plate, nose, eyes, and antlers that were made beforehand.

Flip the paper plate to stick the antlers at the back.
Glue the antlers around the edge of the paper plate, then flip it over.
Stick the nose on the center of the paper plate bottom side up. If the glue does not stick properly around the edges of the paper cup, ask an adult to help you glue the edges with hot glue.

Lastly, stick the eyes in between the nose and antlers.
Add some finishing touches to the paper plate Rudolph the red-nosed reindeer
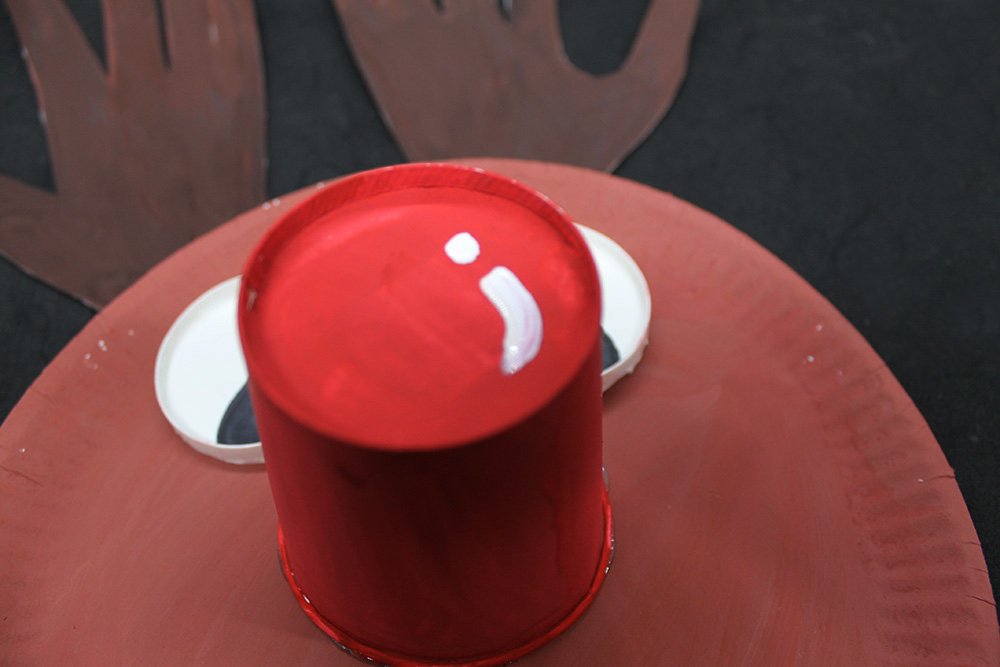
Using white paint, paint a shine on Rudolph’s nose.

Paint some shine on the eyes as well. Add mouth by painting a smile on the bottom part.
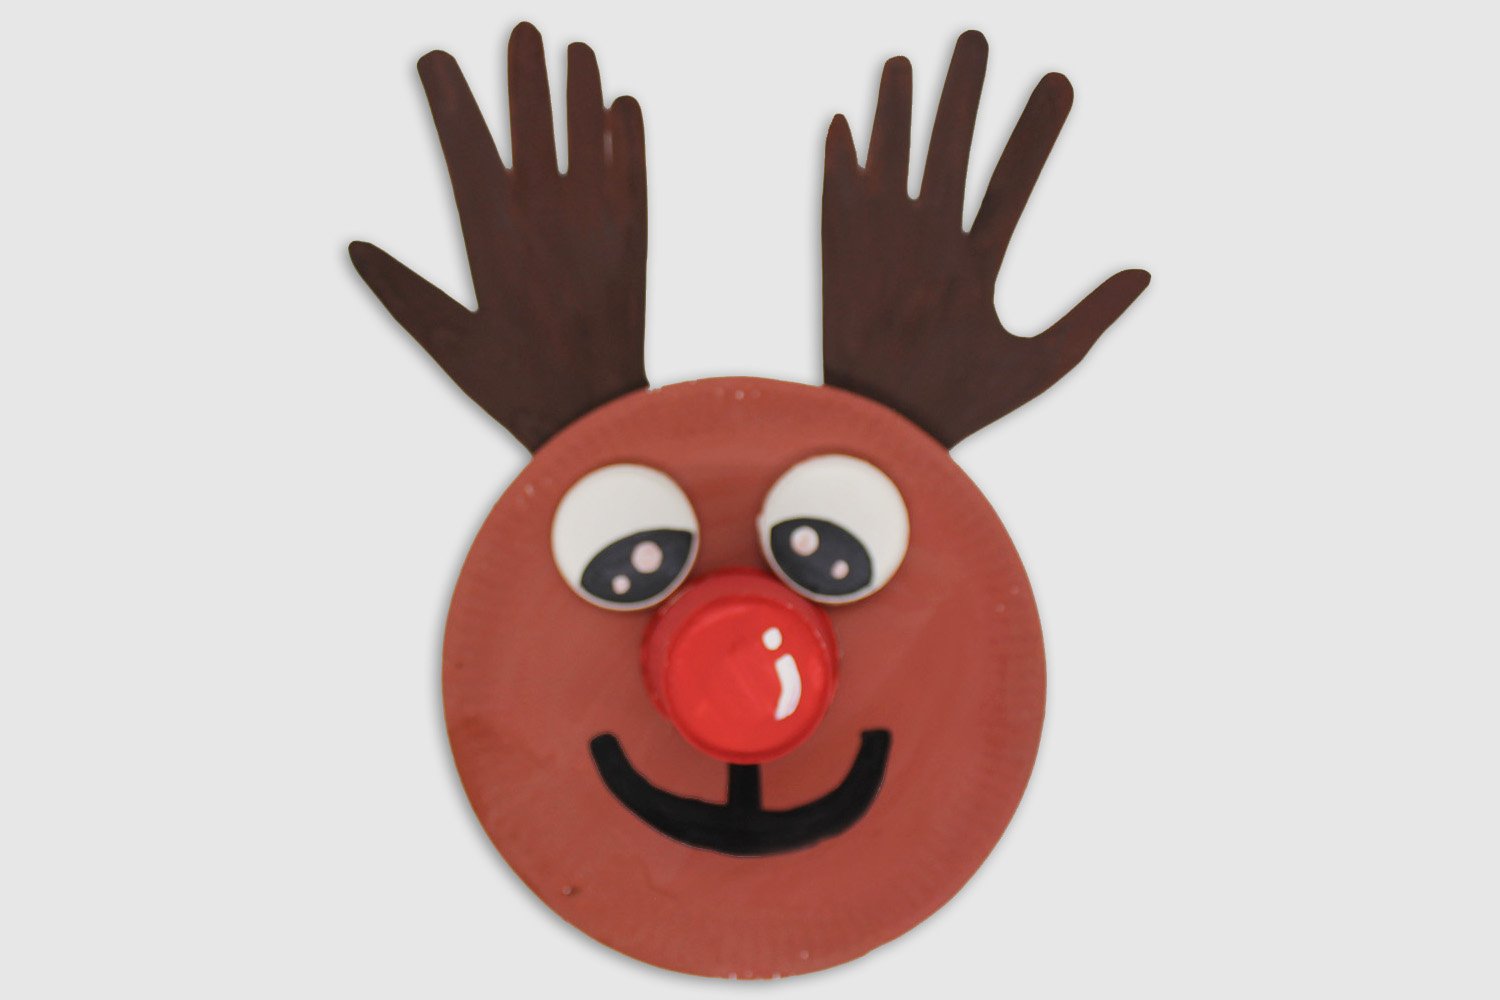
The paper plate Rudolph the red-nosed reindeer is now done!
Extra Tips
- Remember to have fun when making this awesome paper plate craft


My 4-year old enjoyed making the Rudolph craft, cheers
You got some nc christmas stuff 👍🏼
Why didn’t you mentioned earlier dat hot glue was needed??!
Mine looks good and the instruction itself was was alright. IF there is something i can suggest for this paper plate craft is to add more aesthetics. GOod job though
I was bored so I made this. It was fun.
Christmas is still far away though ahaha. I’ll make this as decor when the holidays come, what you guys think should we make other than this??