Make A Paper Plate Frankenstein Easily at Home

Introduction:
Learn how to make a paper plate Frankenstein using a piece of a paper plate. A great craft for all things Halloween; kids and adults will surely enjoy doing this spooky art project based on a famous fictional character. What’s fantastic about this project is that you can use this project as a way to introduce kids to weaving/stitching. It also serves as a spooky decoration for parties, especially during Halloween.
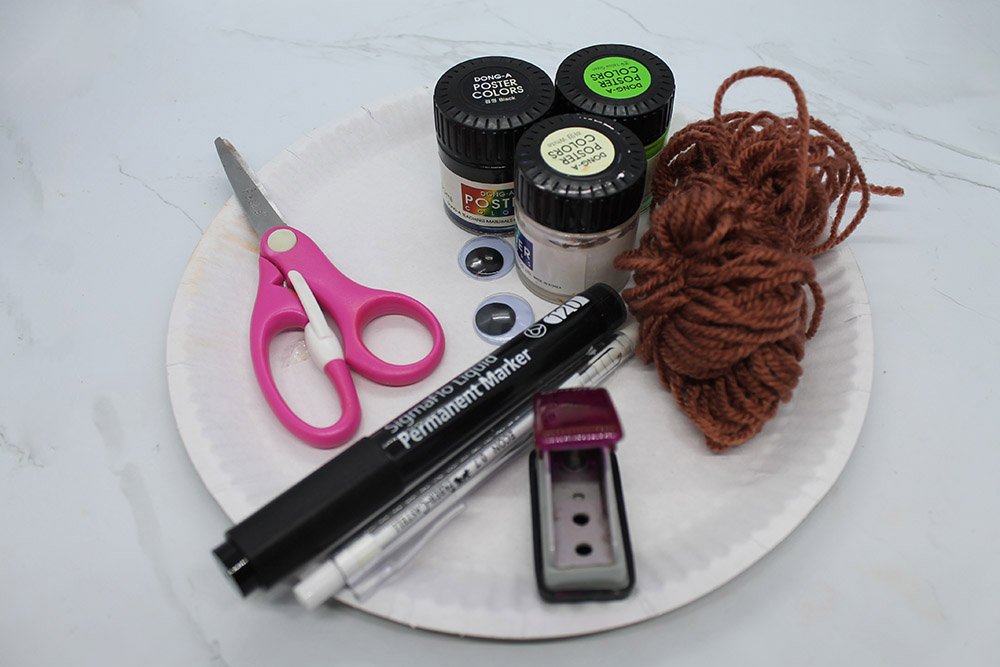
Tools
- Paintbrush
- Black marker
- Puncher
Supplies
- Paper plate
- Poster paint (light green, black and white
- Googly eyes
- Yarn
Cut out the base of the paper plate Frankenstein
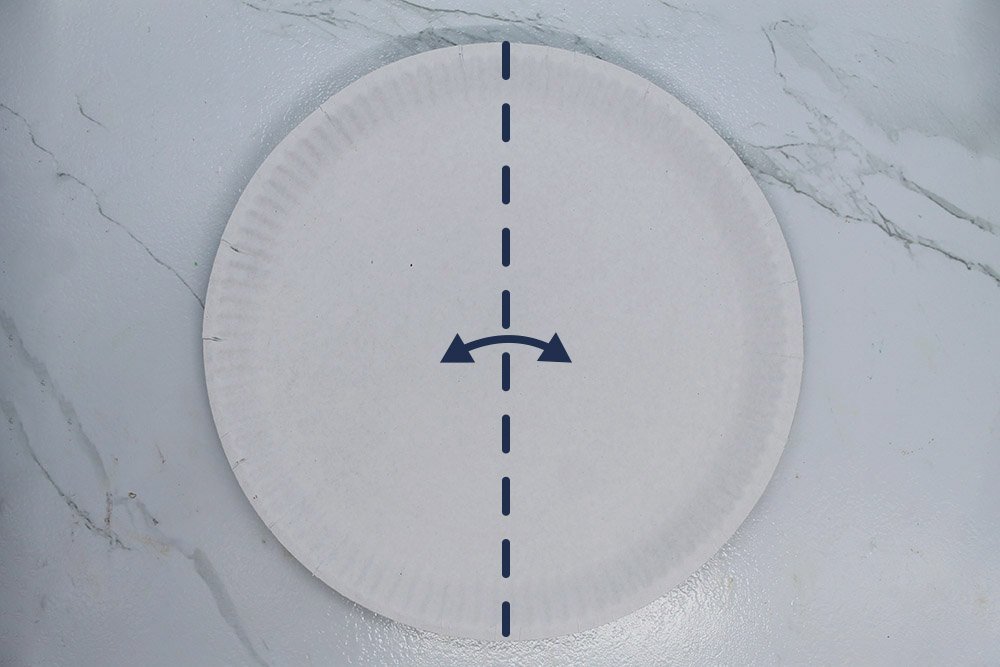
Grab a paper plate and fold it in half (follow along the dashed line). Crease well, then unfold it after.
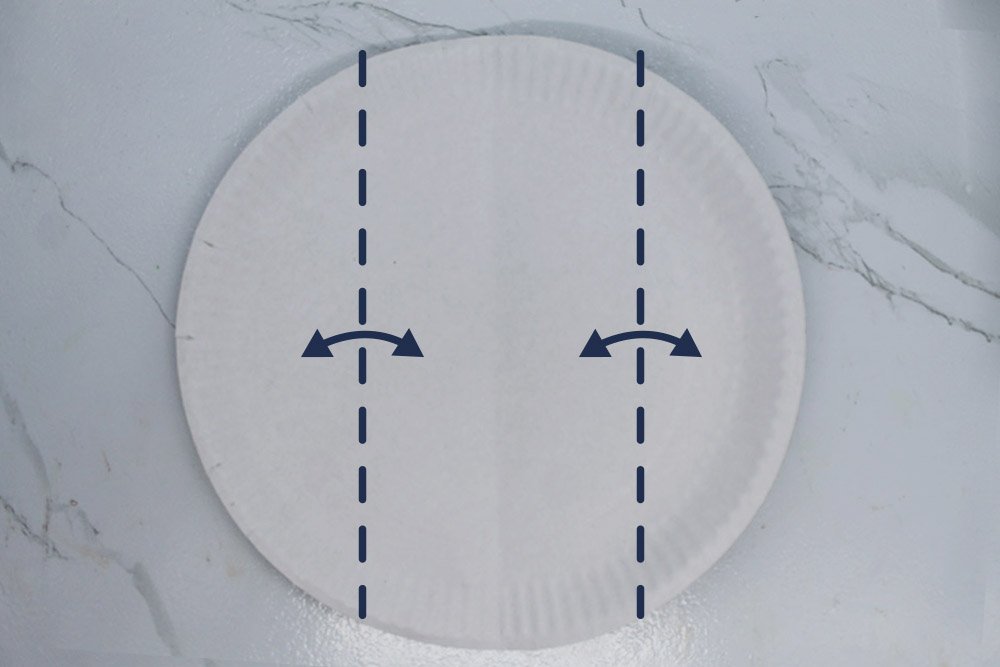
Fold the left and right edge to the center crease line made from the previous step. Crease it well and unfold.
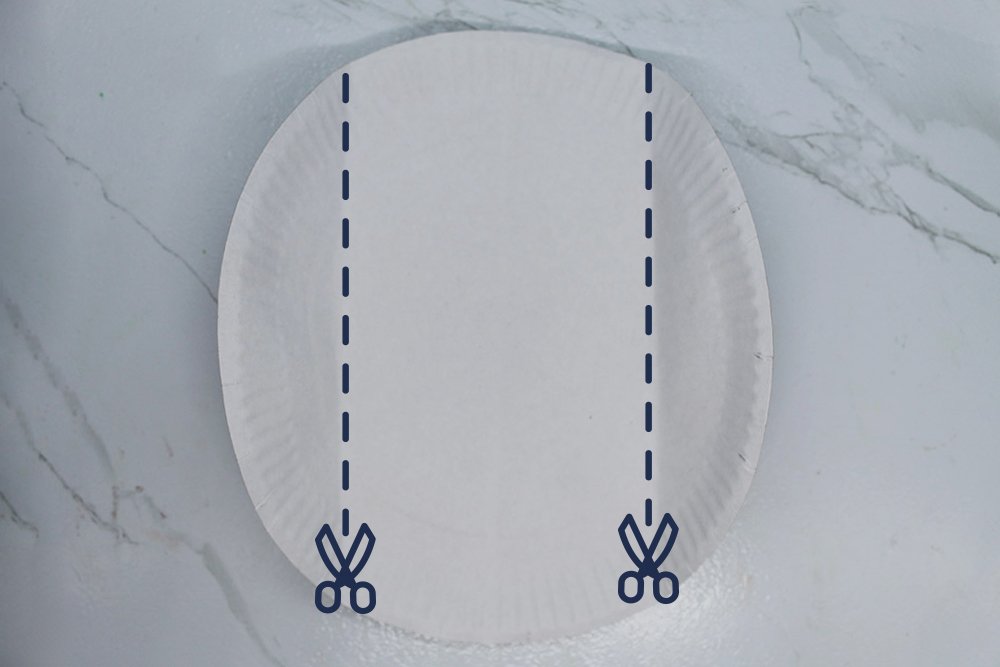
Cut the crease marks made from the previous step. Use the dashed line illustrated above as a guide.
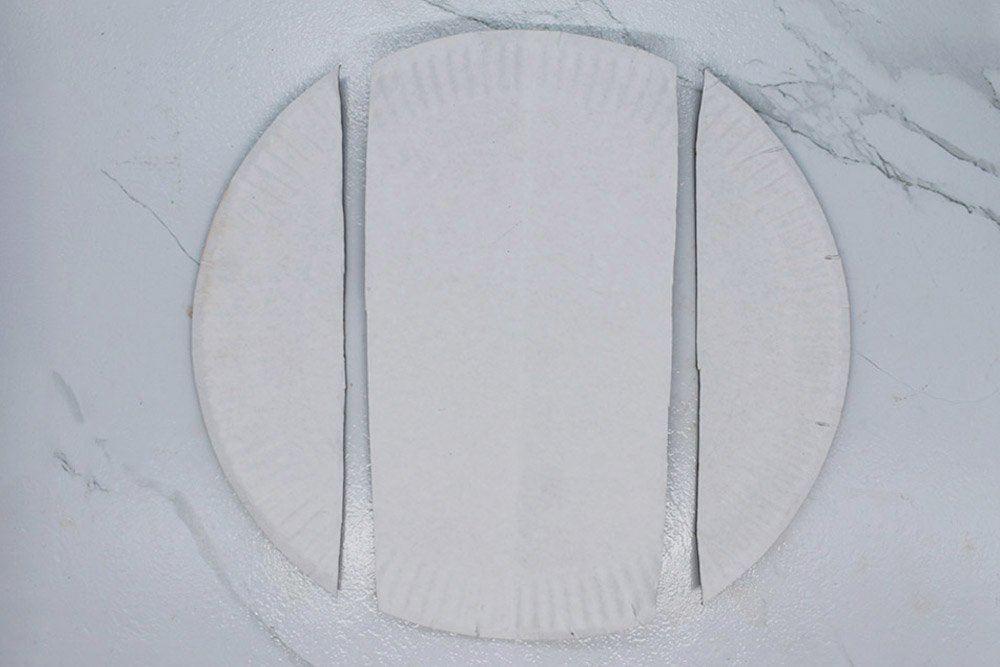
Once cut, it should look like the sample image above. For this project, we will only be using the middle and right cutout. Discard the left part, or you may recycle it for another craft
Color and cut the base of Frankenstein’s head
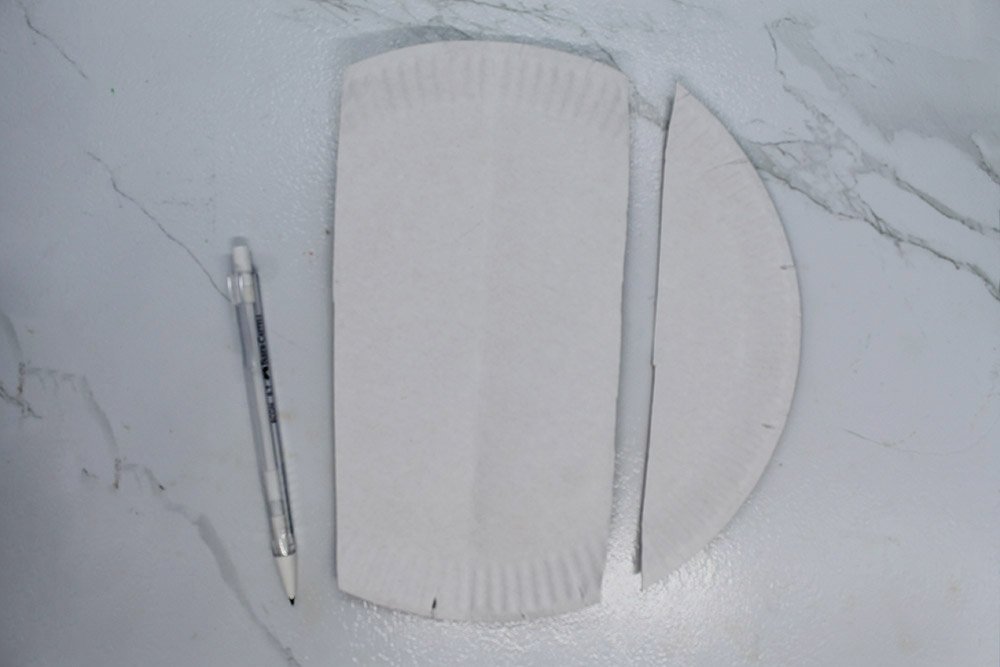
Set aside the right part of the paper plate first.
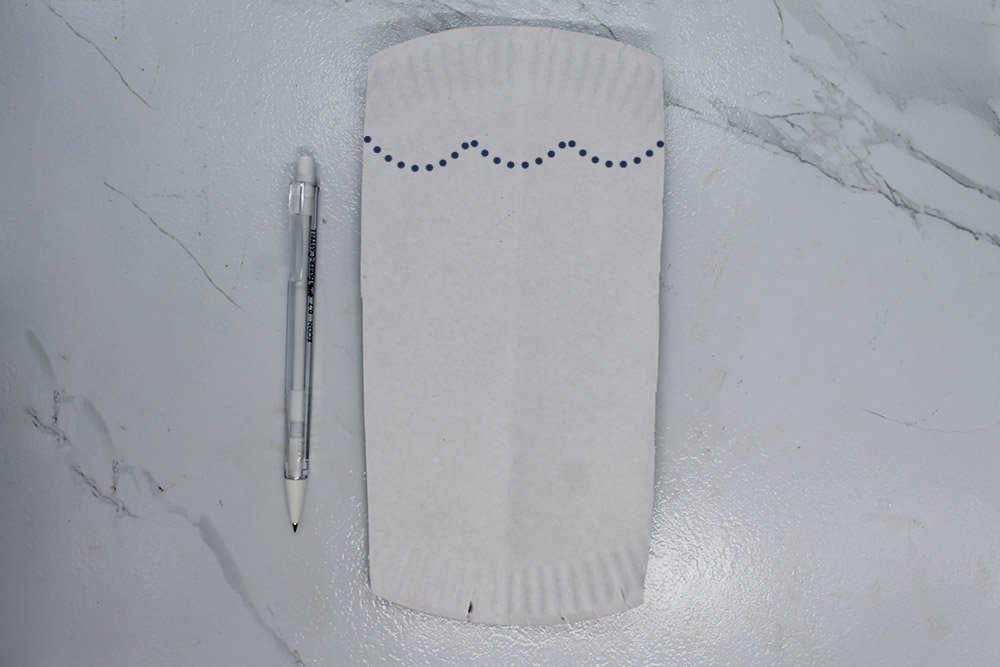
Draw a hairline on the top middle part of the center paper plate. Follow along the dotted line as illustrated above.
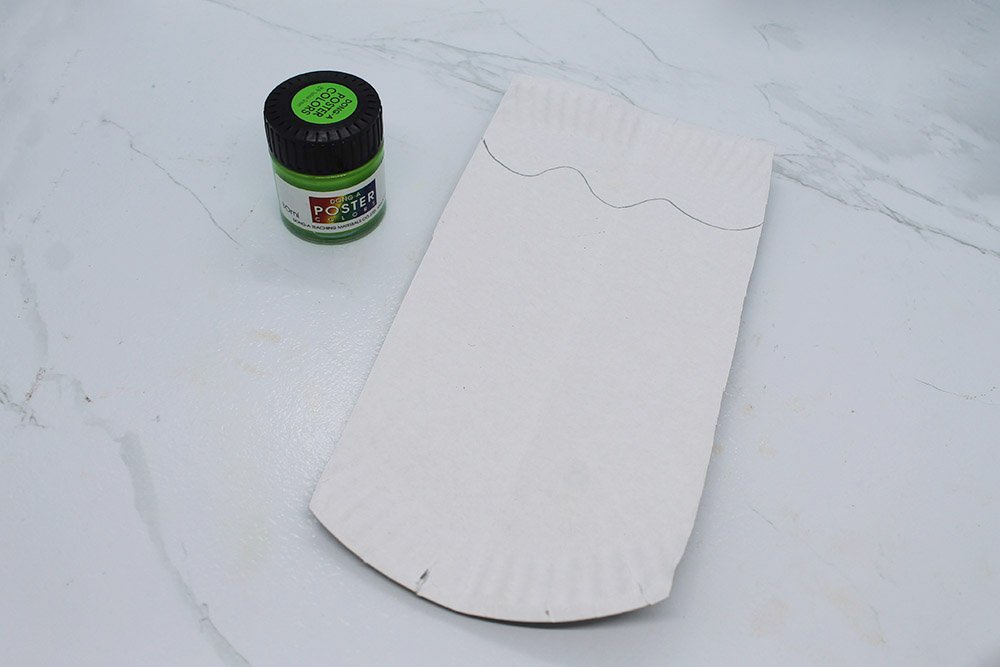
Color the skin of the paper plate Frankenstein paper plate with light green paint.
Mix green and white paint if you don’t have light green color.
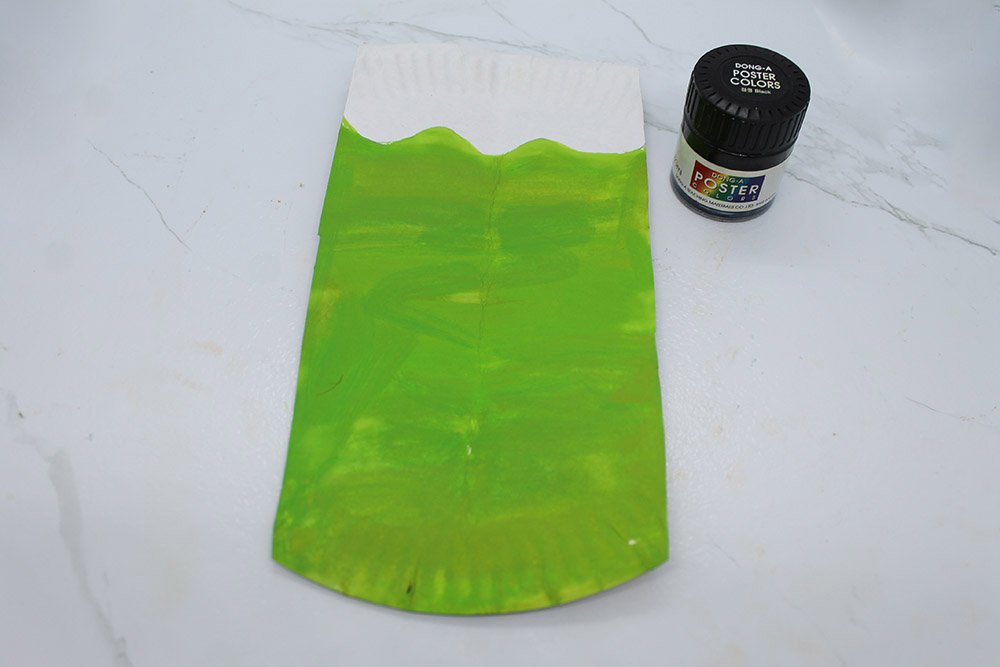
Color the hair with black paint.
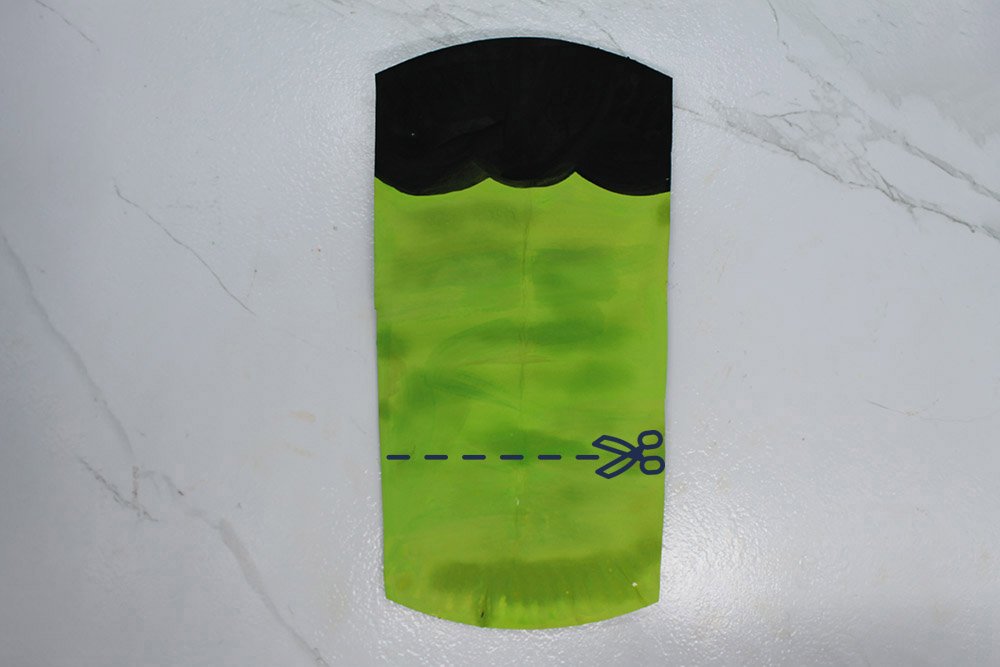
Frankenstein is known for the stitches on his mouth. To make this distinct feature, cut along the bottom middle part of the head.

Punch some holes on the edges using a puncher.
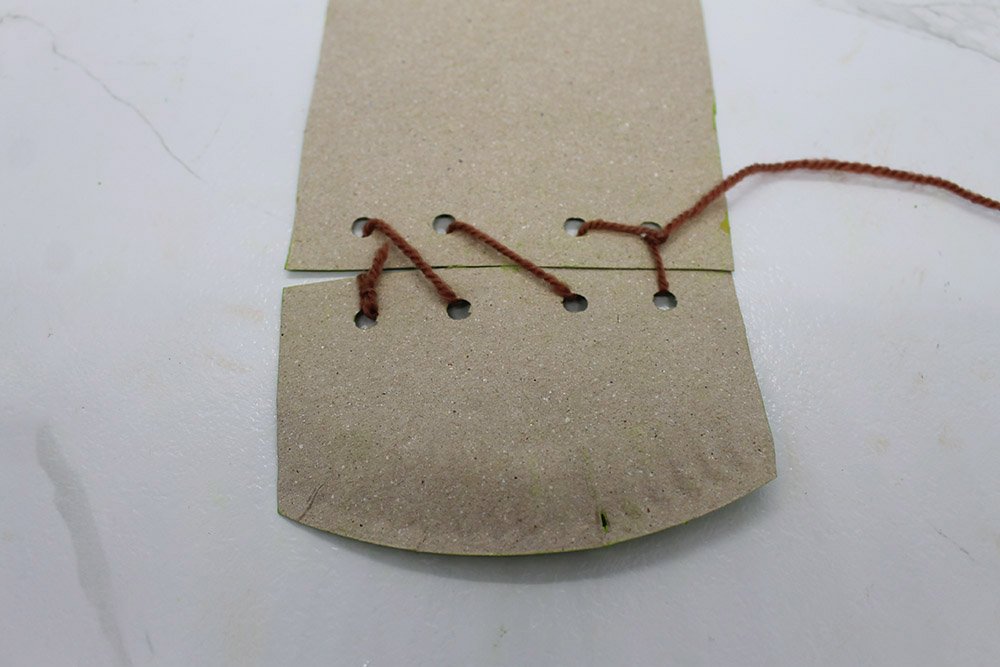
Time to stitch
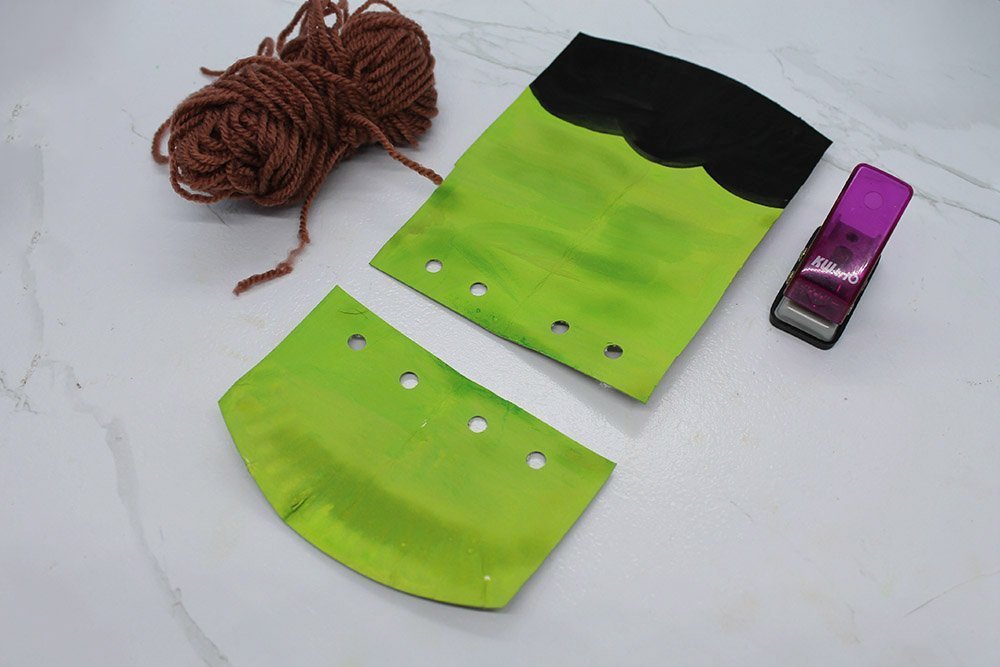
Grab a foot of yarn, and let’s start weaving!
Flip over the bottom part.
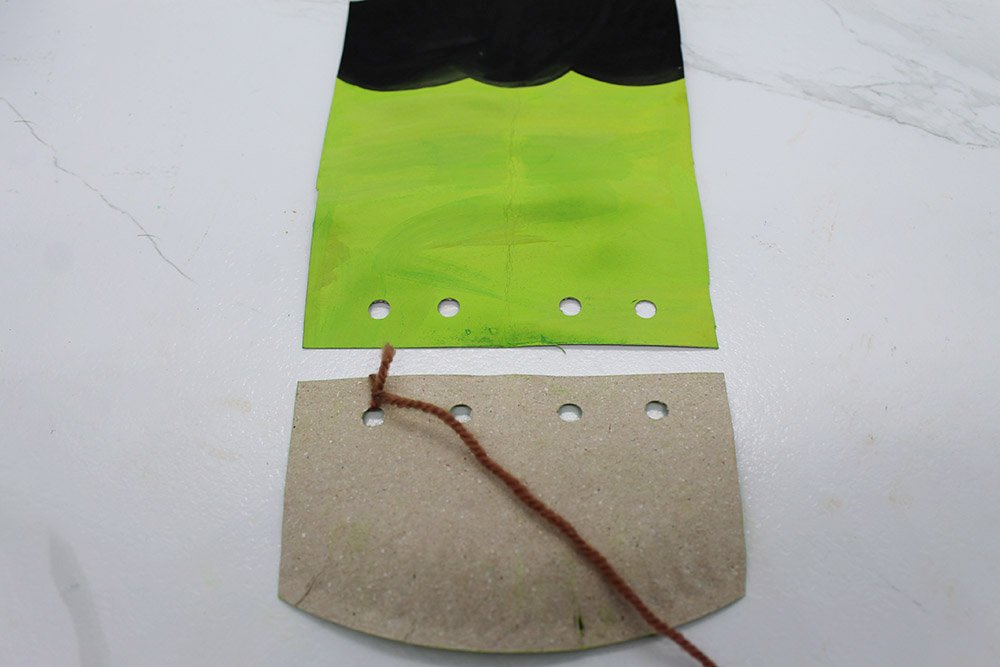
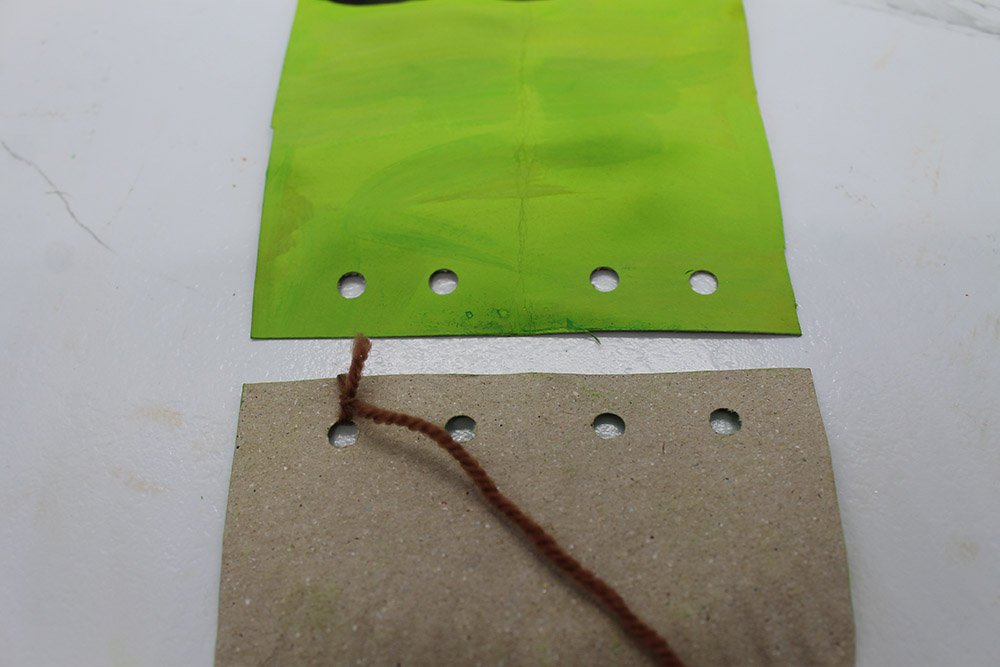
Tie a double knot on the leftmost hole with a piece of yarn.

Insert the end of the yarn to the leftmost hole again then flip it over.
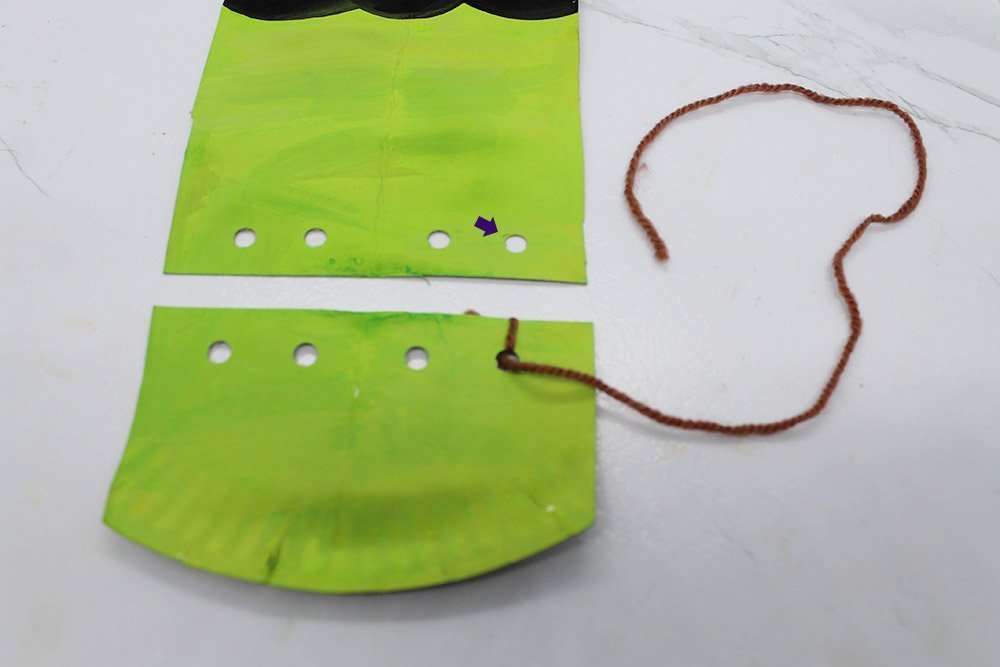
Insert the end of the yarn to the top right hole.
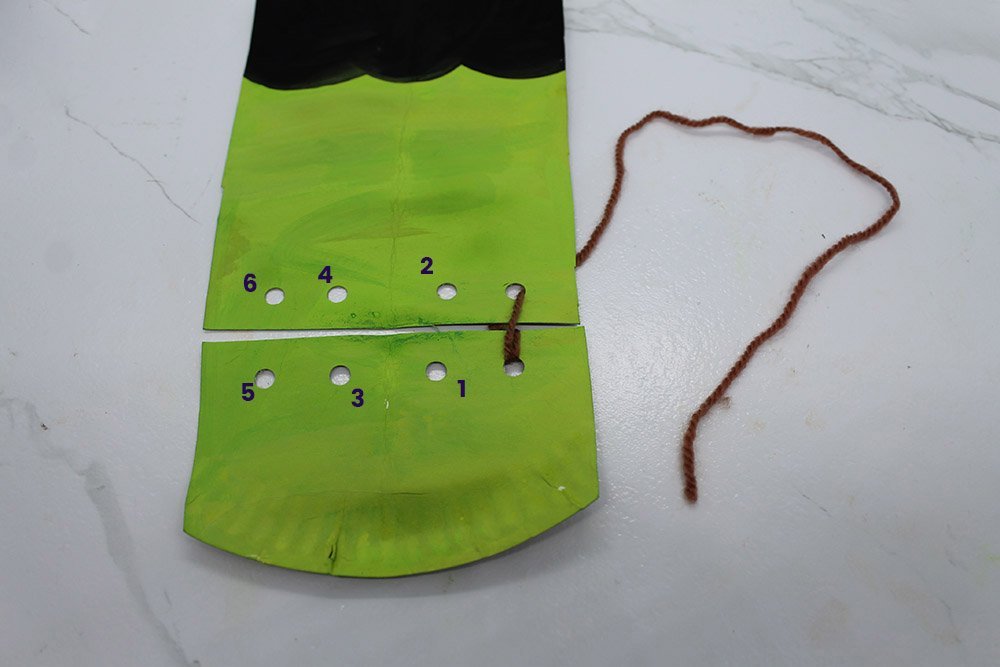
Keep inserting the end of the yarn back and forth the paper plate to the right until it has passed through all the holes.
Use the number sequence as a guide.

Flip over the plate.
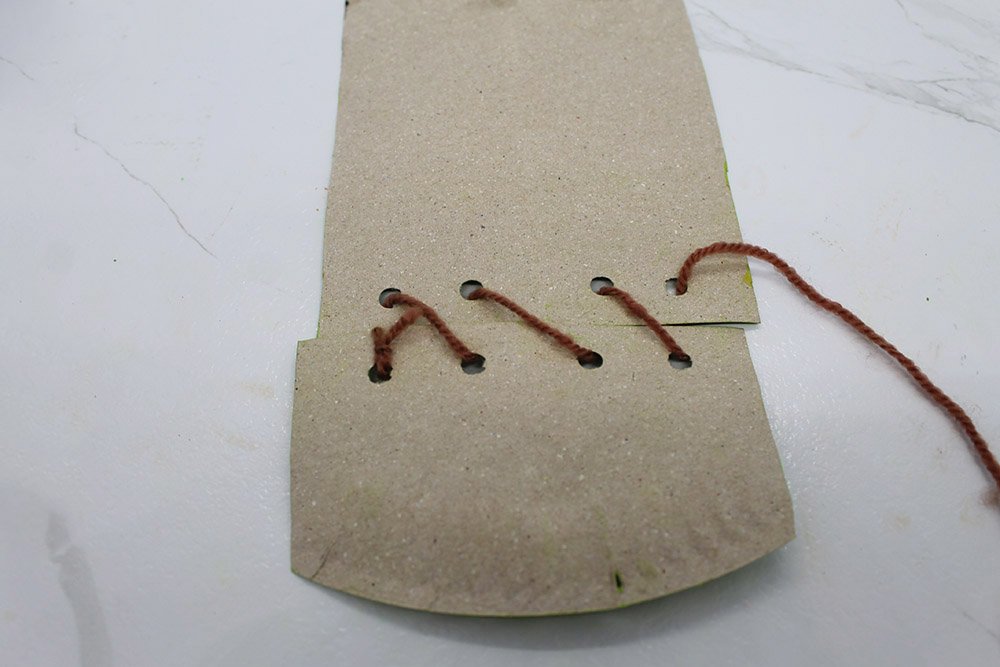
Secure the plates together by tying a double knot.
Flip it over, and the base of the paper plate Frankenstein is done.
Add some details to the head

Stick some googly eyes at the paper plate head.
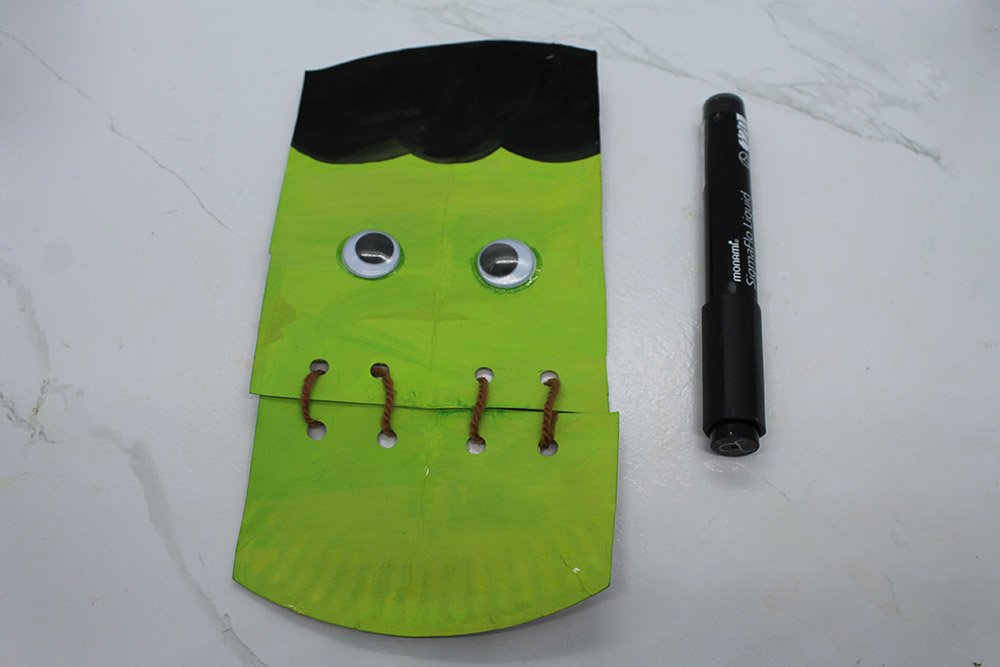
Draw some extra stitch marks and a pair of eyebrows.
The head of Frankenstein is almost done! Time to add some bolts.
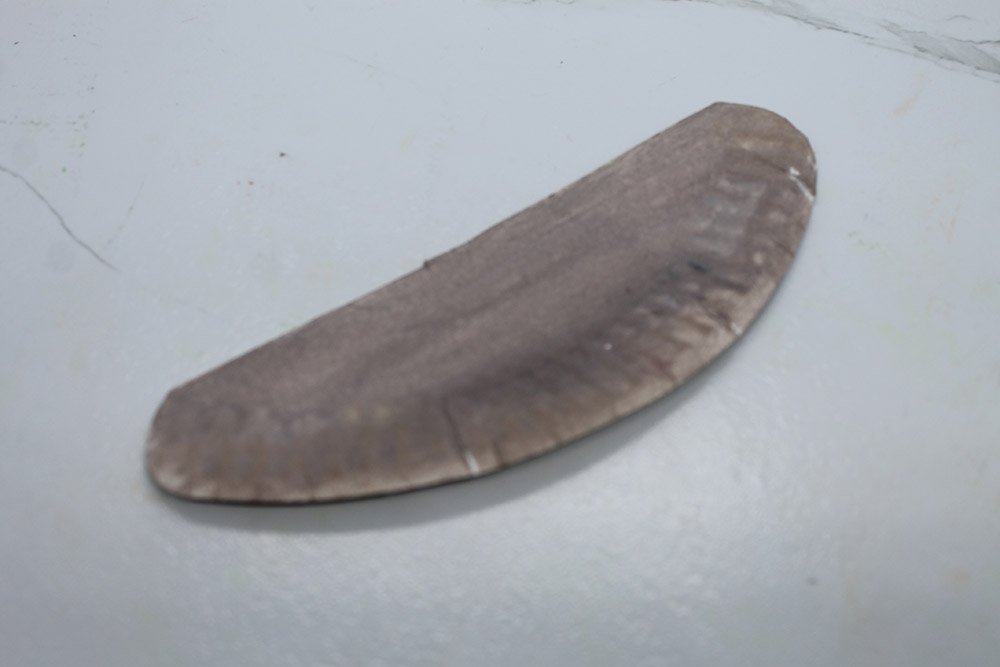
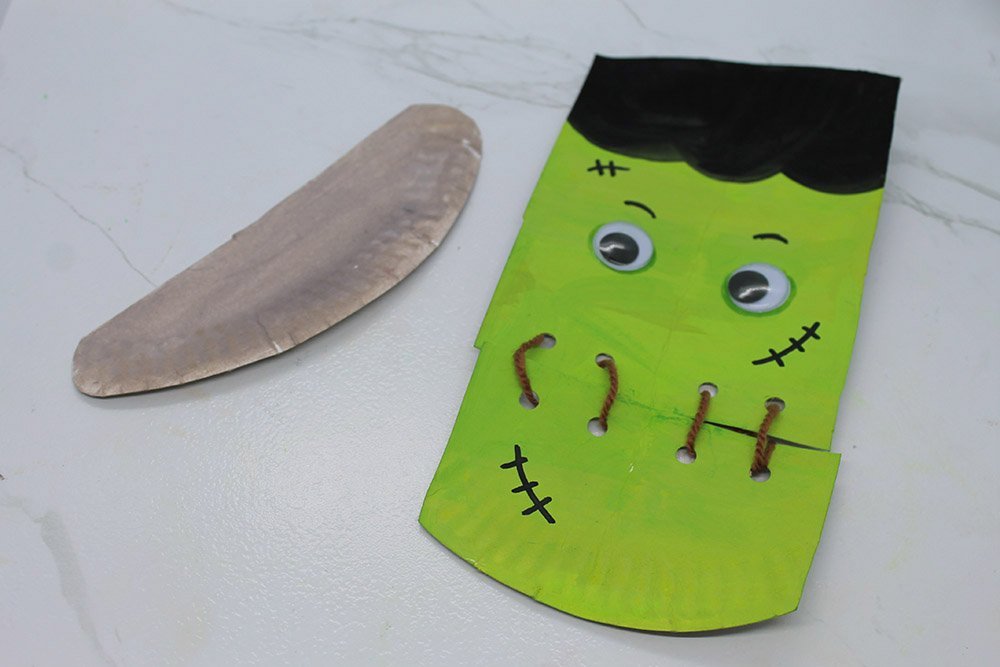
Make some bolts for the paper plate Frankenstein

The easiest way to make some bolts is to get the right end of the paper plate set aside a while ago. Paint it with grey paint to make it look like bolts.
Optional: You can trim the ends of the paper plate so that it’s not sharp.
Grab the head of Frankenstein.
Stick the grey paper plate at the back around the level of the eye area.
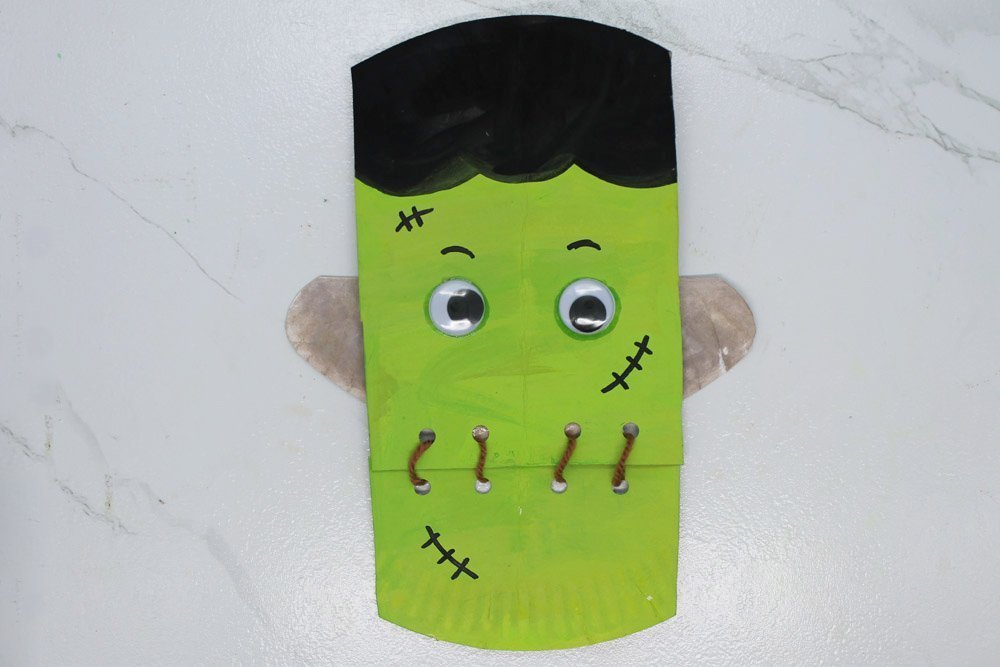
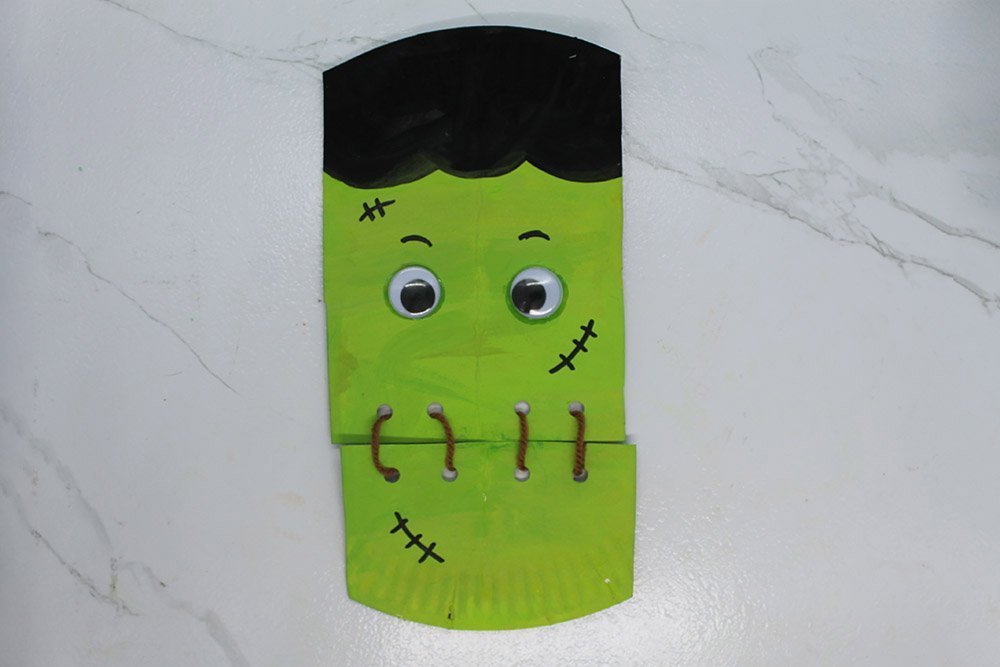
The paper plate Frankenstein is now completed. We hope you had a spooktacular time crafting!


ahaha adorable
This is the only paper plate craft that i made with yarn
I don’t think green is the right color… so mine’s grey
My son made this. I gave him 10 bucks because he did it without asking for my help. It should have been 5 – this is an easy instruction, Good guide guys
I just love it